Price quote request
Download and import this process into your Workflow Automation instance. Find the downloadable JSON file at the bottom of this page. For information on importing processes, refer to this guide.
This guide explains pricing exemption requests from salespeople using Workflow Automation tools.
The process involves a form to generate a mapped PDF document containing all necessary information, ensuring consistent data capture and reducing manual entry errors.
Prerequisites
Before you begin, ensure you have:
- Adobe Acrobat Pro for creating and mapping PDF fields
- Administrator access to your Workflow Automation instance
- Basic familiarity with creating processes (refer to the create a new process guide)
Creating your PDF template in Adobe Acrobat
To create a PDF from scratch to become a mapped field document, follow the steps below:
- Open Adobe Acrobat and go to File > Create > Blank Page.
- Choose Edit PDF on the right-hand side.
- Add text and images to your form for the required fields you’d like to include in your PDF.
Mapping form fields in Adobe Acrobat
After creating your PDF template with the required fields, configure the form fields for mapping:
- Click Tools in the upper-left corner of your Acrobat window.
- Under Forms & Signatures, select Prepare Form. Select the file you’re working on or the file you’ve already created, and click Start.
- The top banner should now include fields you can drag onto your form in the correct sections. There are multiple types of field boxes you can use. To use the Workflow Automation instance, use the
text boxorcheckboxfields. - Choose the field you’d like and highlight it over the section you want the Workflow Automation system to map to. Then name your field.
- After you map all of your fields, go to File > Save as and name your PDF document.
Adding your PDF to the process
This workflow includes a form task to collect pricing request information, followed by an approval process, and then the PDF Generator to create the final document.
- Click Processes in the left navigation panel of your Workflow Automation instance and create a new process.
- Build your workflow by adding these tasks to the Process Flow canvas:
- A Form Task (for the Initial Price Quote Request Form) to collect information
- An Approval task to review the request
- A PDF Generator task to create the mapped PDF document
- Connect the tasks in sequence: Form Task → Approval → PDF Generator.
Configuring the PDF Generator task
Right click the PDF Generator task, click Configuration, and select Configure Task.
Add the PDF you created in Adobe in the PDF document template field.
For the source of the PDF to complete, choose Template.
Next, write a name that the PDF will download as every time. Add the
.pdfextension at the end.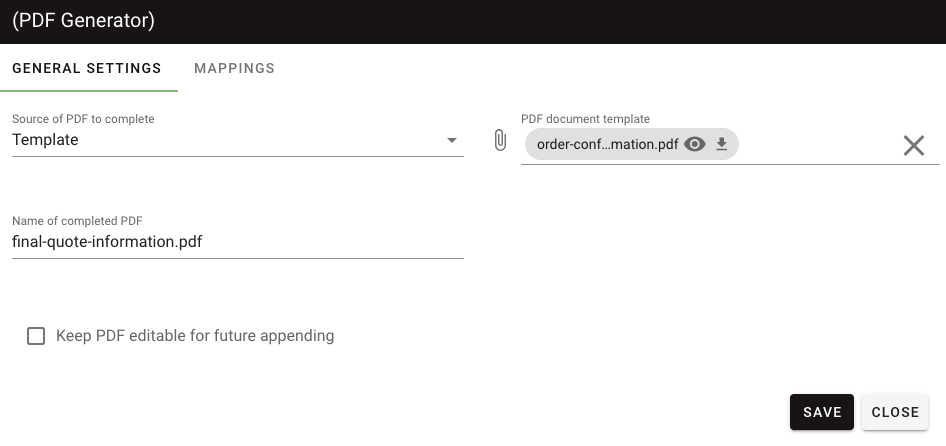
After configuring the PDF, click the Mappings tab.
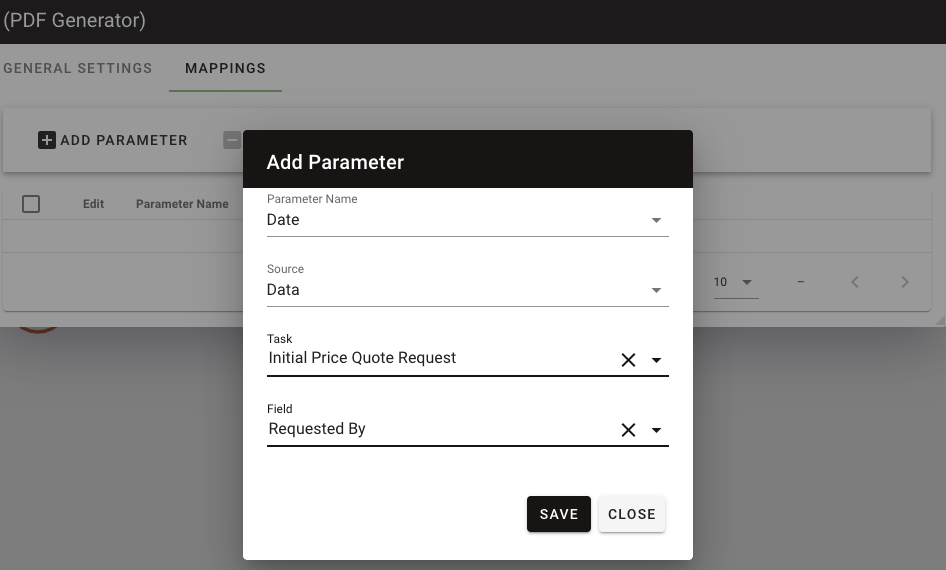
Click Add Parameter. Under Parameter Name, you can view all the fields you created on your PDF in Adobe.
Repeat previous step for each field. For this example, start with Name. In the Source field, choose Data. For the Task field, choose the form you’re mapping from — in this instance, it’s the Initial Price Quote Request Form. Then select the field on the form that matches your PDF; in this example, Requested By maps to the Name field.
This is an example of four mapped fields.
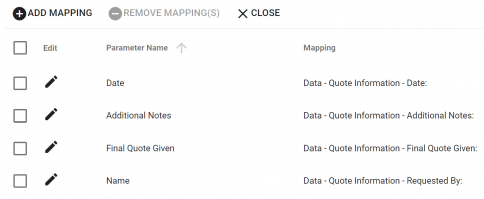
Once you map every field, click Save at the bottom. Then, run a test of the process, and the PDF will generate with each mapped field from the form.
Troubleshooting
This section covers common issues with PDF generation, including missing mapped fields, template upload failures, and incorrect test run results.
Mapped fields not appearing in generated PDF
If you change field names on the form after mapping:
- Click Form Task > Configuration > Configure Task.
- Under Fields to Capture and Prefill Settings, click Import Fields.
- Return to the PDF Generator mappings and add the field again.
PDF template upload fails
Ensure your PDF file:
- Contains properly named form fields
- Doesn’t exceed the file size limit
- Uses a compatible PDF format (PDF 1.4 or higher)
Test run produces incorrect results
If the test run doesn’t populate fields correctly:
- Verify field names in Adobe Acrobat match the mapping configuration
- Check that you placed the form task before the PDF Generator task in the workflow
- Ensure all required fields have mappings configured
What’s next
Now that you created your price quote request workflow, you might want to:
- Add approval steps to your workflow for manager review
- Configure email notifications for request submissions
- Explore other workflow templates in the workflow templates section