Getting started on Web

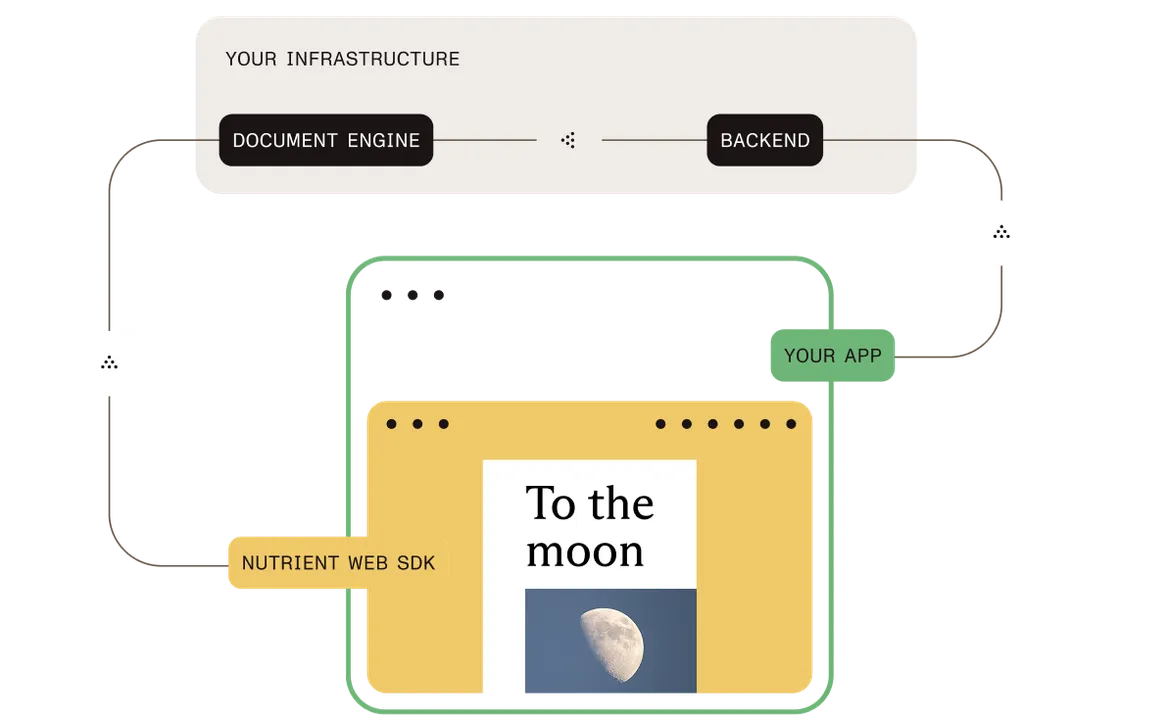
This guide will walk you through the steps necessary to integrate PSPDFKit for Web backed by Document Engine into your project. By the end, you’ll be able to present a PDF document in the PSPDFKit UI.

Requirements

Document Engine runs on a variety of platforms. The following operating systems are supported:

  • macOS Ventura, Monterey, Mojave, Catalina, or Big Sur

  • Ubuntu, Fedora, Debian, or CentOS. Ubuntu and Debian derivatives such as Kubuntu or Xubuntu are supported as well. Currently, 64-bit Intel (x86_64) and ARM (AArch64) processors are supported.

Regardless of your operating system, you’ll need at least 4 GB of RAM.

Installing Docker

Document Engine is distributed as a Docker container. To run it on your computer, you need to install a Docker runtime distribution for your operating system.

Install and start Docker Desktop for Mac. Refer to the Docker website for instructions.

Install and start Docker Desktop for Windows. Refer to the Docker website for instructions.

Install and start Docker Engine. Refer to the Docker website for instructions on how to install it for your Linux distribution.

After you install Docker, use these instructions to install Docker Compose.

Setting Up Document Engine

Copy the code snippet below and save it anywhere on your computer in a file called docker-compose.yml:

version: "3.8"

services:
  document_engine:
    image: pspdfkit/document-engine:1.5.4
    environment:
      PGUSER: de-user
      PGPASSWORD: password
      PGDATABASE: document-engine
      PGHOST: db
      PGPORT: 5432
      API_AUTH_TOKEN: secret
      SECRET_KEY_BASE: secret-key-base
      JWT_PUBLIC_KEY: |
        -----BEGIN PUBLIC KEY-----
        MIIBIjANBgkqhkiG9w0BAQEFAAOCAQ8AMIIBCgKCAQEA2gzhmJ9TDanEzWdP1WG+
        0Ecwbe7f3bv6e5UUpvcT5q68IQJKP47AQdBAnSlFVi4X9SaurbWoXdS6jpmPpk24
        QvitzLNFphHdwjFBelTAOa6taZrSusoFvrtK9x5xsW4zzt/bkpUraNx82Z8MwLwr
        t6HlY7dgO9+xBAabj4t1d2t+0HS8O/ed3CB6T2lj6S8AbLDSEFc9ScO6Uc1XJlSo
        rgyJJSPCpNhSq3AubEZ1wMS1iEtgAzTPRDsQv50qWIbn634HLWxTP/UH6YNJBwzt
        3O6q29kTtjXlMGXCvin37PyX4Jy1IiPFwJm45aWJGKSfVGMDojTJbuUtM+8P9Rrn
        AwIDAQAB
        -----END PUBLIC KEY-----
      JWT_ALGORITHM: RS256
      DASHBOARD_USERNAME: dashboard
      DASHBOARD_PASSWORD: secret
    ports:
      - 5000:5000
    depends_on:
      - db
  db:
    image: postgres:16
    environment:
      POSTGRES_USER: de-user
      POSTGRES_PASSWORD: password
      POSTGRES_DB: document-engine
      POSTGRES_INITDB_ARGS: --data-checksums
      PGDATA: /var/lib/postgresql/data/pgdata
    volumes:
      - pgdata:/var/lib/postgresql/data

volumes:
  pgdata:

Starting Document Engine

Now open a terminal emulator.

Use the terminal emulator integrated with your code editor or IDE. Alternatively, you can use Terminal.app or iTerm2.

Use the terminal emulator integrated with your code editor or IDE. Alternatively, you can use PowerShell.

Use the terminal emulator integrated with your code editor or IDE, or one bundled with your desktop environment.

Go to the directory where you saved the docker-compose.yml file:

cd <path-to-directory-with-docker-compose-yml>

Run the following:

docker-compose up

This command might take a while to run, depending on your internet connection speed. Wait until you see the following message in the terminal:

document_engine_1  | Access the web dashboard at http://localhost:5000/dashboard

Document Engine is now up and running!

Uploading a Document to Document Engine

With Document Engine running, visit http://localhost:5000/dashboard and authenticate using “dashboard” for the username and “secret” for the password. Choose Add Document and upload the document you want to work with.

Screenshot showing the create document modal window in the Document Engine Dashboard

Once the document is uploaded, visit http://localhost:5000/dashboard/documents to see the list of available documents. Each document is identified by an ID. Take note of the ID of the document you just uploaded, as you’ll need it shortly.

Screenshot showing the create document modal window in the Document Engine Dashboard

The ID will look similar to 7KPS8X13JRB2G841X4V7EQ3T2J.

Installing Node.js

If you haven’t installed Node.js, head to the official guides and follow the instructions. By the end of the installation process, you should be able to run the following command:

node --version

The output should be something like v14. You can ignore any subsequent number.

Generating the Application

You’ll use Express, one of the most common Node.js web frameworks. To create a new Express application, you can use the official generator.

Run:

npx express-generator pspdfkit_example --view=ejs

This command will generate a project structure and instruct you on the steps to follow to install dependencies and start the project.

Once you’ve followed all the steps, you should be able to visit http://localhost:3000 to confirm the application is working as expected.

Adding a Page to View the Document

You need to create a page that will show a document stored inside Document Engine.

You’ll want this page to be available at http://localhost:3000/documents/:id, where the document ID is the ID automatically assigned by Document Engine when uploading a document.

To achieve this, create a new route to display a document and mount it in the application.

  1. Create the document’s route:

./routes/documents.js
var express = require("express");
var router = express.Router();

router.get("/:documentId", function (req, res, next) {
  res.render("documents/show", { documentId: req.params.documentId });
});

module.exports = router;

Inside the route, retrieve the ID captured by the routing logic and assign it to a documentId variable you can refer to in the view.

  1. Create a corresponding view with some minimal HTML that prints the document ID:

./views/documents/show.ejs
<h1>Show document <%= documentId %></h1>

  1. Mount the new route in the application:

./app.js
var indexRouter = require('./routes/index');
 var usersRouter = require('./routes/users');
+var documentsRouter = require("./routes/documents");
 // ...
 // rest of the file
 // ...
 app.use('/', indexRouter);
 app.use('/users', usersRouter);
+app.use("/documents", documentsRouter);

Stop and restart the Express server.

You can now visit http://localhost:3000/documents/:id, replacing :id with the ID of the document you uploaded to the Document Engine dashboard.

The page should contain the text Show document, followed by your document ID.

Creating a JSON Web Token (JWT)

PSPDFKit requires the use of JWTs to authenticate and authorize a viewer session against Document Engine.

To create JWTs, install the jsonwebtoken dependency:

npm install --save jsonwebtoken

Stop and restart the Express server.

Working with JWTs requires a private and public key pair. The private key is used by the Express application, while the public key is used by Document Engine.

The public key has already been configured in the Document Engine docker-compose.yml file via the JWT_PUBLIC_KEY environment variable.

To configure the private key, create a config/pspdfkit/jwt.pem file with the following contents:

./config/pspdfkit/jwt.pem
-----BEGIN RSA PRIVATE KEY-----
MIIEpQIBAAKCAQEA2gzhmJ9TDanEzWdP1WG+0Ecwbe7f3bv6e5UUpvcT5q68IQJK
P47AQdBAnSlFVi4X9SaurbWoXdS6jpmPpk24QvitzLNFphHdwjFBelTAOa6taZrS
usoFvrtK9x5xsW4zzt/bkpUraNx82Z8MwLwrt6HlY7dgO9+xBAabj4t1d2t+0HS8
O/ed3CB6T2lj6S8AbLDSEFc9ScO6Uc1XJlSorgyJJSPCpNhSq3AubEZ1wMS1iEtg
AzTPRDsQv50qWIbn634HLWxTP/UH6YNJBwzt3O6q29kTtjXlMGXCvin37PyX4Jy1
IiPFwJm45aWJGKSfVGMDojTJbuUtM+8P9RrnAwIDAQABAoIBAQDSKxhGw0qKINhQ
IwQP5+bDWdqUG2orjsQf2dHOHNhRwJoUNuDZ4f3tcYzV7rGmH0d4Q5CaXj2qMyCd
0eVjpgW0h3z9kM3RA+d7BX7XKlkdQABliZUT9SUUcfIPvohXPKEzBRHed2kf6WVt
XKAuJTD+Dk3LjzRygWldOAE4mnLeZjU61kxPYriynyre+44Gpsgy37Tj25MAmVCY
Flotr/1WZx6bg3HIyFRGxnoJ1zU1MkGxwS4IsrQwOpWEHBiD5nvo54hF5I00NHj/
ccz+MwpgGdjyl02IGCy1fF+Q5SYyH86DG52Mgn8VI9dseGmanLGcgNvrdJFILoJR
SZW7gQoBAoGBAP+D6ZmRF7EqPNMypEHQ5qHHDMvil3mhNQJyIC5rhhl/nn063wnm
zhg96109hVh4zUAj3Rmjb9WqPiW7KBMJJdnEPjmZ/NOXKmgjs2BF+c8oiLQyTQml
xB7LnptvBDi8MnEd3uemfxNuZc+2siuSzgditshNru8xPG2Sn99JC271AoGBANp2
xj5EfdlqNLd11paLOtJ7dfREgc+8FxQCiKSxbaOlVXNk0DW1w4+zLnFohj2m/wRr
bBIzSL+eufoQ9y4BT/AA+ln4qxOpC0isOGK5SxwIjB6OHhCuP8L3anj1IFYM+NX0
Xr1/qdZHKulgbS49cq+TDpB74WyKLLnsvQFyINMXAoGABR5+cp4ujFUdTNnp4out
4zXasscCY+Rv7HGe5W8wC5i78yRXzZn7LQ8ohQCziDc7XXqadmYI2o4DmrvqLJ91
S6yb1omYQCD6L4XvlREx1Q2p13pegr/4cul/bvvFaOGUXSHNEnUKfLgsgAHYBfl1
+T3oDZFI3O/ulv9mBpIvEXUCgYEApeRnqcUM49o4ac/7wZm8czT5XyHeiUbFJ5a8
+IMbRJc6CkRVr1N1S1u/OrMqrQpwwIRqLm/vIEOB6hiT+sVYVGIJueSQ1H8baHYO
4zjdhk4fSNyWjAgltwF2Qp+xjGaRVrcYckHNUD/+n/VvMxvKSPUcrC7GAUvzpsPU
ypJFxsUCgYEA6GuP6M2zIhCYYeB2iLRD4ZHw92RfjikaYmB0++T0y2TVrStlzXHl
c8H6tJWNchtHH30nfLCj9WIMb/cODpm/DrzlSigHffo3+5XUpD/2nSrcFKESw4Xs
a4GXoAxqU44w4Mckg2E19b2MrcNkV9eWAyTACbEO4oFcZcSZOCKj8Fw=
-----END RSA PRIVATE KEY-----

Update ./routes/documents.js to read the private key so that it can be used to sign JWTs and pass them to the view.

In the claims, pass the document ID, the set of permissions you want to have, and an expiry of one hour:

./routes/documents.js
var express = require("express");
 var router = express.Router();
+var fs = require("fs");
+var path = require("path");
+var jwt = require("jsonwebtoken");
+var jwtKey = fs.readFileSync(
+  path.resolve(__dirname, "../config/pspdfkit/jwt.pem")
+);

 router.get("/:documentId", function (req, res, next) {
+  var jwt = prepareJwt(req.params.documentId);
-  res.render("documents/show", { documentId: req.params.documentId });
+  res.render("documents/show", { documentId: req.params.documentId, jwt: jwt });
 });
+
+var prepareJwt = function (documentId) {
+  var claims = {
+    document_id: documentId,
+    permissions: ["read-document", "write", "download"],
+  };
+
+  return jwt.sign(claims, jwtKey, {
+    algorithm: "RS256",
+    expiresIn: 60 * 60, // 1hr, this will set the `exp` claim for us.
+    allowInsecureKeySizes: true,
+  });
+};

 module.exports = router;

The encoded JWT is then assigned to the jwt variable, which can be referenced in the view:


./views/documents/show.ejs
<h1>Show document <%= documentId %></h1>
+<h1>JWT <%= jwt %></h1>

Stop and restart the Express server, and then refresh the page. You’ll now see a fairly long token printed on the page.

Loading an Existing Document

Update the view to load the SDK, passing the document ID and the JWT:

./views/documents/show.ejs
+<script src="https://cdn.cloud.pspdfkit.com/[email protected]/pspdfkit.js"></script>
 <h1>Show document <%= documentId %></h1>
 <h1>JWT <%= jwt %></h1>
+<!-- 2. Element where PSPDFKit will be mounted. -->
+<div id="pspdfkit" style="width: 100%; max-width: 800px; height: 480px;"></div>
+<!-- 3. Initialize PSPDFKit. -->
+<script>
+  PSPDFKit.load({
+    serverUrl: "http://localhost:5000/",
+    container: "#pspdfkit",
+    documentId: "<%= documentId %>",
+    authPayload: { jwt: "<%= jwt %>" },
+    instant: true
+  })
+    .then(function(instance) {
+      console.log("PSPDFKit loaded", instance);
+    })
+    .catch(function(error) {
+      console.error(error.message);
+    });
+</script>

Refresh the page, and you’ll see the PSPDFKit for Web viewer showing the document you just uploaded. If you annotate the document and refresh the page, all changes will be automatically persisted.

This guide will walk you through the steps necessary to integrate PSPDFKit for Web backed by Document Engine into your project. By the end, you’ll be able to present a PDF document in the PSPDFKit UI.

Requirements

Document Engine runs on a variety of platforms. The following operating systems are supported:

  • macOS Ventura, Monterey, Mojave, Catalina, or Big Sur

  • Ubuntu, Fedora, Debian, or CentOS. Ubuntu and Debian derivatives such as Kubuntu or Xubuntu are supported as well. Currently, 64-bit Intel (x86_64) and ARM (AArch64) processors are supported.

Regardless of your operating system, you’ll need at least 4 GB of RAM.

Installing Docker

Document Engine is distributed as a Docker container. To run it on your computer, you need to install a Docker runtime distribution for your operating system.

Install and start Docker Desktop for Mac. Refer to the Docker website for instructions.

Install and start Docker Desktop for Windows. Refer to the Docker website for instructions.

Install and start Docker Engine. Refer to the Docker website for instructions on how to install it for your Linux distribution.

After you install Docker, use these instructions to install Docker Compose.

Setting Up Document Engine

Copy the code snippet below and save it anywhere on your computer in a file called docker-compose.yml:

version: "3.8"

services:
  document_engine:
    image: pspdfkit/document-engine:1.5.4
    environment:
      PGUSER: de-user
      PGPASSWORD: password
      PGDATABASE: document-engine
      PGHOST: db
      PGPORT: 5432
      API_AUTH_TOKEN: secret
      SECRET_KEY_BASE: secret-key-base
      JWT_PUBLIC_KEY: |
        -----BEGIN PUBLIC KEY-----
        MIIBIjANBgkqhkiG9w0BAQEFAAOCAQ8AMIIBCgKCAQEA2gzhmJ9TDanEzWdP1WG+
        0Ecwbe7f3bv6e5UUpvcT5q68IQJKP47AQdBAnSlFVi4X9SaurbWoXdS6jpmPpk24
        QvitzLNFphHdwjFBelTAOa6taZrSusoFvrtK9x5xsW4zzt/bkpUraNx82Z8MwLwr
        t6HlY7dgO9+xBAabj4t1d2t+0HS8O/ed3CB6T2lj6S8AbLDSEFc9ScO6Uc1XJlSo
        rgyJJSPCpNhSq3AubEZ1wMS1iEtgAzTPRDsQv50qWIbn634HLWxTP/UH6YNJBwzt
        3O6q29kTtjXlMGXCvin37PyX4Jy1IiPFwJm45aWJGKSfVGMDojTJbuUtM+8P9Rrn
        AwIDAQAB
        -----END PUBLIC KEY-----
      JWT_ALGORITHM: RS256
      DASHBOARD_USERNAME: dashboard
      DASHBOARD_PASSWORD: secret
    ports:
      - 5000:5000
    depends_on:
      - db
  db:
    image: postgres:16
    environment:
      POSTGRES_USER: de-user
      POSTGRES_PASSWORD: password
      POSTGRES_DB: document-engine
      POSTGRES_INITDB_ARGS: --data-checksums
      PGDATA: /var/lib/postgresql/data/pgdata
    volumes:
      - pgdata:/var/lib/postgresql/data

volumes:
  pgdata:

Starting Document Engine

Now open a terminal emulator.

Use the terminal emulator integrated with your code editor or IDE. Alternatively, you can use Terminal.app or iTerm2.

Use the terminal emulator integrated with your code editor or IDE. Alternatively, you can use PowerShell.

Use the terminal emulator integrated with your code editor or IDE, or one bundled with your desktop environment.

Go to the directory where you saved the docker-compose.yml file:

cd <path-to-directory-with-docker-compose-yml>

Run the following:

docker-compose up

This command might take a while to run, depending on your internet connection speed. Wait until you see the following message in the terminal:

document_engine_1  | Access the web dashboard at http://localhost:5000/dashboard

Document Engine is now up and running!

Uploading a Document to Document Engine

With Document Engine running, visit http://localhost:5000/dashboard and authenticate using “dashboard” for the username and “secret” for the password. Choose Add Document and upload the document you want to work with.

Screenshot showing the create document modal window in the Document Engine Dashboard

Once the document is uploaded, visit http://localhost:5000/dashboard/documents to see the list of available documents. Each document is identified by an ID. Take note of the ID of the document you just uploaded, as you’ll need it shortly.

Screenshot showing the create document modal window in the Document Engine Dashboard

The ID will look similar to 7KPS8X13JRB2G841X4V7EQ3T2J.

Generating the Application

Now, the application using Document Engine needs to be provisioned.

To use Document Engine, you’ll need a web application library or framework. Depending on the chosen technology, different steps might be necessary. Refer to the technology/framework-specific guidelines for setting up the project.

Creating a JSON Web Token (JWT)

PSPDFKit requires the use of a JSON Web Token (JWT) to authenticate and authorize a viewer session against Document Engine.

You can generate JWTs using one of the libraries available in the programming language of your choice. The list of available libraries can be found at jwt.io.

When generating the JWT, make sure to use the RS256 signing algorithm and the private key below:

private key
-----BEGIN RSA PRIVATE KEY-----
MIIEpQIBAAKCAQEA2gzhmJ9TDanEzWdP1WG+0Ecwbe7f3bv6e5UUpvcT5q68IQJK
P47AQdBAnSlFVi4X9SaurbWoXdS6jpmPpk24QvitzLNFphHdwjFBelTAOa6taZrS
usoFvrtK9x5xsW4zzt/bkpUraNx82Z8MwLwrt6HlY7dgO9+xBAabj4t1d2t+0HS8
O/ed3CB6T2lj6S8AbLDSEFc9ScO6Uc1XJlSorgyJJSPCpNhSq3AubEZ1wMS1iEtg
AzTPRDsQv50qWIbn634HLWxTP/UH6YNJBwzt3O6q29kTtjXlMGXCvin37PyX4Jy1
IiPFwJm45aWJGKSfVGMDojTJbuUtM+8P9RrnAwIDAQABAoIBAQDSKxhGw0qKINhQ
IwQP5+bDWdqUG2orjsQf2dHOHNhRwJoUNuDZ4f3tcYzV7rGmH0d4Q5CaXj2qMyCd
0eVjpgW0h3z9kM3RA+d7BX7XKlkdQABliZUT9SUUcfIPvohXPKEzBRHed2kf6WVt
XKAuJTD+Dk3LjzRygWldOAE4mnLeZjU61kxPYriynyre+44Gpsgy37Tj25MAmVCY
Flotr/1WZx6bg3HIyFRGxnoJ1zU1MkGxwS4IsrQwOpWEHBiD5nvo54hF5I00NHj/
ccz+MwpgGdjyl02IGCy1fF+Q5SYyH86DG52Mgn8VI9dseGmanLGcgNvrdJFILoJR
SZW7gQoBAoGBAP+D6ZmRF7EqPNMypEHQ5qHHDMvil3mhNQJyIC5rhhl/nn063wnm
zhg96109hVh4zUAj3Rmjb9WqPiW7KBMJJdnEPjmZ/NOXKmgjs2BF+c8oiLQyTQml
xB7LnptvBDi8MnEd3uemfxNuZc+2siuSzgditshNru8xPG2Sn99JC271AoGBANp2
xj5EfdlqNLd11paLOtJ7dfREgc+8FxQCiKSxbaOlVXNk0DW1w4+zLnFohj2m/wRr
bBIzSL+eufoQ9y4BT/AA+ln4qxOpC0isOGK5SxwIjB6OHhCuP8L3anj1IFYM+NX0
Xr1/qdZHKulgbS49cq+TDpB74WyKLLnsvQFyINMXAoGABR5+cp4ujFUdTNnp4out
4zXasscCY+Rv7HGe5W8wC5i78yRXzZn7LQ8ohQCziDc7XXqadmYI2o4DmrvqLJ91
S6yb1omYQCD6L4XvlREx1Q2p13pegr/4cul/bvvFaOGUXSHNEnUKfLgsgAHYBfl1
+T3oDZFI3O/ulv9mBpIvEXUCgYEApeRnqcUM49o4ac/7wZm8czT5XyHeiUbFJ5a8
+IMbRJc6CkRVr1N1S1u/OrMqrQpwwIRqLm/vIEOB6hiT+sVYVGIJueSQ1H8baHYO
4zjdhk4fSNyWjAgltwF2Qp+xjGaRVrcYckHNUD/+n/VvMxvKSPUcrC7GAUvzpsPU
ypJFxsUCgYEA6GuP6M2zIhCYYeB2iLRD4ZHw92RfjikaYmB0++T0y2TVrStlzXHl
c8H6tJWNchtHH30nfLCj9WIMb/cODpm/DrzlSigHffo3+5XUpD/2nSrcFKESw4Xs
a4GXoAxqU44w4Mckg2E19b2MrcNkV9eWAyTACbEO4oFcZcSZOCKj8Fw=
-----END RSA PRIVATE KEY-----

When it comes to claims, you must provide the document ID, the set of permissions, and an expiry time in the future. Note that some libraries might automatically inject the exp (expiration time) field, while other ones expect the field to be present in the payload. Check the documentation of the chosen JWT library to see how it’s handled:

claims
{
  "document_id": documentId,
  "permissions": ["read-document", "write", "download"]
}

Loading an Existing Document

To view the document in the browser, first you need to load the PSPDFKit for Web JavaScript library. Add the following script tag to the page that will present the document:

<script src="https://cdn.cloud.pspdfkit.com/[email protected]/pspdfkit.js"></script>

Then, on the same page, add the div element where the PSPDFKit for Web viewer will be mounted:

<!-- Element where PSPDFKit will be mounted. -->
<div id="pspdfkit" style="width: 100%; max-width: 800px; height: 480px;"></div>

Finally, add a script that will initialize the viewer:

<script>
  PSPDFKit.load({
    serverUrl: "http://localhost:5000",
    container: "#pspdfkit",
    documentId: documentId,
    authPayload: { jwt: jwt },
    instant: true
  })
    .then(function(instance) {
      console.log("PSPDFKit loaded", instance);
    })
    .catch(function(error) {
      console.error(error.message);
    });
</script>

There are two variables that need to be passed in: documentId and jwt. Refer to the documentation of the web application framework you use to see how to pass variables to the page, or use hardcoded values. When you open the page, you’ll see the PSPDFKit for Web viewer showing the document you just uploaded. If you annotate the document and refresh the page, all changes will be automatically persisted.

Integrate into a Vanilla JavaScript Project

This guide will walk you through the steps necessary to integrate PSPDFKit for Web into your project. By the end, you’ll be able to present a PDF document in the PSPDFKit UI.

Select the preferred products:

The Web SDK uses the Standalone operational mode, where our JavaScript library renders and edits documents directly in the browser. It’s powered by WebAssembly technology, and it doesn’t require a server, plugins, or internet access.

A serverless solution has the following advantages:

  • Get up and running faster — No servers need to be deployed or maintained.

  • Lower infrastructure costs — Rendering and processing are offloaded to the client.

  • Security and privacy — Documents don’t need to be transferred across a network.

Compare operational modes.

If you prefer a video tutorial, watch our step-by-step Getting Started with PSPDFKit video guide.

Requirements

You need Node.js to complete this guide, but in general, Node.js isn’t a requirement for using PSPDFKit for Web.

Adding to Your Project

PSPDFKit for Web library files are distributed as an archive that can be installed as an npm module.

  1. Add the PSPDFKit dependency:

yarn add pspdfkit
npm install --save pspdfkit
  1. Copy the PSPDFKit for Web distribution to the assets directory in your project’s folder:

cp -R ./node_modules/pspdfkit/dist/ ./assets/
  1. Make sure your assets directory contains the pspdfkit.js file and a pspdfkit-lib directory with the library assets.

  2. Make sure your server has the Content-Type: application/wasm MIME typeset. Read more about this in the troubleshooting section.

Integrating into Your Project

  1. Rename the PDF document you want to display in your application to document.pdf, and then add the PDF document to your project’s root directory. You can use this demo document as an example.

  2. Add an empty <div> element with a defined width and height to where PSPDFKit will be mounted:

<div id="pspdfkit" style="width: 100%; height: 100vh;"></div>
  1. Import pspdfkit into your application and initialize PSPDFKit for Web in JavaScript by calling PSPDFKit.load():

import "./assets/pspdfkit.js";

// We need to inform PSPDFKit where to look for its library assets, i.e. the location of the `pspdfkit-lib` directory.
const baseUrl = `${window.location.protocol}//${window.location.host}/assets/`;

PSPDFKit.load({
	baseUrl,
	container: "#pspdfkit",
	document: "document.pdf"
})
.then(instance => {
	console.log("PSPDFKit loaded", instance);
})
.catch(error => {
	console.error(error.message);
});
  1. Import index.js into your HTML page:

    <script type="module" src="index.js"></script>

See the full index.html file below:

<!DOCTYPE html>
<html>
  <head>
    <title>My App</title>
    <!-- Provide proper viewport information so that the layout works on mobile devices. -->
    <meta
      name="viewport"
      content="width=device-width, initial-scale=1.0, minimum-scale=1.0, maximum-scale=1.0, user-scalable=no"
    />
  </head>
  <body>
    <!-- Element where PSPDFKit will be mounted. -->
    <div id="pspdfkit" style="width: 100%; height: 100vh;"></div>

    <script type="module" src="index.js"></script>
  </body>
</html>

Serving Your Website

You’ll use the npm serve package as a simple HTTP server.

  1. Install the serve package:

yarn global add serve
npm install --global serve
  1. Serve the contents of the current directory:

serve -l 8080 .
  1. Navigate to http://localhost:8080 to view the website.

Getting Started Video Guide

Next Steps

When the Web SDK is combined with Document Engine, it uses the Server-Backed operational mode, where rendering is handled by the server and documents are streamed down to the web viewer. It’s delivered as a Docker container, but it can also be managed by PSPDFKit infrastructure.

Web Server-Backed has the following advantages:

  • Faster performance — Leveraging both client-side viewing and server-side rendering, it ensures swift performance, enhancing user interactions. This results in a lighter end user experience by shifting operations from the browser to the backend.

  • Seamless syncing — Annotations and form field values synchronize across servers and sessions without additional configuration, streamlining collaborative workflows.

  • Security and privacy — Designed with privacy and security in mind, it offers a resilient infrastructure to protect sensitive data.

  • High-performance capabilities — Developers can harness advanced features like OCR (web) and Instant Collaboration (web, mobile), empowering real-time collaborative document management.

  • Scalability — Its scalable architecture caters to evolving needs, providing a reliable foundation for projects of all sizes.

  • Headless processing — Supports headless document processing, enabling automated tasks such as batch conversion and manipulation without the need for a graphical user interface, thus enhancing efficiency and integration capabilities.

Compare operational modes.

Requirements

You need Node.js to complete this guide, but in general, Node.js isn’t a requirement for using PSPDFKit for Web.

Adding to Your Project

PSPDFKit for Web library files are distributed as an archive that can be installed as an npm module.

  1. Add the PSPDFKit dependency:

yarn add pspdfkit
npm install --save pspdfkit
  1. Copy the PSPDFKit for Web distribution to the assets directory in your project’s folder:

cp -R ./node_modules/pspdfkit/dist/ ./assets/
  1. Make sure your assets directory contains the pspdfkit.js file and a pspdfkit-lib directory with the library assets.

  2. Make sure your server has the Content-Type: application/wasm MIME typeset. Read more about this in the troubleshooting section.

Integrating into Your Project

  1. Rename the PDF document you want to display in your application to document.pdf, and then add the PDF document to your project’s root directory. You can use this demo document as an example.

  2. Add an empty <div> element with a defined width and height to where PSPDFKit will be mounted:

<div id="pspdfkit" style="width: 100%; height: 100vh;"></div>
  1. Import pspdfkit into your application and initialize PSPDFKit for Web in JavaScript by calling PSPDFKit.load():

import "./assets/pspdfkit.js";

// We need to inform PSPDFKit where to look for its library assets, i.e. the location of the `pspdfkit-lib` directory.
const baseUrl = `${window.location.protocol}//${window.location.host}/assets/`;

PSPDFKit.load({
	baseUrl,
	container: "#pspdfkit",
	document: "document.pdf"
})
.then(instance => {
	console.log("PSPDFKit loaded", instance);
})
.catch(error => {
	console.error(error.message);
});
  1. Import index.js into your HTML page:

    <script type="module" src="index.js"></script>

See the full index.html file below:

<!DOCTYPE html>
<html>
  <head>
    <title>My App</title>
    <!-- Provide proper viewport information so that the layout works on mobile devices. -->
    <meta
      name="viewport"
      content="width=device-width, initial-scale=1.0, minimum-scale=1.0, maximum-scale=1.0, user-scalable=no"
    />
  </head>
  <body>
    <!-- Element where PSPDFKit will be mounted. -->
    <div id="pspdfkit" style="width: 100%; height: 100vh;"></div>

    <script type="module" src="index.js"></script>
  </body>
</html>

Serving Your Website

You’ll use the npm serve package as a simple HTTP server.

  1. Install the serve package:

yarn global add serve
npm install --global serve
  1. Serve the contents of the current directory:

serve -l 8080 .
  1. Navigate to http://localhost:8080 to view the website.

Getting Started Video Guide

Setting Up Document Engine

To set up Document Engine so that it’ll be the backend for PSPDFKit for Web, follow the instructions in the Getting Started with Document Engine guide.

Once Document Engine has been set up, you’ll need to update your code to open a document from Document Engine. This is accomplished by replacing properties included in the configuration object passed to PSPDFKit.load(). Refer to the code snippets located earlier in this guide to find where PSPDFKit.load() will need to be updated.

The document property in PSPDFKit.load() will be replaced with the documentId provided by Document Engine, while the authPayload and the serverUrl properties will be added. If you’d like to enable Instant synchronization, set the instant property to true. See the following example:

PSPDFKit.load({
+  container: "#pspdfkit",
+  documentId: "[DOCUMENT ID FROM DOCUMENT ENGINE]",
+  serverUrl: "[DOCUMENT ENGINE URL]",
+  authPayload: { jwt: "[JWT]" },
+  instant: true
})

Integrate into a Vanilla JavaScript Project

This guide will walk you through the steps necessary to integrate PSPDFKit for Web into your project. By the end, you’ll be able to present a PDF document in the PSPDFKit UI.

Select the preferred products:

The Web SDK uses the Standalone operational mode, where our JavaScript library renders and edits documents directly in the browser. It’s powered by WebAssembly technology, and it doesn’t require a server, plugins, or internet access.

A serverless solution has the following advantages:

  • Get up and running faster — No servers need to be deployed or maintained.

  • Lower infrastructure costs — Rendering and processing are offloaded to the client.

  • Security and privacy — Documents don’t need to be transferred across a network.

Compare operational modes.

If you prefer a video tutorial, watch our step-by-step Getting Started with PSPDFKit video guide.

Requirements

You need Node.js to complete this guide, but in general, Node.js isn’t a requirement for using PSPDFKit for Web.

Adding to Your Project

PSPDFKit for Web library files are distributed as an archive that can be extracted manually.

  1. Download the framework here. The download will start immediately and will save a .tar.gz archive like PSPDFKit-Web-binary-2024.8.0.tar.gz to your computer.

  2. Once the download is complete, extract the archive and copy the entire contents of its dist folder to your project’s assets folder.

  3. Make sure your assets folder contains the pspdfkit.js file and a pspdfkit-lib directory with the library assets.

  4. Make sure your server has the Content-Type: application/wasm MIME typeset. Read more about this in the troubleshooting section.

Integrating into Your Project

  1. Rename the PDF document you want to display in your application to document.pdf, and then add the PDF document to your project’s root directory. You can use this demo document as an example.

  2. Add an empty <div> element with a defined width and height to where PSPDFKit will be mounted:

<div id="pspdfkit" style="width: 100%; height: 100vh;"></div>
  1. Include pspdfkit.js in your HTML page:

<script src="assets/pspdfkit.js"></script>
  1. Initialize PSPDFKit for Web in JavaScript by calling PSPDFKit.load():

<script>
	PSPDFKit.load({
		container: "#pspdfkit",
  	document: "document.pdf"
	})
	.then(function(instance) {
		console.log("PSPDFKit loaded", instance);
	})
	.catch(function(error) {
		console.error(error.message);
	});
</script>

See the full index.html file below:

<!DOCTYPE html>
<html>
  <head>
    <title>My App</title>
    <!-- Provide proper viewport information so that the layout works on mobile devices. -->
    <meta
      name="viewport"
      content="width=device-width, initial-scale=1.0, minimum-scale=1.0, maximum-scale=1.0, user-scalable=no"
    />
  </head>
  <body>
    <!-- Element where PSPDFKit will be mounted. -->
    <div id="pspdfkit" style="width: 100%; height: 100vh;"></div>

    <script src="assets/pspdfkit.js"></script>

    <script>
      PSPDFKit.load({
        container: "#pspdfkit",
        document: "document.pdf",
      })
        .then(function(instance) {
          console.log("PSPDFKit loaded", instance);
        })
        .catch(function(error) {
          console.error(error.message);
        });
    </script>
  </body>
</html>

Serving Your Website

You’ll use the npm serve package as a simple HTTP server.

  1. Install the serve package:

yarn global add serve
npm install --global serve
  1. Serve the contents of the current directory:

serve -l 8080 .
  1. Navigate to http://localhost:8080 to view the website.

Getting Started Video Guide

Next Steps

When the Web SDK is combined with Document Engine, it uses the Server-Backed operational mode, where rendering is handled by the server and documents are streamed down to the web viewer. It’s delivered as a Docker container, but it can also be managed by PSPDFKit infrastructure.

Web Server-Backed has the following advantages:

  • Faster performance — Leveraging both client-side viewing and server-side rendering, it ensures swift performance, enhancing user interactions. This results in a lighter end user experience by shifting operations from the browser to the backend.

  • Seamless syncing — Annotations and form field values synchronize across servers and sessions without additional configuration, streamlining collaborative workflows.

  • Security and privacy — Designed with privacy and security in mind, it offers a resilient infrastructure to protect sensitive data.

  • High-performance capabilities — Developers can harness advanced features like OCR (web) and Instant Collaboration (web, mobile), empowering real-time collaborative document management.

  • Scalability — Its scalable architecture caters to evolving needs, providing a reliable foundation for projects of all sizes.

  • Headless processing — Supports headless document processing, enabling automated tasks such as batch conversion and manipulation without the need for a graphical user interface, thus enhancing efficiency and integration capabilities.

Compare operational modes.

Requirements

You need Node.js to complete this guide, but in general, Node.js isn’t a requirement for using PSPDFKit for Web.

Adding to Your Project

PSPDFKit for Web library files are distributed as an archive that can be extracted manually.

  1. Download the framework here. The download will start immediately and will save a .tar.gz archive like PSPDFKit-Web-binary-2024.8.0.tar.gz to your computer.

  2. Once the download is complete, extract the archive and copy the entire contents of its dist folder to your project’s assets folder.

  3. Make sure your assets folder contains the pspdfkit.js file and a pspdfkit-lib directory with the library assets.

  4. Make sure your server has the Content-Type: application/wasm MIME typeset. Read more about this in the troubleshooting section.

Integrating into Your Project

  1. Rename the PDF document you want to display in your application to document.pdf, and then add the PDF document to your project’s root directory. You can use this demo document as an example.

  2. Add an empty <div> element with a defined width and height to where PSPDFKit will be mounted:

<div id="pspdfkit" style="width: 100%; height: 100vh;"></div>
  1. Include pspdfkit.js in your HTML page:

<script src="assets/pspdfkit.js"></script>
  1. Initialize PSPDFKit for Web in JavaScript by calling PSPDFKit.load():

<script>
	PSPDFKit.load({
		container: "#pspdfkit",
  	document: "document.pdf"
	})
	.then(function(instance) {
		console.log("PSPDFKit loaded", instance);
	})
	.catch(function(error) {
		console.error(error.message);
	});
</script>

See the full index.html file below:

<!DOCTYPE html>
<html>
  <head>
    <title>My App</title>
    <!-- Provide proper viewport information so that the layout works on mobile devices. -->
    <meta
      name="viewport"
      content="width=device-width, initial-scale=1.0, minimum-scale=1.0, maximum-scale=1.0, user-scalable=no"
    />
  </head>
  <body>
    <!-- Element where PSPDFKit will be mounted. -->
    <div id="pspdfkit" style="width: 100%; height: 100vh;"></div>

    <script src="assets/pspdfkit.js"></script>

    <script>
      PSPDFKit.load({
        container: "#pspdfkit",
        document: "document.pdf",
      })
        .then(function(instance) {
          console.log("PSPDFKit loaded", instance);
        })
        .catch(function(error) {
          console.error(error.message);
        });
    </script>
  </body>
</html>

Serving Your Website

You’ll use the npm serve package as a simple HTTP server.

  1. Install the serve package:

yarn global add serve
npm install --global serve
  1. Serve the contents of the current directory:

serve -l 8080 .
  1. Navigate to http://localhost:8080 to view the website.

Getting Started Video Guide

Setting Up Document Engine

To set up Document Engine so that it’ll be the backend for PSPDFKit for Web, follow the instructions in the Getting Started with Document Engine guide.

Once Document Engine has been set up, you’ll need to update your code to open a document from Document Engine. This is accomplished by replacing properties included in the configuration object passed to PSPDFKit.load(). Refer to the code snippets located earlier in this guide to find where PSPDFKit.load() will need to be updated.

The document property in PSPDFKit.load() will be replaced with the documentId provided by Document Engine, while the authPayload and the serverUrl properties will be added. If you’d like to enable Instant synchronization, set the instant property to true. See the following example:

PSPDFKit.load({
+  container: "#pspdfkit",
+  documentId: "[DOCUMENT ID FROM DOCUMENT ENGINE]",
+  serverUrl: "[DOCUMENT ENGINE URL]",
+  authPayload: { jwt: "[JWT]" },
+  instant: true
})

Integrate into a Vanilla JavaScript Project

This guide will walk you through the steps necessary to integrate PSPDFKit for Web into your project. By the end, you’ll be able to present a PDF document in the PSPDFKit UI.

Select the preferred products:

The Web SDK uses the Standalone operational mode, where our JavaScript library renders and edits documents directly in the browser. It’s powered by WebAssembly technology, and it doesn’t require a server, plugins, or internet access.

A serverless solution has the following advantages:

  • Get up and running faster — No servers need to be deployed or maintained.

  • Lower infrastructure costs — Rendering and processing are offloaded to the client.

  • Security and privacy — Documents don’t need to be transferred across a network.

Compare operational modes.

If you prefer a video tutorial, watch our step-by-step Getting Started with PSPDFKit video guide.

Requirements

You need Node.js to complete this guide, but in general, Node.js isn’t a requirement for using PSPDFKit for Web.

Adding to Your Project

PSPDFKit for Web library files are distributed as an archive that can be extracted manually.

  1. Download the framework here. The download will start immediately and will save a .tar.gz archive like PSPDFKit-Web-binary-2024.8.0.tar.gz to your computer.

  2. Once the download is complete, extract the archive and copy the entire contents of its dist folder to your project’s assets folder.

  3. Make sure your assets folder contains the pspdfkit.js file and a pspdfkit-lib directory with the library assets.

  4. Make sure your server has the Content-Type: application/wasm MIME typeset. Read more about this in the troubleshooting section.

Integrating into Your Project

  1. Rename the PDF document you want to display in your application to document.pdf, and then add the PDF document to your project’s root directory. You can use this demo document as an example.

  2. Add an empty <div> element with a defined width and height to where PSPDFKit will be mounted:

<div id="pspdfkit" style="width: 100%; height: 100vh;"></div>
  1. Import pspdfkit into your application and initialize PSPDFKit for Web in JavaScript by calling PSPDFKit.load():

import "./assets/pspdfkit.js";

// We need to inform PSPDFKit where to look for its library assets, i.e. the location of the `pspdfkit-lib` directory.
const baseUrl = `${window.location.protocol}//${window.location.host}/assets/`;

PSPDFKit.load({
	baseUrl,
	container: "#pspdfkit",
	document: "document.pdf"
})
.then(instance => {
	console.log("PSPDFKit loaded", instance);
})
.catch(error => {
	console.error(error.message);
});
  1. Import index.js into your HTML page:

    <script type="module" src="index.js"></script>

See the full index.html file below:

<!DOCTYPE html>
<html>
  <head>
    <title>My App</title>
    <!-- Provide proper viewport information so that the layout works on mobile devices. -->
    <meta
      name="viewport"
      content="width=device-width, initial-scale=1.0, minimum-scale=1.0, maximum-scale=1.0, user-scalable=no"
    />
  </head>
  <body>
    <!-- Element where PSPDFKit will be mounted. -->
    <div id="pspdfkit" style="width: 100%; height: 100vh;"></div>

    <script type="module" src="index.js"></script>
  </body>
</html>

Serving Your Website

You’ll use the npm serve package as a simple HTTP server.

  1. Install the serve package:

yarn global add serve
npm install --global serve
  1. Serve the contents of the current directory:

serve -l 8080 .
  1. Navigate to http://localhost:8080 to view the website.

Getting Started Video Guide

Next Steps

When the Web SDK is combined with Document Engine, it uses the Server-Backed operational mode, where rendering is handled by the server and documents are streamed down to the web viewer. It’s delivered as a Docker container, but it can also be managed by PSPDFKit infrastructure.

Web Server-Backed has the following advantages:

  • Faster performance — Leveraging both client-side viewing and server-side rendering, it ensures swift performance, enhancing user interactions. This results in a lighter end user experience by shifting operations from the browser to the backend.

  • Seamless syncing — Annotations and form field values synchronize across servers and sessions without additional configuration, streamlining collaborative workflows.

  • Security and privacy — Designed with privacy and security in mind, it offers a resilient infrastructure to protect sensitive data.

  • High-performance capabilities — Developers can harness advanced features like OCR (web) and Instant Collaboration (web, mobile), empowering real-time collaborative document management.

  • Scalability — Its scalable architecture caters to evolving needs, providing a reliable foundation for projects of all sizes.

  • Headless processing — Supports headless document processing, enabling automated tasks such as batch conversion and manipulation without the need for a graphical user interface, thus enhancing efficiency and integration capabilities.

Compare operational modes.

Requirements

You need Node.js to complete this guide, but in general, Node.js isn’t a requirement for using PSPDFKit for Web.

Adding to Your Project

PSPDFKit for Web library files are distributed as an archive that can be extracted manually.

  1. Download the framework here. The download will start immediately and will save a .tar.gz archive like PSPDFKit-Web-binary-2024.8.0.tar.gz to your computer.

  2. Once the download is complete, extract the archive and copy the entire contents of its dist folder to your project’s assets folder.

  3. Make sure your assets folder contains the pspdfkit.js file and a pspdfkit-lib directory with the library assets.

  4. Make sure your server has the Content-Type: application/wasm MIME typeset. Read more about this in the troubleshooting section.

Integrating into Your Project

  1. Rename the PDF document you want to display in your application to document.pdf, and then add the PDF document to your project’s root directory. You can use this demo document as an example.

  2. Add an empty <div> element with a defined width and height to where PSPDFKit will be mounted:

<div id="pspdfkit" style="width: 100%; height: 100vh;"></div>
  1. Import pspdfkit into your application and initialize PSPDFKit for Web in JavaScript by calling PSPDFKit.load():

import "./assets/pspdfkit.js";

// We need to inform PSPDFKit where to look for its library assets, i.e. the location of the `pspdfkit-lib` directory.
const baseUrl = `${window.location.protocol}//${window.location.host}/assets/`;

PSPDFKit.load({
	baseUrl,
	container: "#pspdfkit",
	document: "document.pdf"
})
.then(instance => {
	console.log("PSPDFKit loaded", instance);
})
.catch(error => {
	console.error(error.message);
});
  1. Import index.js into your HTML page:

    <script type="module" src="index.js"></script>

See the full index.html file below:

<!DOCTYPE html>
<html>
  <head>
    <title>My App</title>
    <!-- Provide proper viewport information so that the layout works on mobile devices. -->
    <meta
      name="viewport"
      content="width=device-width, initial-scale=1.0, minimum-scale=1.0, maximum-scale=1.0, user-scalable=no"
    />
  </head>
  <body>
    <!-- Element where PSPDFKit will be mounted. -->
    <div id="pspdfkit" style="width: 100%; height: 100vh;"></div>

    <script type="module" src="index.js"></script>
  </body>
</html>

Serving Your Website

You’ll use the npm serve package as a simple HTTP server.

  1. Install the serve package:

yarn global add serve
npm install --global serve
  1. Serve the contents of the current directory:

serve -l 8080 .
  1. Navigate to http://localhost:8080 to view the website.

Getting Started Video Guide

Setting Up Document Engine

To set up Document Engine so that it’ll be the backend for PSPDFKit for Web, follow the instructions in the Getting Started with Document Engine guide.

Once Document Engine has been set up, you’ll need to update your code to open a document from Document Engine. This is accomplished by replacing properties included in the configuration object passed to PSPDFKit.load(). Refer to the code snippets located earlier in this guide to find where PSPDFKit.load() will need to be updated.

The document property in PSPDFKit.load() will be replaced with the documentId provided by Document Engine, while the authPayload and the serverUrl properties will be added. If you’d like to enable Instant synchronization, set the instant property to true. See the following example:

PSPDFKit.load({
+  container: "#pspdfkit",
+  documentId: "[DOCUMENT ID FROM DOCUMENT ENGINE]",
+  serverUrl: "[DOCUMENT ENGINE URL]",
+  authPayload: { jwt: "[JWT]" },
+  instant: true
})

Integrate into a React Project

This guide will walk you through the steps necessary to integrate PSPDFKit for Web into your project. By the end, you’ll be able to present a PDF document in the PSPDFKit UI.

Select the preferred products:

The Web SDK uses the Standalone operational mode, where our JavaScript library renders and edits documents directly in the browser. It’s powered by WebAssembly technology, and it doesn’t require a server, plugins, or internet access.

A serverless solution has the following advantages:

  • Get up and running faster — No servers need to be deployed or maintained.

  • Lower infrastructure costs — Rendering and processing are offloaded to the client.

  • Security and privacy — Documents don’t need to be transferred across a network.

Compare operational modes.

Requirements

You need Node.js to complete this guide, but in general, Node.js isn’t a requirement for using PSPDFKit for Web.

Creating a New Project

  1. Create a new React app using Vite:

yarn create vite pspdfkit-react-example -- --template react
npm create vite@latest react-pdf-example -- --template react
  1. Change to the created project directory:

cd pspdfkit-react-example

Adding PSPDFKit to Your Project

  1. Add the PSPDFKit dependency:

yarn add pspdfkit
npm install pspdfkit
  1. Copy the PSPDFKit for Web library assets to the public directory:

cp -R ./node_modules/pspdfkit/dist/pspdfkit-lib public/pspdfkit-lib
  1. Make sure your public directory contains a pspdfkit-lib directory with the PSPDFKit library assets.

  2. Make sure your server has the Content-Type: application/wasm MIME typeset. Read more about this in the troubleshooting section.

Displaying a PDF

  1. Rename the PDF document you want to display in your application to document.pdf, and then add the PDF document to the public directory. You can use this demo document as an example.

  2. In the src/components/ folder, create the PdfViewerComponent.jsx file with the following content. This adds a component wrapper for the PSPDFKit library:

import { useEffect, useRef } from "react";

export default function PdfViewerComponent(props) {
  const containerRef = useRef(null);

  useEffect(() => {
    const container = containerRef.current; // This `useRef` instance will render the PDF.

    let PSPDFKit, instance;

    (async function () {
      PSPDFKit = await import("pspdfkit")

		PSPDFKit.unload(container) // Ensure that there's only one PSPDFKit instance.

      instance = await PSPDFKit.load({
        // Container where PSPDFKit should be mounted.
        container,
        // The document to open.
        document: props.document,
        // Use the public directory URL as a base URL. PSPDFKit will download its library assets from here.
        baseUrl: `${window.location.protocol}//${window.location.host}/${import.meta.env.BASE_URL}`
      });
    })();

    return () => PSPDFKit && PSPDFKit.unload(container)
  }, []);

  // This div element will render the document to the DOM.
  return <div ref={containerRef} style={{ width: "100%", height: "100vh" }} />
}

The PUBLIC_URL variable is used to reference assets in your public/ folder. Your project might not have the process.env.PUBLIC_URL variable set. You can set it before building the project:

  • Mac and Linux — PUBLIC_URL=https://localhost:3000 npm run build

  • Windows — set PUBLIC_URL=https://localhost:3000&&npm run build

  1. In the src folder, replace the contents of the App.jsx file with the following. This includes the newly created component in your app:

import PdfViewerComponent from './components/PdfViewerComponent';

function App() {
	return (
		<div className="App" style={{width:"100vw"}}>
			<div className="PDF-viewer">
			<PdfViewerComponent
				document={"document.pdf"}
			/>
			</div>
		</div>
	);
}

export default App;
  1. Your project structure should now look like this:

pspdfkit-react-example
├── public
│   ├── pspdfkit-lib
│   └── document.pdf
├── src
│   ├── components
│   |   └── PdfViewerComponent.jsx
|   └── App.jsx
├── package.json
└── yarn.lock
pspdfkit-react-example
├── public
│   ├── pspdfkit-lib
│   └── document.pdf
├── src
│   ├── components
│   |   └── PdfViewerComponent.jsx
|   └── App.jsx
├── package.json
└── package-lock.json
  1. Start the app and run it in your default browser:

yarn run dev
npm run dev

When the Web SDK is combined with Document Engine, it uses the Server-Backed operational mode, where rendering is handled by the server and documents are streamed down to the web viewer. It’s delivered as a Docker container, but it can also be managed by PSPDFKit infrastructure.

Web Server-Backed has the following advantages:

  • Faster performance — Leveraging both client-side viewing and server-side rendering, it ensures swift performance, enhancing user interactions. This results in a lighter end user experience by shifting operations from the browser to the backend.

  • Seamless syncing — Annotations and form field values synchronize across servers and sessions without additional configuration, streamlining collaborative workflows.

  • Security and privacy — Designed with privacy and security in mind, it offers a resilient infrastructure to protect sensitive data.

  • High-performance capabilities — Developers can harness advanced features like OCR (web) and Instant Collaboration (web, mobile), empowering real-time collaborative document management.

  • Scalability — Its scalable architecture caters to evolving needs, providing a reliable foundation for projects of all sizes.

  • Headless processing — Supports headless document processing, enabling automated tasks such as batch conversion and manipulation without the need for a graphical user interface, thus enhancing efficiency and integration capabilities.

Compare operational modes.

Creating a New Project

  1. Create a new React app using Vite:

yarn create vite pspdfkit-react-example -- --template react
npm create vite@latest react-pdf-example -- --template react
  1. Change to the created project directory:

cd pspdfkit-react-example

Adding PSPDFKit to Your Project

  1. Add the PSPDFKit dependency:

yarn add pspdfkit
npm install pspdfkit
  1. Copy the PSPDFKit for Web library assets to the public directory:

cp -R ./node_modules/pspdfkit/dist/pspdfkit-lib public/pspdfkit-lib
  1. Make sure your public directory contains a pspdfkit-lib directory with the PSPDFKit library assets.

  2. Make sure your server has the Content-Type: application/wasm MIME typeset. Read more about this in the troubleshooting section.

Displaying a PDF

  1. Rename the PDF document you want to display in your application to document.pdf, and then add the PDF document to the public directory. You can use this demo document as an example.

  2. In the src/components/ folder, create the PdfViewerComponent.jsx file with the following content. This adds a component wrapper for the PSPDFKit library:

import { useEffect, useRef } from "react";

export default function PdfViewerComponent(props) {
  const containerRef = useRef(null);

  useEffect(() => {
    const container = containerRef.current; // This `useRef` instance will render the PDF.

    let PSPDFKit, instance;

    (async function () {
      PSPDFKit = await import("pspdfkit")

		PSPDFKit.unload(container) // Ensure that there's only one PSPDFKit instance.

      instance = await PSPDFKit.load({
        // Container where PSPDFKit should be mounted.
        container,
        // The document to open.
        document: props.document,
        // Use the public directory URL as a base URL. PSPDFKit will download its library assets from here.
        baseUrl: `${window.location.protocol}//${window.location.host}/${import.meta.env.BASE_URL}`
      });
    })();

    return () => PSPDFKit && PSPDFKit.unload(container)
  }, []);

  // This div element will render the document to the DOM.
  return <div ref={containerRef} style={{ width: "100%", height: "100vh" }} />
}

The PUBLIC_URL variable is used to reference assets in your public/ folder. Your project might not have the process.env.PUBLIC_URL variable set. You can set it before building the project:

  • Mac and Linux — PUBLIC_URL=https://localhost:3000 npm run build

  • Windows — set PUBLIC_URL=https://localhost:3000&&npm run build

  1. In the src folder, replace the contents of the App.jsx file with the following. This includes the newly created component in your app:

import PdfViewerComponent from './components/PdfViewerComponent';

function App() {
	return (
		<div className="App" style={{width:"100vw"}}>
			<div className="PDF-viewer">
			<PdfViewerComponent
				document={"document.pdf"}
			/>
			</div>
		</div>
	);
}

export default App;
  1. Your project structure should now look like this:

pspdfkit-react-example
├── public
│   ├── pspdfkit-lib
│   └── document.pdf
├── src
│   ├── components
│   |   └── PdfViewerComponent.jsx
|   └── App.jsx
├── package.json
└── yarn.lock
pspdfkit-react-example
├── public
│   ├── pspdfkit-lib
│   └── document.pdf
├── src
│   ├── components
│   |   └── PdfViewerComponent.jsx
|   └── App.jsx
├── package.json
└── package-lock.json
  1. Start the app and run it in your default browser:

yarn run dev
npm run dev

Setting Up Document Engine

To set up Document Engine so that it’ll be the backend for PSPDFKit for Web, follow the instructions in the Getting Started with Document Engine guide.

Once Document Engine has been set up, you’ll need to update your code to open a document from Document Engine. This is accomplished by replacing properties included in the configuration object passed to PSPDFKit.load(). Refer to the code snippets located earlier in this guide to find where PSPDFKit.load() will need to be updated.

The document property in PSPDFKit.load() will be replaced with the documentId provided by Document Engine, while the authPayload and the serverUrl properties will be added. If you’d like to enable Instant synchronization, set the instant property to true. See the following example:

PSPDFKit.load({
+  container: "#pspdfkit",
+  documentId: "[DOCUMENT ID FROM DOCUMENT ENGINE]",
+  serverUrl: "[DOCUMENT ENGINE URL]",
+  authPayload: { jwt: "[JWT]" },
+  instant: true
})

Integrate into a React Project

This guide will walk you through the steps necessary to integrate PSPDFKit for Web into your project. By the end, you’ll be able to present a PDF document in the PSPDFKit UI.

Select the preferred products:

The Web SDK uses the Standalone operational mode, where our JavaScript library renders and edits documents directly in the browser. It’s powered by WebAssembly technology, and it doesn’t require a server, plugins, or internet access.

A serverless solution has the following advantages:

  • Get up and running faster — No servers need to be deployed or maintained.

  • Lower infrastructure costs — Rendering and processing are offloaded to the client.

  • Security and privacy — Documents don’t need to be transferred across a network.

Compare operational modes.

Adding PSPDFKit to Your Project

  1. Add the PSPDFKit dependency:

yarn add pspdfkit
npm install pspdfkit
  1. Copy the PSPDFKit for Web library assets to the public directory:

cp -R ./node_modules/pspdfkit/dist/pspdfkit-lib public/pspdfkit-lib
  1. Make sure your public directory contains a pspdfkit-lib directory with the PSPDFKit library assets.

  2. Make sure your server has the Content-Type: application/wasm MIME typeset. Read more about this in the troubleshooting section.

Displaying a PDF

  1. Rename the PDF document you want to display in your application to document.pdf, and then add the PDF document to the public directory. You can use this demo document as an example.

  2. In the src/components/ folder, create the PdfViewerComponent.js file with the following content. This adds a component wrapper for the PSPDFKit library:

import { useEffect, useRef } from "react";

export default function PdfViewerComponent(props) {
  const containerRef = useRef(null);

  useEffect(() => {
    const container = containerRef.current; // This `useRef` instance will render the PDF.

    let PSPDFKit, instance;

    (async function () {
      PSPDFKit = await import("pspdfkit")

		PSPDFKit.unload(container) // Ensure that there's only one PSPDFKit instance.

      instance = await PSPDFKit.load({
        // Container where PSPDFKit should be mounted.
        container,
        // The document to open.
        document: props.document,
        // Use the public directory URL as a base URL. PSPDFKit will download its library assets from here.
        baseUrl: `${window.location.protocol}//${window.location.host}/${process.env.PUBLIC_URL}`
      });
    })();

    return () => PSPDFKit && PSPDFKit.unload(container)
  }, []);

  // This div element will render the document to the DOM.
  return <div ref={containerRef} style={{ width: "100%", height: "100vh" }} />
}

The PUBLIC_URL variable is used to reference assets in your public/ folder. Your project might not have the process.env.PUBLIC_URL variable set. You can set it before building the project:

  • Mac and Linux — PUBLIC_URL=https://localhost:3000 npm run build

  • Windows — set PUBLIC_URL=https://localhost:3000&&npm run build

  1. In your app, add the following below the lines beginning with import. This includes the newly created component in your app:

import PdfViewerComponent from './components/PdfViewerComponent';

function DocumentViewerComponent() {
	return (
		<div className="PDF-viewer">
			<PdfViewerComponent
				document={"document.pdf"}
			/>
		</div>
	);
}
  1. Add the following to the rendering function in your app:

DocumentViewerComponent()
  1. Start the app and run it in your default browser:

yarn start
npm start

Next Steps

When the Web SDK is combined with Document Engine, it uses the Server-Backed operational mode, where rendering is handled by the server and documents are streamed down to the web viewer. It’s delivered as a Docker container, but it can also be managed by PSPDFKit infrastructure.

Web Server-Backed has the following advantages:

  • Faster performance — Leveraging both client-side viewing and server-side rendering, it ensures swift performance, enhancing user interactions. This results in a lighter end user experience by shifting operations from the browser to the backend.

  • Seamless syncing — Annotations and form field values synchronize across servers and sessions without additional configuration, streamlining collaborative workflows.

  • Security and privacy — Designed with privacy and security in mind, it offers a resilient infrastructure to protect sensitive data.

  • High-performance capabilities — Developers can harness advanced features like OCR (web) and Instant Collaboration (web, mobile), empowering real-time collaborative document management.

  • Scalability — Its scalable architecture caters to evolving needs, providing a reliable foundation for projects of all sizes.

  • Headless processing — Supports headless document processing, enabling automated tasks such as batch conversion and manipulation without the need for a graphical user interface, thus enhancing efficiency and integration capabilities.

Compare operational modes.

Adding PSPDFKit to Your Project

  1. Add the PSPDFKit dependency:

yarn add pspdfkit
npm install pspdfkit
  1. Copy the PSPDFKit for Web library assets to the public directory:

cp -R ./node_modules/pspdfkit/dist/pspdfkit-lib public/pspdfkit-lib
  1. Make sure your public directory contains a pspdfkit-lib directory with the PSPDFKit library assets.

  2. Make sure your server has the Content-Type: application/wasm MIME typeset. Read more about this in the troubleshooting section.

Displaying a PDF

  1. Rename the PDF document you want to display in your application to document.pdf, and then add the PDF document to the public directory. You can use this demo document as an example.

  2. In the src/components/ folder, create the PdfViewerComponent.js file with the following content. This adds a component wrapper for the PSPDFKit library:

import { useEffect, useRef } from "react";

export default function PdfViewerComponent(props) {
  const containerRef = useRef(null);

  useEffect(() => {
    const container = containerRef.current; // This `useRef` instance will render the PDF.

    let PSPDFKit, instance;

    (async function () {
      PSPDFKit = await import("pspdfkit")

		PSPDFKit.unload(container) // Ensure that there's only one PSPDFKit instance.

      instance = await PSPDFKit.load({
        // Container where PSPDFKit should be mounted.
        container,
        // The document to open.
        document: props.document,
        // Use the public directory URL as a base URL. PSPDFKit will download its library assets from here.
        baseUrl: `${window.location.protocol}//${window.location.host}/${process.env.PUBLIC_URL}`
      });
    })();

    return () => PSPDFKit && PSPDFKit.unload(container)
  }, []);

  // This div element will render the document to the DOM.
  return <div ref={containerRef} style={{ width: "100%", height: "100vh" }} />
}

The PUBLIC_URL variable is used to reference assets in your public/ folder. Your project might not have the process.env.PUBLIC_URL variable set. You can set it before building the project:

  • Mac and Linux — PUBLIC_URL=https://localhost:3000 npm run build

  • Windows — set PUBLIC_URL=https://localhost:3000&&npm run build

  1. In your app, add the following below the lines beginning with import. This includes the newly created component in your app:

import PdfViewerComponent from './components/PdfViewerComponent';

function DocumentViewerComponent() {
	return (
		<div className="PDF-viewer">
			<PdfViewerComponent
				document={"document.pdf"}
			/>
		</div>
	);
}
  1. Add the following to the rendering function in your app:

DocumentViewerComponent()
  1. Start the app and run it in your default browser:

yarn start
npm start

Setting Up Document Engine

To set up Document Engine so that it’ll be the backend for PSPDFKit for Web, follow the instructions in the Getting Started with Document Engine guide.

Once Document Engine has been set up, you’ll need to update your code to open a document from Document Engine. This is accomplished by replacing properties included in the configuration object passed to PSPDFKit.load(). Refer to the code snippets located earlier in this guide to find where PSPDFKit.load() will need to be updated.

The document property in PSPDFKit.load() will be replaced with the documentId provided by Document Engine, while the authPayload and the serverUrl properties will be added. If you’d like to enable Instant synchronization, set the instant property to true. See the following example:

PSPDFKit.load({
+  container: "#pspdfkit",
+  documentId: "[DOCUMENT ID FROM DOCUMENT ENGINE]",
+  serverUrl: "[DOCUMENT ENGINE URL]",
+  authPayload: { jwt: "[JWT]" },
+  instant: true
})

Integrate into an Angular Project

This guide will walk you through the steps necessary to integrate PSPDFKit for Web into your project. By the end, you’ll be able to present a PDF document in the PSPDFKit UI.

Select the preferred products:

The Web SDK uses the Standalone operational mode, where our JavaScript library renders and edits documents directly in the browser. It’s powered by WebAssembly technology, and it doesn’t require a server, plugins, or internet access.

A serverless solution has the following advantages:

  • Get up and running faster — No servers need to be deployed or maintained.

  • Lower infrastructure costs — Rendering and processing are offloaded to the client.

  • Security and privacy — Documents don’t need to be transferred across a network.

Compare operational modes.

Requirements

You need Node.js to complete this guide, but in general, Node.js isn’t a requirement for using PSPDFKit for Web.

Creating a New Project

  1. Install the Angular CLI:

yarn global add @angular/cli
npm install -g @angular/cli
  1. Create a new Angular application:

ng new my-app
  1. The Angular CLI will ask you information about the app configuration. Accept the defaults by repeatedly pressing the Enter key.

  2. Change to the created project directory:

cd my-app

Adding PSPDFKit

  1. Add the PSPDFKit dependency:

yarn add pspdfkit
npm install --save pspdfkit
  1. Make sure your server has the Content-Type: application/wasm MIME typeset. Read more about this in the troubleshooting section.

  2. In the angular.json file, add the following to the assets option:

"assets": [
	"src/assets",
	{
		"glob": "**/*",
	   "input": "./node_modules/pspdfkit/dist/pspdfkit-lib/",
		"output": "./assets/pspdfkit-lib/"
	}
]

Angular will now copy the PSPDFKit library assets to the assets directory before running your app.

Displaying a PDF

  1. Rename the PDF document you want to display in your application to document.pdf, and then add the PDF document to the src/assets directory. You can use this demo document as an example.

  2. In the src/app/ folder, replace the contents of the app.component.html file with the following:

<div class="app">
	<!-- We'll mount the PSPDFKit UI to this element. -->
	<div id="pspdfkit-container" style="width: 100%; height: 100vh"></div>
</div>
  1. In the src/app/ folder, replace the contents of the app.component.ts file with the following:

import { Component } from "@angular/core";
import PSPDFKit from "pspdfkit";

@Component({
selector: "app-root",
templateUrl: "./app.component.html",
styleUrls: ["app.component.css"],
standalone: true,
})
export class AppComponent {
	title = "PSPDFKit for Web Angular Example";

	ngAfterViewInit() {
		PSPDFKit.load({
			// Use the assets directory URL as a base URL. PSPDFKit will download its library assets from here.
			baseUrl: location.protocol + "//" + location.host + "/assets/",
			document: "/assets/Document.pdf",
			container: "#pspdfkit-container",
		}).then(instance => {
			// For the sake of this demo, store the PSPDFKit for Web instance
			// on the global object so that you can open the dev tools and
			// play with the PSPDFKit API.
			(window as any).instance = instance;
		});
	}
}
  1. Start the app and open it in your default browser:

yarn start --open
npm start --open

Next Steps

When the Web SDK is combined with Document Engine, it uses the Server-Backed operational mode, where rendering is handled by the server and documents are streamed down to the web viewer. It’s delivered as a Docker container, but it can also be managed by PSPDFKit infrastructure.

Web Server-Backed has the following advantages:

  • Faster performance — Leveraging both client-side viewing and server-side rendering, it ensures swift performance, enhancing user interactions. This results in a lighter end user experience by shifting operations from the browser to the backend.

  • Seamless syncing — Annotations and form field values synchronize across servers and sessions without additional configuration, streamlining collaborative workflows.

  • Security and privacy — Designed with privacy and security in mind, it offers a resilient infrastructure to protect sensitive data.

  • High-performance capabilities — Developers can harness advanced features like OCR (web) and Instant Collaboration (web, mobile), empowering real-time collaborative document management.

  • Scalability — Its scalable architecture caters to evolving needs, providing a reliable foundation for projects of all sizes.

  • Headless processing — Supports headless document processing, enabling automated tasks such as batch conversion and manipulation without the need for a graphical user interface, thus enhancing efficiency and integration capabilities.

Compare operational modes.

Requirements

You need Node.js to complete this guide, but in general, Node.js isn’t a requirement for using PSPDFKit for Web.

Creating a New Project

  1. Install the Angular CLI:

yarn global add @angular/cli
npm install -g @angular/cli
  1. Create a new Angular application:

ng new my-app
  1. The Angular CLI will ask you information about the app configuration. Accept the defaults by repeatedly pressing the Enter key.

  2. Change to the created project directory:

cd my-app

Adding PSPDFKit

  1. Add the PSPDFKit dependency:

yarn add pspdfkit
npm install --save pspdfkit
  1. Make sure your server has the Content-Type: application/wasm MIME typeset. Read more about this in the troubleshooting section.

  2. In the angular.json file, add the following to the assets option:

"assets": [
	"src/assets",
	{
		"glob": "**/*",
	   "input": "./node_modules/pspdfkit/dist/pspdfkit-lib/",
		"output": "./assets/pspdfkit-lib/"
	}
]

Angular will now copy the PSPDFKit library assets to the assets directory before running your app.

Displaying a PDF

  1. Rename the PDF document you want to display in your application to document.pdf, and then add the PDF document to the src/assets directory. You can use this demo document as an example.

  2. In the src/app/ folder, replace the contents of the app.component.html file with the following:

<div class="app">
	<!-- We'll mount the PSPDFKit UI to this element. -->
	<div id="pspdfkit-container" style="width: 100%; height: 100vh"></div>
</div>
  1. In the src/app/ folder, replace the contents of the app.component.ts file with the following:

import { Component } from "@angular/core";
import PSPDFKit from "pspdfkit";

@Component({
selector: "app-root",
templateUrl: "./app.component.html",
styleUrls: ["app.component.css"],
standalone: true,
})
export class AppComponent {
	title = "PSPDFKit for Web Angular Example";

	ngAfterViewInit() {
		PSPDFKit.load({
			// Use the assets directory URL as a base URL. PSPDFKit will download its library assets from here.
			baseUrl: location.protocol + "//" + location.host + "/assets/",
			document: "/assets/Document.pdf",
			container: "#pspdfkit-container",
		}).then(instance => {
			// For the sake of this demo, store the PSPDFKit for Web instance
			// on the global object so that you can open the dev tools and
			// play with the PSPDFKit API.
			(window as any).instance = instance;
		});
	}
}
  1. Start the app and open it in your default browser:

yarn start --open
npm start --open

Setting Up Document Engine

To set up Document Engine so that it’ll be the backend for PSPDFKit for Web, follow the instructions in the Getting Started with Document Engine guide.

Once Document Engine has been set up, you’ll need to update your code to open a document from Document Engine. This is accomplished by replacing properties included in the configuration object passed to PSPDFKit.load(). Refer to the code snippets located earlier in this guide to find where PSPDFKit.load() will need to be updated.

The document property in PSPDFKit.load() will be replaced with the documentId provided by Document Engine, while the authPayload and the serverUrl properties will be added. If you’d like to enable Instant synchronization, set the instant property to true. See the following example:

PSPDFKit.load({
+  container: "#pspdfkit",
+  documentId: "[DOCUMENT ID FROM DOCUMENT ENGINE]",
+  serverUrl: "[DOCUMENT ENGINE URL]",
+  authPayload: { jwt: "[JWT]" },
+  instant: true
})

Integrate into an Angular Project

This guide will walk you through the steps necessary to integrate PSPDFKit for Web into your project. By the end, you’ll be able to present a PDF document in the PSPDFKit UI.

Select the preferred products:

The Web SDK uses the Standalone operational mode, where our JavaScript library renders and edits documents directly in the browser. It’s powered by WebAssembly technology, and it doesn’t require a server, plugins, or internet access.

A serverless solution has the following advantages:

  • Get up and running faster — No servers need to be deployed or maintained.

  • Lower infrastructure costs — Rendering and processing are offloaded to the client.

  • Security and privacy — Documents don’t need to be transferred across a network.

Compare operational modes.

Adding PSPDFKit

  1. Add the PSPDFKit dependency:

yarn add pspdfkit
npm install --save pspdfkit
  1. Make sure your server has the Content-Type: application/wasm MIME typeset. Read more about this in the troubleshooting section.

  2. In the angular.json file, add the following to the assets option:

"assets": [
	"src/assets",
	{
		"glob": "**/*",
	   "input": "./node_modules/pspdfkit/dist/pspdfkit-lib/",
		"output": "./assets/pspdfkit-lib/"
	}
]

Angular will now copy the PSPDFKit library assets to the assets directory before running your app.

Displaying a PDF

  1. Rename the PDF document you want to display in your application to document.pdf, and then add the PDF document to the src/assets directory. You can use this demo document as an example.

  2. Generate a new PDF viewer component:

ng generate component pdf-viewer
  1. In the src/app/pdf-viewer folder, replace the contents of the pdf-viewer.component.html file with the following:

<div class="pdf-viewer">
	<div id="pspdfkit-container" style="width: 100%; height: 100vh"></div>
</div>
  1. In the src/app/pdf-viewer folder, replace the contents of the pdf-viewer.component.ts file with the following. This initializes PSPDFKit in the PDF viewer component:

import { Component, OnInit } from '@angular/core';
import PSPDFKit from 'pspdfkit';

@Component({
	selector: 'pdf-viewer',
	templateUrl: './pdf-viewer.component.html',
	styleUrls: ['./pdf-viewer.component.css'],
	standalone: true,
})
export class PdfViewerComponent implements OnInit {
	ngOnInit(): void {
		PSPDFKit.load({
			// Use the assets directory URL as a base URL. PSPDFKit will download its library assets from here.
			baseUrl: location.protocol + "//" + location.host + "/assets/",
			document: "/assets/document.pdf",
			container: "#pspdfkit-container",
		}).then(instance => {
			// For the sake of this demo, store the PSPDFKit for Web instance
			// on the global object so that you can open the dev tools and
			// play with the PSPDFKit API.
			(window as any).instance = instance;
		});
	}
}
  1. In the src/app/ folder, add the following to the app.component.html file in the place where you want to add the PDF viewer:

<pdf-viewer></pdf-viewer>
  1. Start the app and open it in your default browser:

yarn start --open
npm start --open

Next Steps

When the Web SDK is combined with Document Engine, it uses the Server-Backed operational mode, where rendering is handled by the server and documents are streamed down to the web viewer. It’s delivered as a Docker container, but it can also be managed by PSPDFKit infrastructure.

Web Server-Backed has the following advantages:

  • Faster performance — Leveraging both client-side viewing and server-side rendering, it ensures swift performance, enhancing user interactions. This results in a lighter end user experience by shifting operations from the browser to the backend.

  • Seamless syncing — Annotations and form field values synchronize across servers and sessions without additional configuration, streamlining collaborative workflows.

  • Security and privacy — Designed with privacy and security in mind, it offers a resilient infrastructure to protect sensitive data.

  • High-performance capabilities — Developers can harness advanced features like OCR (web) and Instant Collaboration (web, mobile), empowering real-time collaborative document management.

  • Scalability — Its scalable architecture caters to evolving needs, providing a reliable foundation for projects of all sizes.

  • Headless processing — Supports headless document processing, enabling automated tasks such as batch conversion and manipulation without the need for a graphical user interface, thus enhancing efficiency and integration capabilities.

Compare operational modes.

Adding PSPDFKit

  1. Add the PSPDFKit dependency:

yarn add pspdfkit
npm install --save pspdfkit
  1. Make sure your server has the Content-Type: application/wasm MIME typeset. Read more about this in the troubleshooting section.

  2. In the angular.json file, add the following to the assets option:

"assets": [
	"src/assets",
	{
		"glob": "**/*",
	   "input": "./node_modules/pspdfkit/dist/pspdfkit-lib/",
		"output": "./assets/pspdfkit-lib/"
	}
]

Angular will now copy the PSPDFKit library assets to the assets directory before running your app.

Displaying a PDF

  1. Rename the PDF document you want to display in your application to document.pdf, and then add the PDF document to the src/assets directory. You can use this demo document as an example.

  2. Generate a new PDF viewer component:

ng generate component pdf-viewer
  1. In the src/app/pdf-viewer folder, replace the contents of the pdf-viewer.component.html file with the following:

<div class="pdf-viewer">
	<div id="pspdfkit-container" style="width: 100%; height: 100vh"></div>
</div>
  1. In the src/app/pdf-viewer folder, replace the contents of the pdf-viewer.component.ts file with the following. This initializes PSPDFKit in the PDF viewer component:

import { Component, OnInit } from '@angular/core';
import PSPDFKit from 'pspdfkit';

@Component({
	selector: 'pdf-viewer',
	templateUrl: './pdf-viewer.component.html',
	styleUrls: ['./pdf-viewer.component.css'],
	standalone: true,
})
export class PdfViewerComponent implements OnInit {
	ngOnInit(): void {
		PSPDFKit.load({
			// Use the assets directory URL as a base URL. PSPDFKit will download its library assets from here.
			baseUrl: location.protocol + "//" + location.host + "/assets/",
			document: "/assets/document.pdf",
			container: "#pspdfkit-container",
		}).then(instance => {
			// For the sake of this demo, store the PSPDFKit for Web instance
			// on the global object so that you can open the dev tools and
			// play with the PSPDFKit API.
			(window as any).instance = instance;
		});
	}
}
  1. In the src/app/ folder, add the following to the app.component.html file in the place where you want to add the PDF viewer:

<pdf-viewer></pdf-viewer>
  1. Start the app and open it in your default browser:

yarn start --open
npm start --open

Setting Up Document Engine

To set up Document Engine so that it’ll be the backend for PSPDFKit for Web, follow the instructions in the Getting Started with Document Engine guide.

Once Document Engine has been set up, you’ll need to update your code to open a document from Document Engine. This is accomplished by replacing properties included in the configuration object passed to PSPDFKit.load(). Refer to the code snippets located earlier in this guide to find where PSPDFKit.load() will need to be updated.

The document property in PSPDFKit.load() will be replaced with the documentId provided by Document Engine, while the authPayload and the serverUrl properties will be added. If you’d like to enable Instant synchronization, set the instant property to true. See the following example:

PSPDFKit.load({
+  container: "#pspdfkit",
+  documentId: "[DOCUMENT ID FROM DOCUMENT ENGINE]",
+  serverUrl: "[DOCUMENT ENGINE URL]",
+  authPayload: { jwt: "[JWT]" },
+  instant: true
})

Integrate into a Vue.js Project

This guide will walk you through the steps necessary to integrate PSPDFKit for Web into your project. By the end, you’ll be able to present a PDF document in the PSPDFKit UI.

Select the preferred products:

The Web SDK uses the Standalone operational mode, where our JavaScript library renders and edits documents directly in the browser. It’s powered by WebAssembly technology, and it doesn’t require a server, plugins, or internet access.

A serverless solution has the following advantages:

  • Get up and running faster — No servers need to be deployed or maintained.

  • Lower infrastructure costs — Rendering and processing are offloaded to the client.

  • Security and privacy — Documents don’t need to be transferred across a network.

Compare operational modes.

Requirements

You need Node.js to complete this guide, but in general, Node.js isn’t a requirement for using PSPDFKit for Web.

Installing the Vue.js CLI

First, install the Vue.js command-line tool for managing your Vue.js projects:

yarn global add @vue/cli
npm install -g @vue/cli

Creating the Project

  1. Create a new Vue.js app:

vue create my-app
  1. Select Default (Vue 3) ([Vue 3] babel, eslint) from the list.

Activity controller

  1. Select the package manager you want to use (Yarn is recommended).

  2. Change to the created project directory:

cd my-app

Adding PSPDFKit

  1. Add the PSPDFKit dependency:

yarn add pspdfkit
npm install pspdfkit
  1. Create a new directory under public called js:

mkdir -p public/js
  1. Copy the PSPDFKit for Web library assets to the public/js directory:

cp -R ./node_modules/pspdfkit/dist/pspdfkit-lib public/js/pspdfkit-lib
  1. Make sure your server has the Content-Type: application/wasm MIME typeset. Read more about this in the troubleshooting section.

Displaying a PDF

  1. Rename the PDF document you want to display in your application to document.pdf, and then add the PDF document to the public directory. You can use this demo document as an example.

  2. In the src/components/ folder, create the PSPDFKitContainer.vue file with the following content. This adds a component wrapper for the PSPDFKit library:

<template>
  <div class="pdf-container"></div>
</template>

<script>
import PSPDFKit from "pspdfkit";

/**
 * PSPDFKit for Web example component.
 */
export default {
  name: 'PSPDFKit',
  /**
	 * The component receives `pdfFile` as a prop, which is type of `String` and is required.
	 */
  props: {
    pdfFile: {
      type: String,
      required: true,
    },
  },
  /**
	* We wait until the template has been rendered to load the document into the library.
	*/
  mounted() {
    this.loadPSPDFKit().then((instance) => {
      this.$emit("loaded", instance);
    });
  },
  /**
	 * We watch for `pdfFile` prop changes and trigger unloading and loading when there's a new document to load.
	 */
  watch: {
    pdfFile(val) {
      if (val) {
        this.loadPSPDFKit();
      }
    },
  },
  /**
	 * Our component has the `loadPSPDFKit` method. This unloads and cleans up the component and triggers document loading.
	 */
  methods: {
    async loadPSPDFKit() {
      PSPDFKit.unload(".pdf-container");
      return PSPDFKit.load({
        // access the pdfFile from props
        document: this.pdfFile,
        container: ".pdf-container",
      });
    },
  },

  /**
	 * Clean up when the component is unmounted so it's ready to load another document (not needed in this example).
	 */
  beforeUnmount() {
    PSPDFKit.unload(".pdf-container");
  },
};
</script>


<style scoped>
.pdf-container {
  height: 100vh;
}
</style>
  1. In the src folder, replace the contents of the App.vue file with the following. This includes the newly created component in your app:

<template>
  <div id="app">
    <label for="file-upload" class="custom-file-upload">
    Open PDF
    </label>
    <input id="file-upload" type="file" @change="openDocument" class="btn" />
    <PSPDFKitContainer :pdfFile="pdfFile" @loaded="handleLoaded" />
  </div>
</template>

<script>
import PSPDFKitContainer from "@/components/PSPDFKitContainer";

export default {
  data() {
    return {
      pdfFile: this.pdfFile || "/document.pdf",
    };
  },
  /**
   * Render the `PSPDFKitContainer` component.
   */
  components: {
    PSPDFKitContainer,
  },
  /**
   * Our component has two methods — one to check when the document is loaded, and the other to open the document.
   */
  methods: {
    handleLoaded(instance) {
      console.log("PSPDFKit has loaded: ", instance);
      // Do something.
    },

    openDocument(event) {
      // To access the Vue.js instance data properties, use `this` keyword.
      if (this.pdfFile && this.pdfFile.startsWith('blob:')) {
        window.URL.revokeObjectURL(this.pdfFile);
      }
      this.pdfFile = window.URL.createObjectURL(event.target.files[0]);
    },
  },
};
</script>

<style>
#app {
  font-family: Avenir, Helvetica, Arial, sans-serif;
  text-align: center;
  color: #2c3e50;
}

body {
  margin: 0;
}

input[type="file"] {
    display: none;
}

.custom-file-upload {
    border: 1px solid #ccc;
    border-radius: 4px;
    display: inline-block;
    padding: 6px 12px;
    cursor: pointer;
    background:#4A8FED;
    padding:10px;
    color:#fff;
    font:inherit;
    font-size: 16px;
    font-weight: bold;
}

</style>
  1. Start the app:

yarn serve
npm run serve
  1. Open http://localhost:8080/ in your browser to view the website.

Next Steps

When the Web SDK is combined with Document Engine, it uses the Server-Backed operational mode, where rendering is handled by the server and documents are streamed down to the web viewer. It’s delivered as a Docker container, but it can also be managed by PSPDFKit infrastructure.

Web Server-Backed has the following advantages:

  • Faster performance — Leveraging both client-side viewing and server-side rendering, it ensures swift performance, enhancing user interactions. This results in a lighter end user experience by shifting operations from the browser to the backend.

  • Seamless syncing — Annotations and form field values synchronize across servers and sessions without additional configuration, streamlining collaborative workflows.

  • Security and privacy — Designed with privacy and security in mind, it offers a resilient infrastructure to protect sensitive data.

  • High-performance capabilities — Developers can harness advanced features like OCR (web) and Instant Collaboration (web, mobile), empowering real-time collaborative document management.

  • Scalability — Its scalable architecture caters to evolving needs, providing a reliable foundation for projects of all sizes.

  • Headless processing — Supports headless document processing, enabling automated tasks such as batch conversion and manipulation without the need for a graphical user interface, thus enhancing efficiency and integration capabilities.

Compare operational modes.

Requirements

You need Node.js to complete this guide, but in general, Node.js isn’t a requirement for using PSPDFKit for Web.

Installing the Vue.js CLI

First, install the Vue.js command-line tool for managing your Vue.js projects:

yarn global add @vue/cli
npm install -g @vue/cli

Creating the Project

  1. Create a new Vue.js app:

vue create my-app
  1. Select Default (Vue 3) ([Vue 3] babel, eslint) from the list.

Activity controller

  1. Select the package manager you want to use (Yarn is recommended).

  2. Change to the created project directory:

cd my-app

Adding PSPDFKit

  1. Add the PSPDFKit dependency:

yarn add pspdfkit
npm install pspdfkit
  1. Create a new directory under public called js:

mkdir -p public/js
  1. Copy the PSPDFKit for Web library assets to the public/js directory:

cp -R ./node_modules/pspdfkit/dist/pspdfkit-lib public/js/pspdfkit-lib
  1. Make sure your server has the Content-Type: application/wasm MIME typeset. Read more about this in the troubleshooting section.

Displaying a PDF

  1. Rename the PDF document you want to display in your application to document.pdf, and then add the PDF document to the public directory. You can use this demo document as an example.

  2. In the src/components/ folder, create the PSPDFKitContainer.vue file with the following content. This adds a component wrapper for the PSPDFKit library:

<template>
  <div class="pdf-container"></div>
</template>

<script>
import PSPDFKit from "pspdfkit";

/**
 * PSPDFKit for Web example component.
 */
export default {
  name: 'PSPDFKit',
  /**
	 * The component receives `pdfFile` as a prop, which is type of `String` and is required.
	 */
  props: {
    pdfFile: {
      type: String,
      required: true,
    },
  },
  /**
	* We wait until the template has been rendered to load the document into the library.
	*/
  mounted() {
    this.loadPSPDFKit().then((instance) => {
      this.$emit("loaded", instance);
    });
  },
  /**
	 * We watch for `pdfFile` prop changes and trigger unloading and loading when there's a new document to load.
	 */
  watch: {
    pdfFile(val) {
      if (val) {
        this.loadPSPDFKit();
      }
    },
  },
  /**
	 * Our component has the `loadPSPDFKit` method. This unloads and cleans up the component and triggers document loading.
	 */
  methods: {
    async loadPSPDFKit() {
      PSPDFKit.unload(".pdf-container");
      return PSPDFKit.load({
        // access the pdfFile from props
        document: this.pdfFile,
        container: ".pdf-container",
      });
    },
  },

  /**
	 * Clean up when the component is unmounted so it's ready to load another document (not needed in this example).
	 */
  beforeUnmount() {
    PSPDFKit.unload(".pdf-container");
  },
};
</script>


<style scoped>
.pdf-container {
  height: 100vh;
}
</style>
  1. In the src folder, replace the contents of the App.vue file with the following. This includes the newly created component in your app:

<template>
  <div id="app">
    <label for="file-upload" class="custom-file-upload">
    Open PDF
    </label>
    <input id="file-upload" type="file" @change="openDocument" class="btn" />
    <PSPDFKitContainer :pdfFile="pdfFile" @loaded="handleLoaded" />
  </div>
</template>

<script>
import PSPDFKitContainer from "@/components/PSPDFKitContainer";

export default {
  data() {
    return {
      pdfFile: this.pdfFile || "/document.pdf",
    };
  },
  /**
   * Render the `PSPDFKitContainer` component.
   */
  components: {
    PSPDFKitContainer,
  },
  /**
   * Our component has two methods — one to check when the document is loaded, and the other to open the document.
   */
  methods: {
    handleLoaded(instance) {
      console.log("PSPDFKit has loaded: ", instance);
      // Do something.
    },

    openDocument(event) {
      // To access the Vue.js instance data properties, use `this` keyword.
      if (this.pdfFile && this.pdfFile.startsWith('blob:')) {
        window.URL.revokeObjectURL(this.pdfFile);
      }
      this.pdfFile = window.URL.createObjectURL(event.target.files[0]);
    },
  },
};
</script>

<style>
#app {
  font-family: Avenir, Helvetica, Arial, sans-serif;
  text-align: center;
  color: #2c3e50;
}

body {
  margin: 0;
}

input[type="file"] {
    display: none;
}

.custom-file-upload {
    border: 1px solid #ccc;
    border-radius: 4px;
    display: inline-block;
    padding: 6px 12px;
    cursor: pointer;
    background:#4A8FED;
    padding:10px;
    color:#fff;
    font:inherit;
    font-size: 16px;
    font-weight: bold;
}

</style>
  1. Start the app:

yarn serve
npm run serve
  1. Open http://localhost:8080/ in your browser to view the website.

Setting Up Document Engine

To set up Document Engine so that it’ll be the backend for PSPDFKit for Web, follow the instructions in the Getting Started with Document Engine guide.

Once Document Engine has been set up, you’ll need to update your code to open a document from Document Engine. This is accomplished by replacing properties included in the configuration object passed to PSPDFKit.load(). Refer to the code snippets located earlier in this guide to find where PSPDFKit.load() will need to be updated.

The document property in PSPDFKit.load() will be replaced with the documentId provided by Document Engine, while the authPayload and the serverUrl properties will be added. If you’d like to enable Instant synchronization, set the instant property to true. See the following example:

PSPDFKit.load({
+  container: "#pspdfkit",
+  documentId: "[DOCUMENT ID FROM DOCUMENT ENGINE]",
+  serverUrl: "[DOCUMENT ENGINE URL]",
+  authPayload: { jwt: "[JWT]" },
+  instant: true
})

Integrate into a Vue.js Project

This guide will walk you through the steps necessary to integrate PSPDFKit for Web into your project. By the end, you’ll be able to present a PDF document in the PSPDFKit UI.

Select the preferred products:

The Web SDK uses the Standalone operational mode, where our JavaScript library renders and edits documents directly in the browser. It’s powered by WebAssembly technology, and it doesn’t require a server, plugins, or internet access.

A serverless solution has the following advantages:

  • Get up and running faster — No servers need to be deployed or maintained.

  • Lower infrastructure costs — Rendering and processing are offloaded to the client.

  • Security and privacy — Documents don’t need to be transferred across a network.

Compare operational modes.

Adding PSPDFKit

  1. Add the PSPDFKit dependency:

yarn add pspdfkit
npm install pspdfkit
  1. Create a new directory under public called js:

mkdir -p public/js
  1. Copy the PSPDFKit for Web library assets to the public/js directory:

cp -R ./node_modules/pspdfkit/dist/pspdfkit-lib public/js/pspdfkit-lib
  1. Make sure your server has the Content-Type: application/wasm MIME typeset. Read more about this in the troubleshooting section.

Displaying a PDF

  1. Rename the PDF document you want to display in your application to document.pdf, and then add the PDF document to the public directory. You can use this demo document as an example.

  2. In the src/components/ folder, create the PSPDFKitContainer.vue file with the following content. This adds a component wrapper for the PSPDFKit library:

<template>
  <div class="pdf-container"></div>
</template>

<script>
import PSPDFKit from "pspdfkit";

/**
 * PSPDFKit for Web example component.
 */
export default {
  name: 'PSPDFKit',
  /**
	 * The component receives `pdfFile` as a prop, which is type of `String` and is required.
	 */
  props: {
    pdfFile: {
      type: String,
      required: true,
    },
  },
  /**
	* We wait until the template has been rendered to load the document into the library.
	*/
  mounted() {
    this.loadPSPDFKit().then((instance) => {
      this.$emit("loaded", instance);
    });
  },
  /**
	 * We watch for `pdfFile` prop changes and trigger unloading and loading when there's a new document to load.
	 */
  watch: {
    pdfFile(val) {
      if (val) {
        this.loadPSPDFKit();
      }
    },
  },
  /**
	 * Our component has the `loadPSPDFKit` method. This unloads and cleans up the component and triggers document loading.
	 */
  methods: {
    async loadPSPDFKit() {
      PSPDFKit.unload(".pdf-container");
      return PSPDFKit.load({
        // access the pdfFile from props
        document: this.pdfFile,
        container: ".pdf-container",
      });
    },
  },

  /**
	 * Clean up when the component is unmounted so it's ready to load another document (not needed in this example).
	 */
  beforeUnmount() {
    PSPDFKit.unload(".pdf-container");
  },
};
</script>


<style scoped>
.pdf-container {
  height: 100vh;
}
</style>
  1. In the src folder, add the newly created component to the App.vue file in the following way:

<template>
  <div id="app">
    <label for="file-upload" class="custom-file-upload">
    Open PDF
    </label>
    <input id="file-upload" type="file" @change="openDocument" class="btn" />
    <PSPDFKitContainer :pdfFile="pdfFile" @loaded="handleLoaded" />
  </div>
</template>

<script>
import PSPDFKitContainer from "@/components/PSPDFKitContainer";

export default {
  data() {
    return {
      pdfFile: this.pdfFile || "/document.pdf",
    };
  },
  /**
   * Render the `PSPDFKitContainer` component.
   */
  components: {
    PSPDFKitContainer,
  },
  /**
   * Our component has two methods — one to check when the document is loaded, and the other to open the document.
   */
  methods: {
    handleLoaded(instance) {
      console.log("PSPDFKit has loaded: ", instance);
      // Do something.
    },

    openDocument(event) {
      // To access the Vue.js instance data properties, use `this` keyword.
      if (this.pdfFile && this.pdfFile.startsWith('blob:')) {
        window.URL.revokeObjectURL(this.pdfFile);
      }
      this.pdfFile = window.URL.createObjectURL(event.target.files[0]);
    },
  },
};
</script>

<style>
#app {
  font-family: Avenir, Helvetica, Arial, sans-serif;
  text-align: center;
  color: #2c3e50;
}

body {
  margin: 0;
}

input[type="file"] {
    display: none;
}

.custom-file-upload {
    border: 1px solid #ccc;
    border-radius: 4px;
    display: inline-block;
    padding: 6px 12px;
    cursor: pointer;
    background:#4A8FED;
    padding:10px;
    color:#fff;
    font:inherit;
    font-size: 16px;
    font-weight: bold;
}

</style>
  1. Start the app:

yarn serve
npm run serve
  1. Open http://localhost:8080/ in your browser to view the website.

Next Steps

When the Web SDK is combined with Document Engine, it uses the Server-Backed operational mode, where rendering is handled by the server and documents are streamed down to the web viewer. It’s delivered as a Docker container, but it can also be managed by PSPDFKit infrastructure.

Web Server-Backed has the following advantages:

  • Faster performance — Leveraging both client-side viewing and server-side rendering, it ensures swift performance, enhancing user interactions. This results in a lighter end user experience by shifting operations from the browser to the backend.

  • Seamless syncing — Annotations and form field values synchronize across servers and sessions without additional configuration, streamlining collaborative workflows.

  • Security and privacy — Designed with privacy and security in mind, it offers a resilient infrastructure to protect sensitive data.

  • High-performance capabilities — Developers can harness advanced features like OCR (web) and Instant Collaboration (web, mobile), empowering real-time collaborative document management.

  • Scalability — Its scalable architecture caters to evolving needs, providing a reliable foundation for projects of all sizes.

  • Headless processing — Supports headless document processing, enabling automated tasks such as batch conversion and manipulation without the need for a graphical user interface, thus enhancing efficiency and integration capabilities.

Compare operational modes.

Adding PSPDFKit

  1. Add the PSPDFKit dependency:

yarn add pspdfkit
npm install pspdfkit
  1. Create a new directory under public called js:

mkdir -p public/js
  1. Copy the PSPDFKit for Web library assets to the public/js directory:

cp -R ./node_modules/pspdfkit/dist/pspdfkit-lib public/js/pspdfkit-lib
  1. Make sure your server has the Content-Type: application/wasm MIME typeset. Read more about this in the troubleshooting section.

Displaying a PDF

  1. Rename the PDF document you want to display in your application to document.pdf, and then add the PDF document to the public directory. You can use this demo document as an example.

  2. In the src/components/ folder, create the PSPDFKitContainer.vue file with the following content. This adds a component wrapper for the PSPDFKit library:

<template>
  <div class="pdf-container"></div>
</template>

<script>
import PSPDFKit from "pspdfkit";

/**
 * PSPDFKit for Web example component.
 */
export default {
  name: 'PSPDFKit',
  /**
	 * The component receives `pdfFile` as a prop, which is type of `String` and is required.
	 */
  props: {
    pdfFile: {
      type: String,
      required: true,
    },
  },
  /**
	* We wait until the template has been rendered to load the document into the library.
	*/
  mounted() {
    this.loadPSPDFKit().then((instance) => {
      this.$emit("loaded", instance);
    });
  },
  /**
	 * We watch for `pdfFile` prop changes and trigger unloading and loading when there's a new document to load.
	 */
  watch: {
    pdfFile(val) {
      if (val) {
        this.loadPSPDFKit();
      }
    },
  },
  /**
	 * Our component has the `loadPSPDFKit` method. This unloads and cleans up the component and triggers document loading.
	 */
  methods: {
    async loadPSPDFKit() {
      PSPDFKit.unload(".pdf-container");
      return PSPDFKit.load({
        // access the pdfFile from props
        document: this.pdfFile,
        container: ".pdf-container",
      });
    },
  },

  /**
	 * Clean up when the component is unmounted so it's ready to load another document (not needed in this example).
	 */
  beforeUnmount() {
    PSPDFKit.unload(".pdf-container");
  },
};
</script>


<style scoped>
.pdf-container {
  height: 100vh;
}
</style>
  1. In the src folder, add the newly created component to the App.vue file in the following way:

<template>
  <div id="app">
    <label for="file-upload" class="custom-file-upload">
    Open PDF
    </label>
    <input id="file-upload" type="file" @change="openDocument" class="btn" />
    <PSPDFKitContainer :pdfFile="pdfFile" @loaded="handleLoaded" />
  </div>
</template>

<script>
import PSPDFKitContainer from "@/components/PSPDFKitContainer";

export default {
  data() {
    return {
      pdfFile: this.pdfFile || "/document.pdf",
    };
  },
  /**
   * Render the `PSPDFKitContainer` component.
   */
  components: {
    PSPDFKitContainer,
  },
  /**
   * Our component has two methods — one to check when the document is loaded, and the other to open the document.
   */
  methods: {
    handleLoaded(instance) {
      console.log("PSPDFKit has loaded: ", instance);
      // Do something.
    },

    openDocument(event) {
      // To access the Vue.js instance data properties, use `this` keyword.
      if (this.pdfFile && this.pdfFile.startsWith('blob:')) {
        window.URL.revokeObjectURL(this.pdfFile);
      }
      this.pdfFile = window.URL.createObjectURL(event.target.files[0]);
    },
  },
};
</script>

<style>
#app {
  font-family: Avenir, Helvetica, Arial, sans-serif;
  text-align: center;
  color: #2c3e50;
}

body {
  margin: 0;
}

input[type="file"] {
    display: none;
}

.custom-file-upload {
    border: 1px solid #ccc;
    border-radius: 4px;
    display: inline-block;
    padding: 6px 12px;
    cursor: pointer;
    background:#4A8FED;
    padding:10px;
    color:#fff;
    font:inherit;
    font-size: 16px;
    font-weight: bold;
}

</style>
  1. Start the app:

yarn serve
npm run serve
  1. Open http://localhost:8080/ in your browser to view the website.

Setting Up Document Engine

To set up Document Engine so that it’ll be the backend for PSPDFKit for Web, follow the instructions in the Getting Started with Document Engine guide.

Once Document Engine has been set up, you’ll need to update your code to open a document from Document Engine. This is accomplished by replacing properties included in the configuration object passed to PSPDFKit.load(). Refer to the code snippets located earlier in this guide to find where PSPDFKit.load() will need to be updated.

The document property in PSPDFKit.load() will be replaced with the documentId provided by Document Engine, while the authPayload and the serverUrl properties will be added. If you’d like to enable Instant synchronization, set the instant property to true. See the following example:

PSPDFKit.load({
+  container: "#pspdfkit",
+  documentId: "[DOCUMENT ID FROM DOCUMENT ENGINE]",
+  serverUrl: "[DOCUMENT ENGINE URL]",
+  authPayload: { jwt: "[JWT]" },
+  instant: true
})

Integrate into a Next.js Project

This guide will walk you through the steps necessary to integrate PSPDFKit for Web into your project. By the end, you’ll be able to present a PDF document in the PSPDFKit UI.

Select the preferred products:

The Web SDK uses the Standalone operational mode, where our JavaScript library renders and edits documents directly in the browser. It’s powered by WebAssembly technology, and it doesn’t require a server, plugins, or internet access.

A serverless solution has the following advantages:

  • Get up and running faster — No servers need to be deployed or maintained.

  • Lower infrastructure costs — Rendering and processing are offloaded to the client.

  • Security and privacy — Documents don’t need to be transferred across a network.

Compare operational modes.

Requirements

You need Node.js to complete this guide, but in general, Node.js isn’t a requirement for using PSPDFKit for Web.

Creating a New Project

  1. Create a new Next.js app using the create-next-app tool:

yarn create next-app pspdfkit-nextjs-example
npx create-next-app pspdfkit-nextjs-example
  1. During the setup process, Next.js will prompt you with a series of questions, allowing you to customize your project. One of the questions will ask if you want to use TypeScript. Respond with your preference (No or Yes) to set up your project accordingly.

  2. Change to the created project directory:

cd pspdfkit-nextjs-example

Adding PSPDFKit to Your Project

  1. Add the PSPDFKit dependency:

yarn add pspdfkit
npm install pspdfkit
  1. Copy the PSPDFKit for Web library assets to the public directory:

cp -R ./node_modules/pspdfkit/dist/pspdfkit-lib public/pspdfkit-lib
  1. Make sure your public directory contains a pspdfkit-lib directory with the PSPDFKit library assets.

  2. Make sure your server has the Content-Type: application/wasm MIME typeset. Read more about this in the troubleshooting section.

Displaying a PDF

  1. Rename the PDF document you want to display in your application to document.pdf, and then add the PDF document to the public directory. You can use this demo document as an example.

  2. If you chose JavaScript during the setup of your project, add the following code to your app/page.js file:

'use client';
import { useEffect, useRef } from 'react';

export default function Home() {
	const containerRef = useRef(null);

	useEffect(() => {
		const container = containerRef.current;
	
		if (typeof window !== 'undefined') {
		  import('pspdfkit').then((PSPDFKit) => {
			if (PSPDFKit) {
			  PSPDFKit.unload(container);
			}
	
			PSPDFKit.load({
			  container,
			  document: '/document.pdf',
			  baseUrl: `${window.location.protocol}//${window.location.host}/`,
			});
		  });
		}
	  }, []);

	return <div ref={containerRef} style={{ height: '100vh' }} />;
}
  1. If you chose TypeScript during the setup of your project, add the following code to your app/page.tsx file:

"use client";
import { useEffect, useRef } from 'react';

const App: React.FC = () => {
  const containerRef = useRef<HTMLDivElement | null>(null);

  useEffect(() => {
    const container = containerRef.current;

    if (container && typeof window !== 'undefined') {
      import('pspdfkit').then((PSPDFKit) => {
        if (PSPDFKit) {
          PSPDFKit.unload(container);
        }

        PSPDFKit.load({
          container,
          document: '/document.pdf',
          baseUrl: `${window.location.protocol}//${window.location.host}/`,
        });
      });
    }
  }, []);

  return <div ref={containerRef} style={{ height: '100vh' }} />;
};

export default App;
  1. Your project structure should now look like this:

pspdfkit-next-js-example
├── app
│   └── page.js
├── public
│   ├── document.pdf
│   └── pspdfkit-lib
└── next.config.js
  1. Start the app:

yarn dev
npm run dev
  1. Open http://localhost:3000 in your browser to view the website.

Next Steps

When the Web SDK is combined with Document Engine, it uses the Server-Backed operational mode, where rendering is handled by the server and documents are streamed down to the web viewer. It’s delivered as a Docker container, but it can also be managed by PSPDFKit infrastructure.

Web Server-Backed has the following advantages:

  • Faster performance — Leveraging both client-side viewing and server-side rendering, it ensures swift performance, enhancing user interactions. This results in a lighter end user experience by shifting operations from the browser to the backend.

  • Seamless syncing — Annotations and form field values synchronize across servers and sessions without additional configuration, streamlining collaborative workflows.

  • Security and privacy — Designed with privacy and security in mind, it offers a resilient infrastructure to protect sensitive data.

  • High-performance capabilities — Developers can harness advanced features like OCR (web) and Instant Collaboration (web, mobile), empowering real-time collaborative document management.

  • Scalability — Its scalable architecture caters to evolving needs, providing a reliable foundation for projects of all sizes.

  • Headless processing — Supports headless document processing, enabling automated tasks such as batch conversion and manipulation without the need for a graphical user interface, thus enhancing efficiency and integration capabilities.

Compare operational modes.

Requirements

You need Node.js to complete this guide, but in general, Node.js isn’t a requirement for using PSPDFKit for Web.

Creating a New Project

  1. Create a new Next.js app using the create-next-app tool:

yarn create next-app pspdfkit-nextjs-example
npx create-next-app pspdfkit-nextjs-example
  1. During the setup process, Next.js will prompt you with a series of questions, allowing you to customize your project. One of the questions will ask if you want to use TypeScript. Respond with your preference (No or Yes) to set up your project accordingly.

  2. Change to the created project directory:

cd pspdfkit-nextjs-example

Adding PSPDFKit to Your Project

  1. Add the PSPDFKit dependency:

yarn add pspdfkit
npm install pspdfkit
  1. Copy the PSPDFKit for Web library assets to the public directory:

cp -R ./node_modules/pspdfkit/dist/pspdfkit-lib public/pspdfkit-lib
  1. Make sure your public directory contains a pspdfkit-lib directory with the PSPDFKit library assets.

  2. Make sure your server has the Content-Type: application/wasm MIME typeset. Read more about this in the troubleshooting section.

Displaying a PDF

  1. Rename the PDF document you want to display in your application to document.pdf, and then add the PDF document to the public directory. You can use this demo document as an example.

  2. If you chose JavaScript during the setup of your project, add the following code to your app/page.js file:

'use client';
import { useEffect, useRef } from 'react';

export default function Home() {
	const containerRef = useRef(null);

	useEffect(() => {
		const container = containerRef.current;
	
		if (typeof window !== 'undefined') {
		  import('pspdfkit').then((PSPDFKit) => {
			if (PSPDFKit) {
			  PSPDFKit.unload(container);
			}
	
			PSPDFKit.load({
			  container,
			  document: '/document.pdf',
			  baseUrl: `${window.location.protocol}//${window.location.host}/`,
			});
		  });
		}
	  }, []);

	return <div ref={containerRef} style={{ height: '100vh' }} />;
}
  1. If you chose TypeScript during the setup of your project, add the following code to your app/page.tsx file:

"use client";
import { useEffect, useRef } from 'react';

const App: React.FC = () => {
  const containerRef = useRef<HTMLDivElement | null>(null);

  useEffect(() => {
    const container = containerRef.current;

    if (container && typeof window !== 'undefined') {
      import('pspdfkit').then((PSPDFKit) => {
        if (PSPDFKit) {
          PSPDFKit.unload(container);
        }

        PSPDFKit.load({
          container,
          document: '/document.pdf',
          baseUrl: `${window.location.protocol}//${window.location.host}/`,
        });
      });
    }
  }, []);

  return <div ref={containerRef} style={{ height: '100vh' }} />;
};

export default App;
  1. Your project structure should now look like this:

pspdfkit-next-js-example
├── app
│   └── page.js
├── public
│   ├── document.pdf
│   └── pspdfkit-lib
└── next.config.js
  1. Start the app:

yarn dev
npm run dev
  1. Open http://localhost:3000 in your browser to view the website.

Setting Up Document Engine

To set up Document Engine so that it’ll be the backend for PSPDFKit for Web, follow the instructions in the Getting Started with Document Engine guide.

Once Document Engine has been set up, you’ll need to update your code to open a document from Document Engine. This is accomplished by replacing properties included in the configuration object passed to PSPDFKit.load(). Refer to the code snippets located earlier in this guide to find where PSPDFKit.load() will need to be updated.

The document property in PSPDFKit.load() will be replaced with the documentId provided by Document Engine, while the authPayload and the serverUrl properties will be added. If you’d like to enable Instant synchronization, set the instant property to true. See the following example:

PSPDFKit.load({
+  container: "#pspdfkit",
+  documentId: "[DOCUMENT ID FROM DOCUMENT ENGINE]",
+  serverUrl: "[DOCUMENT ENGINE URL]",
+  authPayload: { jwt: "[JWT]" },
+  instant: true
})

Integrate into a Next.js Project

This guide will walk you through the steps necessary to integrate PSPDFKit for Web into your project. By the end, you’ll be able to present a PDF document in the PSPDFKit UI.

Select the preferred products:

The Web SDK uses the Standalone operational mode, where our JavaScript library renders and edits documents directly in the browser. It’s powered by WebAssembly technology, and it doesn’t require a server, plugins, or internet access.

A serverless solution has the following advantages:

  • Get up and running faster — No servers need to be deployed or maintained.

  • Lower infrastructure costs — Rendering and processing are offloaded to the client.

  • Security and privacy — Documents don’t need to be transferred across a network.

Compare operational modes.

Adding PSPDFKit to Your Project

  1. Add the PSPDFKit dependency:

yarn add pspdfkit
npm install pspdfkit
  1. Copy the PSPDFKit for Web library assets to the public directory:

cp -R ./node_modules/pspdfkit/dist/pspdfkit-lib public/pspdfkit-lib
  1. Make sure your public directory contains a pspdfkit-lib directory with the PSPDFKit library assets.

  2. Make sure your server has the Content-Type: application/wasm MIME typeset. Read more about this in the troubleshooting section.

Displaying a PDF

  1. Rename the PDF document you want to display in your application to document.pdf, and then add the PDF document to the public directory. You can use this demo document as an example.

  2. If you chose JavaScript during the setup of your project, add the following code to your app/page.js file:

'use client';
import { useEffect, useRef } from 'react';

export default function Home() {
	const containerRef = useRef(null);

	useEffect(() => {
		const container = containerRef.current;
	
		if (typeof window !== 'undefined') {
		  import('pspdfkit').then((PSPDFKit) => {
			if (PSPDFKit) {
			  PSPDFKit.unload(container);
			}
	
			PSPDFKit.load({
			  container,
			  document: '/document.pdf',
			  baseUrl: `${window.location.protocol}//${window.location.host}/`,
			});
		  });
		}
	  }, []);

	return <div ref={containerRef} style={{ height: '100vh' }} />;
}
  1. If you chose TypeScript during the setup of your project, add the following code to your app/page.tsx file:

"use client";
import { useEffect, useRef } from 'react';

const App: React.FC = () => {
  const containerRef = useRef<HTMLDivElement | null>(null);

  useEffect(() => {
    const container = containerRef.current;

    if (container && typeof window !== 'undefined') {
      import('pspdfkit').then((PSPDFKit) => {
        if (PSPDFKit) {
          PSPDFKit.unload(container);
        }

        PSPDFKit.load({
          container,
          document: '/document.pdf',
          baseUrl: `${window.location.protocol}//${window.location.host}/`,
        });
      });
    }
  }, []);

  return <div ref={containerRef} style={{ height: '100vh' }} />;
};

export default App;
  1. Start the app:

yarn dev
npm run dev
  1. Open http://localhost:3000 in your browser to view the website.

Next Steps

When the Web SDK is combined with Document Engine, it uses the Server-Backed operational mode, where rendering is handled by the server and documents are streamed down to the web viewer. It’s delivered as a Docker container, but it can also be managed by PSPDFKit infrastructure.

Web Server-Backed has the following advantages:

  • Faster performance — Leveraging both client-side viewing and server-side rendering, it ensures swift performance, enhancing user interactions. This results in a lighter end user experience by shifting operations from the browser to the backend.

  • Seamless syncing — Annotations and form field values synchronize across servers and sessions without additional configuration, streamlining collaborative workflows.

  • Security and privacy — Designed with privacy and security in mind, it offers a resilient infrastructure to protect sensitive data.

  • High-performance capabilities — Developers can harness advanced features like OCR (web) and Instant Collaboration (web, mobile), empowering real-time collaborative document management.

  • Scalability — Its scalable architecture caters to evolving needs, providing a reliable foundation for projects of all sizes.

  • Headless processing — Supports headless document processing, enabling automated tasks such as batch conversion and manipulation without the need for a graphical user interface, thus enhancing efficiency and integration capabilities.

Compare operational modes.

Adding PSPDFKit to Your Project

  1. Add the PSPDFKit dependency:

yarn add pspdfkit
npm install pspdfkit
  1. Copy the PSPDFKit for Web library assets to the public directory:

cp -R ./node_modules/pspdfkit/dist/pspdfkit-lib public/pspdfkit-lib
  1. Make sure your public directory contains a pspdfkit-lib directory with the PSPDFKit library assets.

  2. Make sure your server has the Content-Type: application/wasm MIME typeset. Read more about this in the troubleshooting section.

Displaying a PDF

  1. Rename the PDF document you want to display in your application to document.pdf, and then add the PDF document to the public directory. You can use this demo document as an example.

  2. If you chose JavaScript during the setup of your project, add the following code to your app/page.js file:

'use client';
import { useEffect, useRef } from 'react';

export default function Home() {
	const containerRef = useRef(null);

	useEffect(() => {
		const container = containerRef.current;
	
		if (typeof window !== 'undefined') {
		  import('pspdfkit').then((PSPDFKit) => {
			if (PSPDFKit) {
			  PSPDFKit.unload(container);
			}
	
			PSPDFKit.load({
			  container,
			  document: '/document.pdf',
			  baseUrl: `${window.location.protocol}//${window.location.host}/`,
			});
		  });
		}
	  }, []);