Set up document generation in Salesforce
Use this guide to configure document generation in Nutrient Documents for Salesforce.
Who should use this guide
This guide is for Salesforce administrators who need to enable document generation for users.
Prerequisites
Before you begin, confirm that:
- The one-time product setup is complete
- Salesforce users who perform setup have administrator access
- At least one document template will be available for the record types you want to support
If you need the Salesforce installation link, contact our Sales team.
If your organization still needs the app-level setup, refer to the set up Nutrient Documents for Salesforce guide.
Add the document creation widget to record pages
Add the appropriate Nutrient document creation widget to each Salesforce record page where users should create documents. The widget name depends on user permissions:
- Create and Send Document with Nutrient — For users who can create documents and send them for signing
- Create Document with Nutrient — For users who can create documents but don’t have signing access
- If a user has signing access but not document creation access, Salesforce shows an insufficient-permissions message
Before you begin, confirm that your Salesforce user has these permissions:
- Customize Application
- View Setup and Configuration
- Object Access with at least Read access for the target object
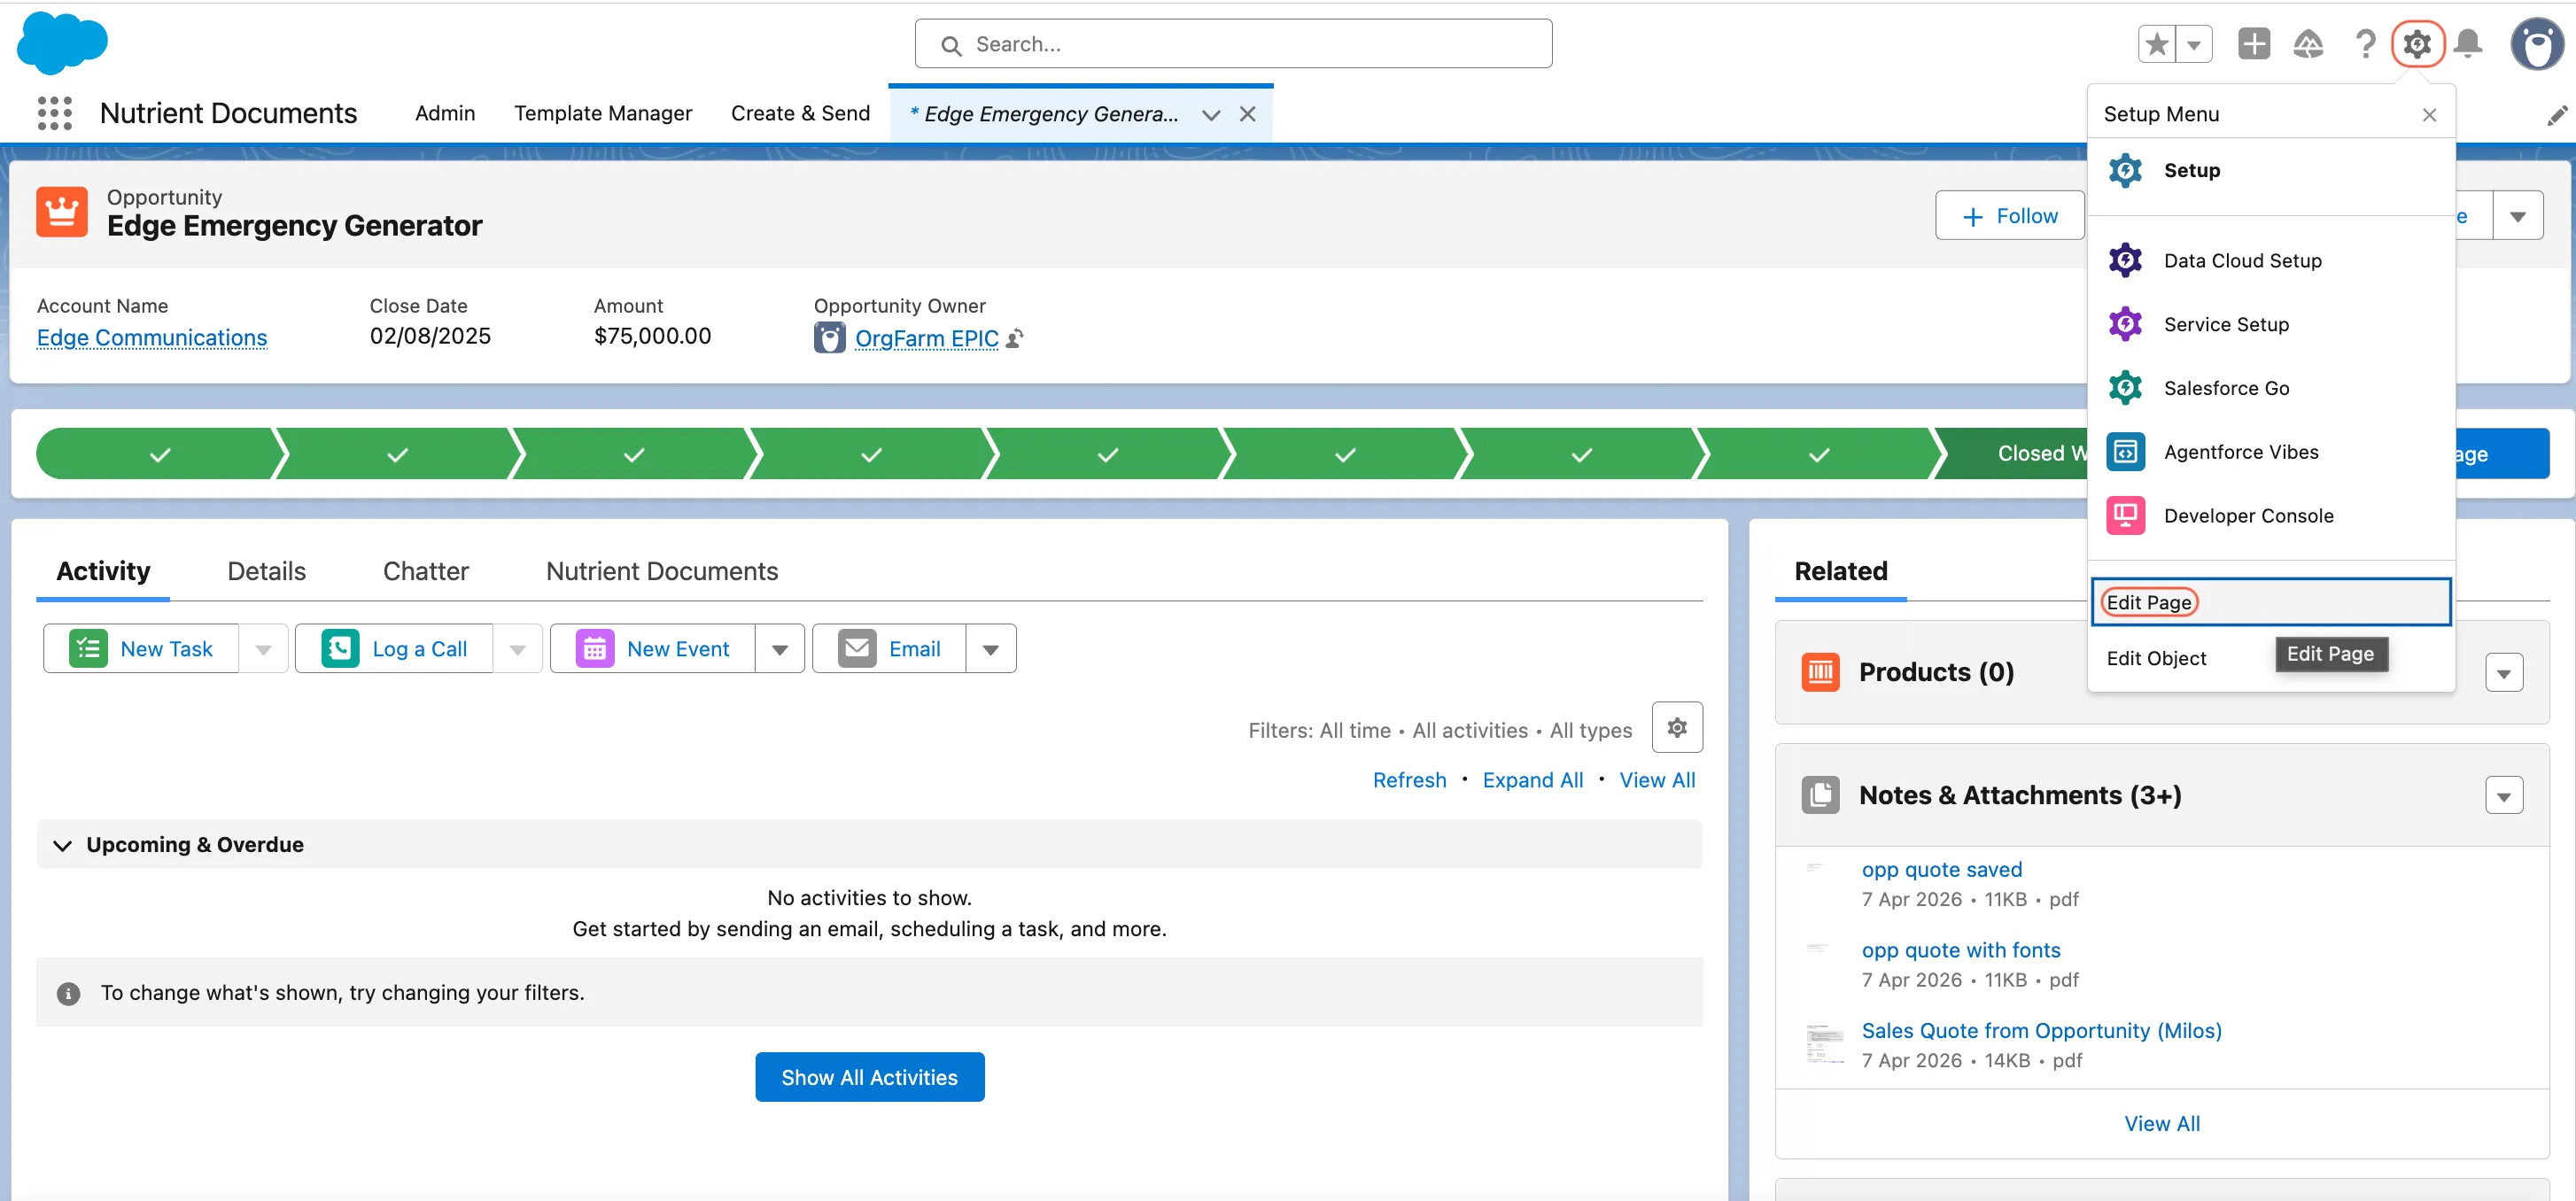
Then open a Salesforce record page and add the widget there. The Edit Page option appears only when you’re viewing an individual record page, not a list view.
Open a Salesforce record, such as an Opportunity, Account, or Contact.
Click the gear icon and select Edit Page.
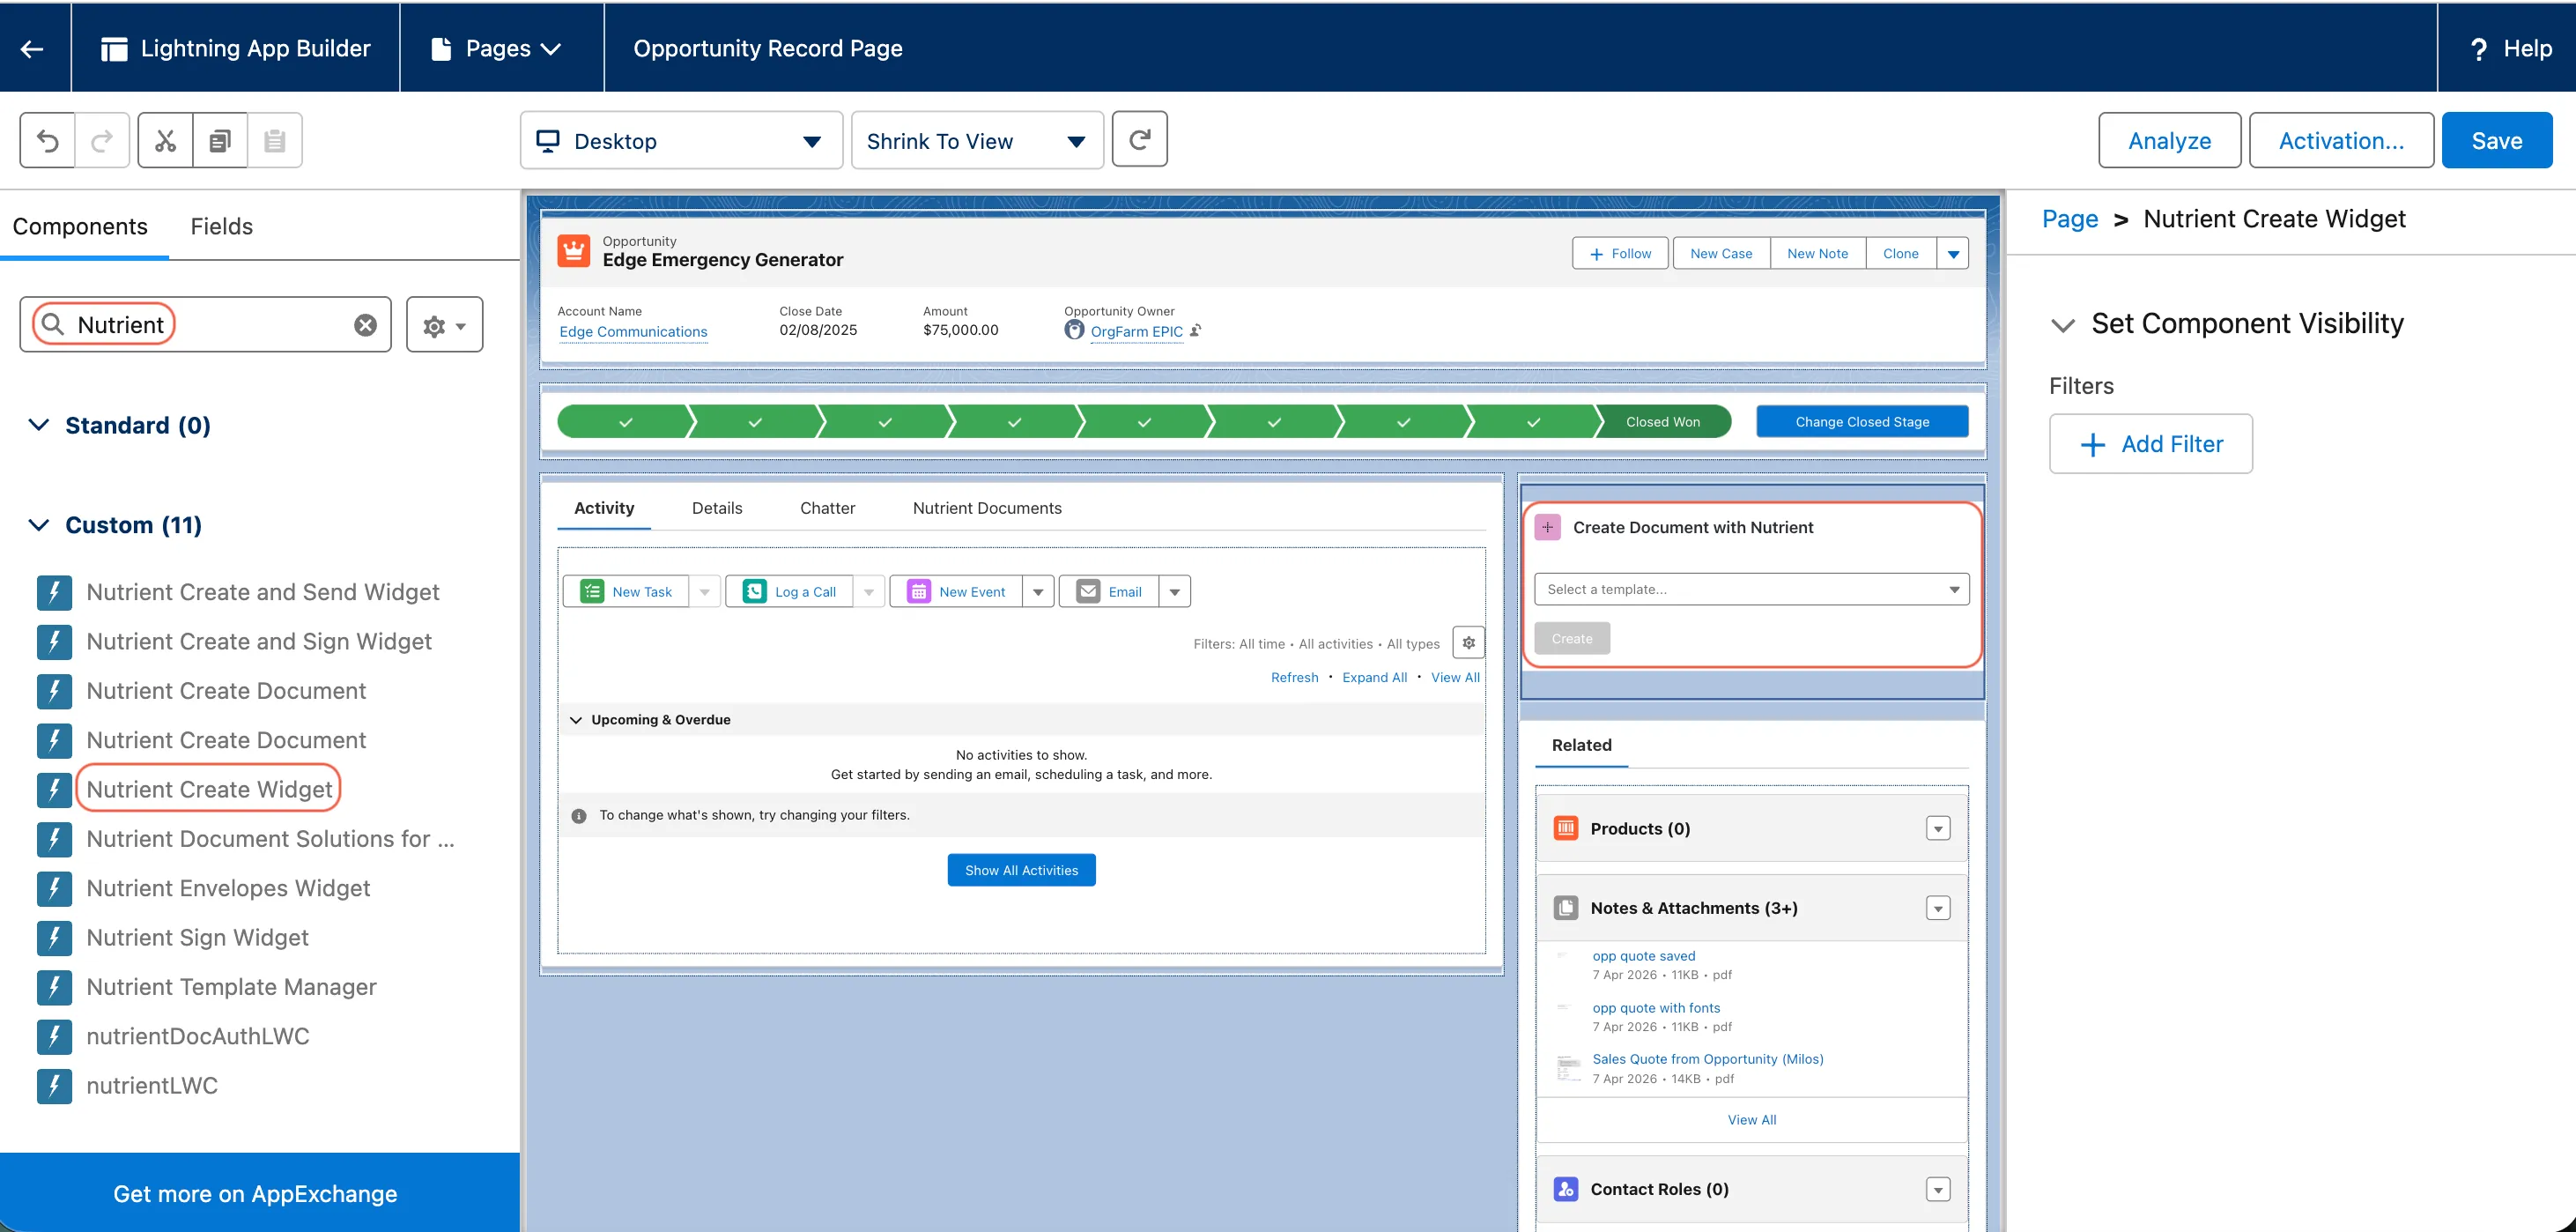
In Lightning App Builder, find the widget that matches the user’s permissions:
- Create and Send Document with Nutrient
- Create Document with Nutrient
Drag the component to the area where you want it to appear.
Optional: Add component visibility rules if only certain users or conditions should show the widget.
Click Save, and then click Activate.
Choose the activation model that fits your rollout:
- Org Default
- App Default
- App, Record Type, and Profile
Open a record and confirm that the widget loads correctly.
You can also open a record, click the gear icon, and select Edit Page to open Lightning App Builder for that page.
Assign user permissions
Assign the required Nutrient permissions before users create documents or manage templates.
Before you begin, confirm that your Salesforce user has these permissions:
- Modify All Data
- Privacy Center
Assign permissions to an individual user
Follow these steps to assign permissions to one user.
In Setup, search for and open Users.
Open the target user.
In Permission Set Assignments, click Edit Assignments.
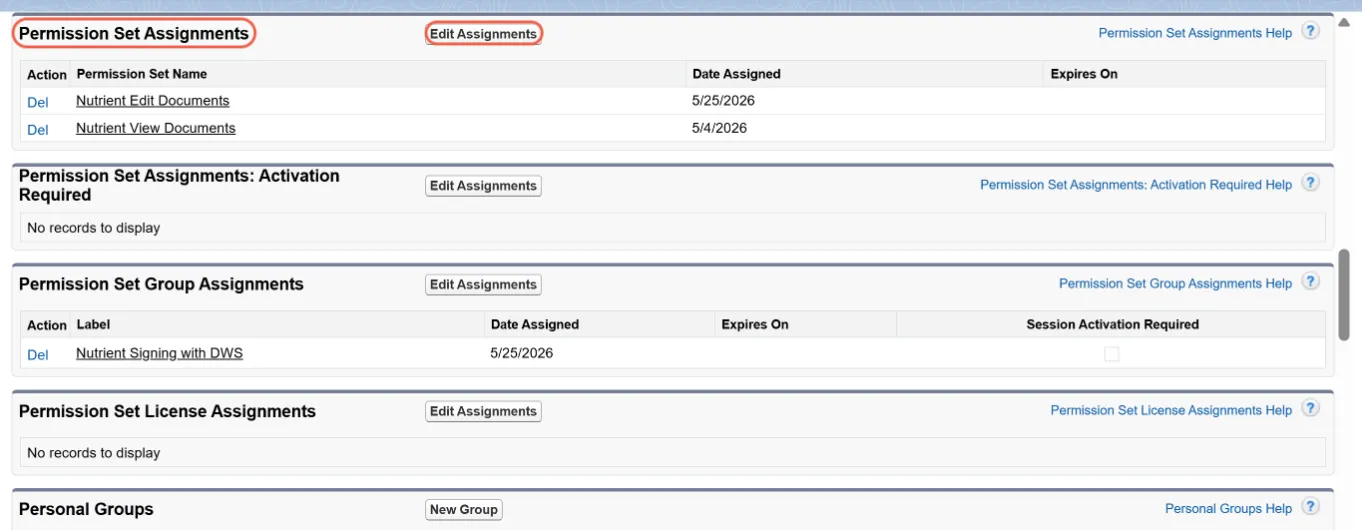
Assign the required Nutrient permissions:
- Nutrient Manage Templates — For users who build and manage templates
- Nutrient Create Documents — For users who generate documents from templates
Click Save.
Assign permissions in bulk
Use permission sets when you need to assign the same access to multiple users.
- In Setup, search for Permission Sets.
- Open the Nutrient permission set that you want to assign.
- Click Manage Assignments.
- In Current Assignments, click Add Assignment.
- Select the users.
- Click Next.
- Optional: Set an expiration date.
- Click Assign.
Validate the setup
After you finish the setup, verify that document generation works as expected.
Confirm that:
- The document creation widget appears on the intended record pages
- At least one test user can select a template and click Create
- Template managers can access the template tools they need
- Documents no longer show an evaluation watermark when you configure a valid license
Related guides
Refer to the following guides for related tasks:
- Set up Nutrient Documents for Salesforce
- Manage document templates in Salesforce
- Build document templates in Salesforce
- Set up digital signing in Salesforce