Send documents for signing in Salesforce
Use this guide after you generate a document from a template as described in create documents in Salesforce.
If signing isn’t configured yet, ask your Salesforce administrator to complete the set up digital signing in Salesforce guide.
Prerequisites
Before sending for signing, verify:
- Your organization has completed the set up digital signing in Salesforce guide
- You can open a generated document in the Preview/Edit screen
- Your user has signing permissions in Salesforce
- Your organization’s signing integration is enabled and working
- The Nutrient Envelopes widget is available on the record page where you want to track signing status
If you need the Salesforce installation link, contact our Sales team.
If the widget isn’t visible, ask your Salesforce administrator to refer to the set up digital signing in Salesforce guide.
Send a document for signing
In the generated document view, click Send in the upper-right corner.
Enter a document name and click Save.
Configure the envelope:
- Envelope name
- Recipients (external recipients or Salesforce recipients)
- Optional email template/message and reminders. If your team needs to manage signing email templates, ask your Salesforce administrator to refer to the set up digital signing in Salesforce guide.
- Optional signing order (if no signing order is specified, recipients are processed as: Signers first, Reviewers second, and Recipients (CC) last):
- Enable Set signing order.
- For each recipient, enter name and email and select a role:
- Needs to sign — Recipient must complete signing fields before the envelope can progress.
- Needs to review — Recipient reviews the document but doesn’t apply a signature.
- Receives a copy — Recipient gets a copy for visibility/audit after required actions are complete.
- Set the sequence (who acts first, second, third, and so on).
- Example sequence in a sales contract flow:
- Customer signer — Needs to sign (Sequence 1)
- Sales manager — Needs to review (Sequence 2)
- Finance team inbox — Receives a copy (Sequence 3)
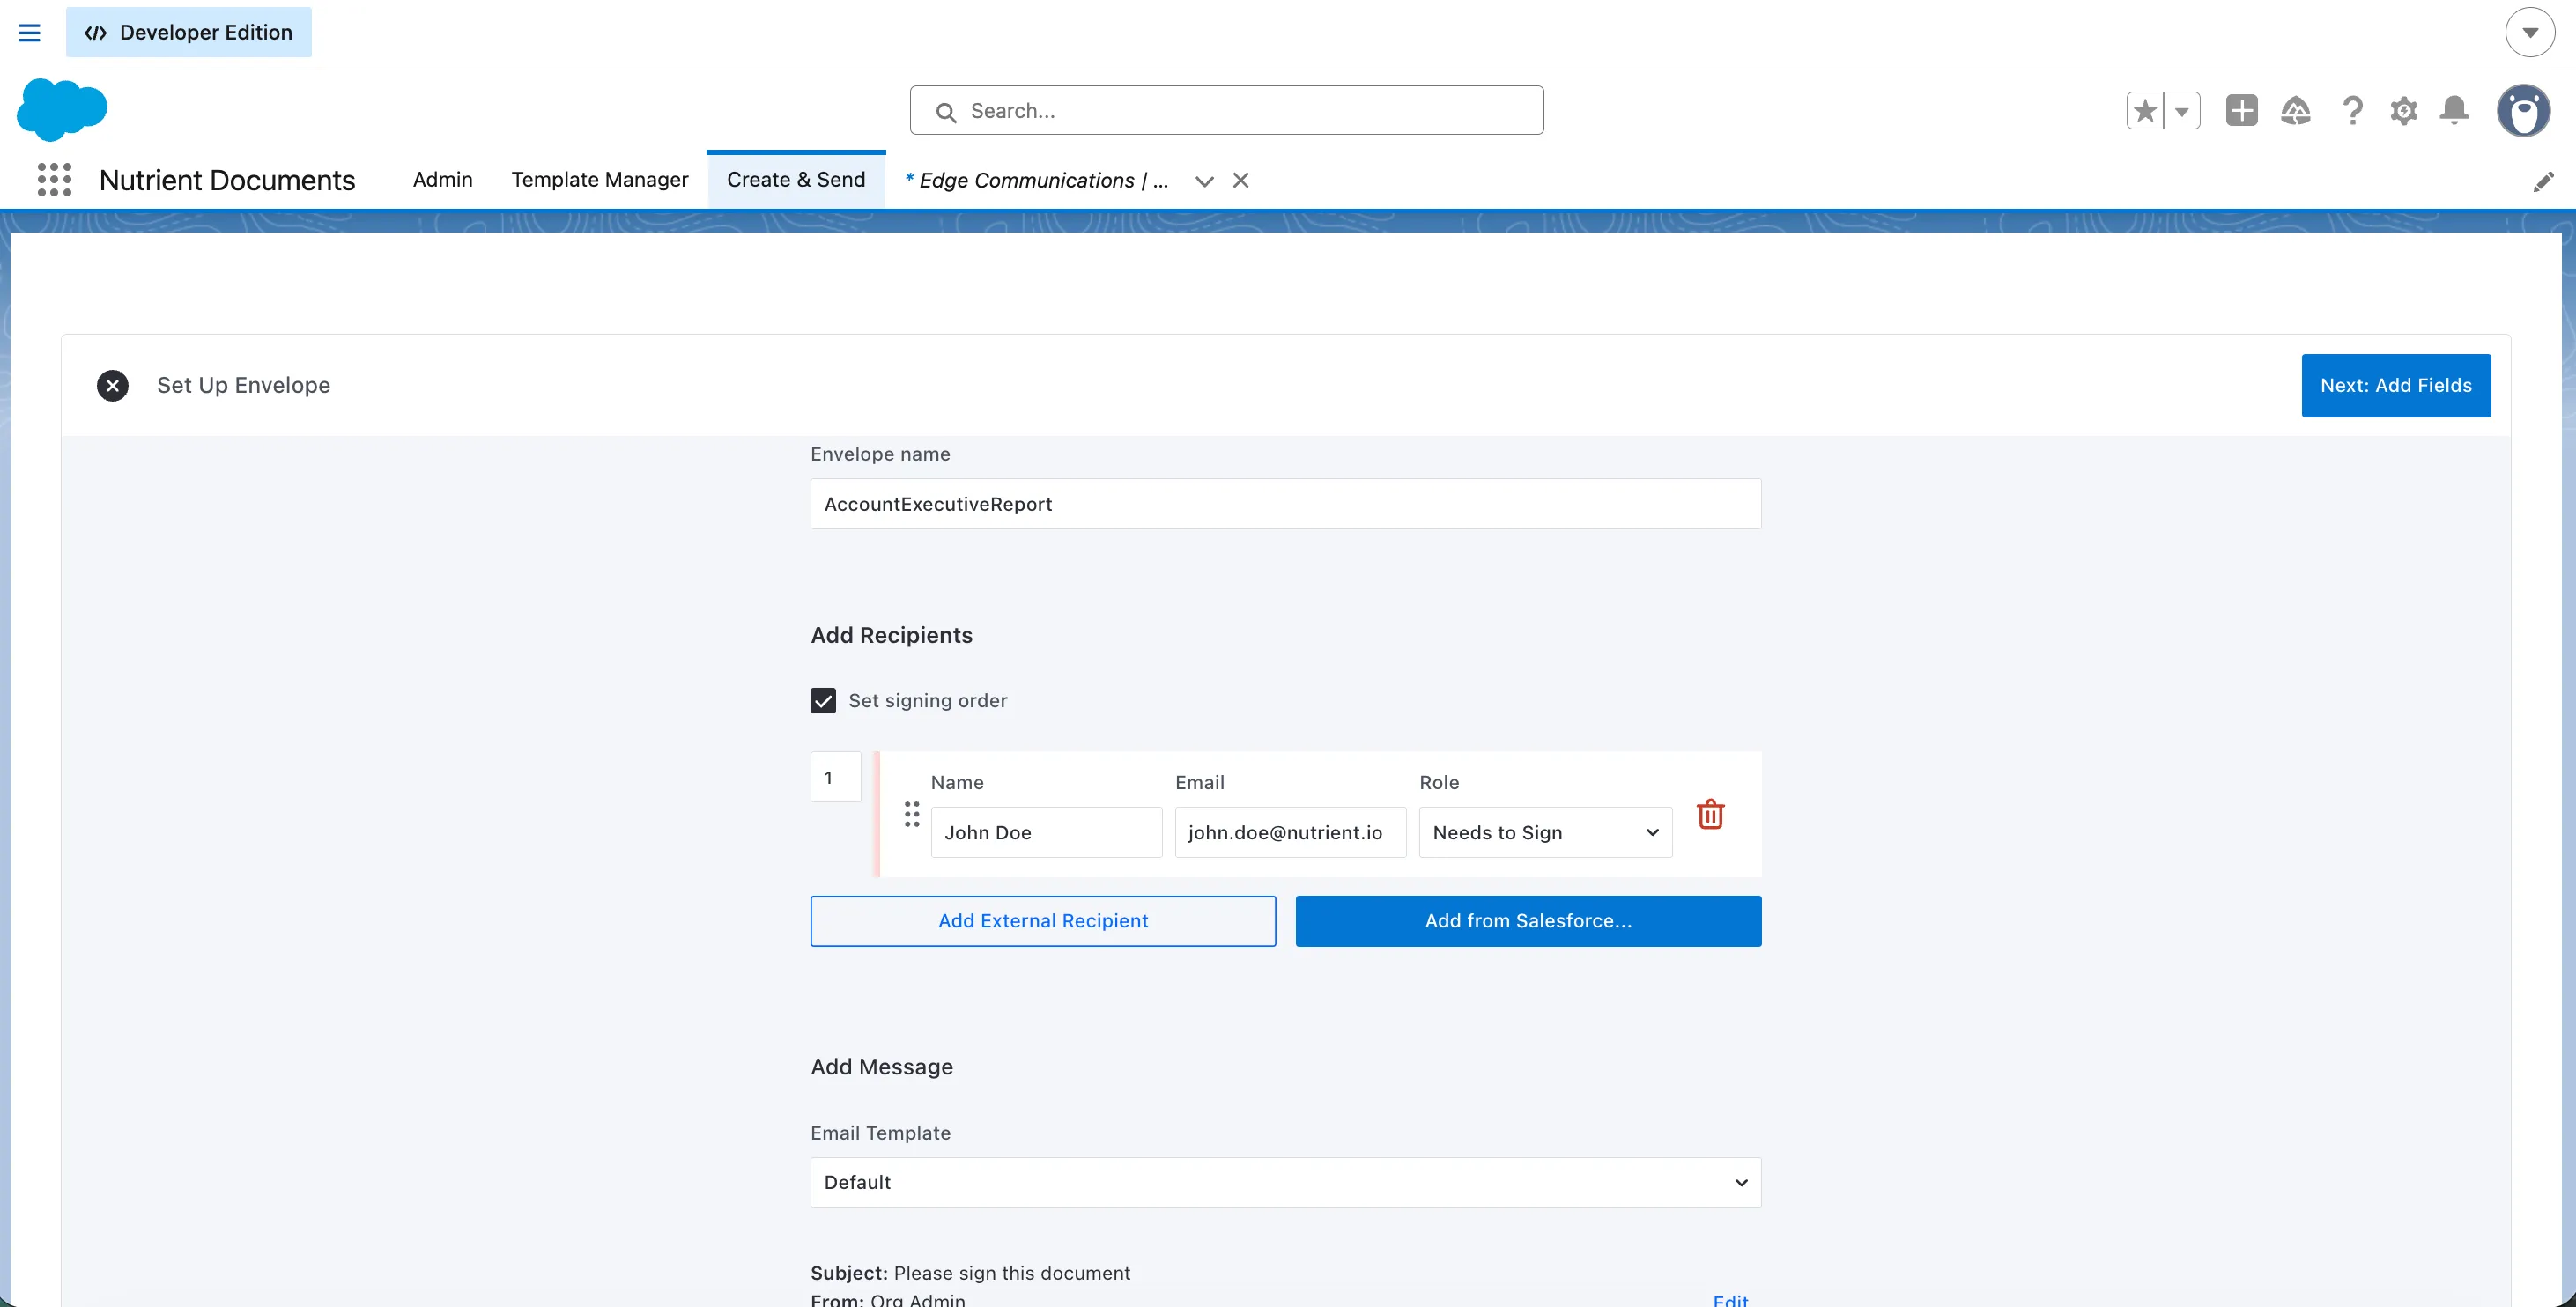
Click Next to open Add Fields.
Drag and configure the fields you need.
Each signer must have at least one signing field on the document before you can send the envelope.
To place fields for a different signer, select that signer from the dropdown above the Add Fields section.
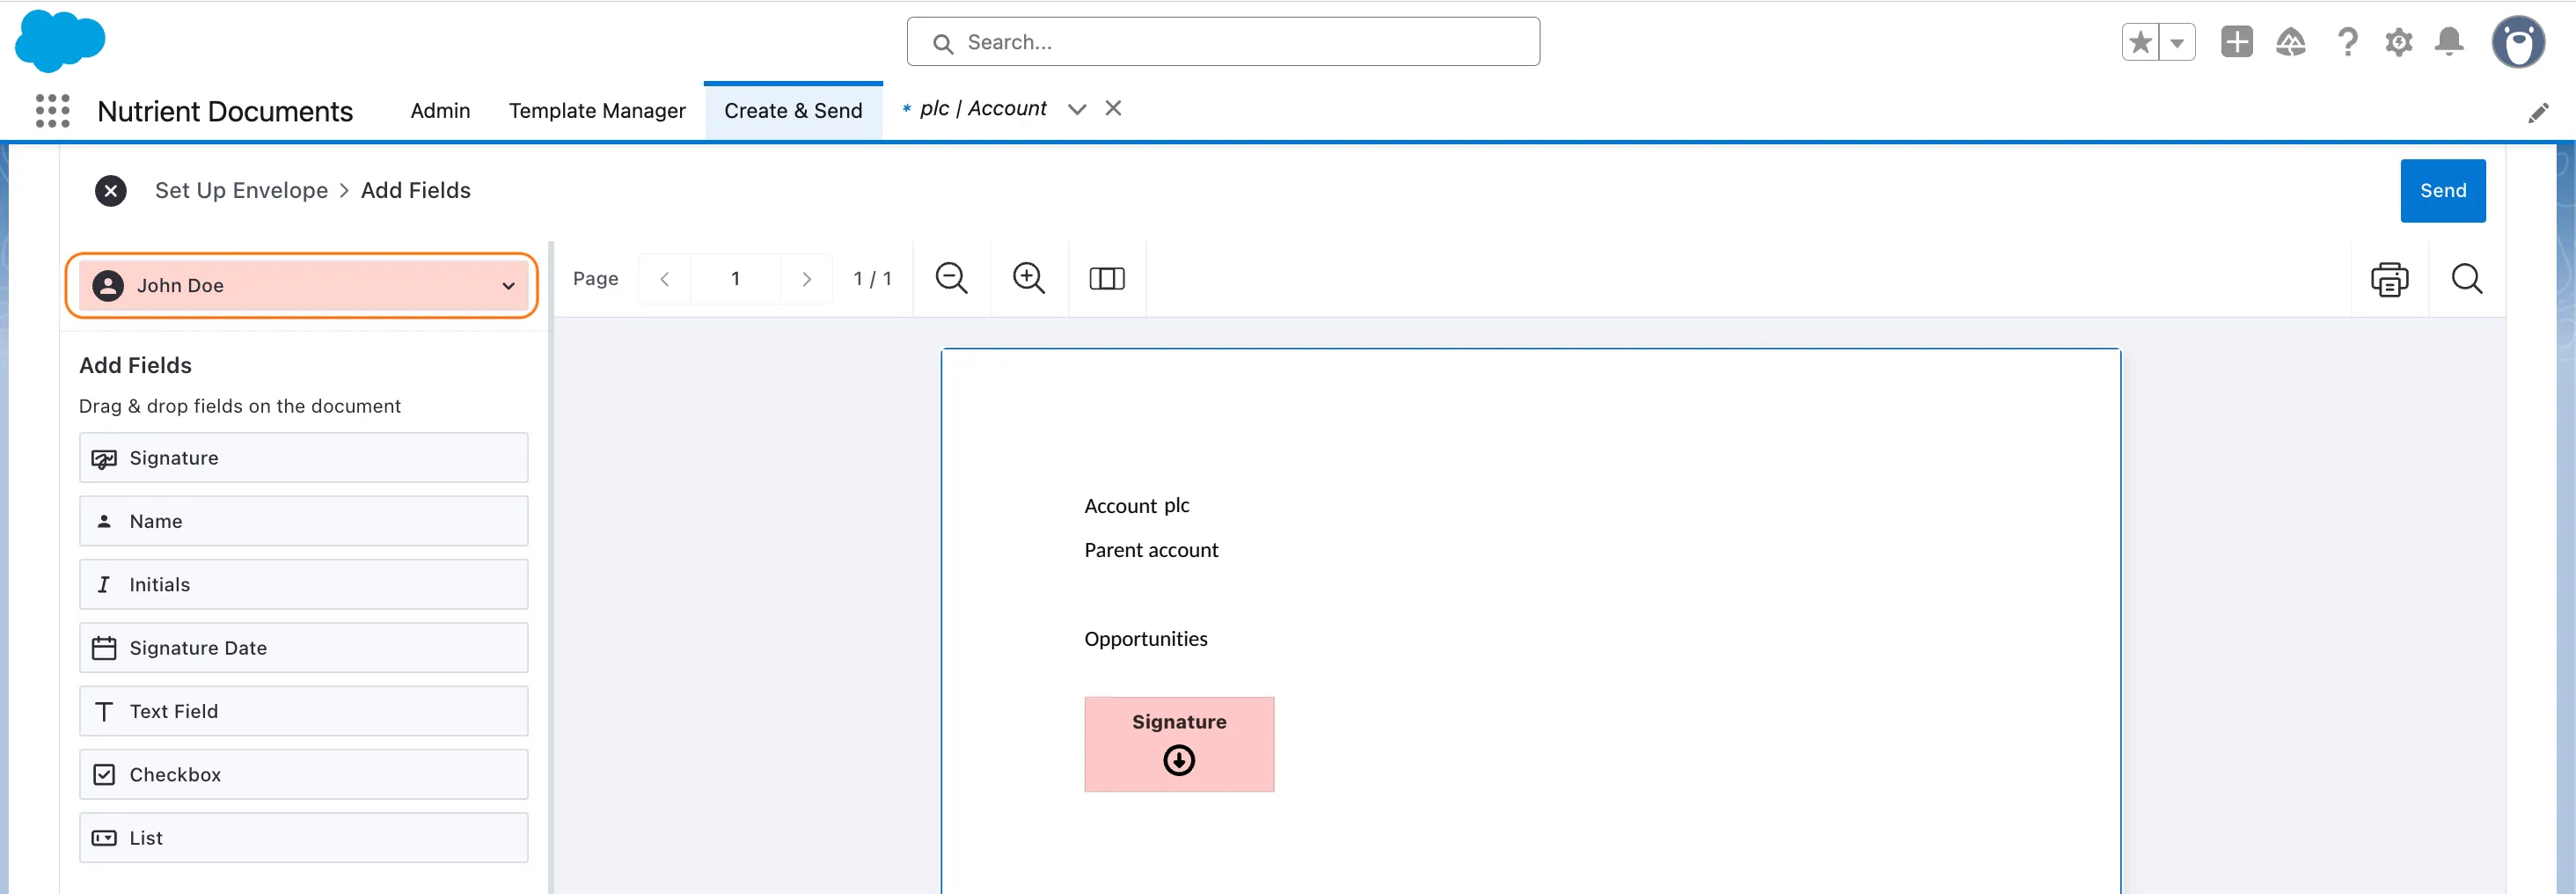
Available field types include:
- Signature — Signer draws or uploads their signature.
- Name — Auto-filled with signer name (read-only).
- Initials — Signer draws or types initials.
- Signature Date — Auto-filled with signing date (read-only).
- Text Field — Editable input, optionally linked to Salesforce.
- Checkbox — True/false toggle, optionally linked to Salesforce.
- List — Dropdown list, optionally linked to a Salesforce picklist.
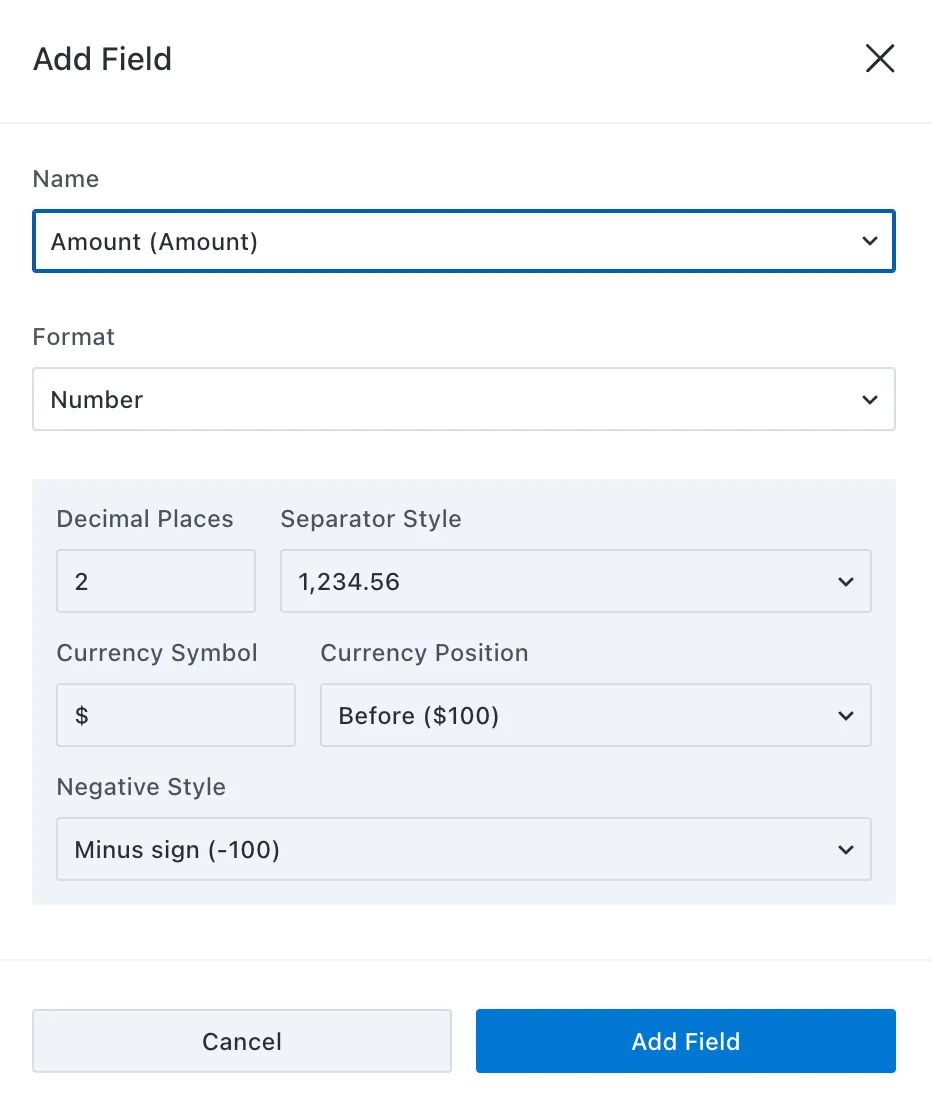
For editable fields (for example, Text Field and List), configure data mapping and validation before placing the field:
- Select an existing Salesforce field, or type a custom field name.
- If you select an existing Salesforce field, the Nutrient Documents app detects and loads the field format and available value/options when applicable.
- If you type a custom field name, select the field format manually.
- Set whether the field is Required.
- Click Add Field.
An example field configuration is shown in the image below.
Click Send in the upper-right corner.
- Recipients receive an email with a signing link.
Track progress and verify completion
After you send the envelope, use the record page to monitor status updates.
- Wait for each participant to complete their action. You receive email updates as the envelope progresses.
- Return to the source Salesforce record, such as an Opportunity, Account, or custom object record.
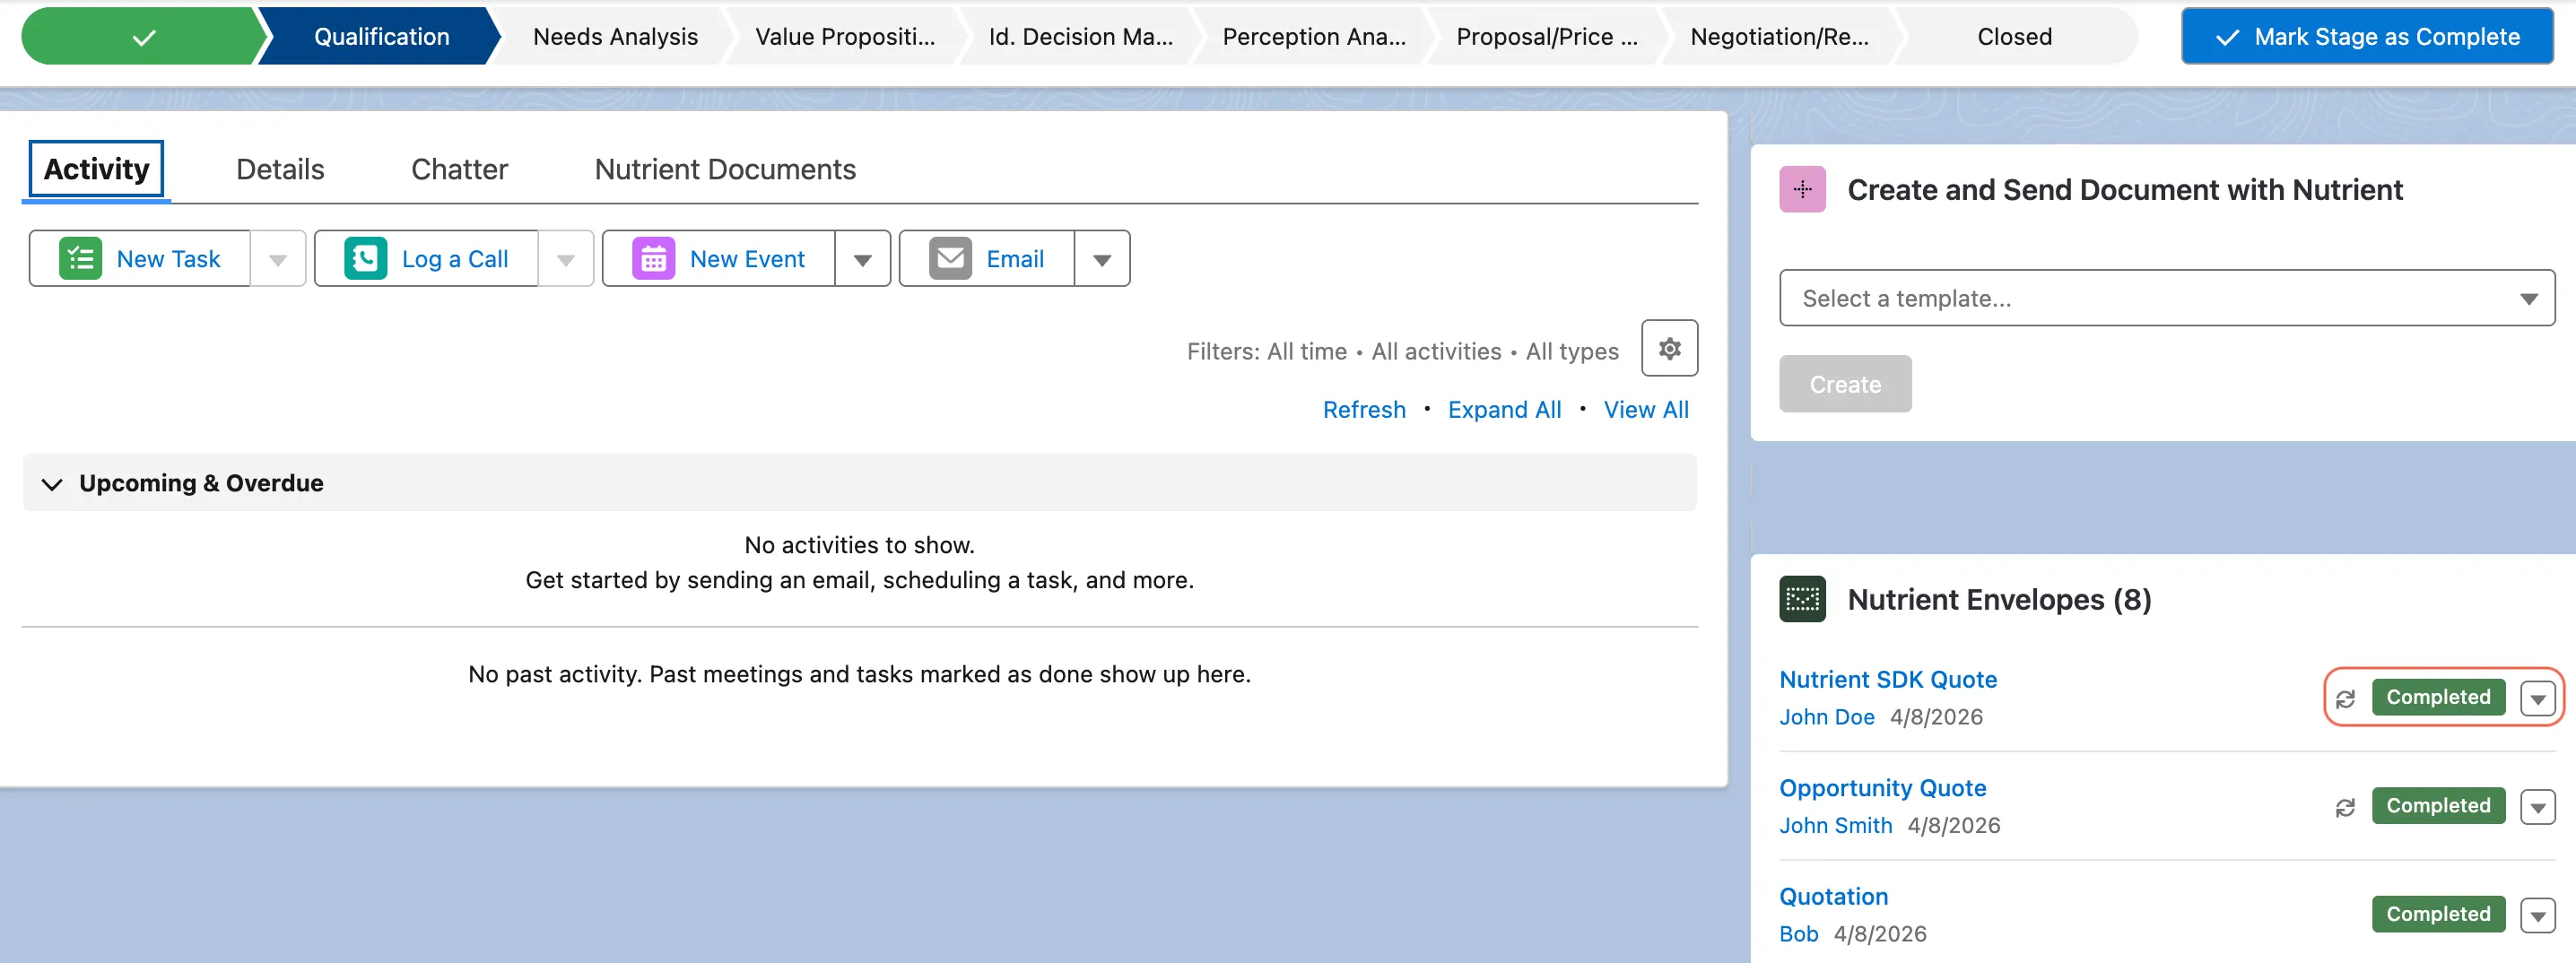
- Locate the Nutrient Envelopes widget on the record page.
- Your Salesforce administrator can place it in different regions of the page layout.
- If you don’t see the Nutrient Envelopes widget, contact your Salesforce administrator.
- Verify that the envelope status updates in the widget.
- After all required signers complete signing, the status updates to Completed.
- Your Salesforce administrator can also track detailed envelope progress in the DWS Signer dashboard(opens in a new tab).
- When the status becomes Completed, click Update record if it appears to push captured signer field data back to Salesforce.
Troubleshoot signing issues
The following are common issues and solutions when sending documents for signing.
Send fails with salesforce_integration_not_found
Cause
The selected named credential isn’t mapped to the active tenant/environment, or tenant integration isn’t fully enabled.
Solution
- Ask your administrator to open Nutrient Admin > DWS Signing > Overview and run Check now.
- Ask your administrator to resolve outbound DWS connection issues or validate DWS tenant/organization integration setup.
Send fails before recipients receive email
Cause
Recipient setup or signing field configuration is incomplete.
Solution
Reopen envelope configuration, verify required recipients and fields, and send again.
Status doesn’t update after signing
Cause
Webhook delivery/configuration issue.
Solution
Ask your administrator to open Nutrient Admin > DWS Signing > Overview, run Check now, and verify the inbound DWS sign-in and webhook event checks. A first real test envelope may be required before the webhook event check passes.
Related guide
If you need the document creation steps, refer to create documents in Salesforce.