Set up Nutrient Documents for Salesforce
Use this guide to complete the one-time Salesforce setup required before users can use Nutrient Documents for Salesforce.
Who should use this guide
This guide is for Salesforce administrators who need to enable Nutrient Documents for Salesforce for users.
Prerequisites
Before you begin, confirm you have:
- Salesforce administrator access
- The Nutrient Documents app installed in Salesforce
- A Nutrient license key, if your organization uses a production license
If you need the Salesforce installation link, contact our Sales team.
You can use Nutrient Documents without a license, but generated documents include an evaluation watermark.
Configure license and admin settings
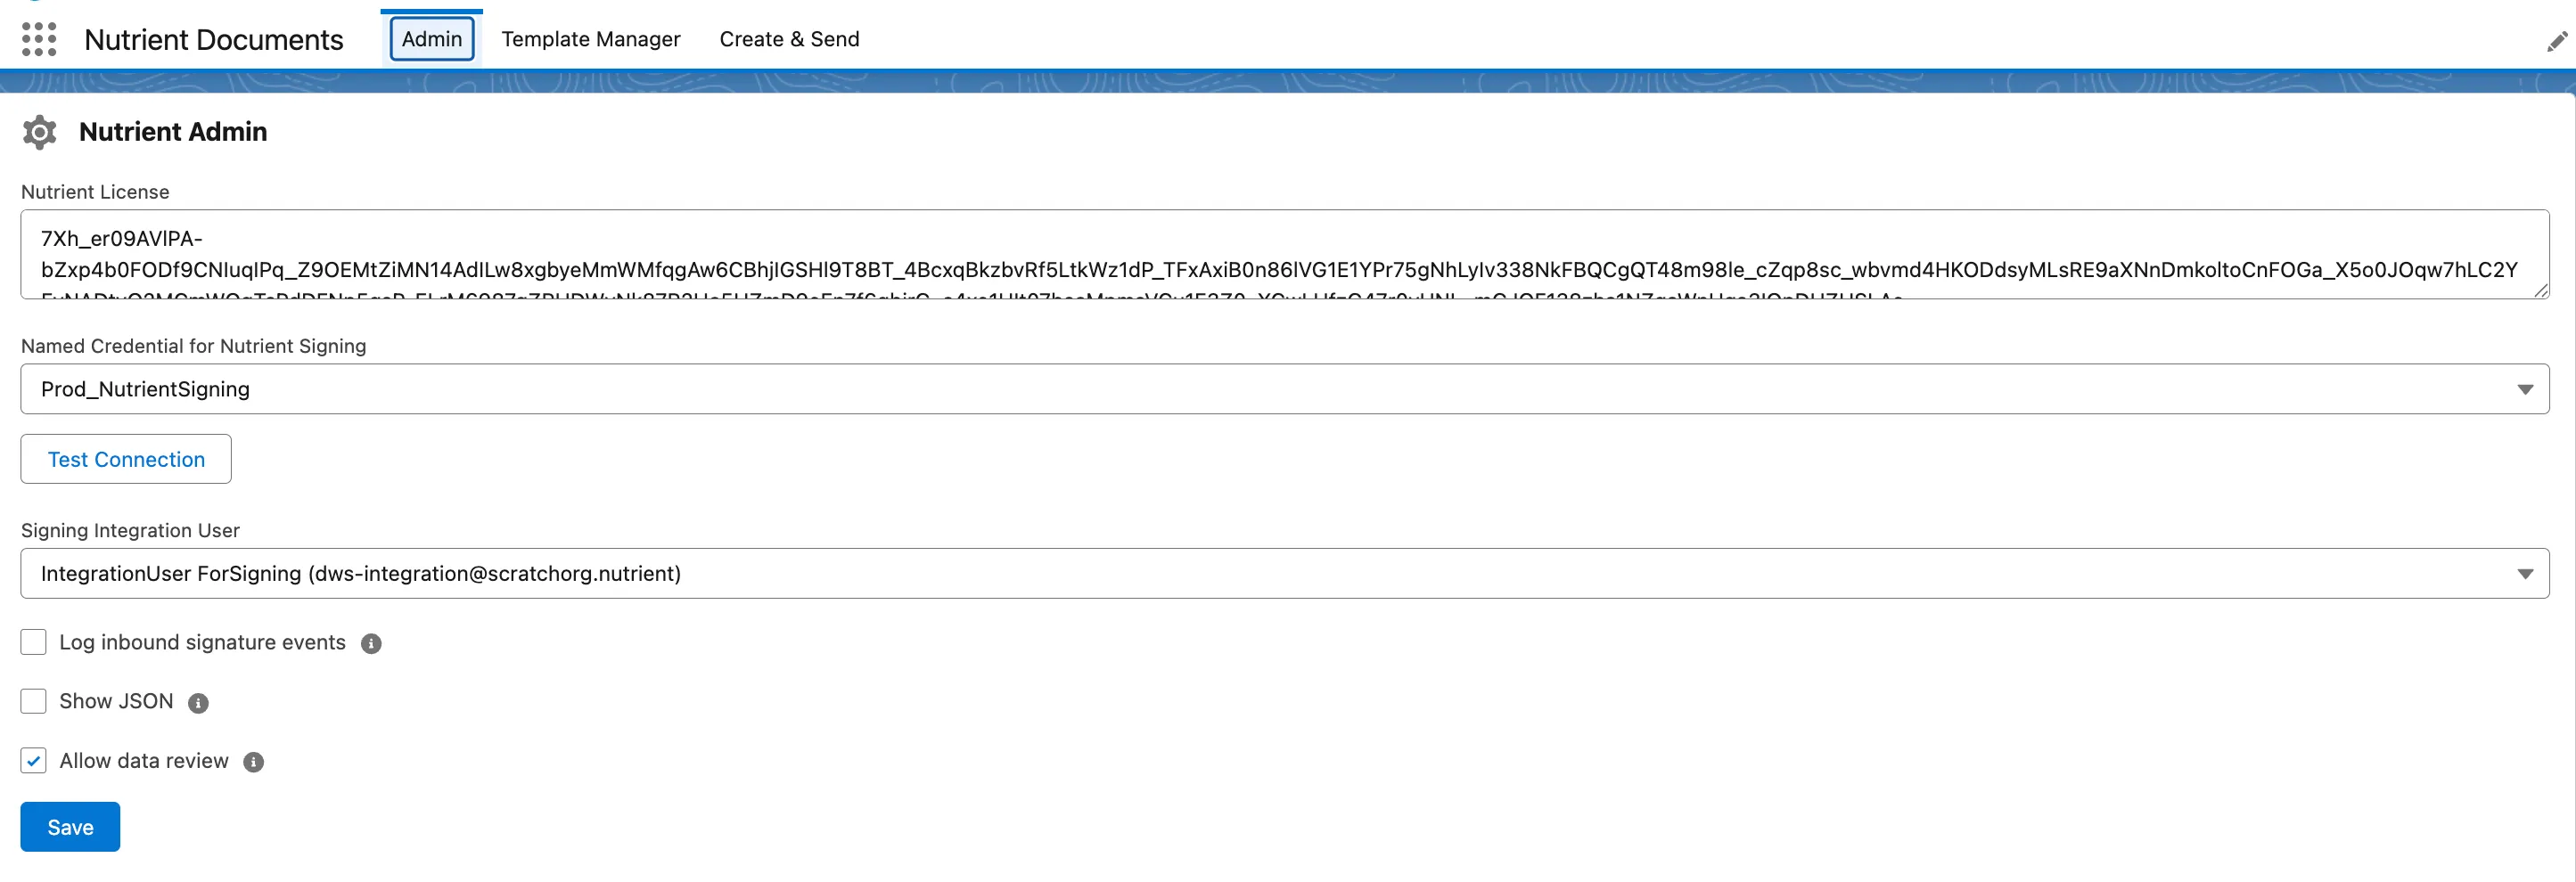
Start in the Nutrient Admin tab to configure the license and app settings.
- Open the Nutrient Documents app from the Salesforce App Launcher.
- Open the Nutrient Admin tab.
- Paste your license key into Nutrient License.
- Review the following required signing settings:
- Named Credential for Nutrient Signing — Selects the Salesforce named credential Nutrient uses for outbound signing requests to DWS.
- Signing Integration User — Selects the dedicated Salesforce integration user used for the signing and webhook integration.
- Optional: Enable Log inbound signature events if you need to log incoming signing webhook requests from DWS for debugging or investigation. Use this only when needed so you don’t overfill limited Salesforce data storage.
- Optional: Enable Show JSON if you need to view JSON data mapping in Template Manager.
- Optional: Enable the Allow data review setting if users should be able to review and edit resolved data before document creation.
- Click Save.
If you enable the Allow data review setting, the review step becomes available for all templates.
Next steps
After you finish the app-level setup, continue with the feature-specific guides:
- Refer to the set up document generation in Salesforce guide to add the document creation widget and assign document generation permissions.
- Refer to the set up digital signing in Salesforce guide to configure DWS signing integration and add the signing status widget.
Related guides
Refer to the following guides for related tasks:
- Set up document generation in Salesforce
- Manage document templates in Salesforce
- Build document templates in Salesforce
- Set up digital signing in Salesforce