Your first DocuVieware MVC Razor page
This guide shows how to integrate DocuVieware in a newly created C# MVC 5 project with Razor view engine.
Requirements — .NET Framework 4.6 or above
Note — Screenshots were taken using Visual Studio 2015 and GdPicture.NET 14. They may differ from the current release.
Empty project creation
Start with the File > New > Project… menu. Then choose Web > ASP.NET Web Application. This guide uses DocuViewareRazor, which is a new ASP.NET 4.6 MVC project.
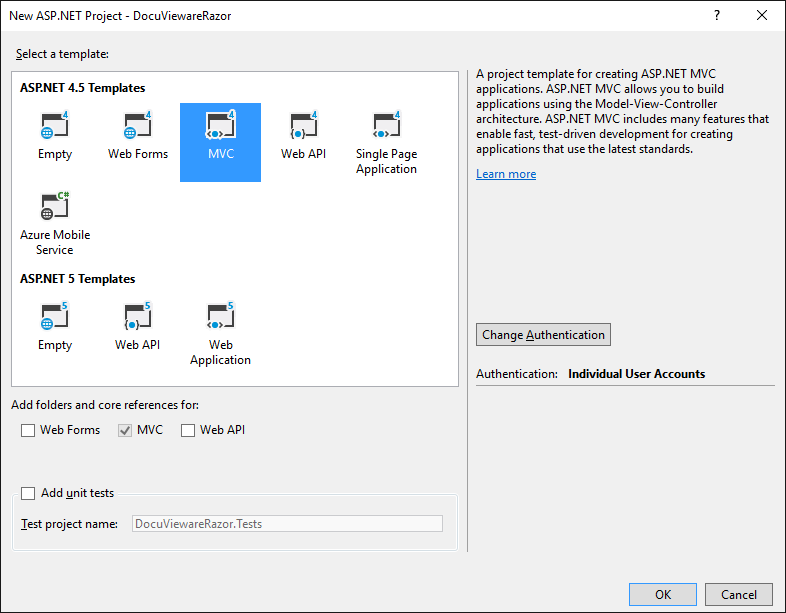
The image below shows the created structure.

Now that the project structure is ready, add project references.
Adding mandatory references
Add the following references to properly use DocuVieware.
Prerequisite references
Before adding DocuVieware, add Microsoft ASP.NET Web API and Newtonsoft JSON. Even though Newtonsoft JSON is already in the references, the version is outdated and will most likely cause an error at runtime.
To do this, run the following commands one after the other in the Package Manager Console (from the Tools menu, select NuGet Package Manager and then click Package Manager Console):
PM> Install-Package Microsoft.AspNet.WebApiPM> Install-Package Newtonsoft.JSON
The installation automatically adds the correct references to the project, including System.Web.Http.
DocuVieware references
Add GdPicture.NET.14.WEB.DocuVieware.dll, found in
[INSTALLATION FOLDER]\Redist\DocuVieware (.NET Framework 4.6). Once added, make sure it’s marked asCopy Local : Truein its properties window. For more information, refer to the MSDN documentation(opens in a new tab).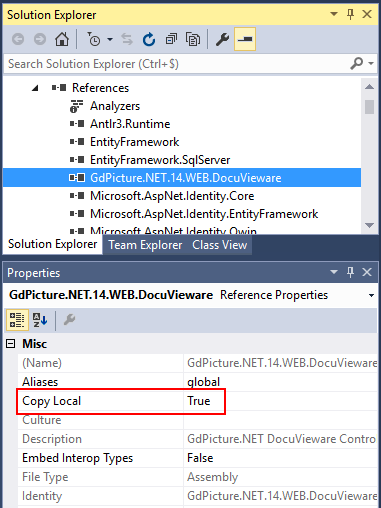
Add DocuVieware’s JavaScript and CSS to the project using docuvieware-min.js and docuvieware-min.css, both of which can be found in
[INSTALLATION FOLDER]\Redist\DocuVieware (Resources).You already have folders for these resources, so just add
docuvieware-min.jsto theScriptsfolder anddocuvieware-min.cssto theContentfolder, as shown in the following screenshot.
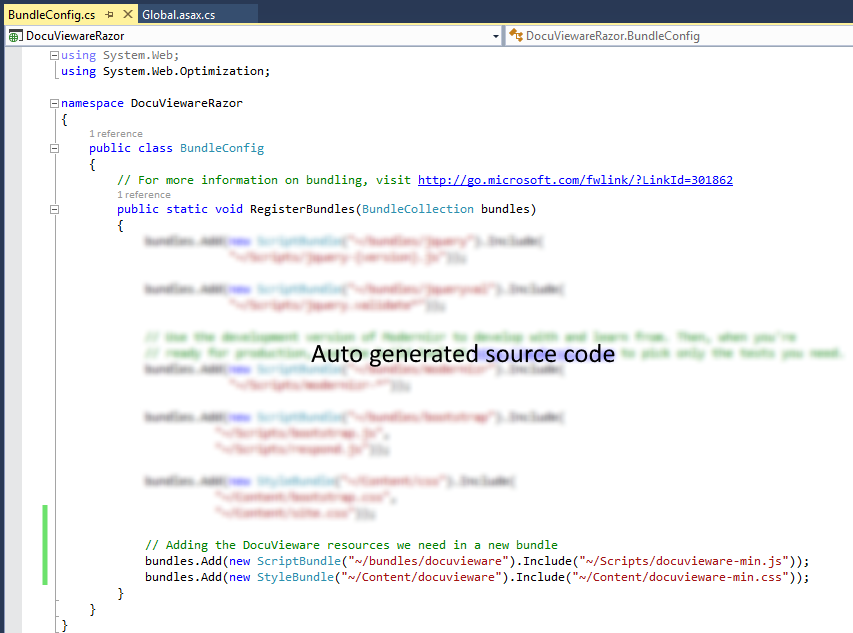
Add them to the bundles so they’re available to the page later on. This is done in the
BundleConfig.csfile in theApp_Startfolder of the project:C# // Adding the DocuVieware resources we need in a new bundlebundles.Add(new ScriptBundle("~/bundles/docuvieware").Include("~/Scripts/docuvieware-min.js"));bundles.Add(new StyleBundle("~/Content/docuvieware").Include("~/Content/docuvieware-min.css"));Once done, the source code looks as shown in the following screenshot.
Add extra libraries that are mandatory for deployment. These files are found in
[INSTALLATION FOLDER]\Redist.GdPicture.NET.14.filters.dll(for a 32-bit execution)GdPicture.NET.14.filters.64.dll(for a 64-bit execution)GdPicture.NET.14.image.gdimgplug.dll(for a 32-bit execution)GdPicture.NET.14.image.gdimgplug.64.dll(for a 64-bit execution)GdPicture.NET.14.Imaging.Rendering.Skia.dll(for a 32-bit execution)GdPicture.NET.14.Imaging.Rendering.Skia.64.dll(for a 64-bit execution)GdPicture.NET.14.jbig2.encoder.dll(for a 32-bit execution)GdPicture.NET.14.jbig2.encoder.64.dll(for a 64-bit execution)
Add them to the project using the Add > Existing item… menu. Once done, the Build Action property should be set to Content, and the Copy to Output Directory property should be set to Copy always for each file.

Licensing and configuring
Now that the references are properly set, open the Global.asax.cs file of the project to add some mandatory imports and handle the licensing and configuration of DocuVieware.
You can find the sample source code available here:
[INSTALLATION FOLDER]\Samples\ASP.NET\DocuVieware\aspnet-mvc\_razor\_app\Global.asax.cs.
Add the following mandatory import:
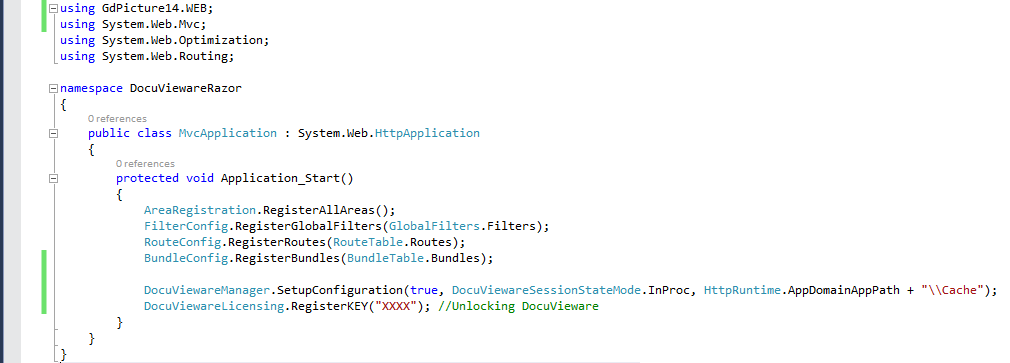
using GdPicture14.WEB;To properly unlock DocuVieware, add a call to the RegisterKEY() method in the Application_Start event. Then enter your license key in the method:
DocuViewareLicensing.RegisterKEY("XXXX"); // Unlocking DocuVieware// Replace "XXXX" with your actual license key.To set up the configuration of DocuVieware, add a call to the DocuViewareManager.SetupConfiguration() method in the Application_Start event. At this point, create a new folder in the project for cache. For clarity, name it Cache.
DocuViewareManager.SetupConfiguration(true, DocuViewareSessionStateMode.InProc, HttpRuntime.AppDomainAppPath + "\\Cache");The Global.asax.cs file looks like what’s shown in the following screenshot.
You can find the sample source code available here:
[INSTALLATION FOLDER]\Samples\ASP.NET\DocuVieware\aspnet-mvc\_razor\_app\Global.asax.cs.
DocuVieware integration
Integrate a DocuVieware instance in the index page.
Create a new folder in the project root called
Cacheto store session data when the service runs.Open the page located in Views > Home called
Index.cshtml. As it already has content, remove it all (except the title code) to start clean.Inject the JavaScript and CSS resources — which were added in a bundle earlier — to the page so you have them ready for the main control integration. This is done using the following code:
C# @Styles.Render("~/Content/docuvieware")@Scripts.Render("~/bundles/docuvieware")Create a
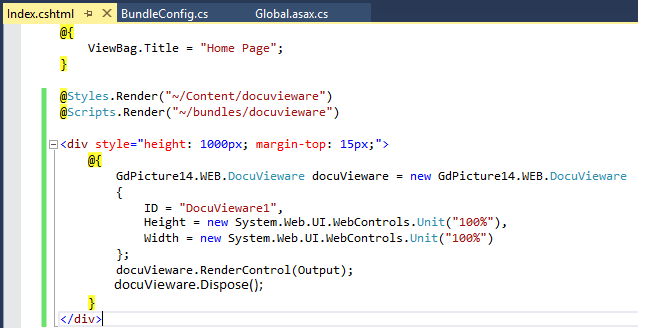
divand insert the DocuVieware control inIndex.cshtml.Using the object initializer, set the
ID. Then set bothHeightandWidthto 100 percent for the control to fit thediv:HTML <div style="height: 1000px; margin-top: 15px;">@{GdPicture14.WEB.DocuVieware docuVieware = new GdPicture14.WEB.DocuVieware{ID = "DocuVieware1",Height = new System.Web.UI.WebControls.Unit("100%"),Width = new System.Web.UI.WebControls.Unit("100%")};docuVieware.RenderControl(Output);docuVieware.Dispose();}</div>
The following screenshot shows how Index.cshtml finally looks after integration is complete.
You can find the mentioned code in the provided samples (
.cshtmlfiles) here:[INSTALLATION FOLDER]\Samples\ASP.NET\DocuVieware\aspnet-mvc\_razor\_app\Views\Home.
That’s it! You can start the project and load documents in your brand-new DocuVieware.