Your first Angular 10 application with DocuVieware
Angular 10 became generally available as a production release on 24 June 2020.
The major upgrade to the Google-developed, TypeScript-based framework puts more emphasis on quality, tool, and ecosystem improvements than new features.
It may not appear as impactful as version 9 but includes some notable changes:
- New Date Range Picker
- Warnings about CommonJS imports
- Optional stricter settings
- Keeping up to date with the ecosystem
- New default browser configuration
- Angular Team Fixit
- Deprecations and removals
At the end of this guide, you’ll be able to run an Angular 10 application on Visual Studio with DocuVieware.
This guide includes a clean-up panel, which isn’t necessary for the application to work. But it shows how to implement a DocuVieware custom feature.
Setting up your Visual Studio project
As a prerequisite, you need Visual Studio updated and the latest version of DocuVieware.
For this guide, Microsoft Visual Studio Enterprise 2019 version 16.6.4 was used.
Setting up the Angular 10 application
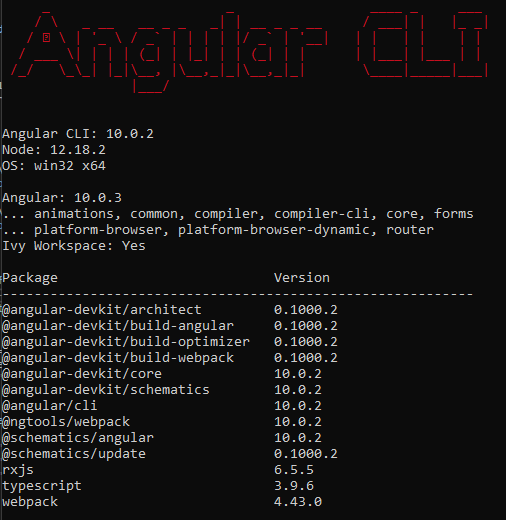
As a prerequisite, you need Node.js installed and set up properly in the PATH environment variable. Verify it by writing node -v into the command prompt. For this guide, Node.js 12.18.2 was used.
Also check your Angular version by typing ng --v, and if you have an old version, update it with this command:
ng update @angular/cli @angular/core
Creating your Visual Studio project
Launch Visual Studio.
Create a new project.
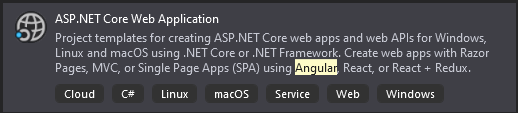
Create an ASP.NET Core Web Application.
Give a name to your project.
Choose Angular.

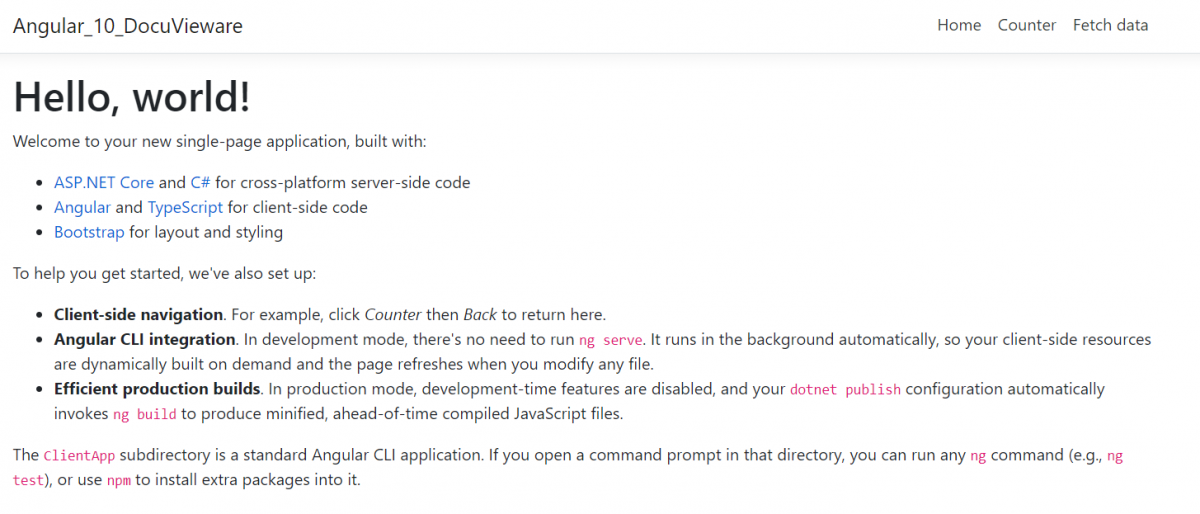
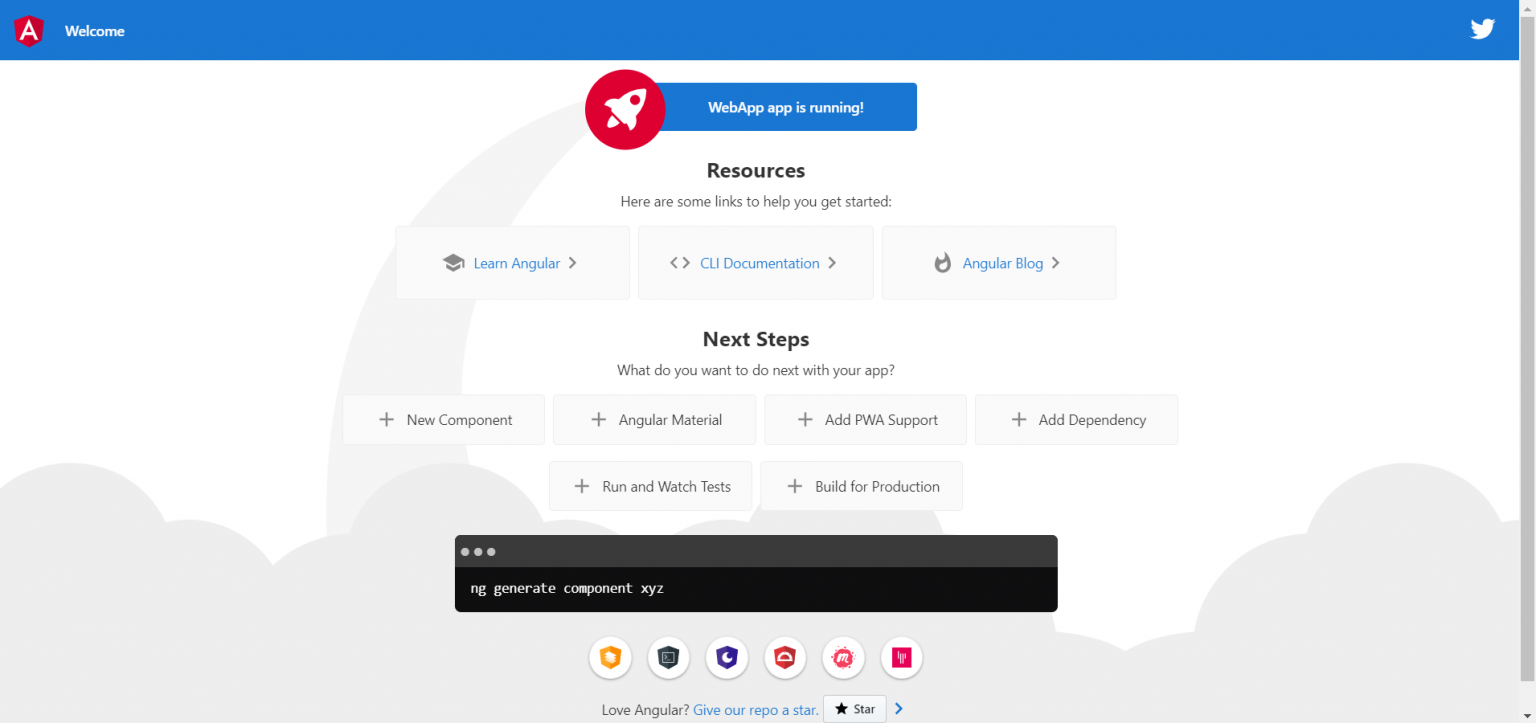
Your project is now created. The image below shows what you should see after running it.
Delete all files and references related to the VS project template, as they’re unnecessary for the rest of this guide.
WeatherForecast.csControllers/WeatherForecastController.cs- The
ClientAppfolder
Create your Angular 10 application
At the moment, Visual Studio doesn’t create an Angular 10 app automatically. Create the client app manually with the command prompt in your VS project.
Close Visual Studio before creating the Angular 10 application inside. If you don’t, Visual Studio creates the node modules dependencies and generates errors.
In a command prompt, go to your VS Project folder > ng new ClientApp > Yes > CSS.
Open Visual Studio. You can see there’s no node_modules folder, because Visual Studio linked it to the dependencies itself.
Your Angular 10 app is now created in your VS project, but there are some errors. This is normal — at the moment, Visual Studio isn’t configured to accept an Angular 10 native app.
To link the Angular app to your project properly, modify the JSON files.
Copy the contents of tsconfig.base.json and paste them into ClientApp/tsconfig.json. In package.json, change "start": "ng serve" under "scripts" to "start": "echo hello && ng serve".
This piece of JSON is important and blocks your application if you don’t modify it.
By doing this, everything should work fine. Now, launch the application.
Adding DocuVieware
Next, add your DocuVieware SDK to the project.
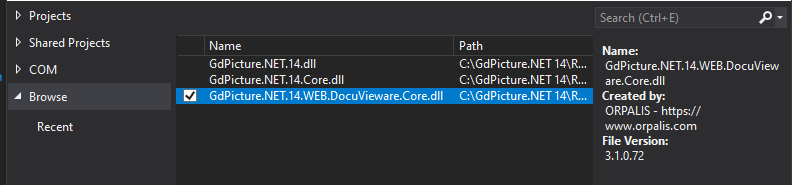
Right-click Dependencies and select Add Project Reference. Then in the Browse section, select GdPicture.NET.14.WEB.DocuVieware.Core.dll. Find it at C:\GdPicture.NET 14\Redist\DocuVieware (.NET Core 3.0).
The SDK is now implemented in your solution. You can access its functionality by adding the using GdPicture14.WEB; directive.
Now create a new folder called assets in ClientApp/src/app/ and add docuvieware.min.js and docuvieware.min.css. Find these files at C:\GdPicture.NET 14\Redist\DocuVieware (Resources).
angular.json
To link the app and DocuVieware JavaScript and CSS, reference angular.json, as demonstrated below:
"styles": [ "src/styles.css", "src/app/assets/docuvieware-min.css" ],"scripts": [ "src/app/assets/docuvieware-min.js" ]Start coding your application
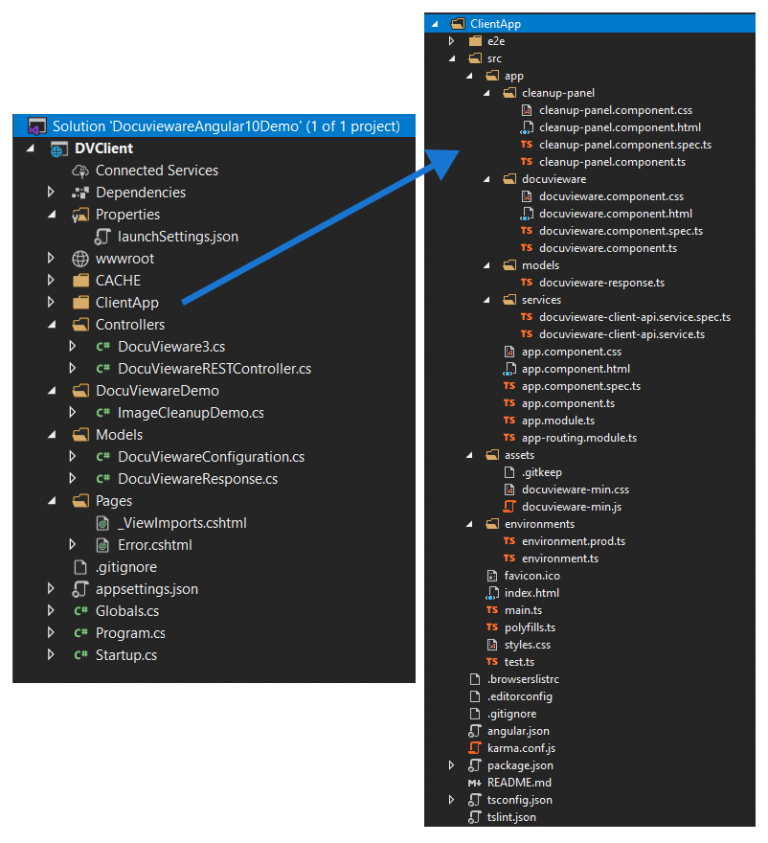
For verification, at the end of this part, you should have the tree shown in the following picture.
Controllers
Controllers are in charge of controlling the application by getting the input. They transfer orders to the view from the model and orders from the view to the model.
Create a Controllers folder at the root of your application. Right-click the project > Add > New Folder > Name it Controllers.
Add the class. Right-click the created folder (Controllers) > Click Add, then New Item.. > Choose API Controller Class – Empty > Name your file DocuVieware3.cs.
This file implements the HTTP communication method:
namespace WebApp.Controllers{ [ApiController] [Route("api/DocuVieware3")] public class DocuVieware3 : ControllerBase { // http get example [HttpGet("ping")] public string ping() { return "pong"; }}}The DocuViewareRESTController file is where the controls are. In this file, you can choose to enable/disable and change some parameters, such as the maximum upload size.
Find them in the documentation.
Right-click the created folder (Controllers). Click Add > New Item.. > Choose API Controller Class – Empty. Now, name your file DocuViewareRESTController.cs:
namespace WebApp.Controllers { [ApiController] [Route("api/DocuVieware")] public class DocuViewareController : ControllerBase { [HttpPost("[action]")] public ActionResult GetDocuViewareControl(DocuViewareConfiguration controlConfiguration) { if (!DocuViewareManager.IsSessionAlive(controlConfiguration.SessionId)) { if (!string.IsNullOrEmpty(controlConfiguration.SessionId) && !string.IsNullOrEmpty(controlConfiguration.ControlId)) { DocuViewareManager.CreateDocuViewareSession(controlConfiguration.SessionId, controlConfiguration.ControlId, 20); } else { throw new Exception("Invalid session identifier and/or invalid control identifier."); } }
 using DocuViewareControl docuVieware = new DocuViewareControl(controlConfiguration.SessionId) { AllowPrint = controlConfiguration.AllowPrint, EnablePrintButton = controlConfiguration.EnablePrintButton, AllowUpload = controlConfiguration.AllowUpload, EnableFileUploadButton = controlConfiguration.EnableFileUploadButton, CollapsedSnapIn = controlConfiguration.CollapsedSnapIn, ShowAnnotationsSnapIn = controlConfiguration.ShowAnnotationsSnapIn, EnableRotateButtons = controlConfiguration.EnableRotateButtons, EnableZoomButtons = controlConfiguration.EnableZoomButtons, EnablePageViewButtons = controlConfiguration.EnablePageViewButtons, EnableMultipleThumbnailSelection = controlConfiguration.EnableMultipleThumbnailSelection, EnableMouseModeButtons = controlConfiguration.EnableMouseModeButtons, EnableFormFieldsEdition = controlConfiguration.EnableFormFieldsEdition, EnableTwainAcquisitionButton = controlConfiguration.EnableTwainAcquisitionButton, MaxUploadSize = 36700160 };
 using StringWriter controlOutput = new StringWriter(); docuVieware.RenderControl(controlOutput);
 return Ok(new DocuViewareResponse { HtmlContent = controlOutput.ToString() }); } } }
Models
Models are in charge of providing the data to the application and storing it too.
Right-click the project and select Add > New Folder. Name it Models.
The DocuViewareConfiguration.cs file defines the getters and setters of the application.
Add the class. Right-click the created folder (Models). Click Add > New Item.. > Choose API Controller Class – Empty. Name your file DocuViewareConfiguration.cs:
namespace WebApp.Models{ public class DocuViewareConfiguration { public string SessionId { get; set; } public string ControlId { get; set; } public bool AllowPrint { get; set; } public bool EnablePrintButton { get; set; } public bool AllowUpload { get; set; } public bool EnableFileUploadButton { get; set; } public bool CollapsedSnapIn { get; set; } public bool ShowAnnotationsSnapIn { get; set; } public bool EnableRotateButtons { get; set; } public bool EnableZoomButtons { get; set; } public bool EnablePageViewButtons { get; set; } public bool EnableMultipleThumbnailSelection { get; set; } public bool EnableMouseModeButtons { get; set; } public bool EnableFormFieldsEdition { get; set; } public bool EnableTwainAcquisitionButton { get; set; } }}Add the class. Right-click the created folder (Models). Click Add > New Item.. > Choose API Controller Class – Empty. Name your file DocuViewareResponse.cs.
This file defines the auto-properties of the HTML content. The client asks the server what it wants, and then the server loads web content and sends it back to the client:
namespace DVClient.Models{ public class DocuViewareResponse { public string HtmlContent { get; set; } }}DocuVieware functionalities
The clean-up panel part implements classes related to the DocuVieware custom features. This guide implements the image quality improvement.
Clean-up panel
The clean-up panel of DocuVieware is a functionality adding a panel of multiple tools to the application for improving the quality of the document.
This part is optional and the app works without it.
In a command prompt, go to DVClient/ClientApp/src/app/. Run ng g c cleanup-panel, and then edit cleanup-panel.component.ts as shown below:
import { Component, OnInit } from '@angular/core';
declare var DocuViewareAPI: any;
@Component({ selector: 'app-cleanup-panel', templateUrl: './cleanup-panel.component.html', styleUrls: ['./cleanup-panel.component.css']})export class CleanupPanelComponent implements OnInit {
DOCUVIEWARE_CONTROL_ID = 'DocuVieware1';
constructor() {}
ngOnInit() {}
applyFilter(customActionName: string) { const pages = DocuViewareAPI.GetSelectedThumbnailItems(this.DOCUVIEWARE_CONTROL_ID); const roi = DocuViewareAPI.GetSelectionAreaCoordinates(this.DOCUVIEWARE_CONTROL_ID); if (pages.length === 0) { pages[0] = DocuViewareAPI.GetCurrentPage(this.DOCUVIEWARE_CONTROL_ID); }const param = { Pages: pages, RegionOfInterest: roi };
 DocuViewareAPI.PostCustomServerAction(this.DOCUVIEWARE_CONTROL_ID, true, customActionName, param);}}
cleanup-panel.component.spec.ts
import { async, ComponentFixture, TestBed } from '@angular/core/testing';
import { CleanupPanelComponent } from './cleanup-panel.component';
describe('CleanupPanelComponent', () => { let component: CleanupPanelComponent; let fixture: ComponentFixture;
 beforeEach(async(() => { TestBed.configureTestingModule({ declarations: [CleanupPanelComponent] }) .compileComponents();}));
 beforeEach(() => { fixture = TestBed.createComponent(CleanupPanelComponent); component = fixture.componentInstance; fixture.detectChanges(); });
 it('should create', () => { expect(component).toBeTruthy(); });});
cleanup-panel.component.html is the HTML structure of the panel. Copy it from the sample folder at [INSTALL FOLDER]\Samples\ASP.NET\DocuVieware.
cleanup-panel.component.css is the CSS design of the panel. Copy it from the sample folder at [INSTALL FOLDER]\Samples\ASP.NET\DocuVieware.
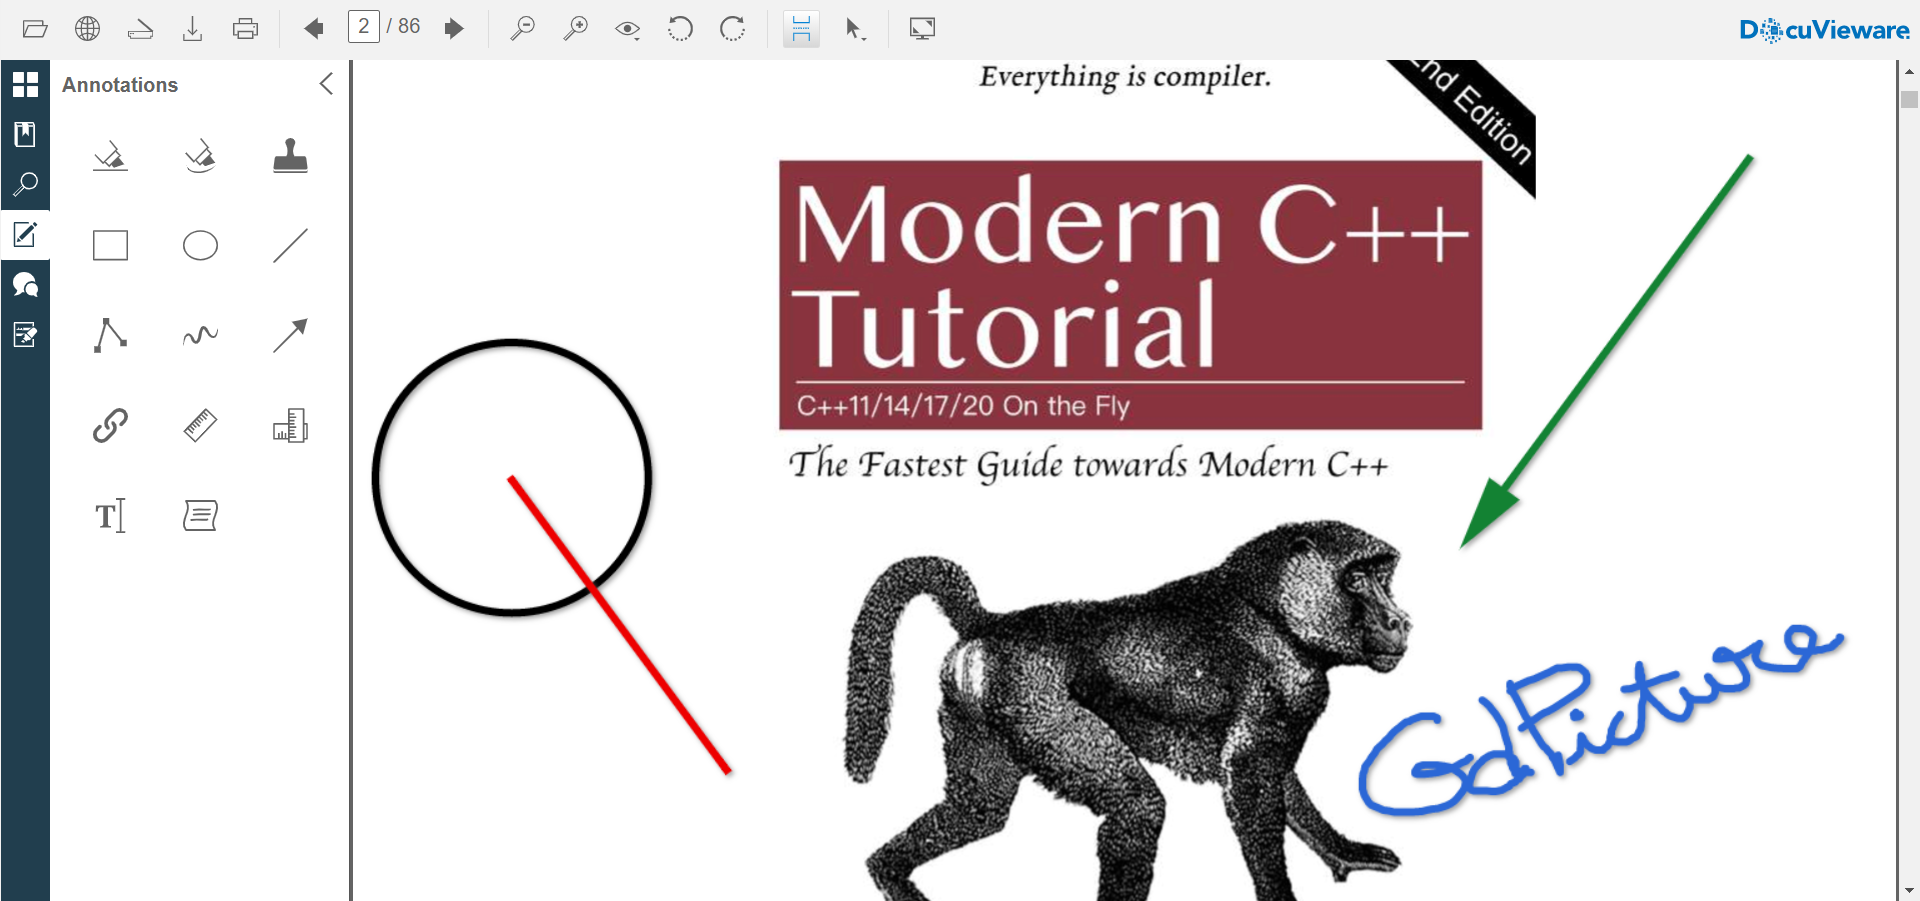
Image cleanup
Create a folder at the project level and name it DocuViewareDemo. Right-click the DocuViewareDemo folder. Click Add > Class. Then name your file ImageCleanupDemo.cs.
This code contains the image quality improvement methods. It implements the clean-up panel by using e.actionName — the application gets the user’s action and chooses the correct clean-up action accordingly.
ImageCleanupDemo.cs
switch (e.actionName){case "automaticRemoveBlackBorders":status = gdPictureImaging.DeleteBlackBorders(imageId, 10, false);break;case "autoDeskew":status = gdPictureImaging.AutoDeskew(imageId);break;case "punchHoleRemoval":status = gdPictureImaging.RemoveHolePunch(imageId, HolePunchMargins.MarginLeft | HolePunchMargins.MarginRight | HolePunchMargins.MarginBottom | HolePunchMargins.MarginTop);break;case "negative":status = gdPictureImaging.FxNegative(imageId);break;case "despeckle":status = gdPictureImaging.FxDespeckle(imageId);break;case "rotate-90":status = gdPictureImaging.RotateAngle(imageId, 270);break;case "rotate+90":status = gdPictureImaging.RotateAngle(imageId, 90);break;}DocuVieware integration
The DocuVieware folder contains the style and code that runs the solution on the client-side and the integration part of it.
To create the folder and files inside, in a command prompt, go to ClientApp/src/app folder. Run ng g c docuvieware, and edit the created files as shown below:
docuvieware.component.css — Where you define the DocuVieware look you need.
docuvieware.component.html — The HTML injected into the main HTML.
<div id="dvContainer" style="width:100%; height:100%;"></div>
docuvieware.component.spec.ts — TypeScript spec code
docuvieware.component.ts — The code for injecting the HTML properly into the dvContainer div.
import { Component, OnInit } from '@angular/core';import { DocuviewareClientApiService } from '../services/docuvieware-client-api.service';
@Component({ selector: 'app-docuvieware', templateUrl: './docuvieware.component.html', styleUrls: ['./docuvieware.component.css']})export class DocuviewareComponent implements OnInit {
constructor(private dvApi: DocuviewareClientApiService) {}htmlMarkup: any;
private static insertInDOM(content: string): void { const fragment = document.createRange().createContextualFragment(content); document.getElementById('dvContainer').appendChild(fragment); }ngOnInit() { this.dvApi.getDocuViewareMarkup().subscribe( response => DocuviewareComponent.insertInDOM(response.htmlContent), error => this.htmlMarkup = error as any ); }}
Application models
The model folder defines the REST service structure:
In a command prompt, go to DVClient/ClientApp/src/app/. Run ng g m models and rename the created file to Docuvieware-response.ts.
The file defines the structure of the HTML content of the server response:
export class DocuviewareResponse {htmlContent: string;}Services folder
The model folder contains the REST layer to communicate with the server properly.
In a command prompt, go to DVClient/ClientApp/src/app/. Run ng g s services/docuvieware-client-api.
The code provides the REST communication with the API URL and all the controls configuration to activate/deactivate functionalities in your app.
This is where you can choose if you want to display the controls in your application.
Find all properties in the online documentation:
import { Injectable } from '@angular/core';import { HttpClient, HttpHeaders } from '@angular/common/http';import { Observable } from 'rxjs';import { DocuviewareResponse } from '../models/docuvieware-response';
@Injectable({ providedIn: 'root'})export class DocuviewareClientApiService { DOCUVIEWARE_CONTROL_ID = 'DocuVieware1'; DOCUVIEWARE_ENDPOINT_BASE_URL = 'http://localhost:5000/api/DocuVieware'; DOCUVIEWARE_GETMARKUP_ENDPOINT = 'GetDocuViewareControl';
constructor(private httpClient: HttpClient) {}
getDocuViewareMarkup(): Observable { const httpOptions = { headers: new HttpHeaders({ 'Content-Type': 'application/json' })};
const docuViewareConfig = { SessionId: 'mySessionId', // Set to an arbitrary value, should be replaced by the session identifier from your session mechanism ControlId: this.DOCUVIEWARE_CONTROL_ID, AllowPrint: true, EnablePrintButton: true, AllowUpload: true, EnableFileUploadButton: true, CollapsedSnapIn: true, ShowAnnotationsSnapIn: true, EnableRotateButtons: true, EnableZoomButtons: true, EnablePageViewButtons: true, EnableMultipleThumbnailSelection: true, EnableMouseModeButtons: true, EnableFormFieldsEdition: true, EnableTwainAcquisitionButton: true,};return this.httpClient.post(`${this.DOCUVIEWARE_ENDPOINT_BASE_URL}${this.DOCUVIEWARE_GETMARKUP_ENDPOINT}/`, docuViewareConfig, httpOptions);}}
Setting main files
Right-click the project. Click Add > Class, and name the file Globals.cs:
using Microsoft.AspNetCore.Http;using Microsoft.Net.Http.Headers;using System;using System.Collections.Generic;using System.IO;using GdPicture14.WEB;using WebApp.DocuViewareCoreDemo;
namespace WebApp{ public static class Globals { private static readonly string m_rootDirectory = Directory.GetCurrentDirectory(); public static readonly int SESSION_TIMEOUT = 20; //Set to 20 minutes. use -1 to handle DocuVieware session timeout through asp.net session mechanism. public const bool STICKY_SESSION = true; //Set false to use DocuVieware on Servers Farm witn non sticky sessions. public const DocuViewareSessionStateMode DOCUVIEWARE_SESSION_STATE_MODE = DocuViewareSessionStateMode.File; //Set DocuViewareSessionStateMode.File is STICKY_SESSION is False.
 public static string GetCacheDirectory() { return m_rootDirectory + "\\cache"; }
 public static string GetDocumentsDirectory() { return m_rootDirectory + "\\documents"; }
 public static string BuildDocuViewareControlSessionID(HttpContext HttpContext, string clientID) { if (HttpContext.Session.GetString("DocuViewareInit") == null) { HttpContext.Session.SetString("DocuViewareInit", "true"); }
 return HttpContext.Session.Id + clientID; }
 public static DocuViewareLocale GetDocuViewareLocale(HttpRequest request) { if (request != null) { IList acceptLanguage = request.GetTypedHeaders().AcceptLanguage;
 if (acceptLanguage != null) { foreach (StringWithQualityHeaderValue language in acceptLanguage) { object docuviewareLocale; if (Enum.TryParse(typeof(DocuViewareLocale), language.Value.Value, true, out docuviewareLocale)) { return (DocuViewareLocale)docuviewareLocale; } }}}
return DocuViewareLocale.En;}
public static void CustomActionDispatcher(object sender, CustomActionEventArgs e){ switch (e.actionName) { case "automaticRemoveBlackBorders": case "autoDeskew": case "punchHoleRemoval": case "negative": case "despeckle": case "rotate-90": case "rotate+90": ImageCleanupDemo.HandleImageCleanupAction(e); break; }}}}
Startup.cs
Don’t forget to replace your API key to make it work!
using GdPicture14.WEB;using Microsoft.AspNetCore.Builder;using Microsoft.AspNetCore.Hosting;using Microsoft.AspNetCore.SpaServices.AngularCli;using Microsoft.Extensions.Configuration;using Microsoft.Extensions.DependencyInjection;using Microsoft.Extensions.Hosting;using Microsoft.Extensions.Logging;
namespace WebApp{ public class Startup { public Startup(IConfiguration configuration) { Configuration = configuration; DocuViewareLicensing.RegisterKEY(Configuration["YOUR_API_KEY"]); //Unlocking DocuVieware. Please set your demo or commercial license key here or in config file. DocuViewareManager.SetupConfiguration(Globals.STICKY_SESSION, Globals.DOCUVIEWARE_SESSION_STATE_MODE, Globals.GetCacheDirectory(), "http://localhost:5000", "api/docuvieware3"); DocuViewareEventsHandler.CustomAction += Globals.CustomActionDispatcher; }
 public IConfiguration Configuration { get; }
 // This method gets called by the runtime. Use this method to add services to the container. public void ConfigureServices(IServiceCollection services) { services.AddControllersWithViews(); // In production, the Angular files will be served from this directory services.AddSpaStaticFiles(configuration => { configuration.RootPath = "ClientApp/dist"; }); }
 // This method gets called by the runtime. Use this method to configure the HTTP request pipeline. public void Configure(IApplicationBuilder app, IWebHostEnvironment env, ILogger logger) { if (env.IsDevelopment()) { app.UseDeveloperExceptionPage(); } else { app.UseExceptionHandler("/Error"); } app.UseCors(cors => cors.AllowAnyOrigin().AllowAnyMethod().AllowAnyHeader().AllowAnyMethod());
 app.UseStaticFiles(); if (!env.IsDevelopment()) { app.UseSpaStaticFiles(); }
 app.UseRouting();
 app.UseEndpoints(endpoints => { endpoints.MapControllerRoute( name: "default", pattern: "{controller}/{action=Index}/{id?}"); });
 app.UseSpa(spa => { spa.Options.SourcePath = "ClientApp";
 if (env.IsDevelopment()) { spa.UseAngularCliServer(npmScript: "start"); }});}}}
Program.cs
using Microsoft.AspNetCore.Hosting;using Microsoft.Extensions.Hosting;using WebApp;
namespace DocuviewareAngular10Demo_proofreading{ public class Program { public static void Main(string[] args) { CreateHostBuilder(args).Build().Run(); }
 public static IHostBuilder CreateHostBuilder(string[] args) => Host.CreateDefaultBuilder(args) .ConfigureWebHostDefaults(webBuilder => { webBuilder.UseStartup(); }); }}
main.ts
import { enableProdMode } from '@angular/core';import { platformBrowserDynamic } from '@angular/platform-browser-dynamic';
import { AppModule } from './app/app.module';import { environment } from './environments/environment';
export function getBaseUrl() { return document.getElementsByTagName('base')[0].href;}
const providers = [{ provide: 'BASE_URL', useFactory: getBaseUrl, deps: [] }];
if (environment.production) { enableProdMode();}
platformBrowserDynamic(providers).bootstrapModule(AppModule).catch(err => console.log(err));
app.component.html
In this file, put the two different HTML parts — the DocuVieware interface and the cleanup panel.
<app-cleanup-panel></app-cleanup-panel><app-docuvieware style="width:100%; height:100%;"></app-docuvieware>app.module.ts
import { BrowserModule } from '@angular/platform-browser';import { NgModule } from '@angular/core';import { FormsModule } from '@angular/forms';import { HttpClientModule, HTTP_INTERCEPTORS } from '@angular/common/http';import { RouterModule } from '@angular/router';
import { AppComponent } from './app.component';import { DocuviewareComponent } from './docuvieware/docuvieware.component';import { CleanupPanelComponent } from './cleanup-panel/cleanup-panel.component';
@NgModule({declarations: [AppComponent,DocuviewareComponent,CleanupPanelComponent],imports: [BrowserModule.withServerTransition({ appId: 'ng-cli-universal' }),HttpClientModule,FormsModule,RouterModule.forRoot([])],providers: [],bootstrap: [AppComponent]})export class AppModule { }
Running your app
Now launch the app to see the results.
The DocuVieware Angular 10 application is now created with all the basic controls.
You can also add TWAIN communication and more. Refer the documentation for more information, and contact Support(opens in a new tab) if you have any questions.