Set up digital signing in Salesforce
This guide walks Salesforce administrators through the one-time configuration required to enable signing documents in the Nutrient Documents for Salesforce.
Digital signing in Salesforce is powered by Nutrient Document Web Services (DWS), which is configured and managed outside of your Salesforce org.
The setup has two parts:
- Outbound — Salesforce calls the DWS API (create envelopes, upload documents, cancel envelopes).
- Inbound — DWS sends webhook events back to Salesforce (for example,
envelope_completed,signer_signed).
Who should use this guide
Use this guide if you’re a Salesforce administrator or implementation owner configuring Nutrient documents signing for your organization.
Prerequisites
Before you start, ensure you have:
- The basic Nutrient Documents for Salesforce setup is complete
- Admin access to your Salesforce organization
- The Nutrient package installed in Salesforce
- Access to DWS Signer and an API key
- A dedicated Salesforce integration user for webhooks (recommended)
If your organization still needs the app-level setup, refer to the set up Nutrient Documents for Salesforce guide. If users will send documents for signing from Salesforce records, also refer to the set up document generation in Salesforce guide.
If you need the Salesforce installation link, DWS Signer dashboard access, or a DWS Signer API key, contact our Sales team.
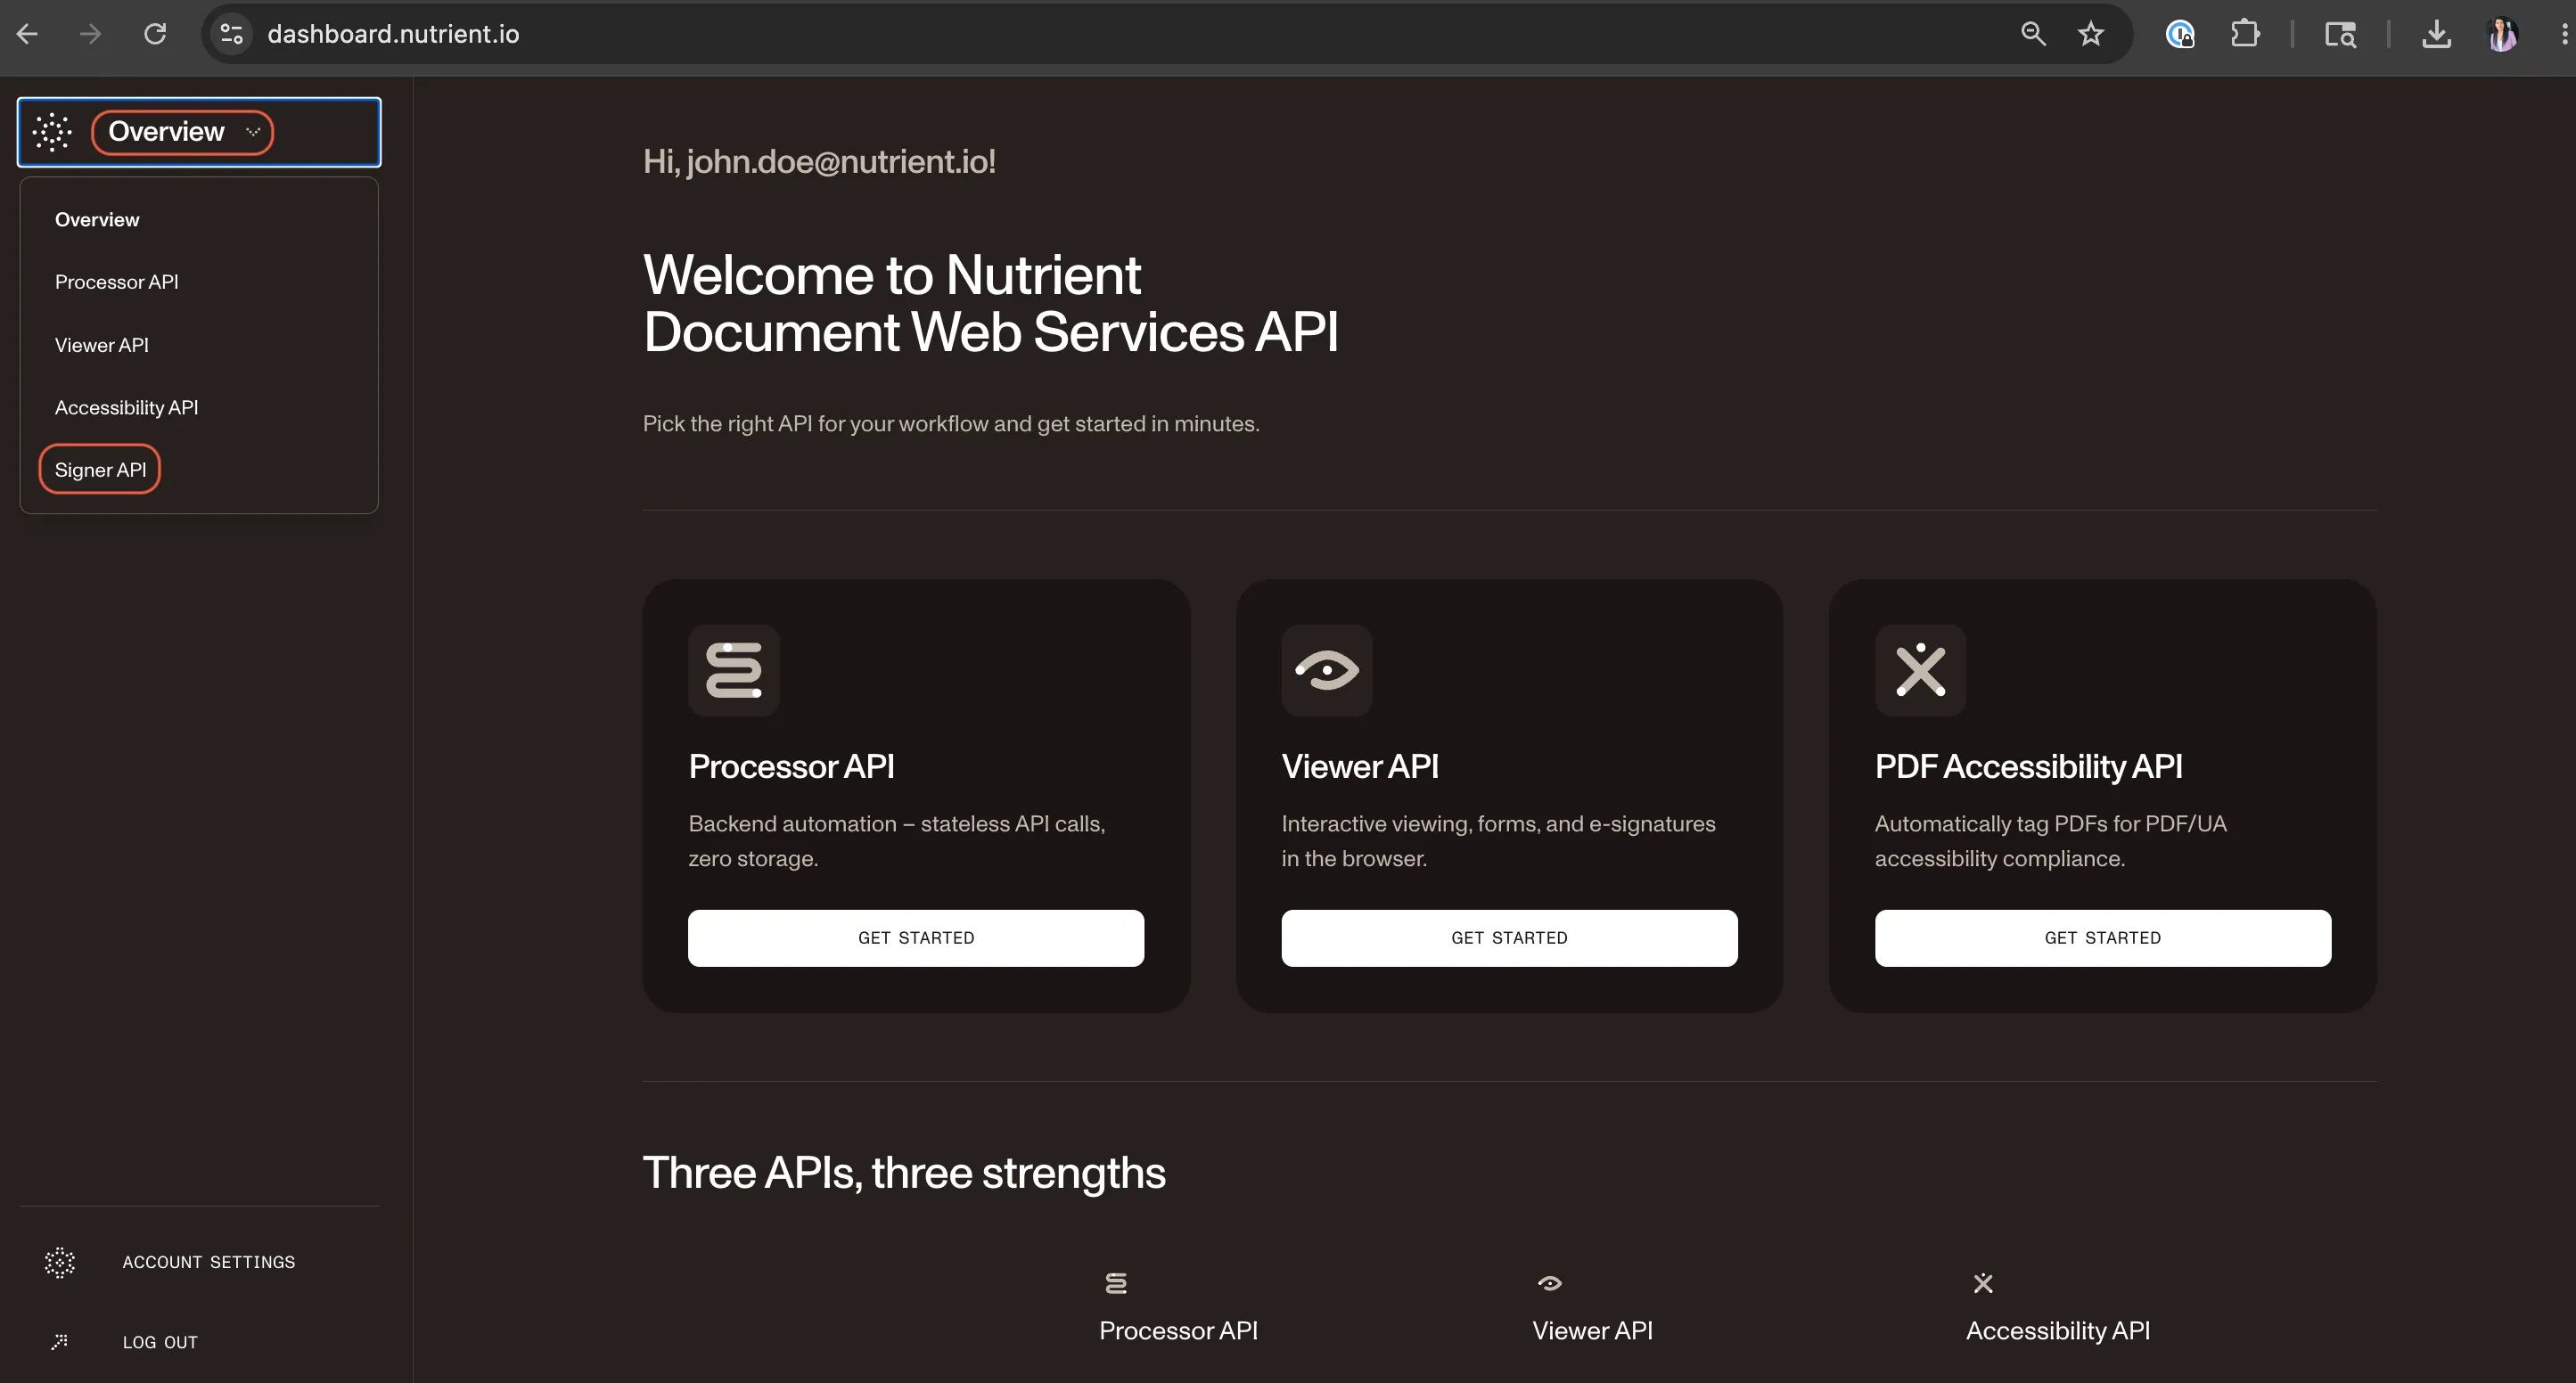
If you already have access to the DWS Signer dashboard, follow these steps to obtain the API key:
Select Signer API in the upper-left corner.
Click the API key tab in the left navigation panel.
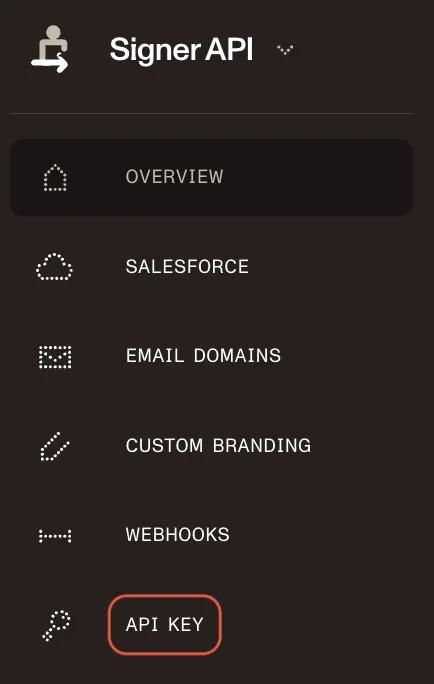
Copy the API key.
Part A — Connect Salesforce to DWS API (outbound)
Create an external credential and a named credential so Salesforce can authenticate callouts to DWS.
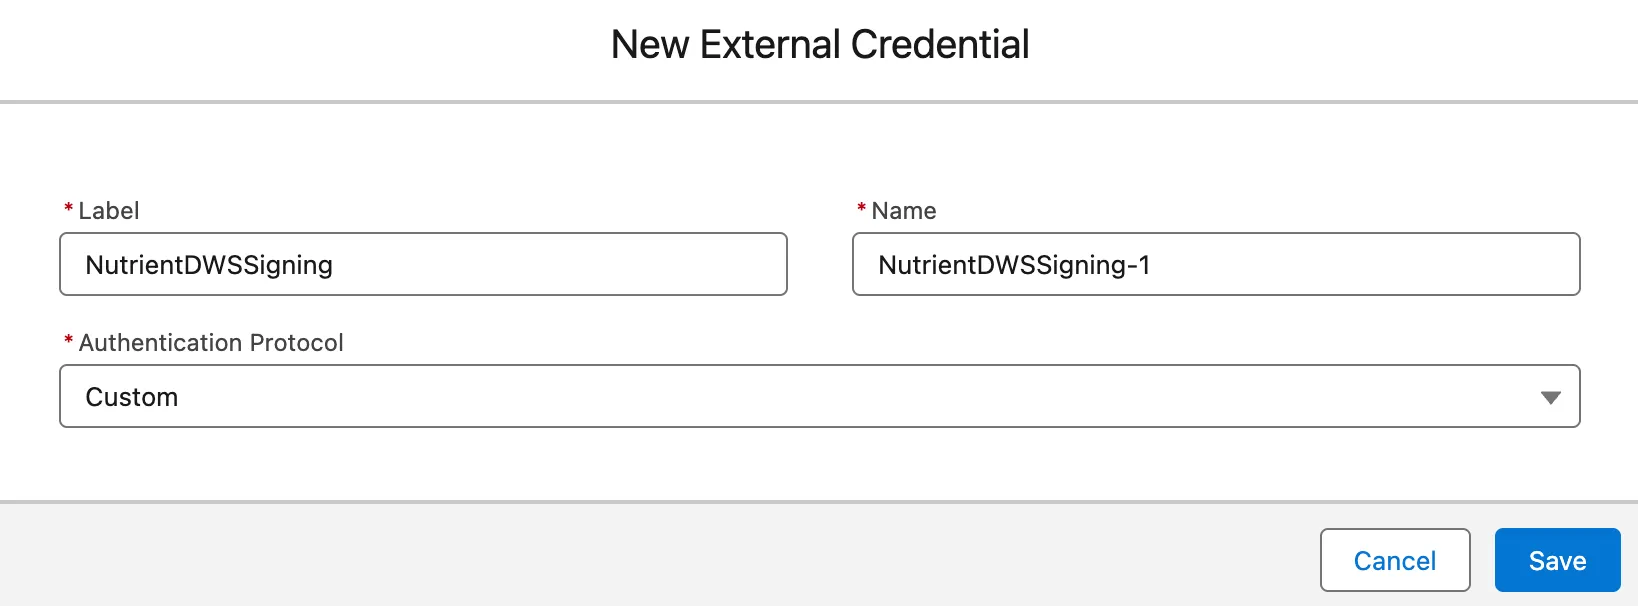
1. Create an external credential
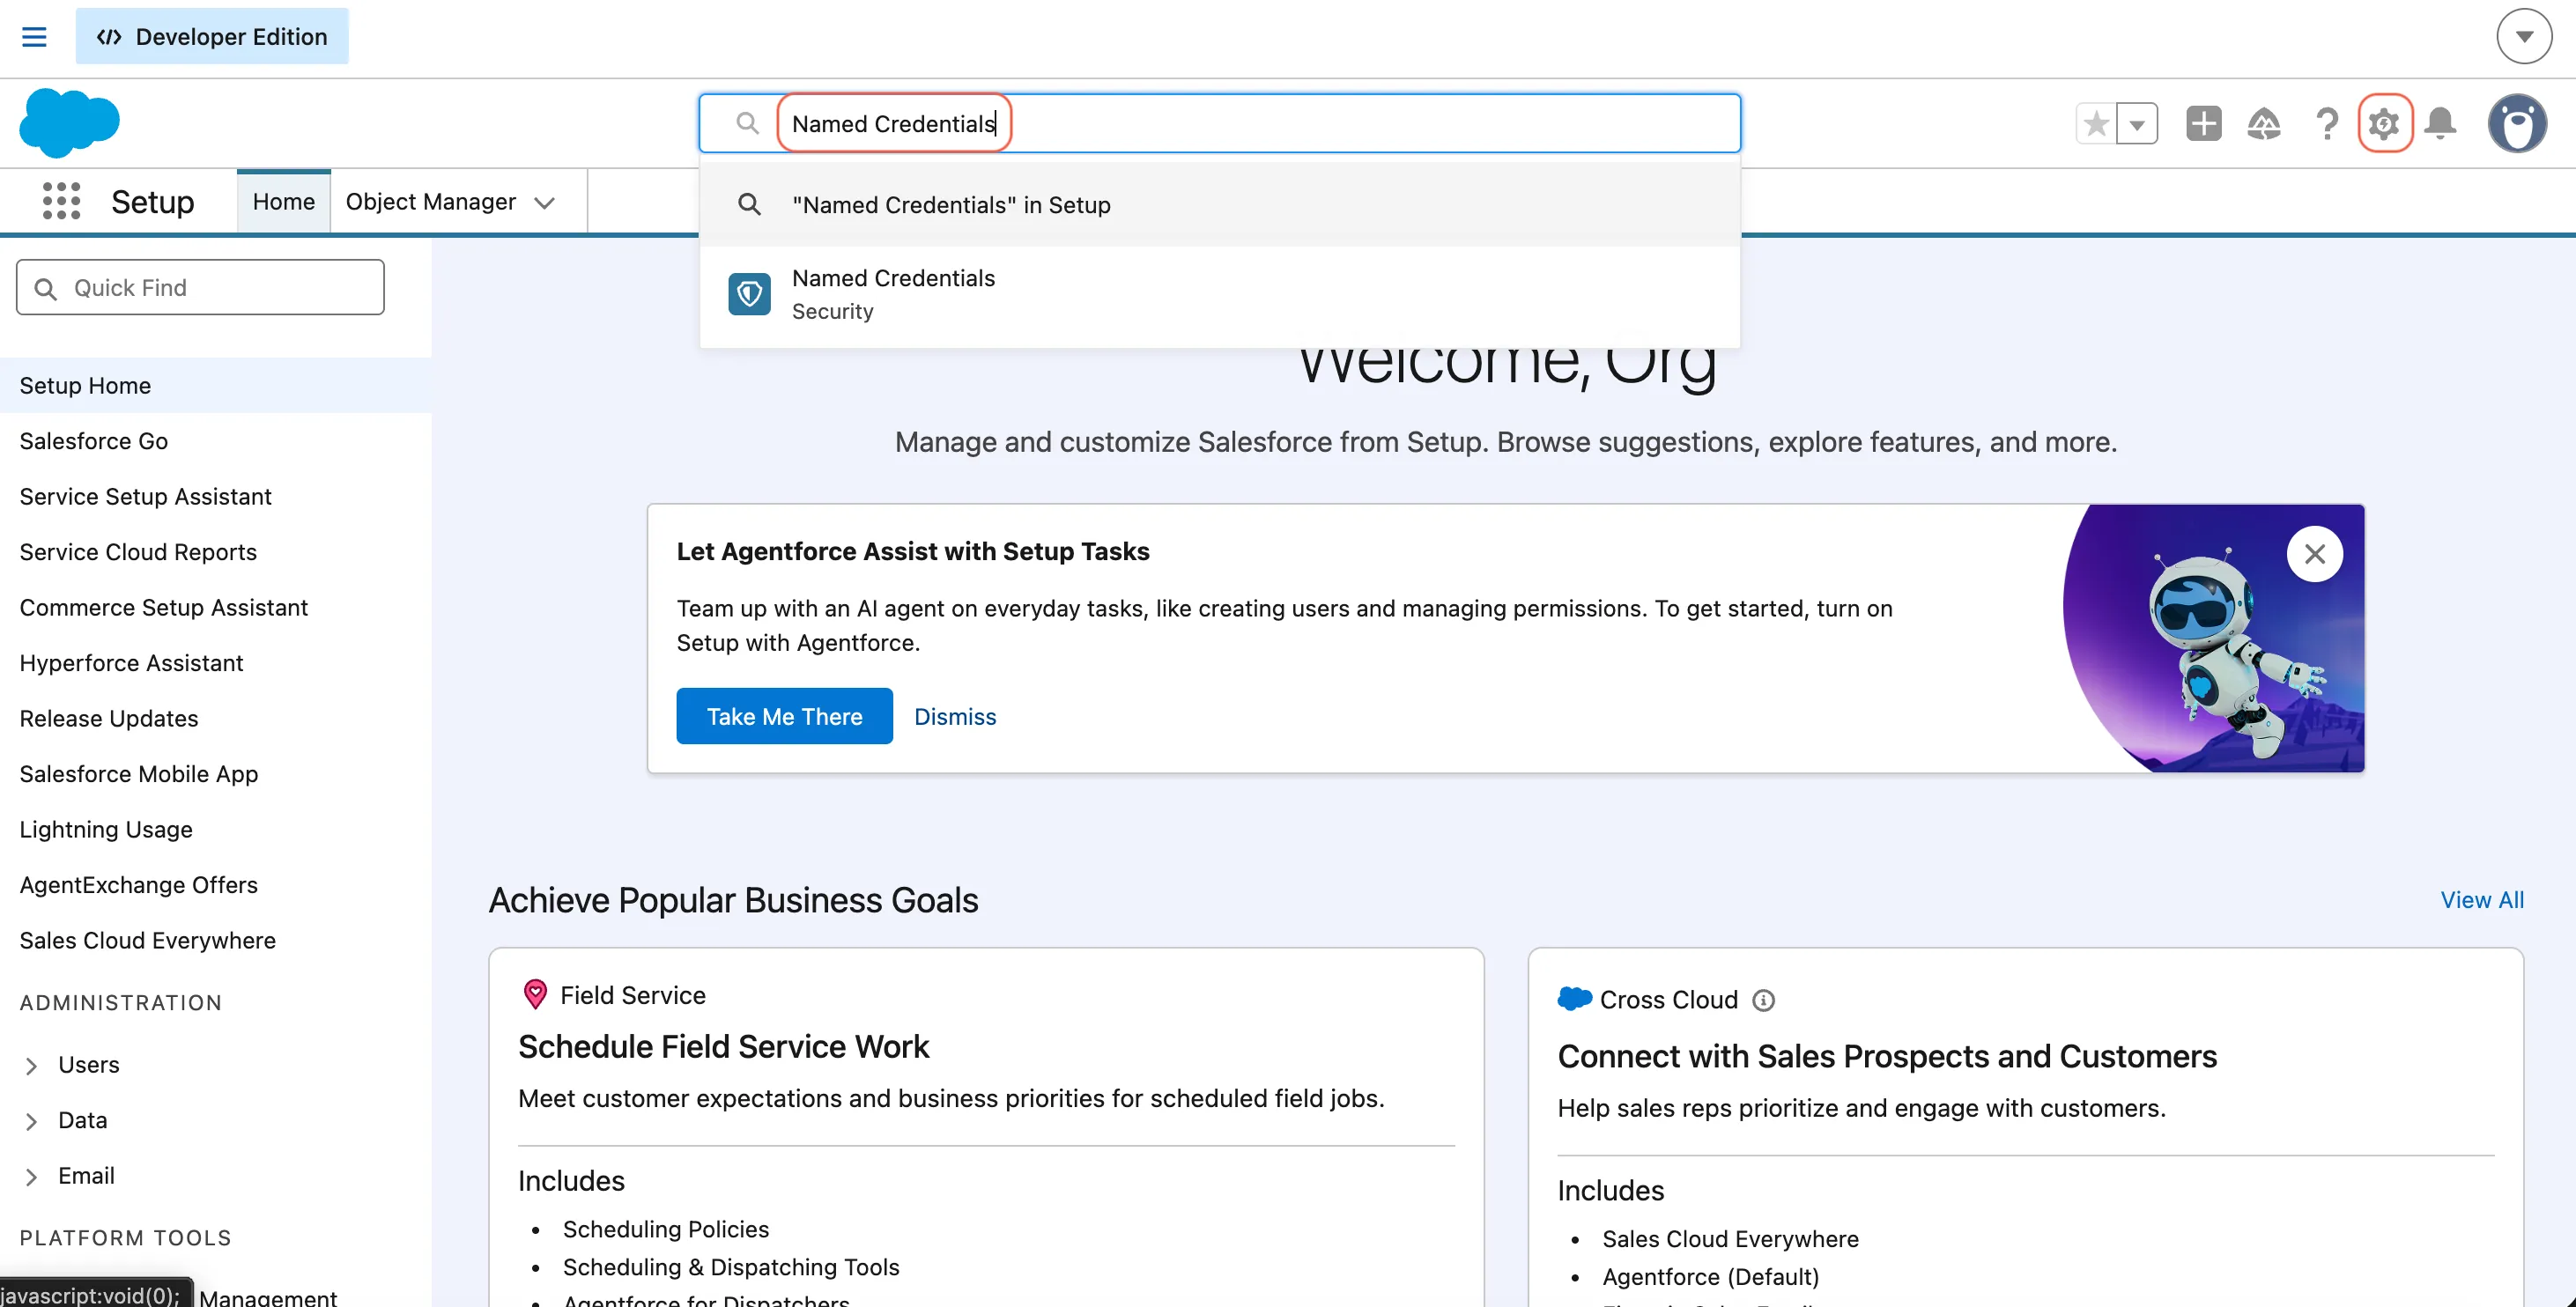
In Setup, search for Named Credentials in quick find.
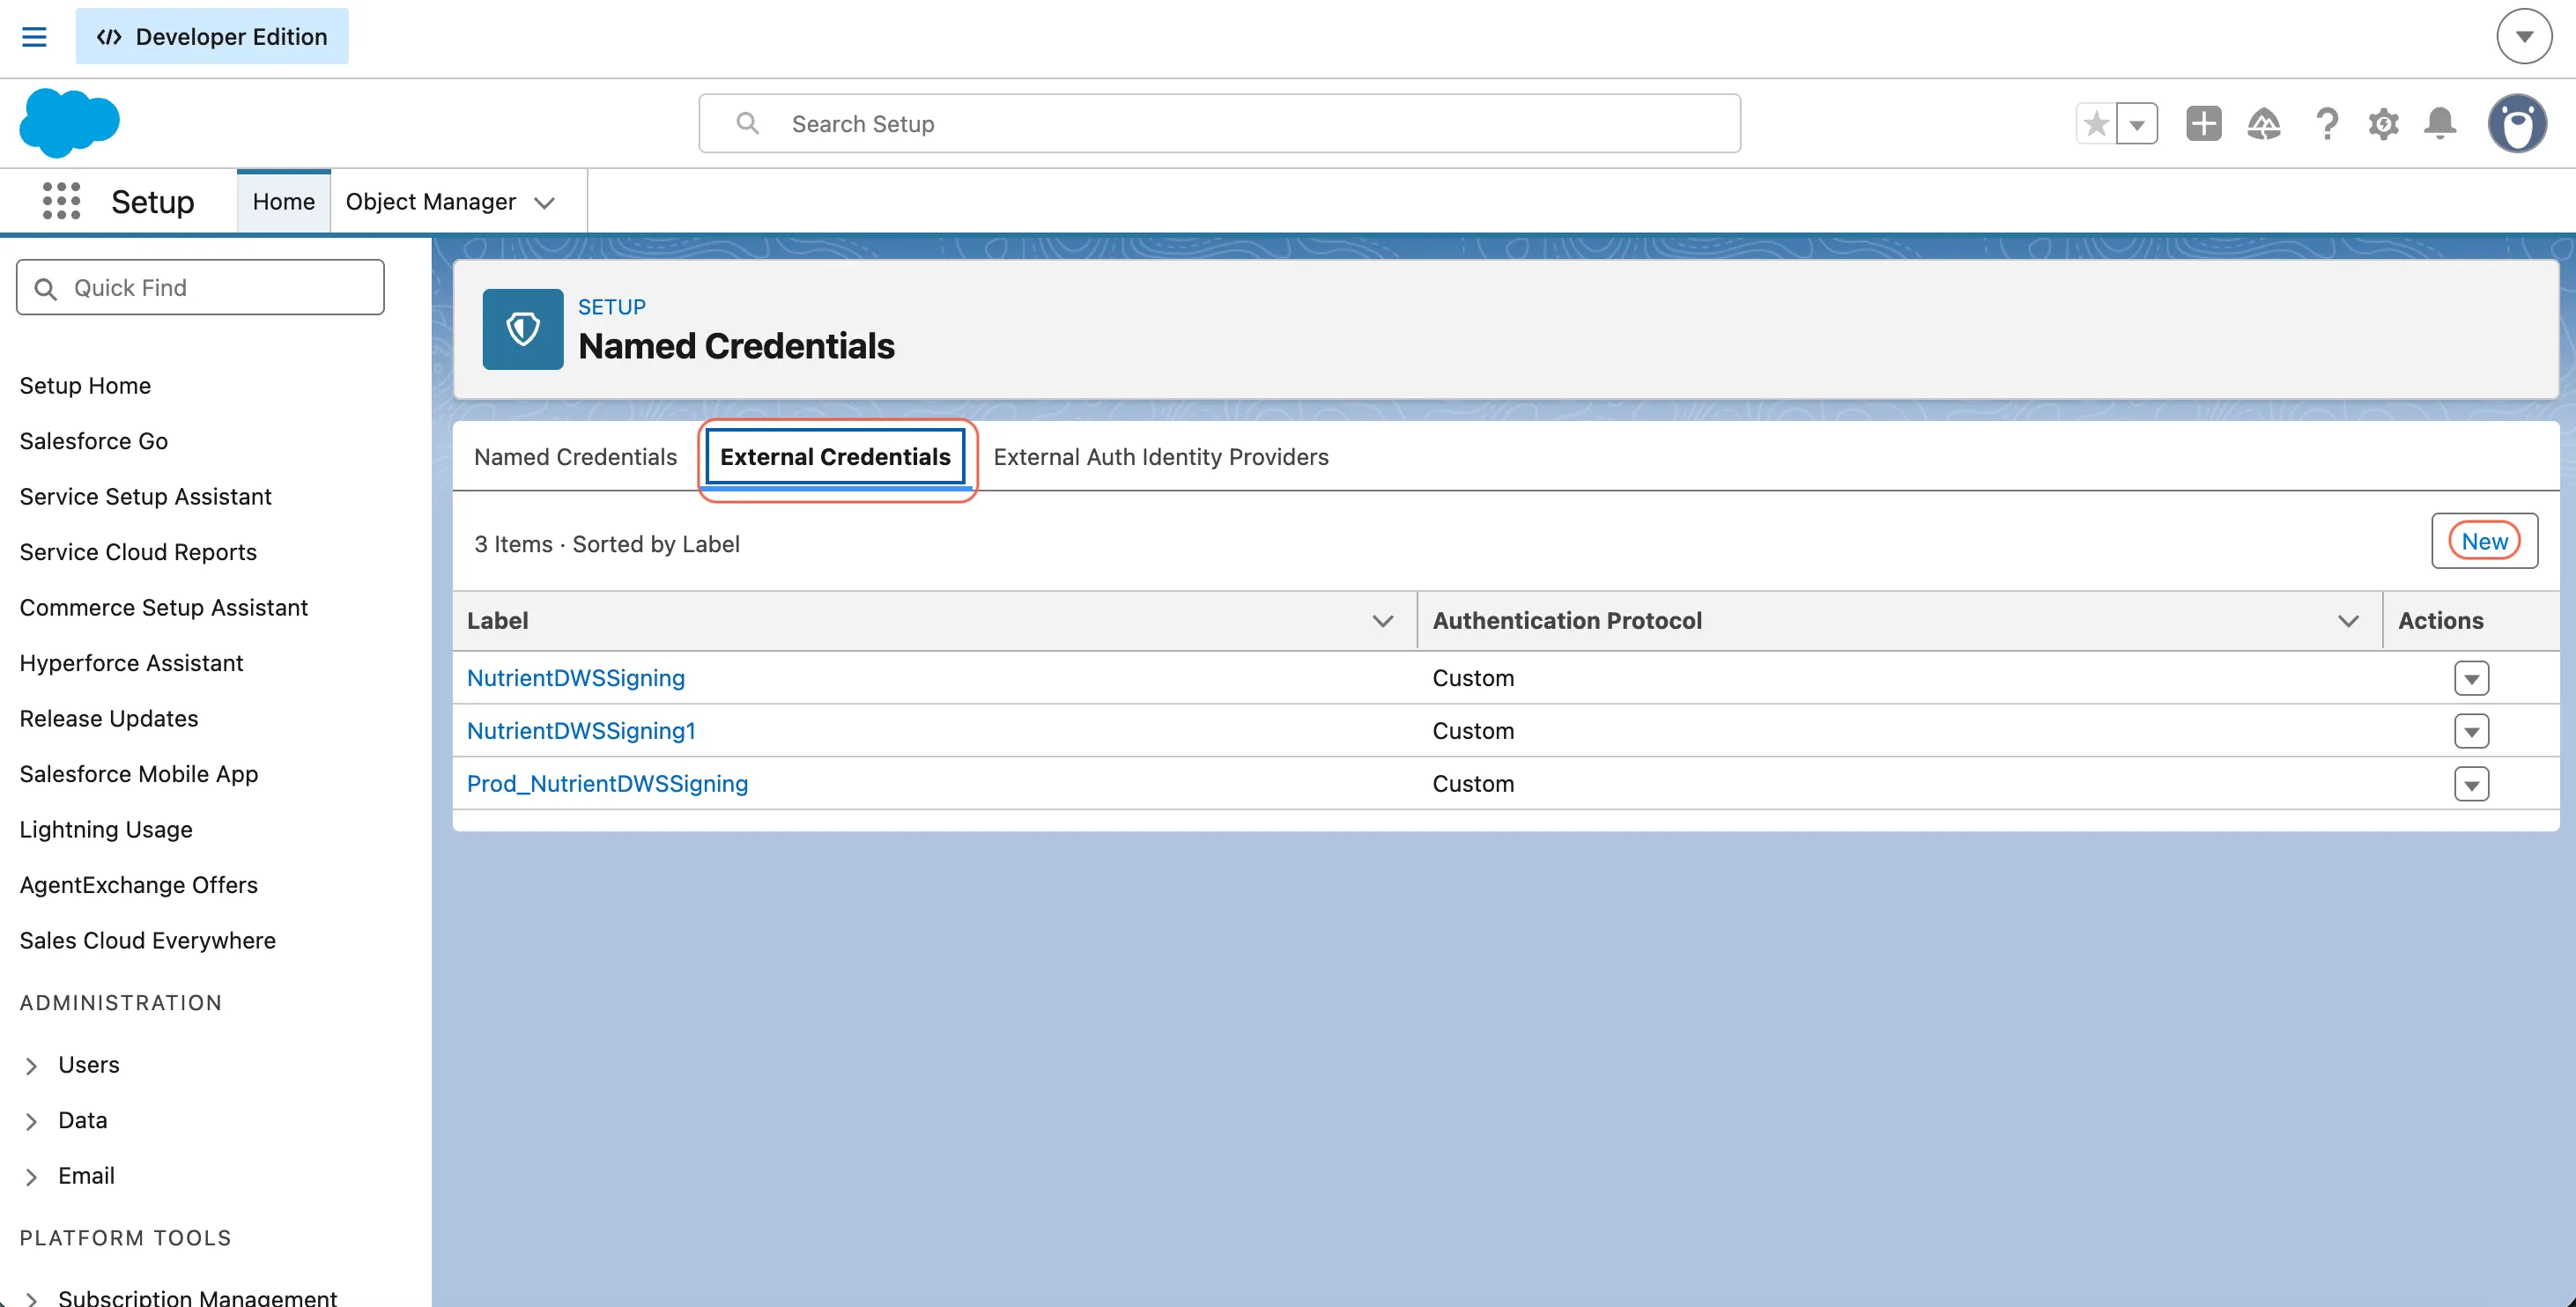
Open External Credentials.
Click New.
Enter the label/name, for example
NutrientDWSSigning.Set Authentication Protocol to
Custom.Save.
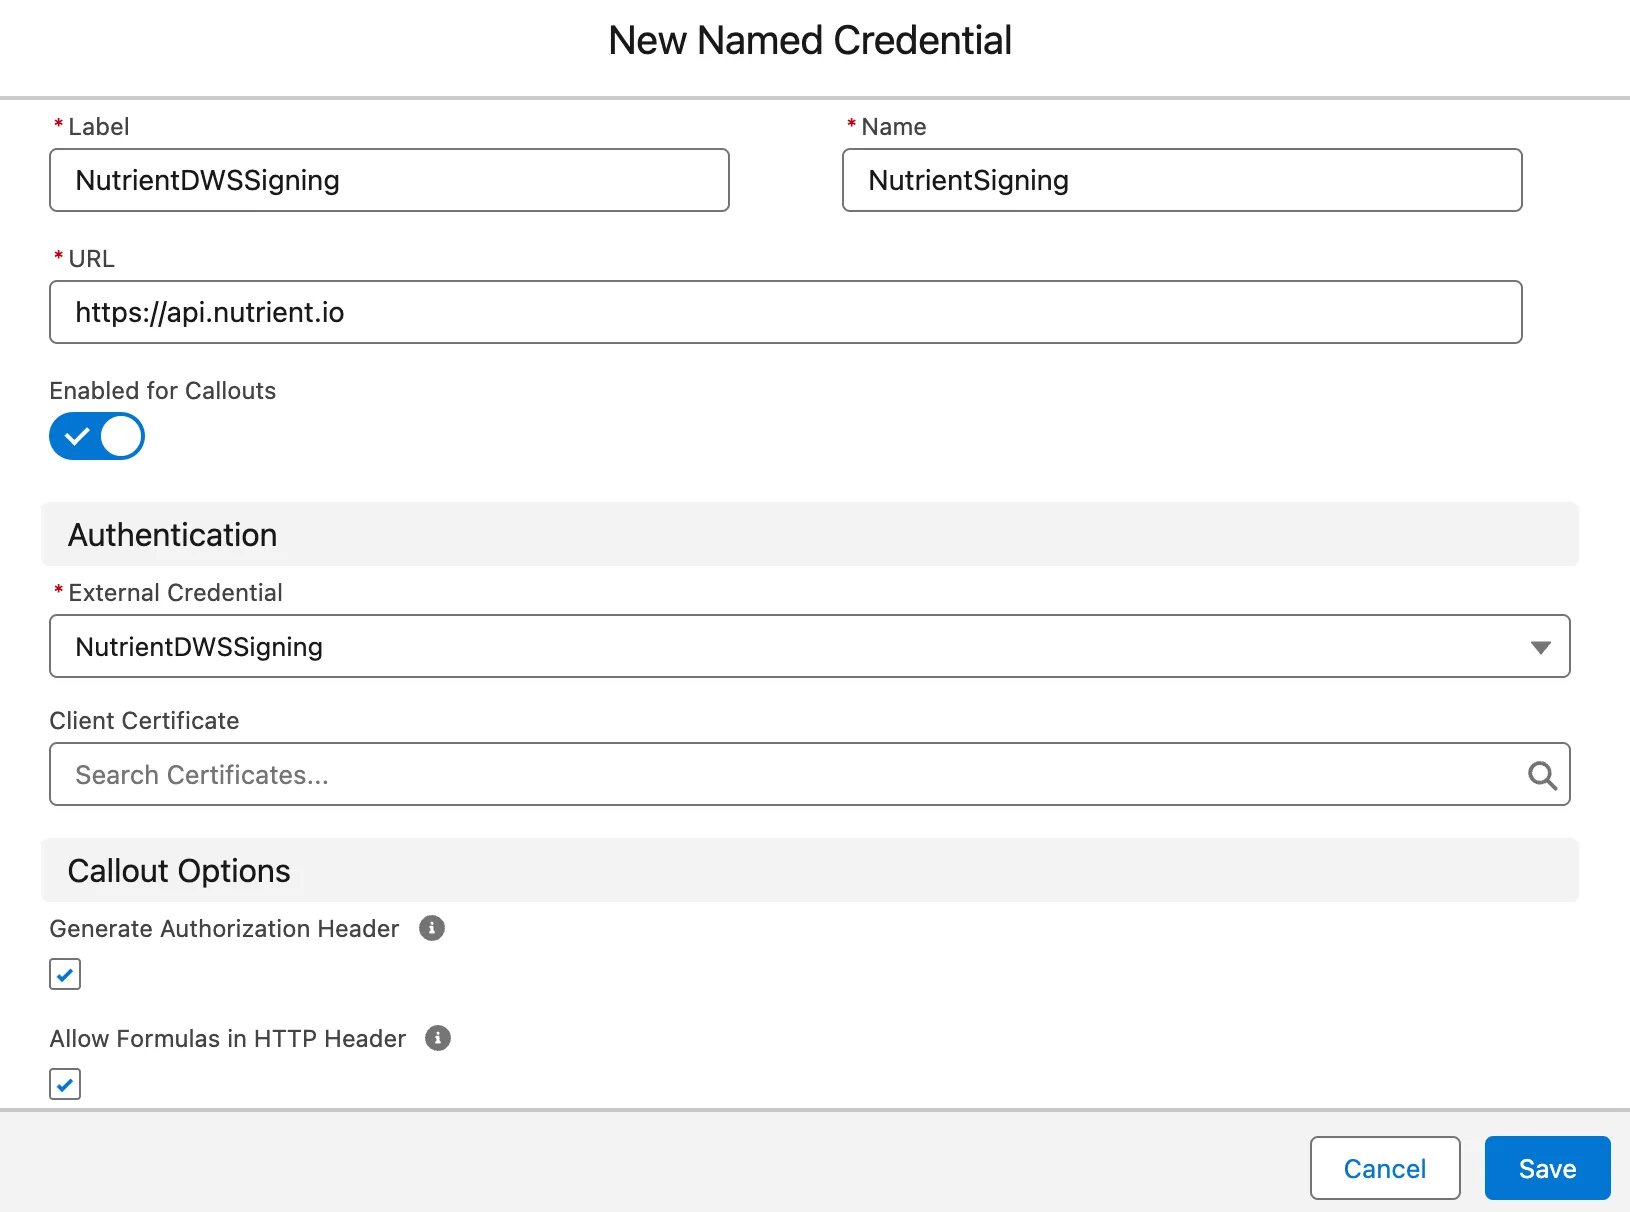
2. Create a named credential
In Setup, open Named Credentials.
Click New.
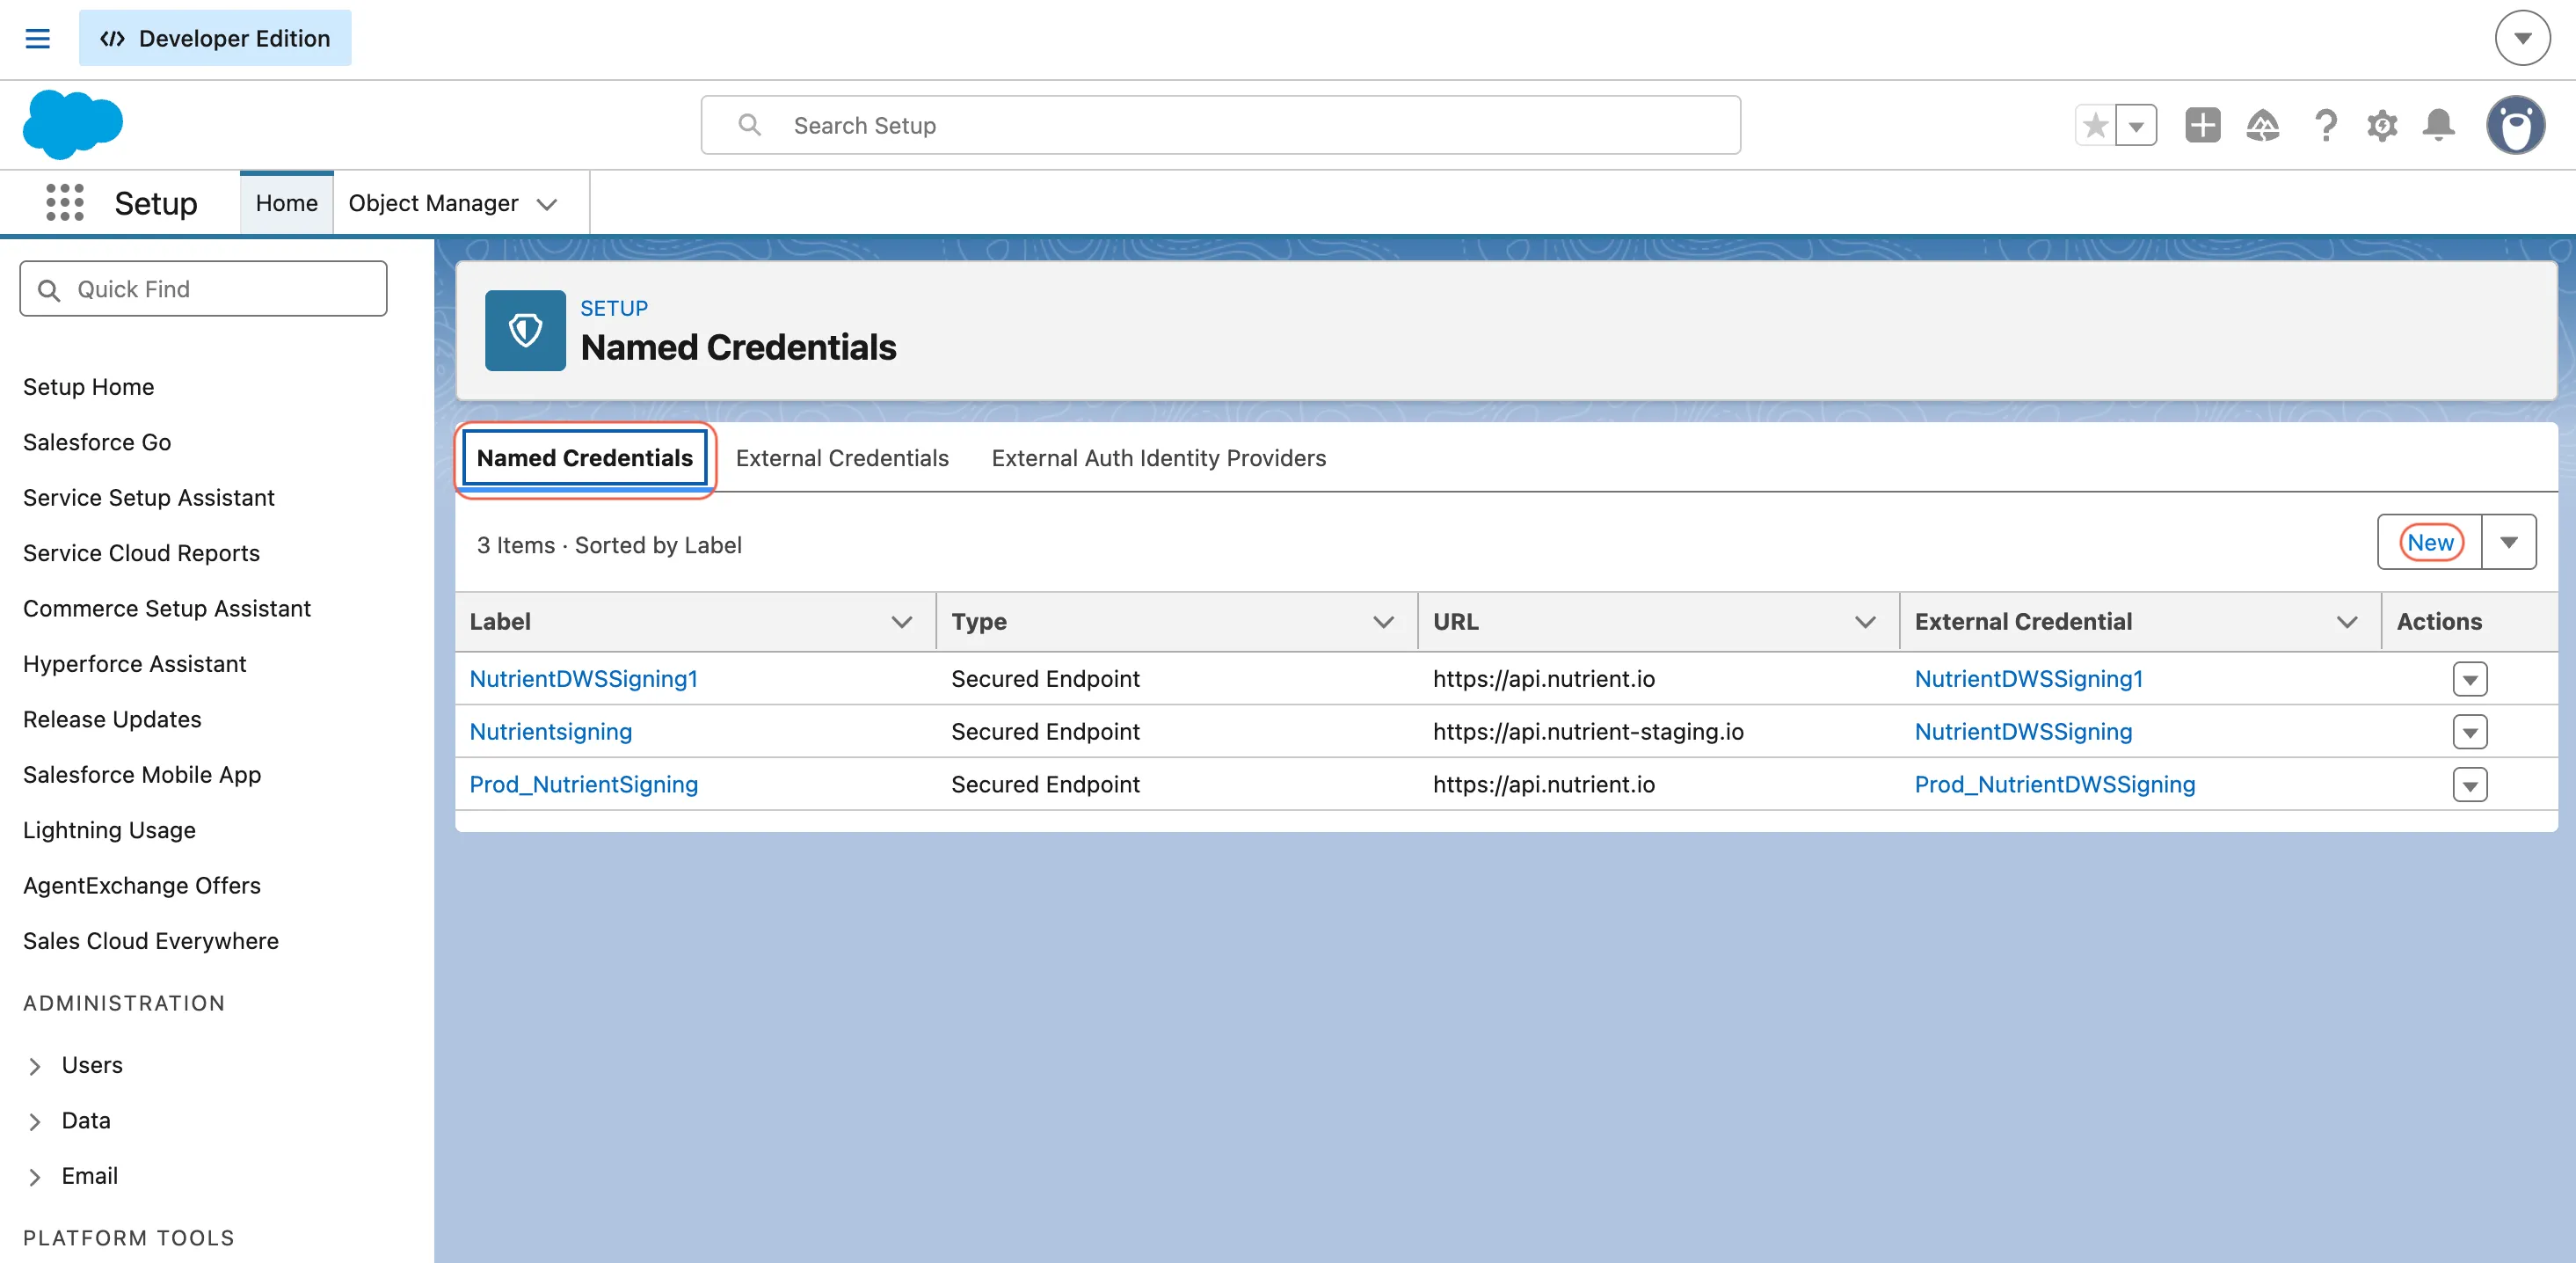
Enter the label/name and URL:
https://api.nutrient.io
Select the external credential you just created.
Enable:
- Generate Authorization Header
- Allow Formulas in HTTP Header
Save.
3. Store the API key and set the authorization header
Open the external credential from step 1.
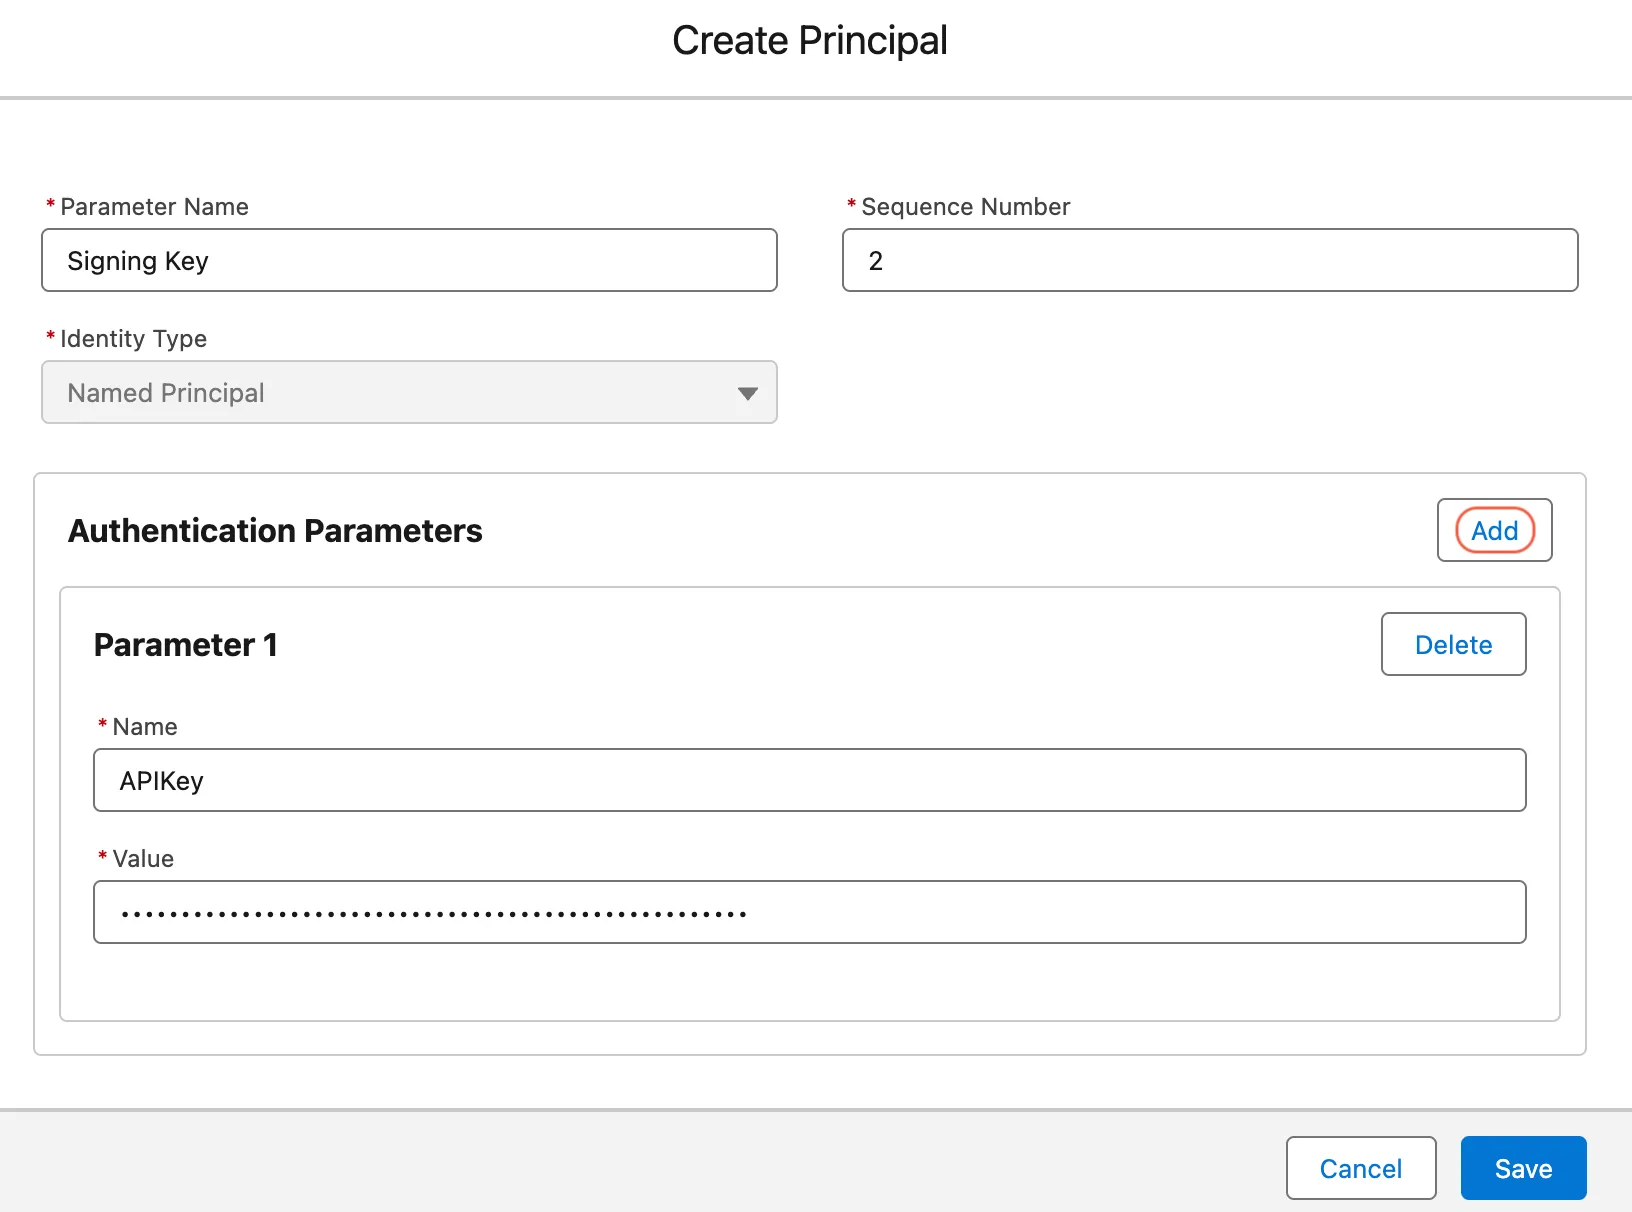
In Principals, click New.
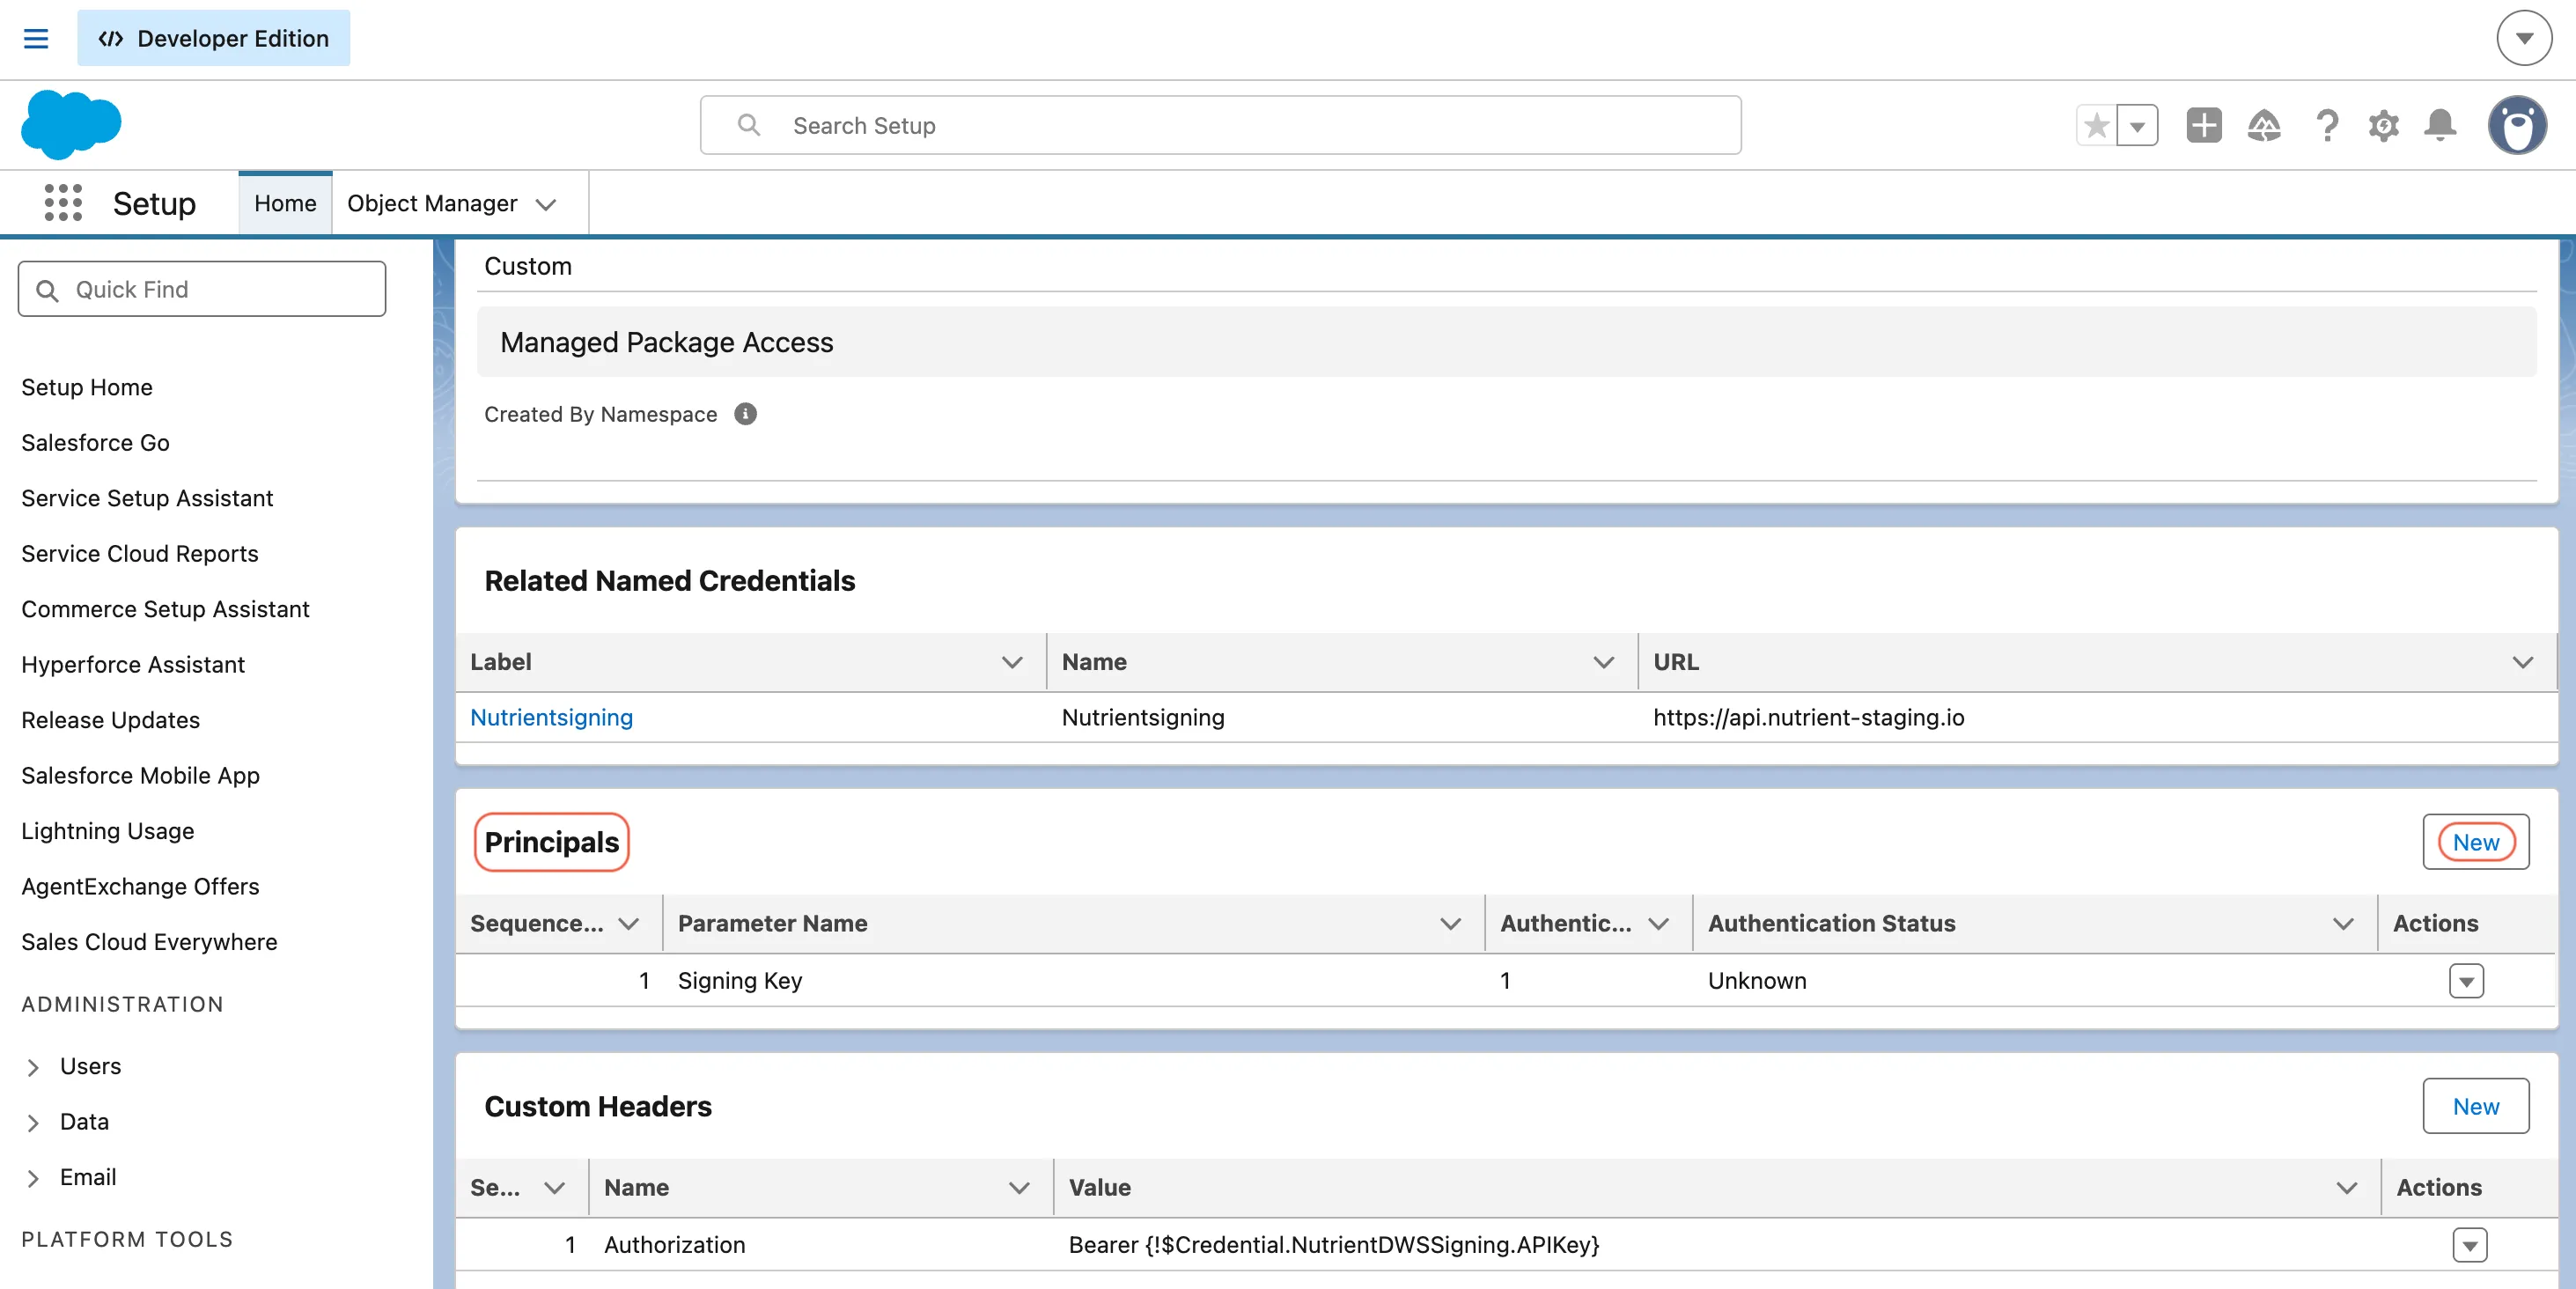
Create a
Named Principal(parameter name example:Signing Key).Add the authentication parameter:
- Name —
APIKey - Value — your DWS Signer API key
- Name —
Save.
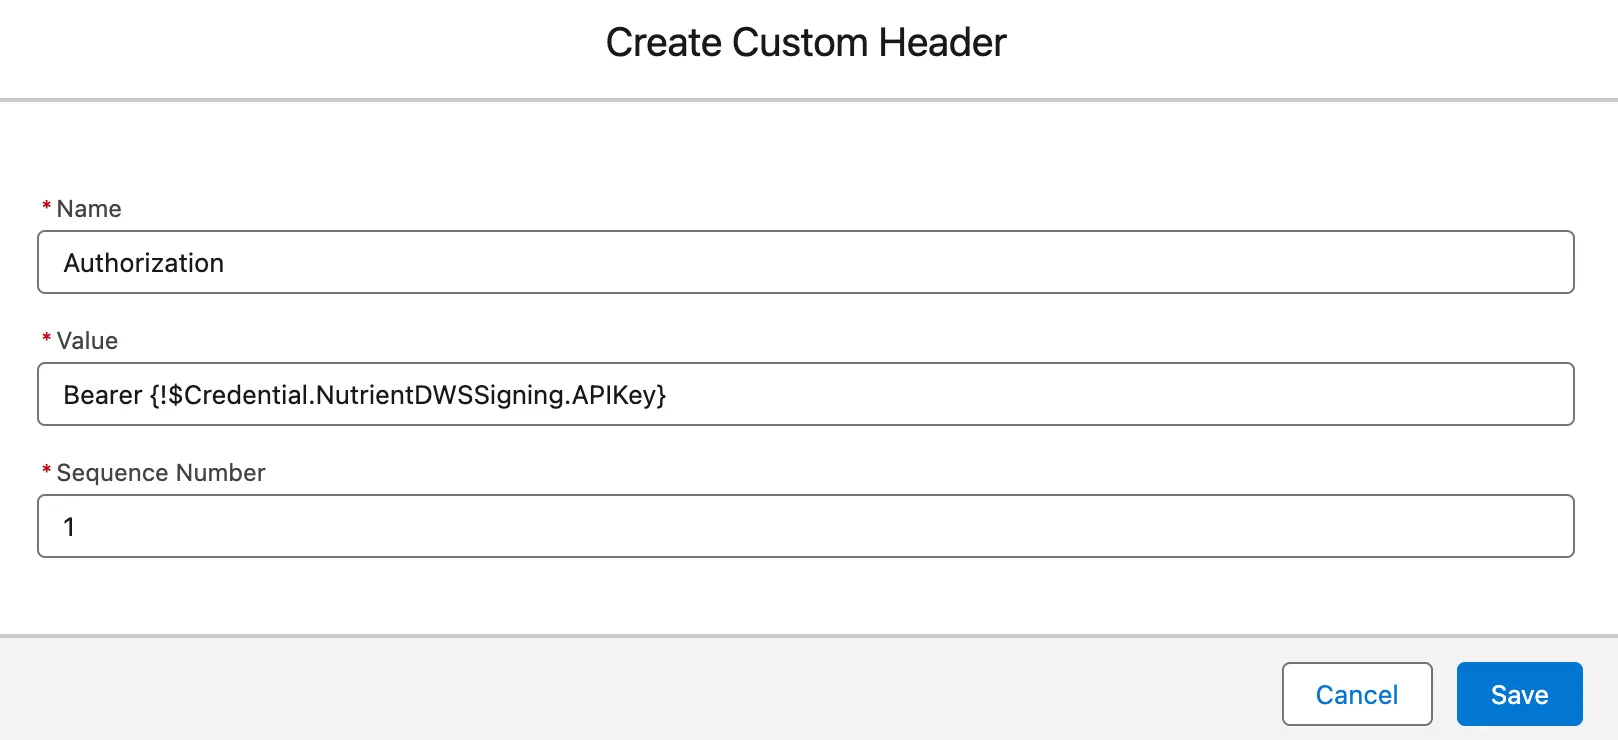
In Custom Headers, click New.
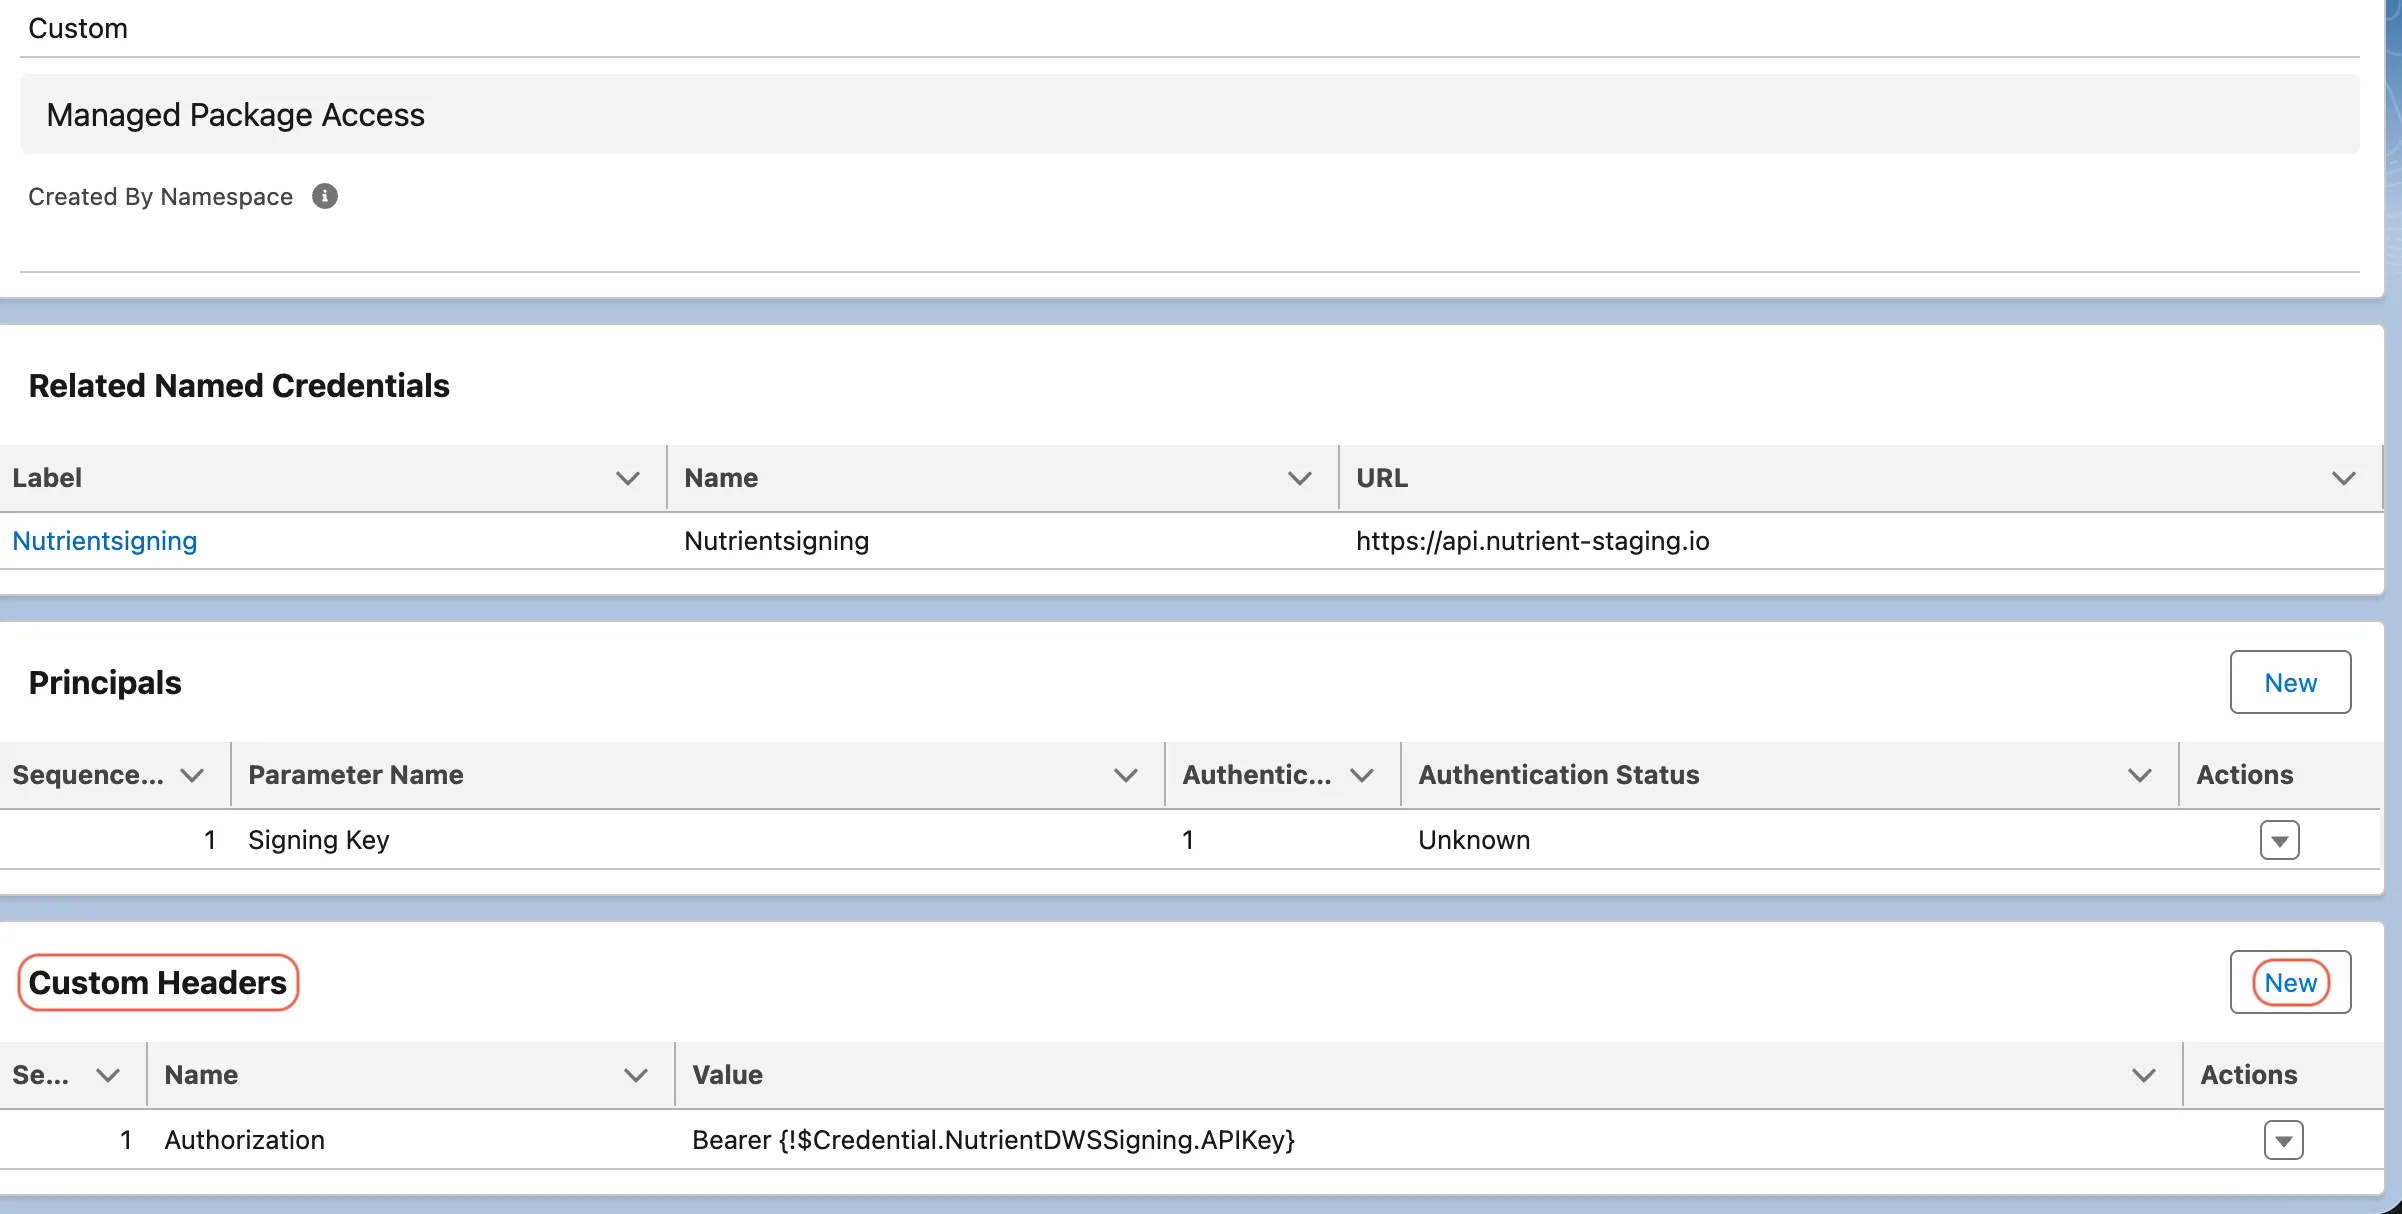
Add the header values:
- Name —
Authorization - Value —
Bearer {!$Credential.NutrientDWSSigning.APIKey} - Sequence Number —
1
- Name —
Save.
4. Grant users access to the DWS external credential
Salesforce requires explicit permission before a user can use a stored external credential.
In the previous steps, you created an external credential and stored the DWS API key in a principal named something like:
NutrientDWSSigning - Signing Key
This principal represents the DWS API key Salesforce uses when making outbound signing requests. Any Salesforce user who sends documents for signing, tests the signing connection, or runs signing-related callouts must be granted access to this external credential principal. Otherwise, the DWS API key may be configured correctly, but Salesforce will block the user from using it.
What this enables
Granting external credential principal access enables Salesforce to make authenticated outbound calls to DWS in response to a user action. For example:
User clicks Send for Signing → Nutrient Salesforce app makes a callout → Named Credential points to DWS → External Credential applies the stored DWS API key → DWS receives the request
Without this permission, the callout can fail even if the named credential and API key are correct.
Option A — Quick setup for testing
For a first-time setup or test organization, you can grant access directly on the packaged Nutrient permission sets.
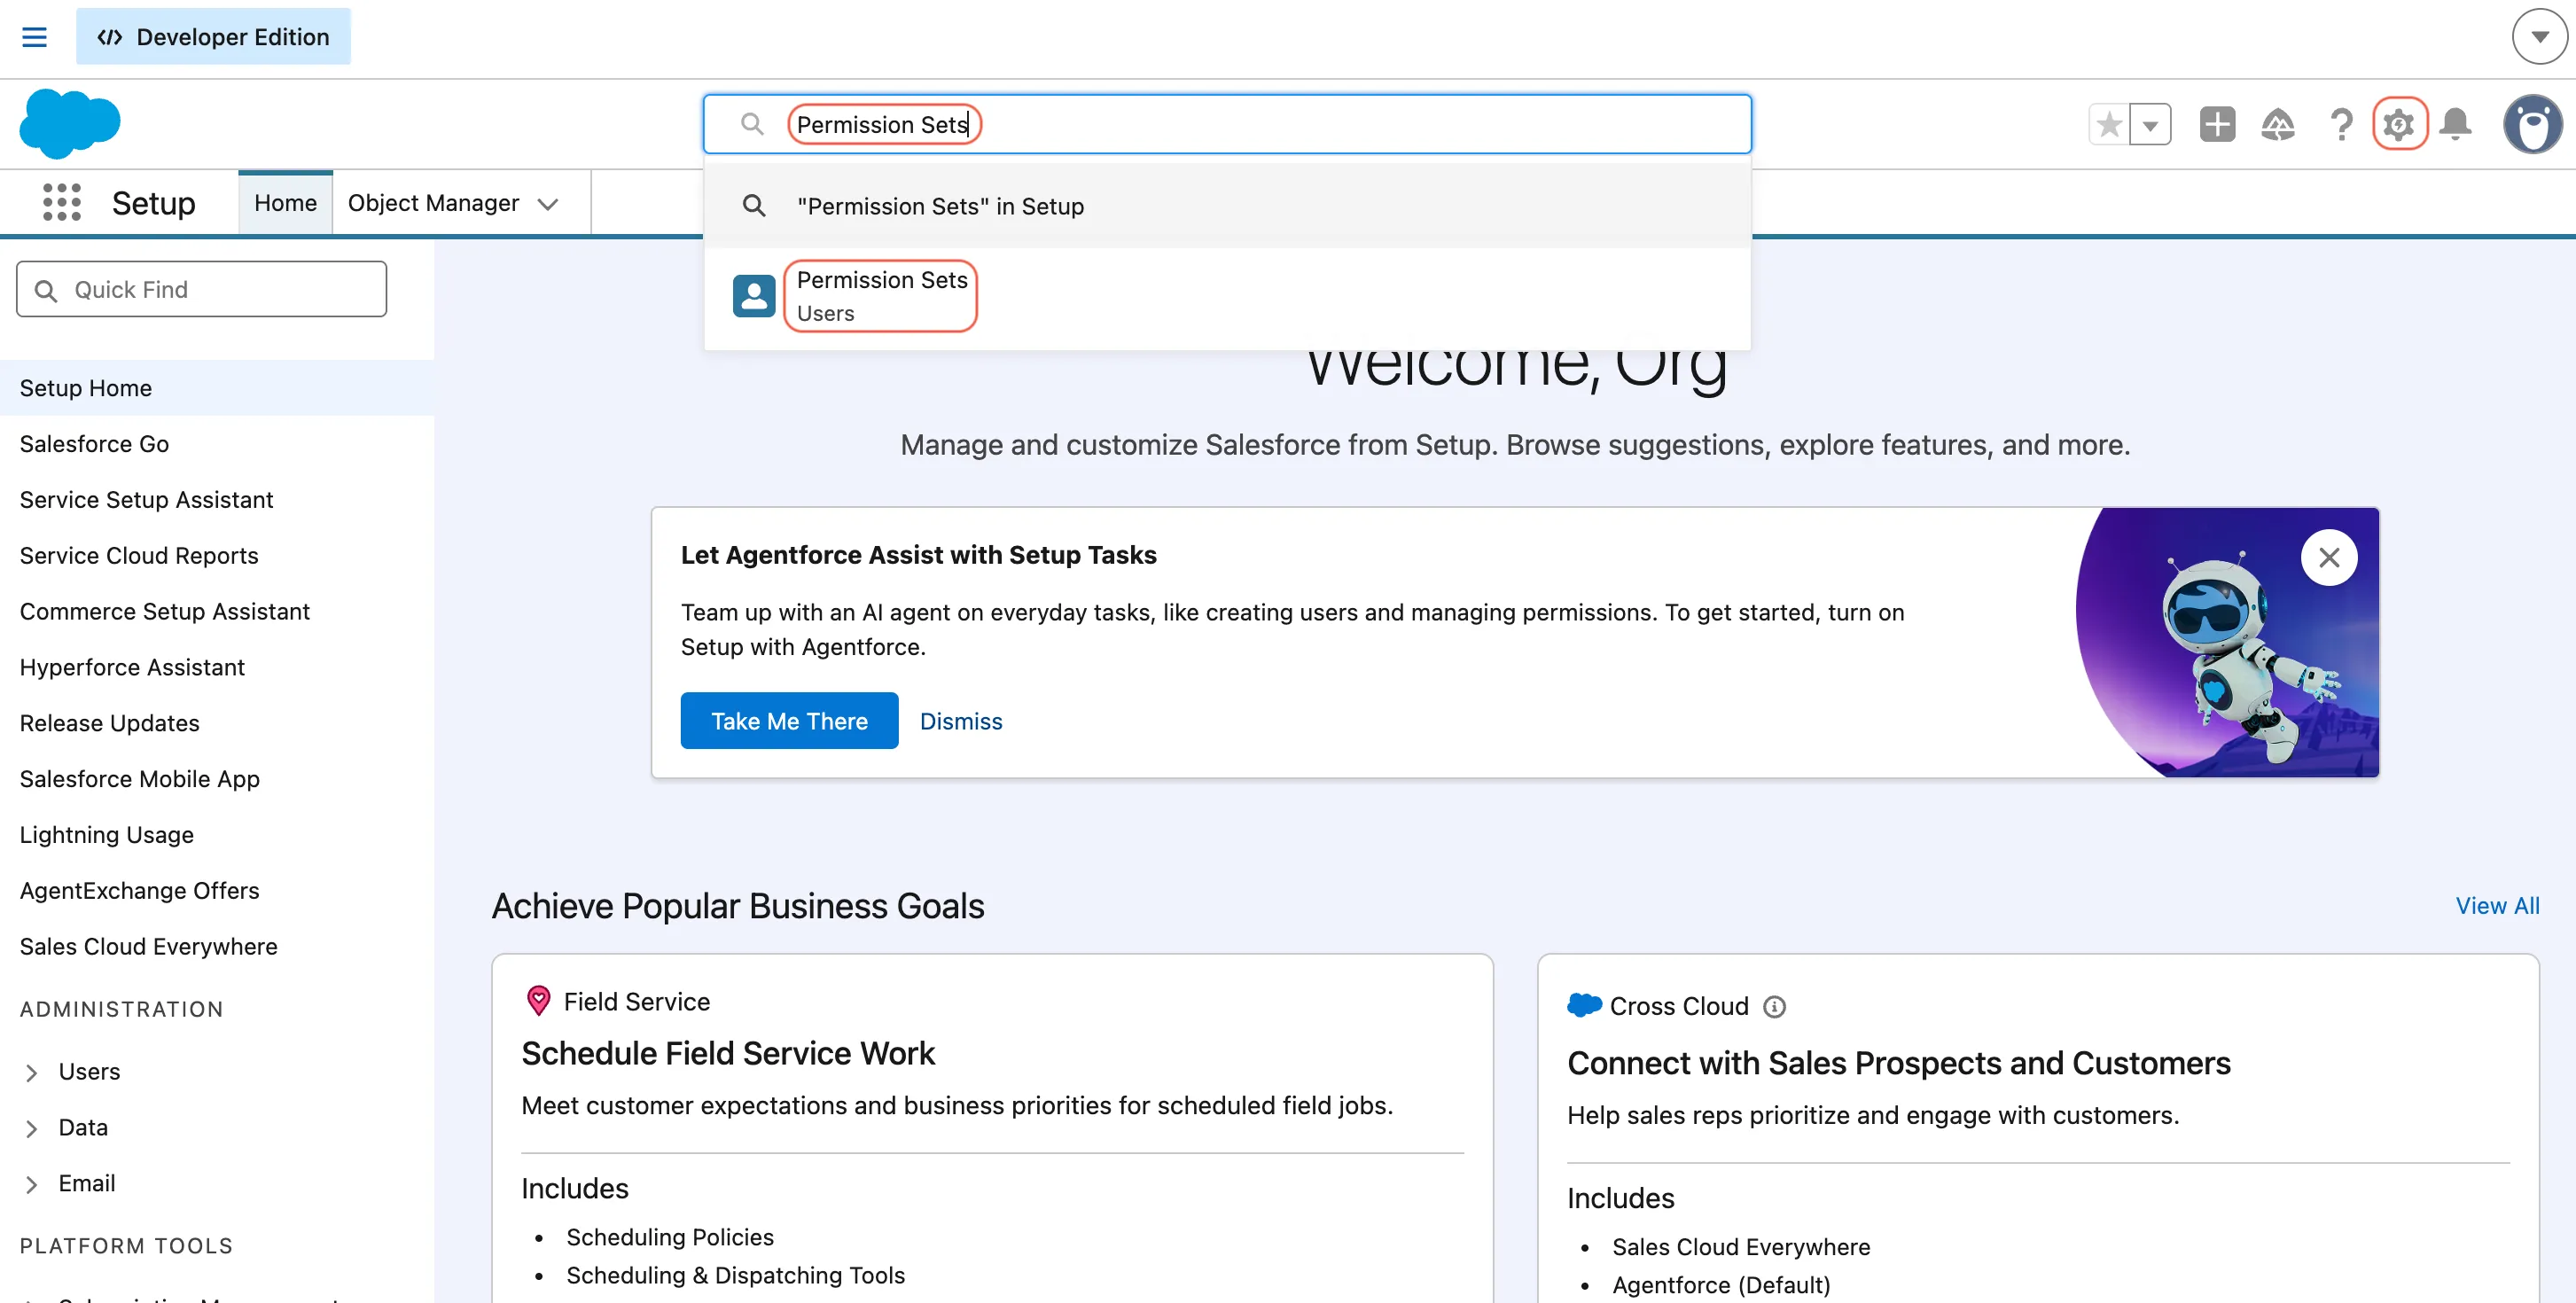
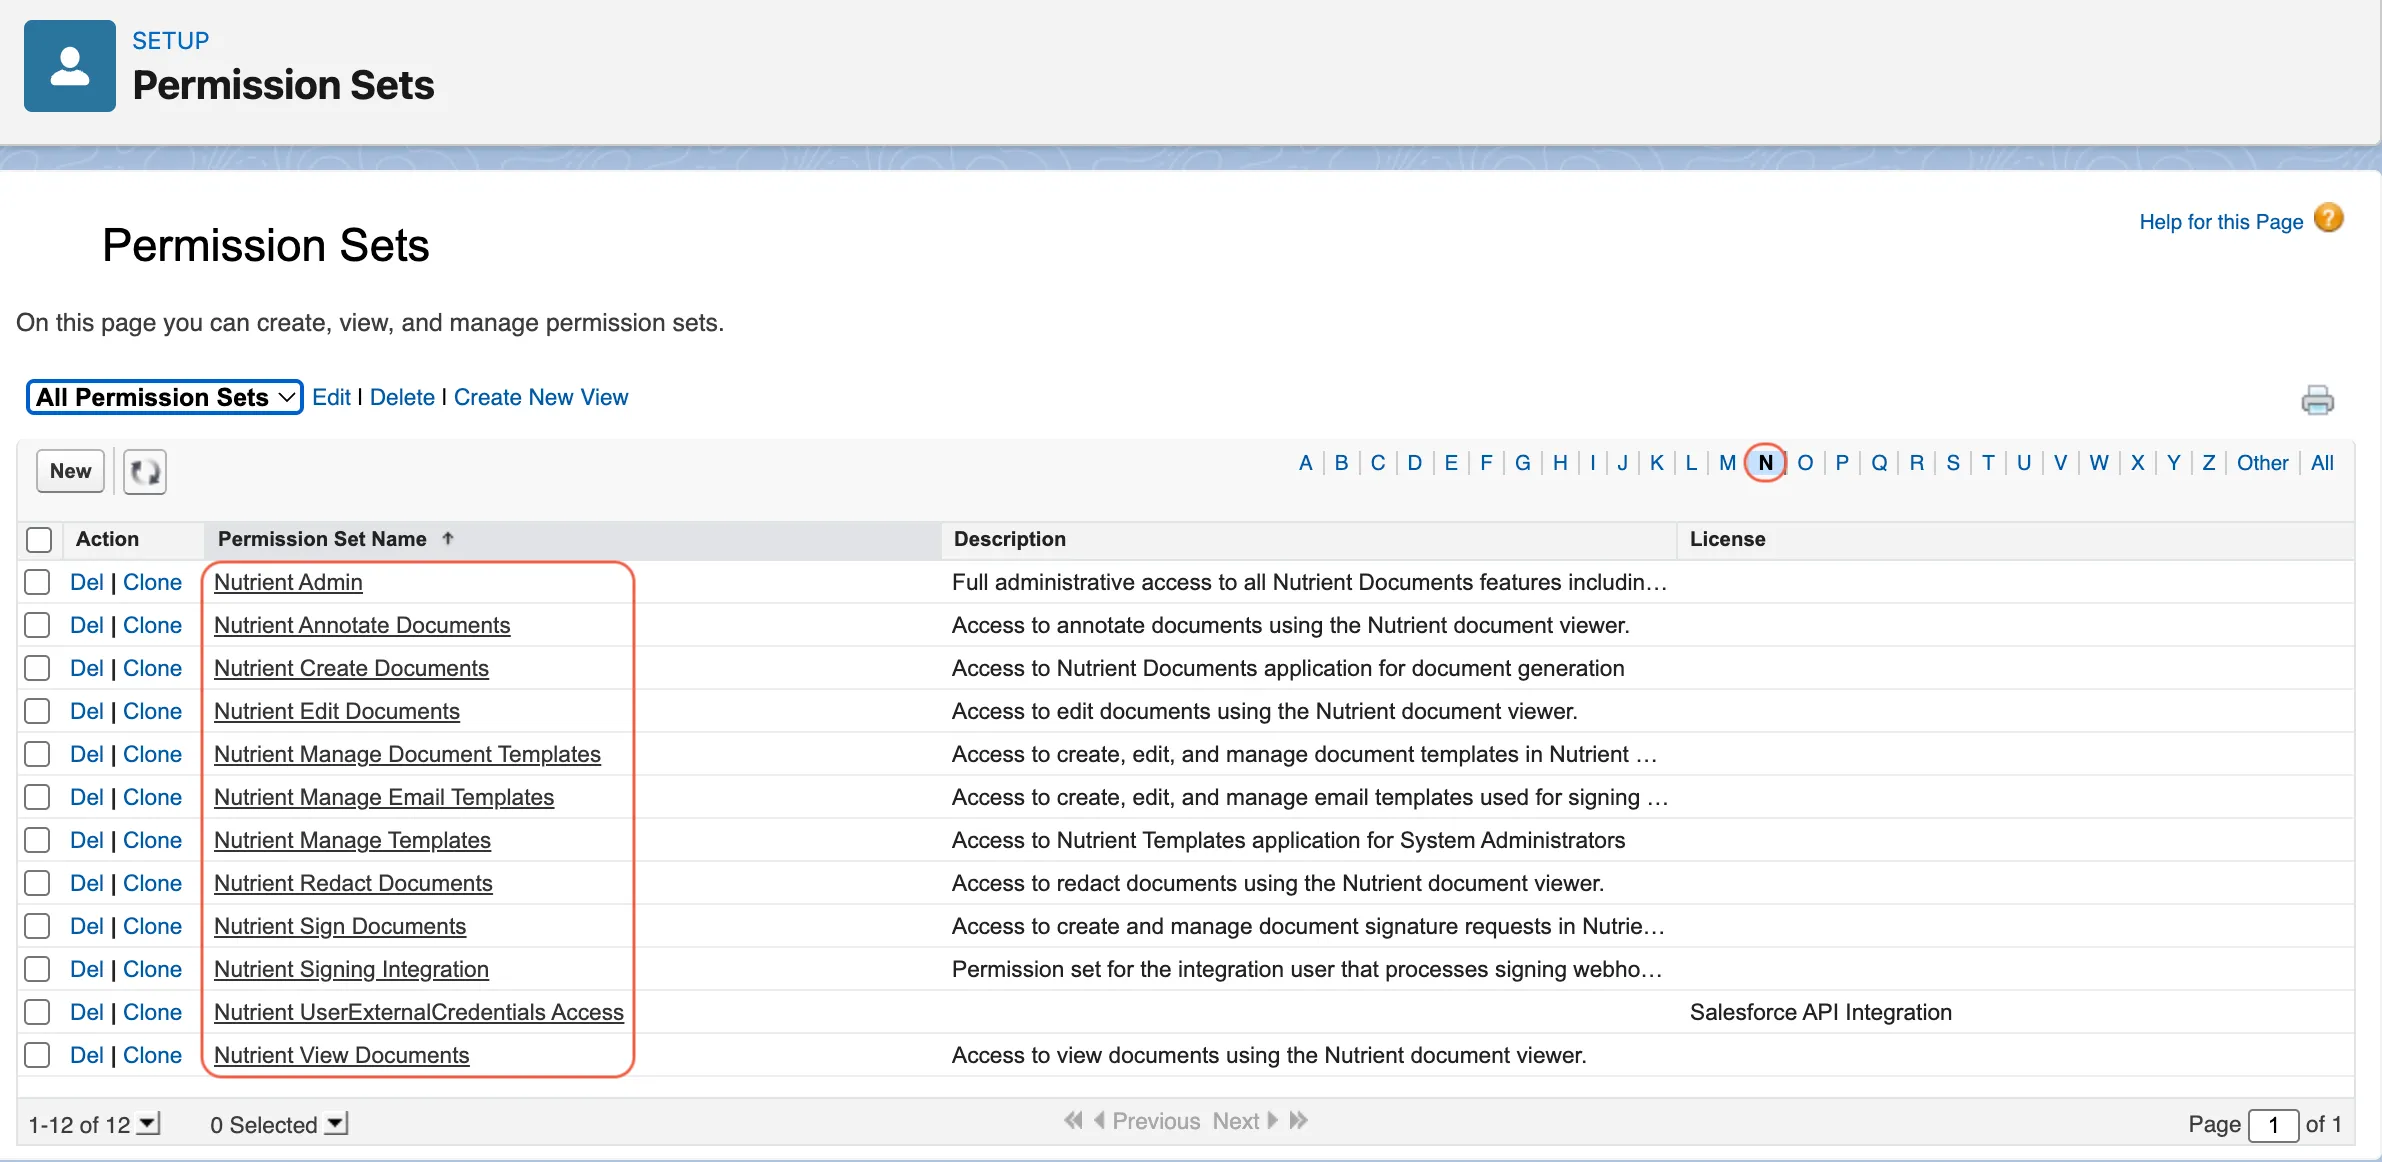
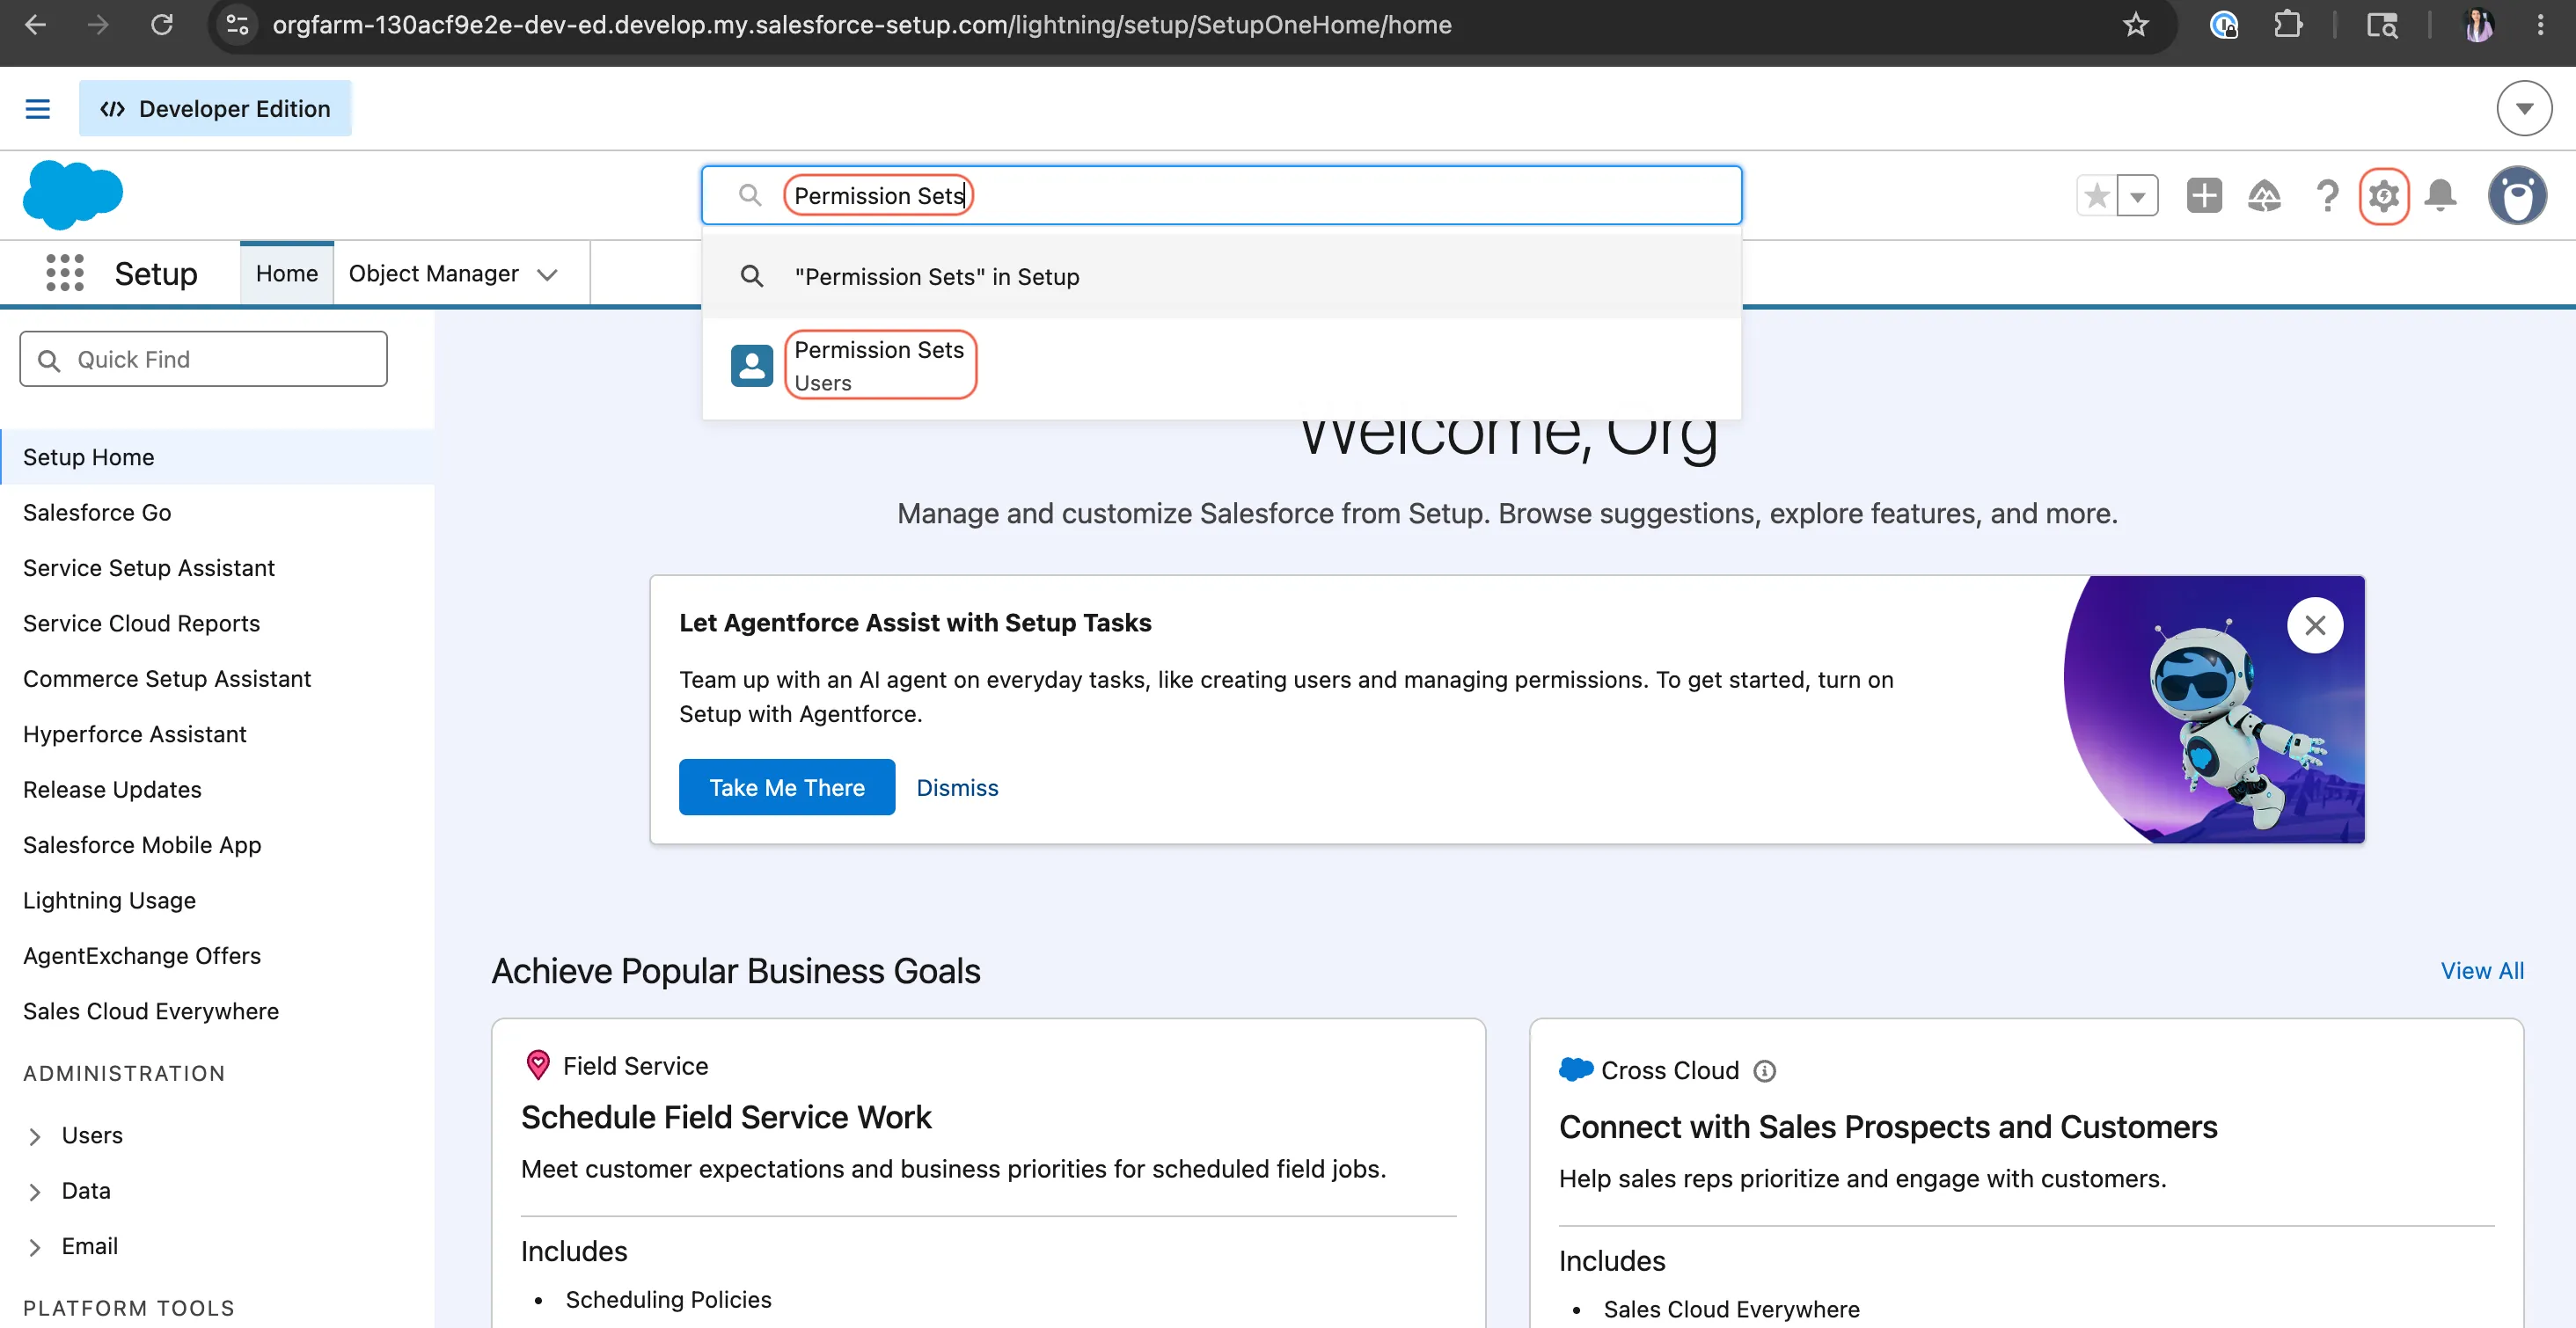
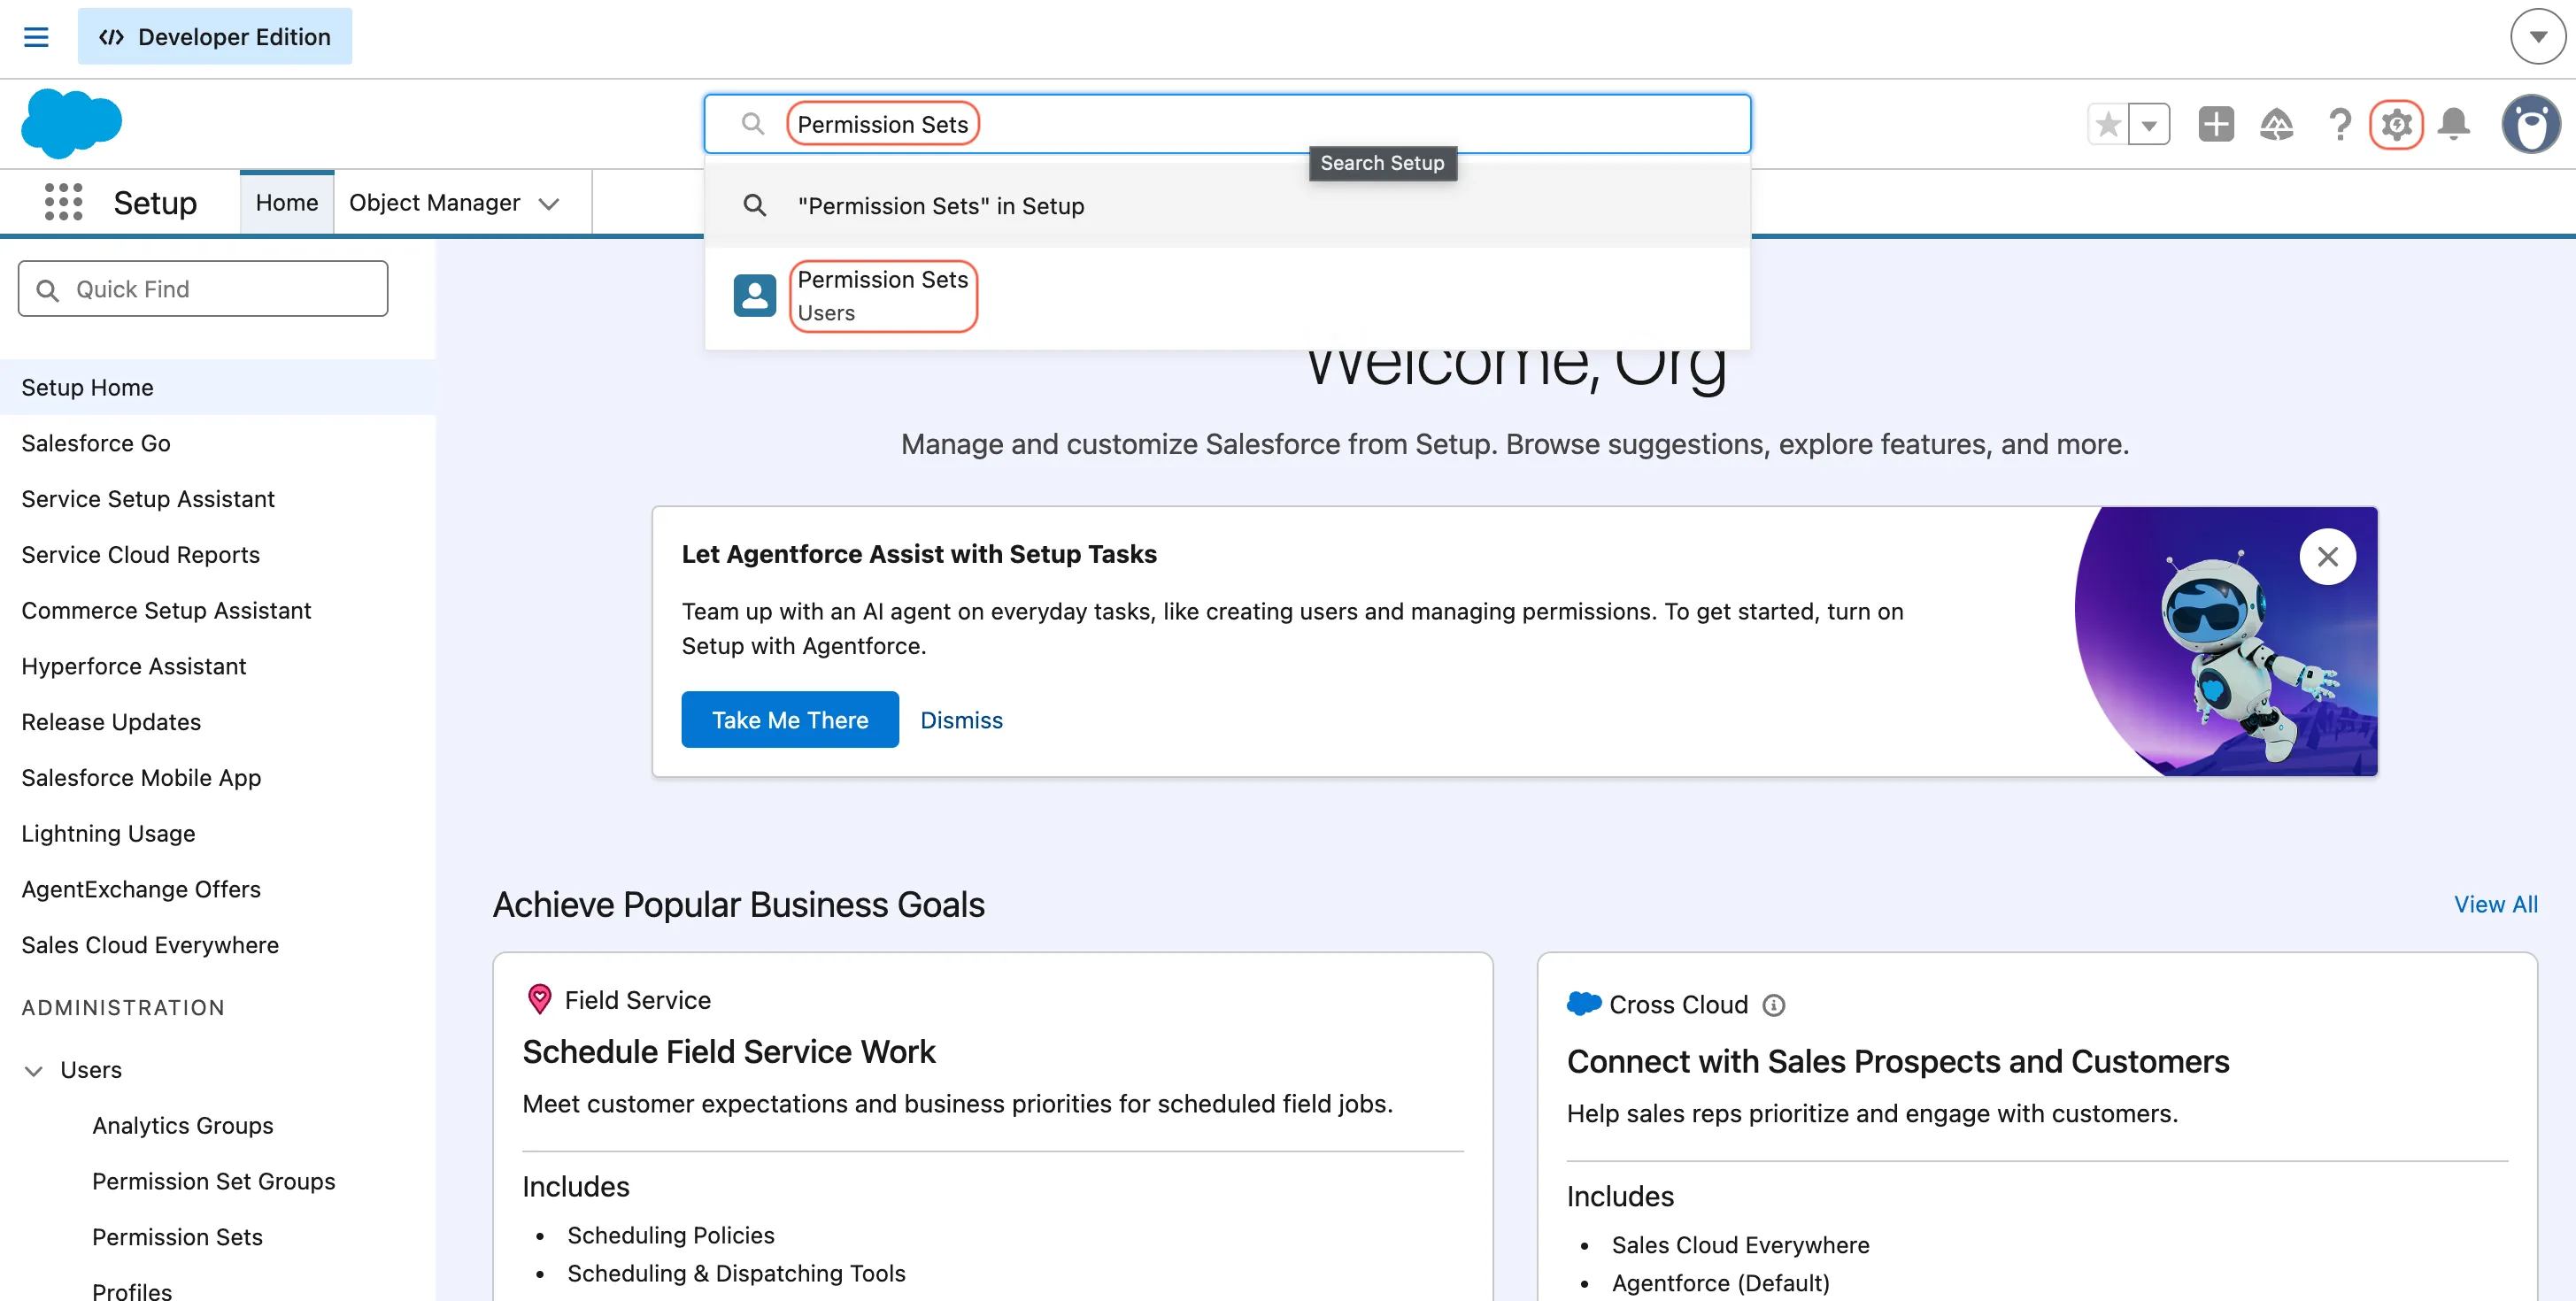
In Setup, search for Permission Sets in quick find.
Open each relevant Nutrient permission set:
Nutrient_AdminNutrient_Sign_DocumentsNutrient_Signing_Integration
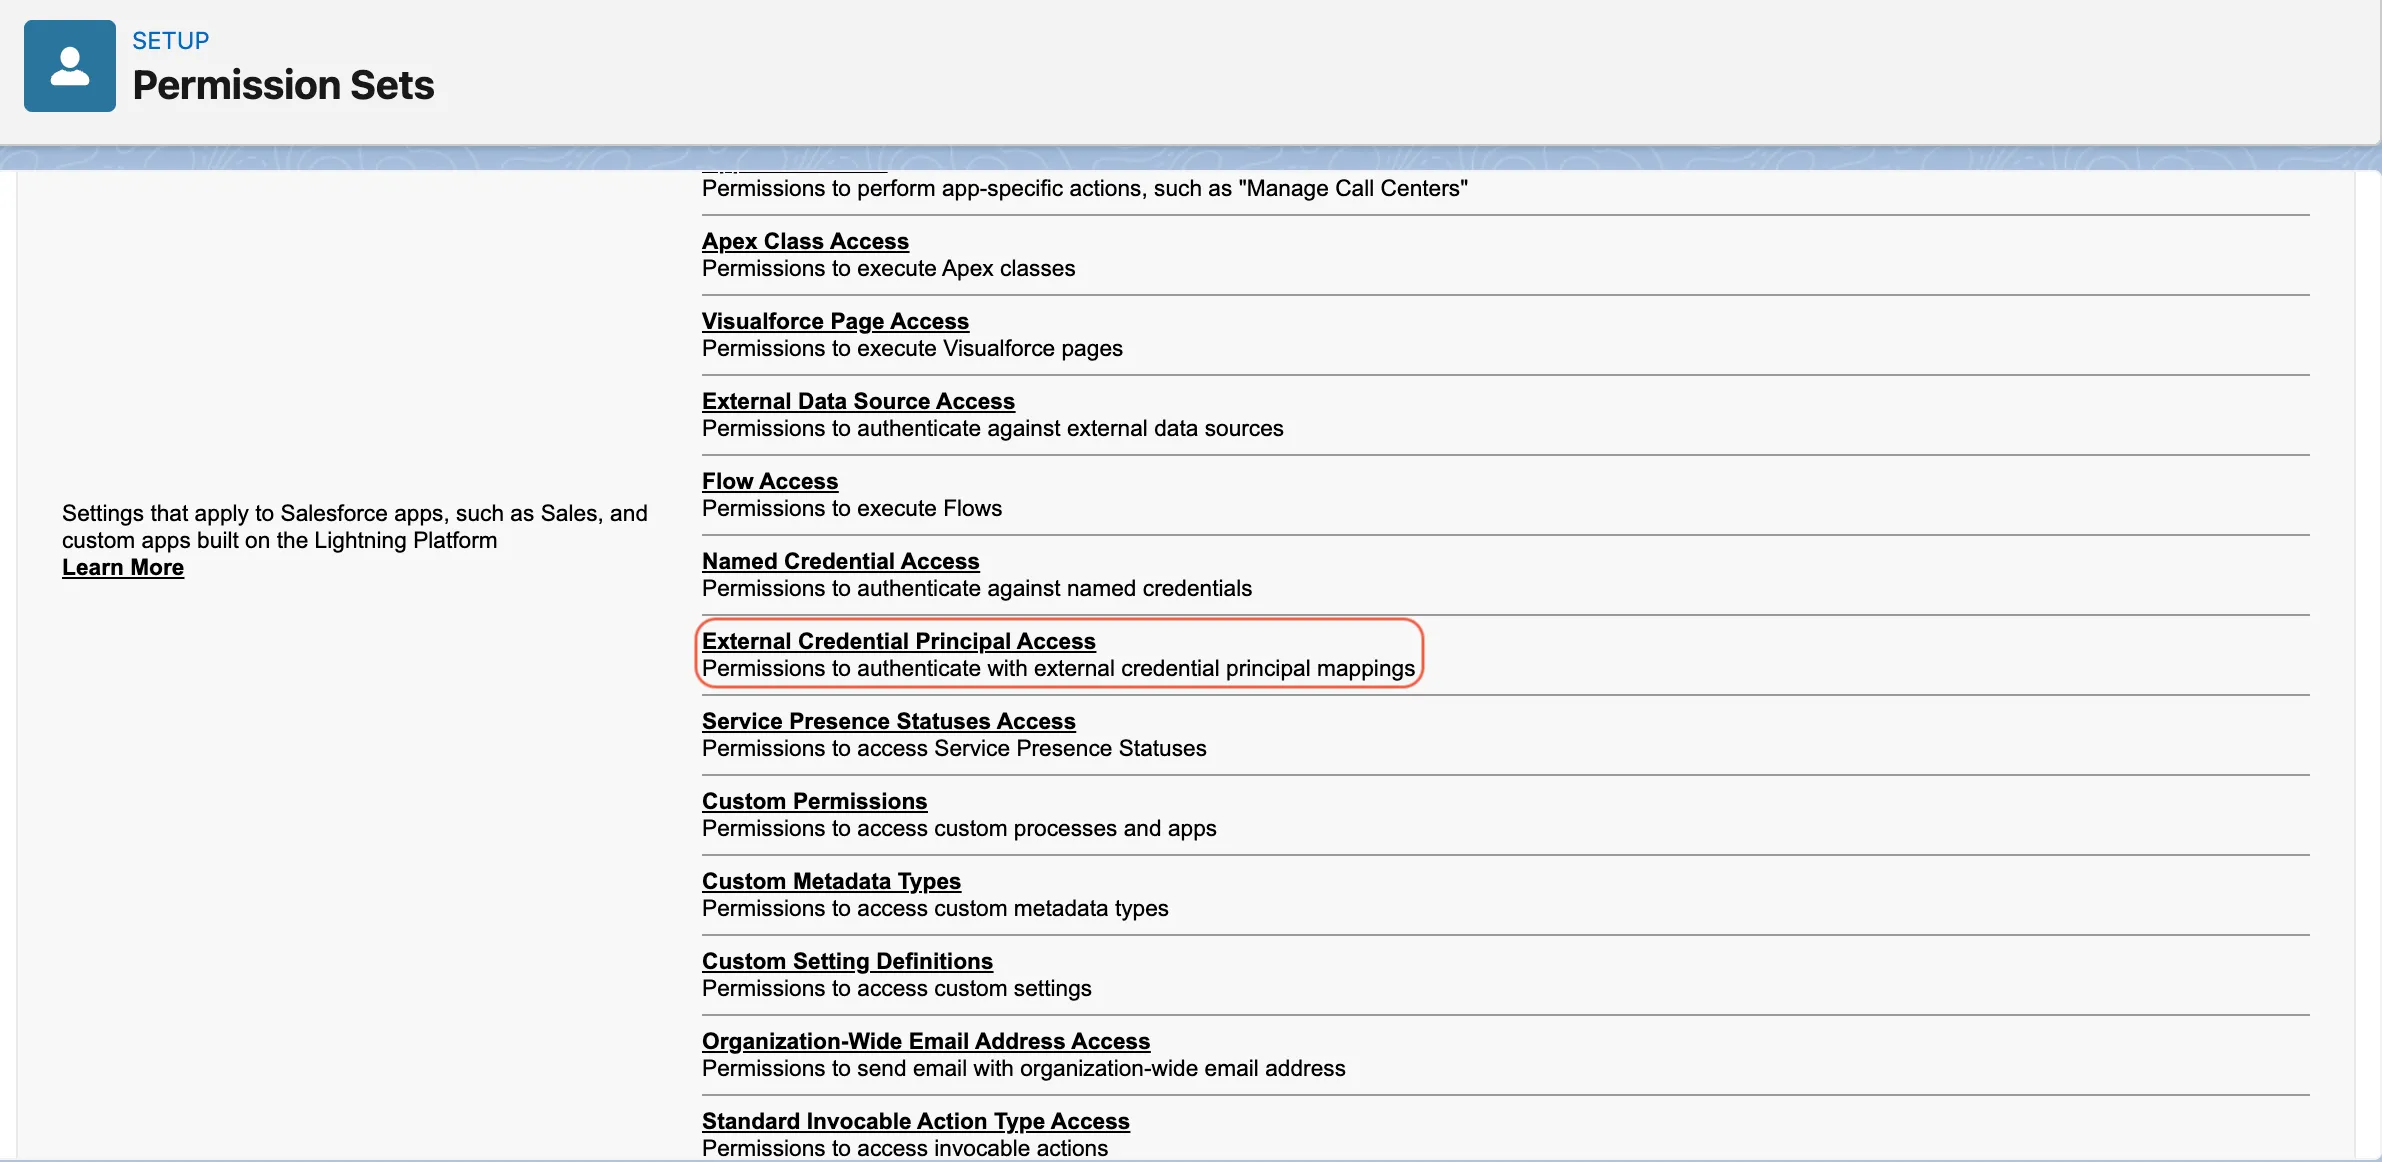
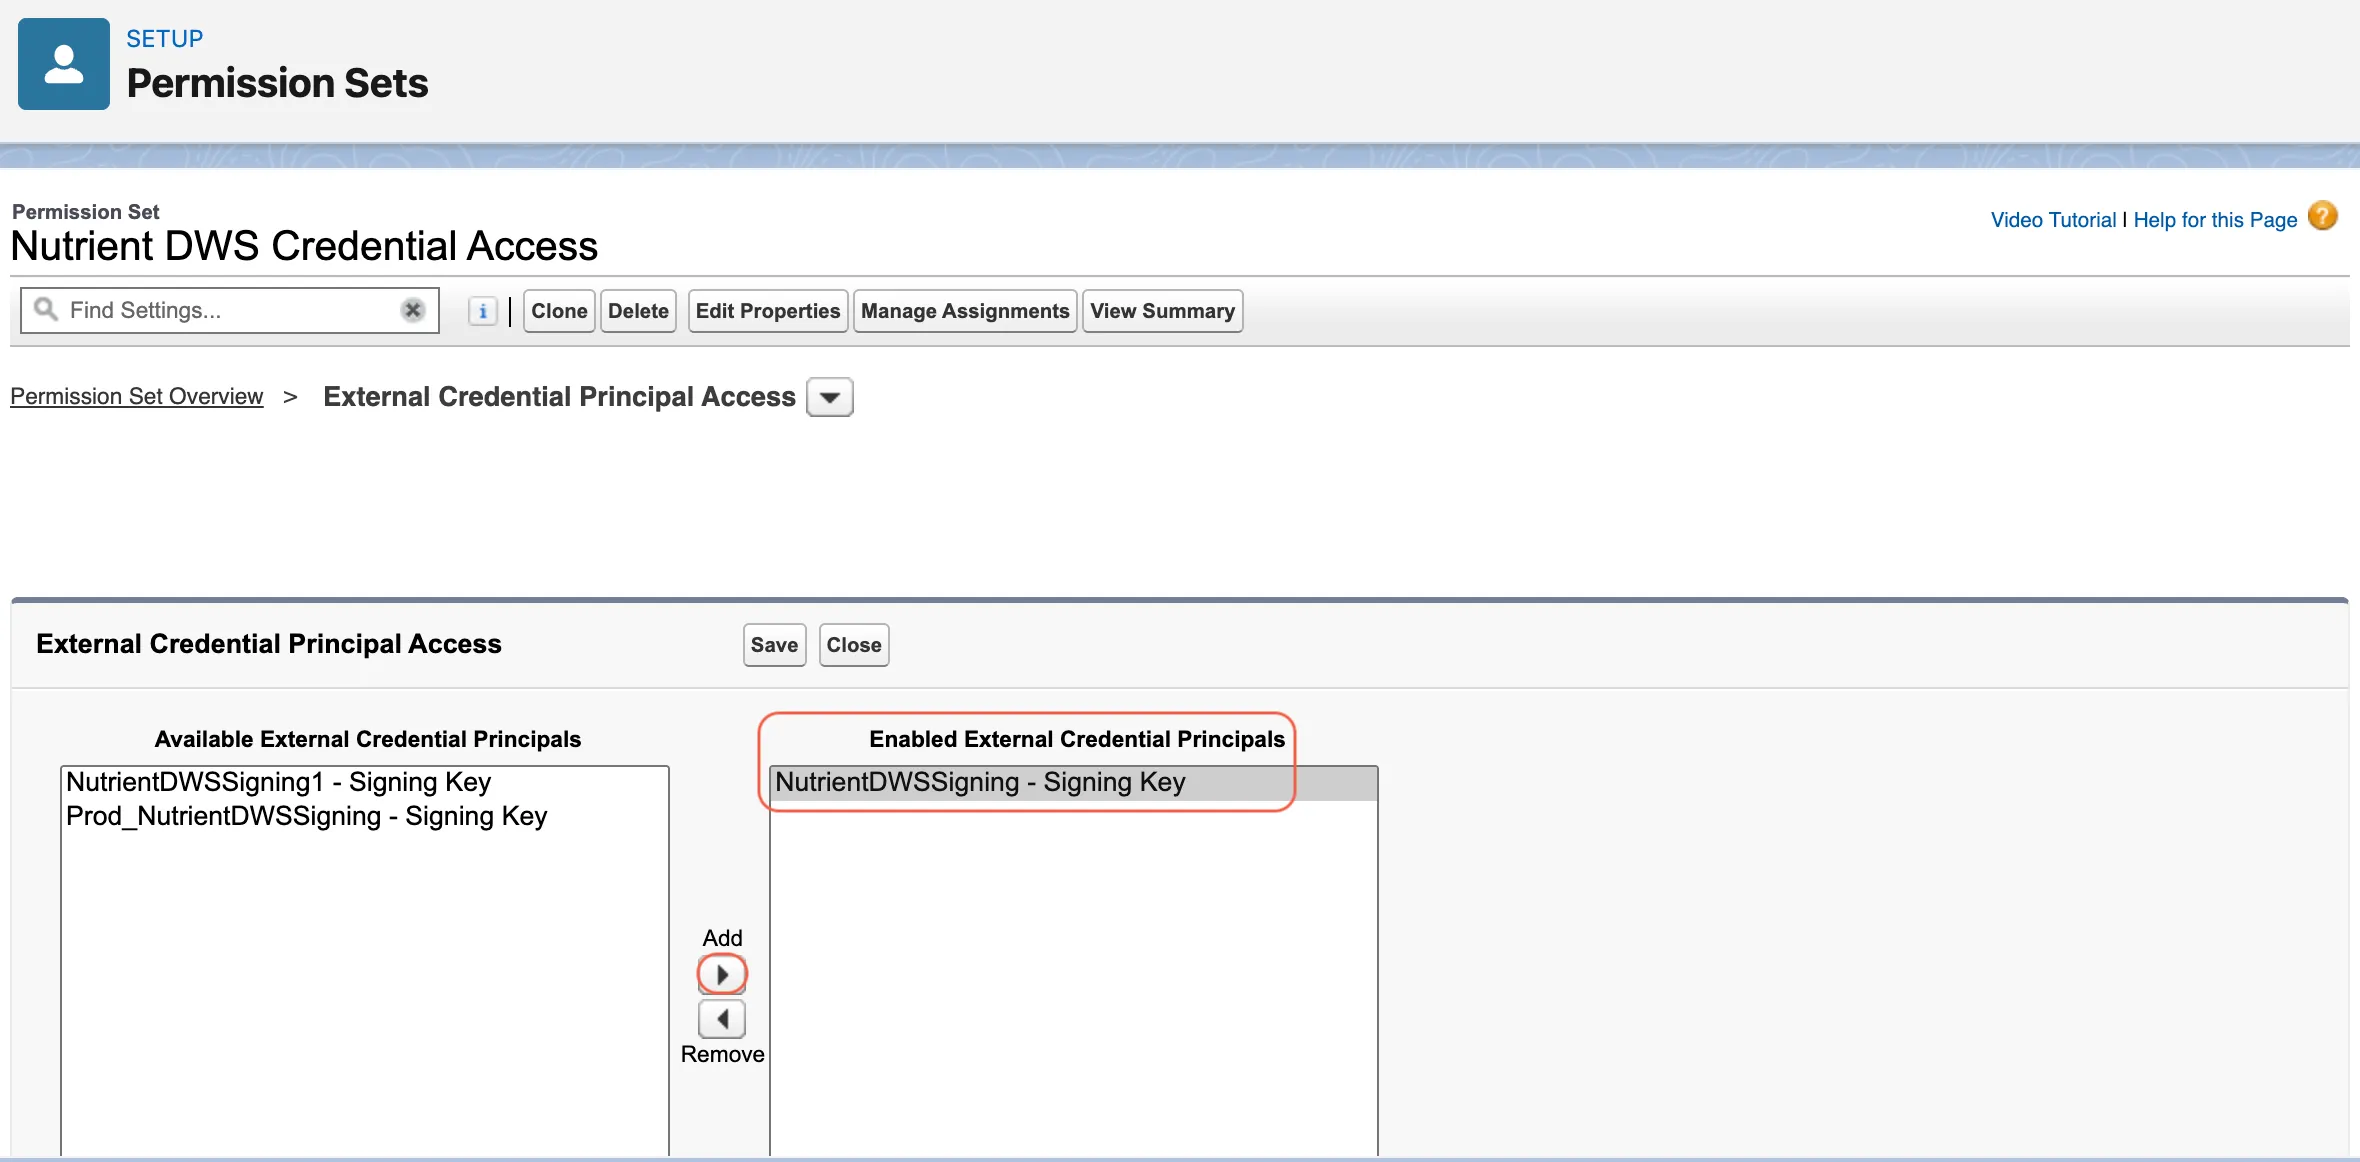
In each permission set, open External Credential Principal Access.
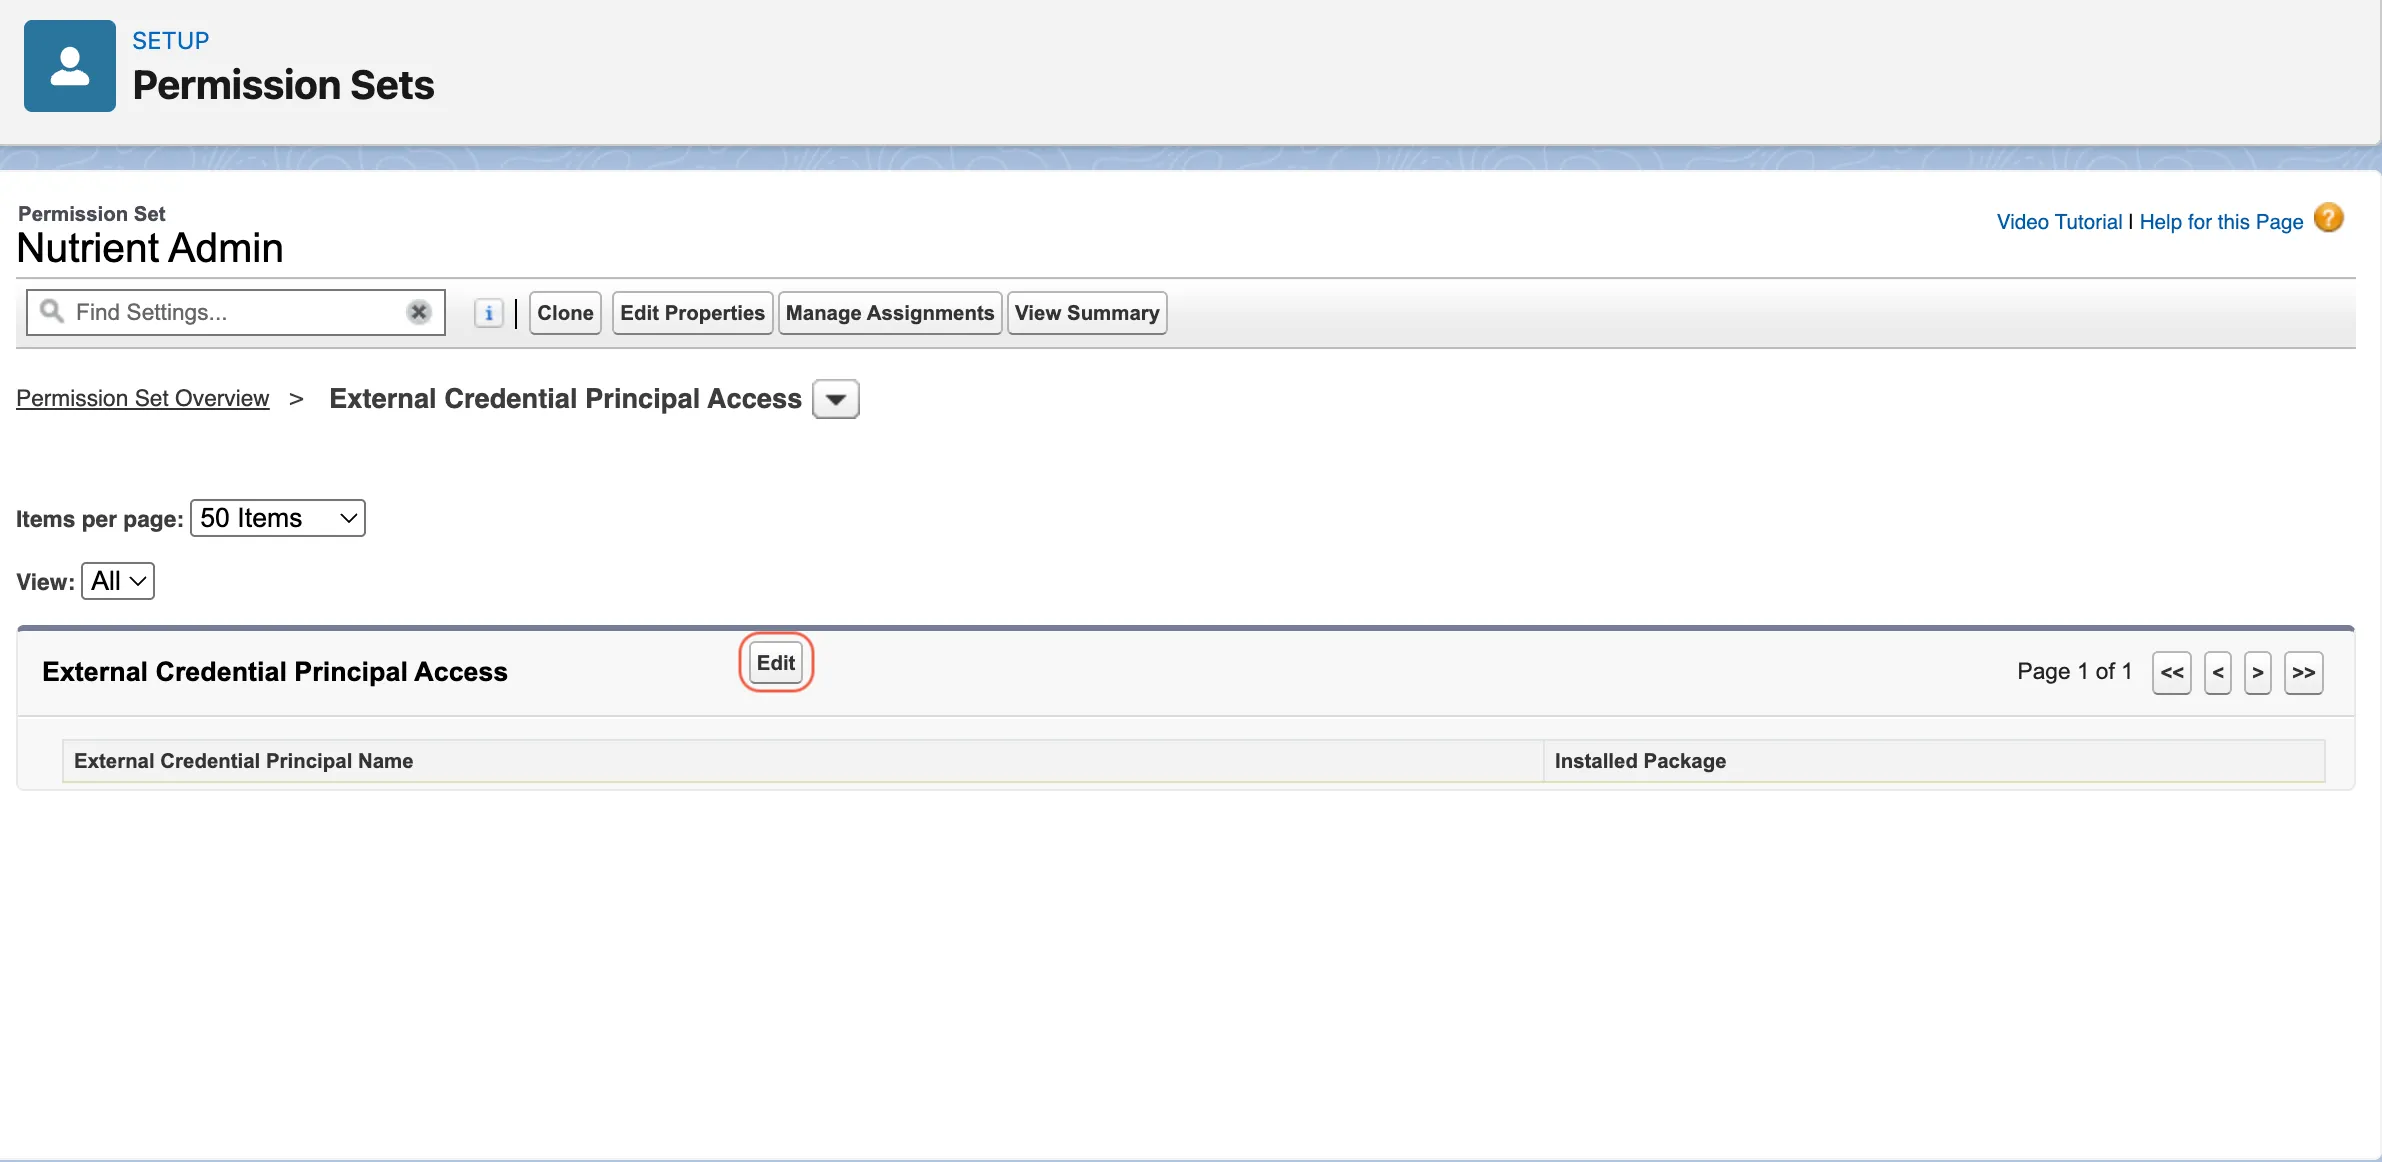
Click Edit.
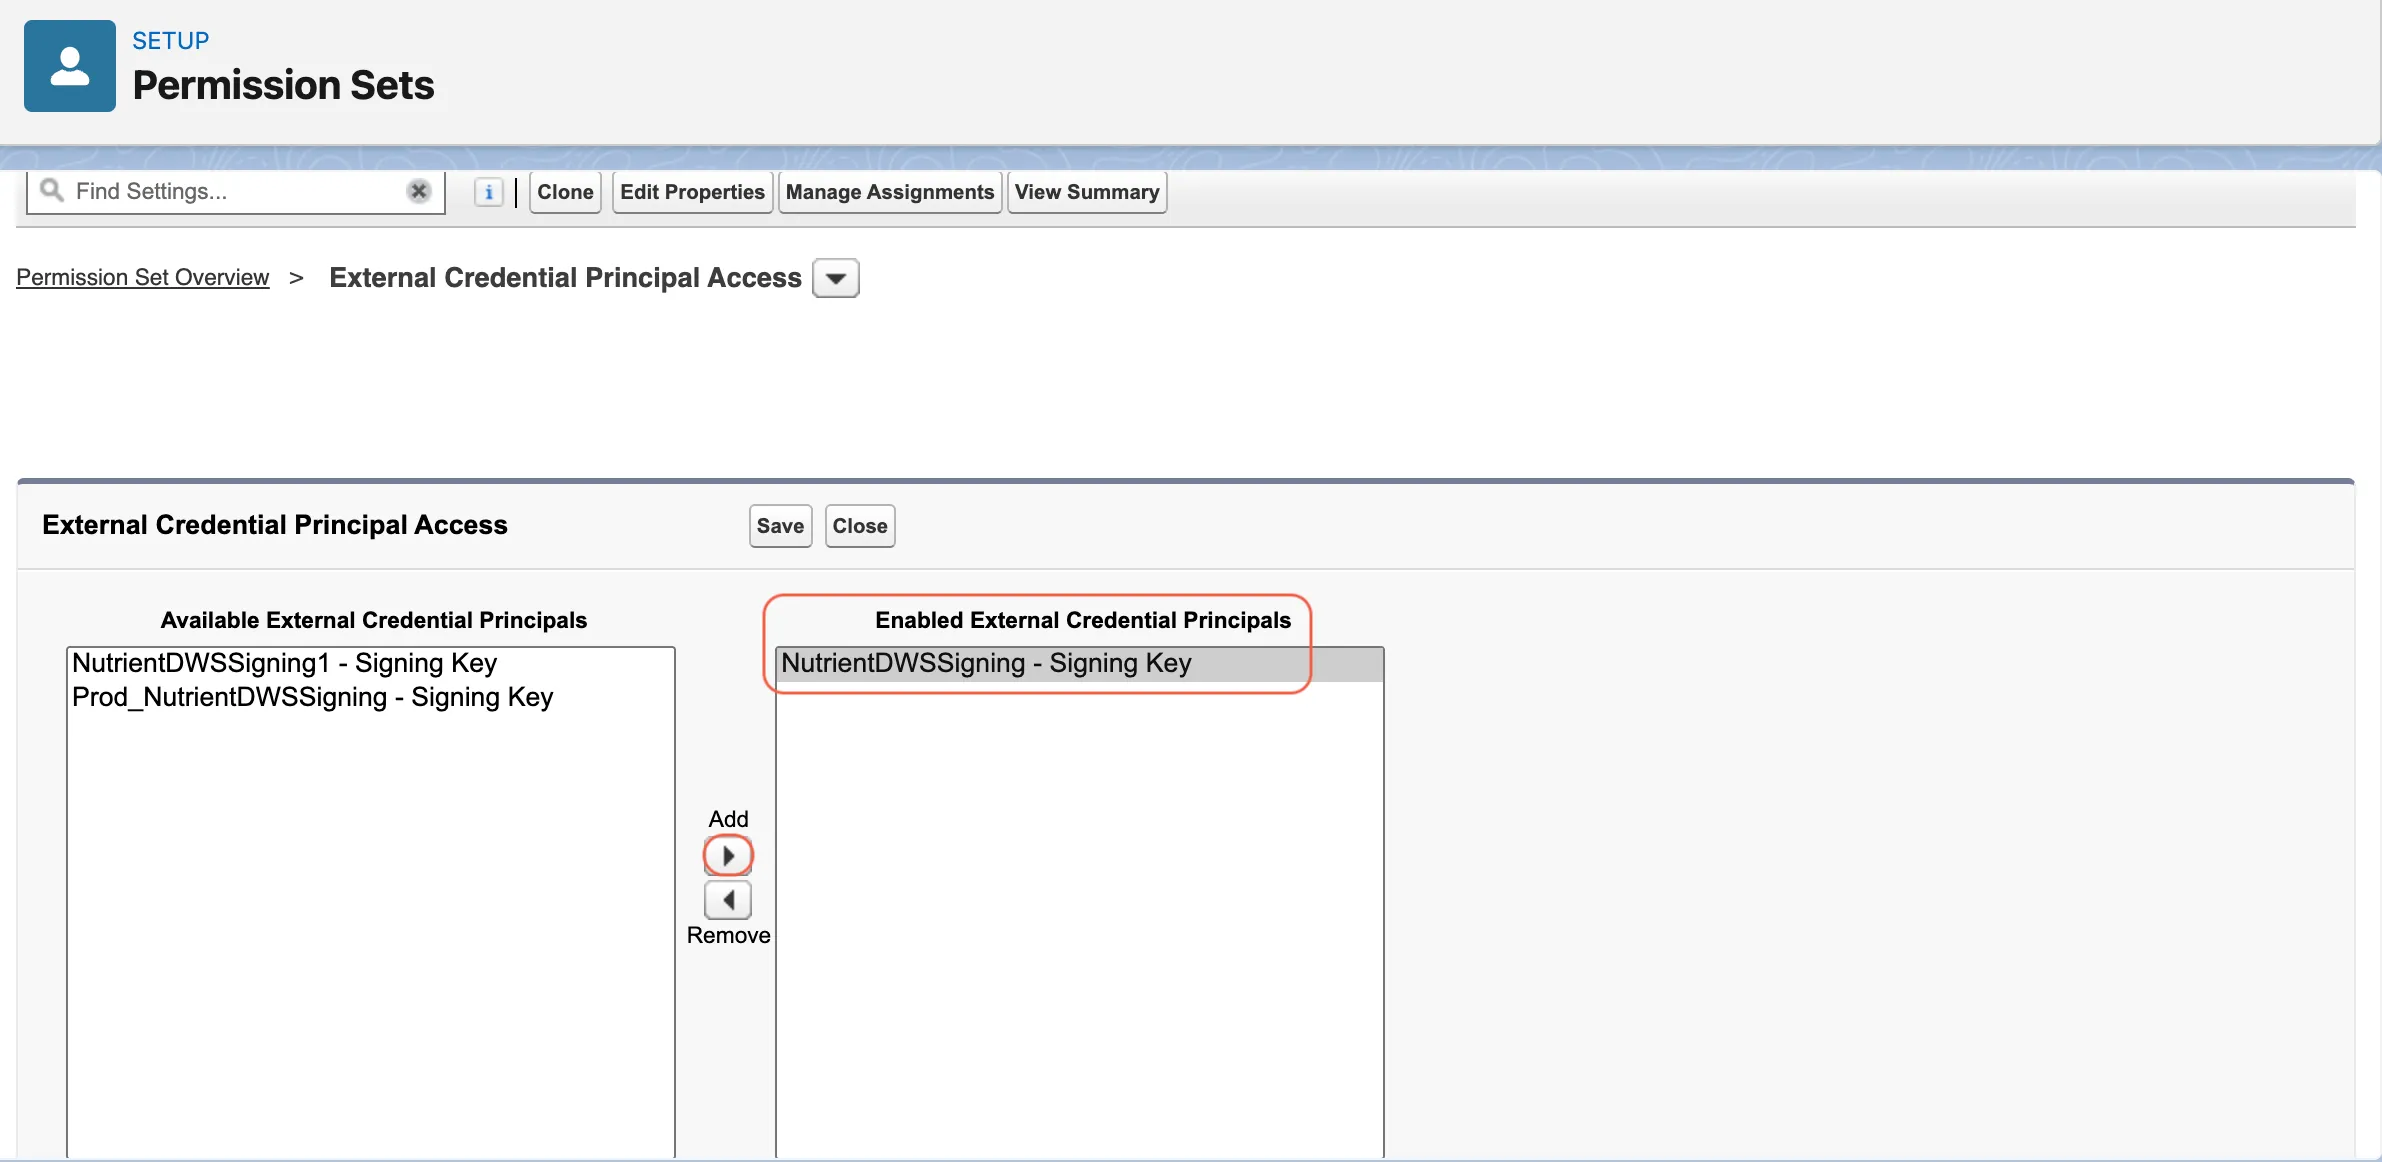
Move the DWS signing principal, for example, NutrientDWSSigning - Signing Key from Available External Credential Principals to Enabled External Credential Principals.
Save.
Use this approach only for initial setup or sandbox testing. Package redeployments or upgrades can reset direct changes made to packaged permission sets, so this isn’t the recommended long-term production setup.
Option B — Recommended production setup
For production, create org-local permission sets and bundle them with the packaged Nutrient permission sets by using permission set groups.
1. Create a local credential-access permission set
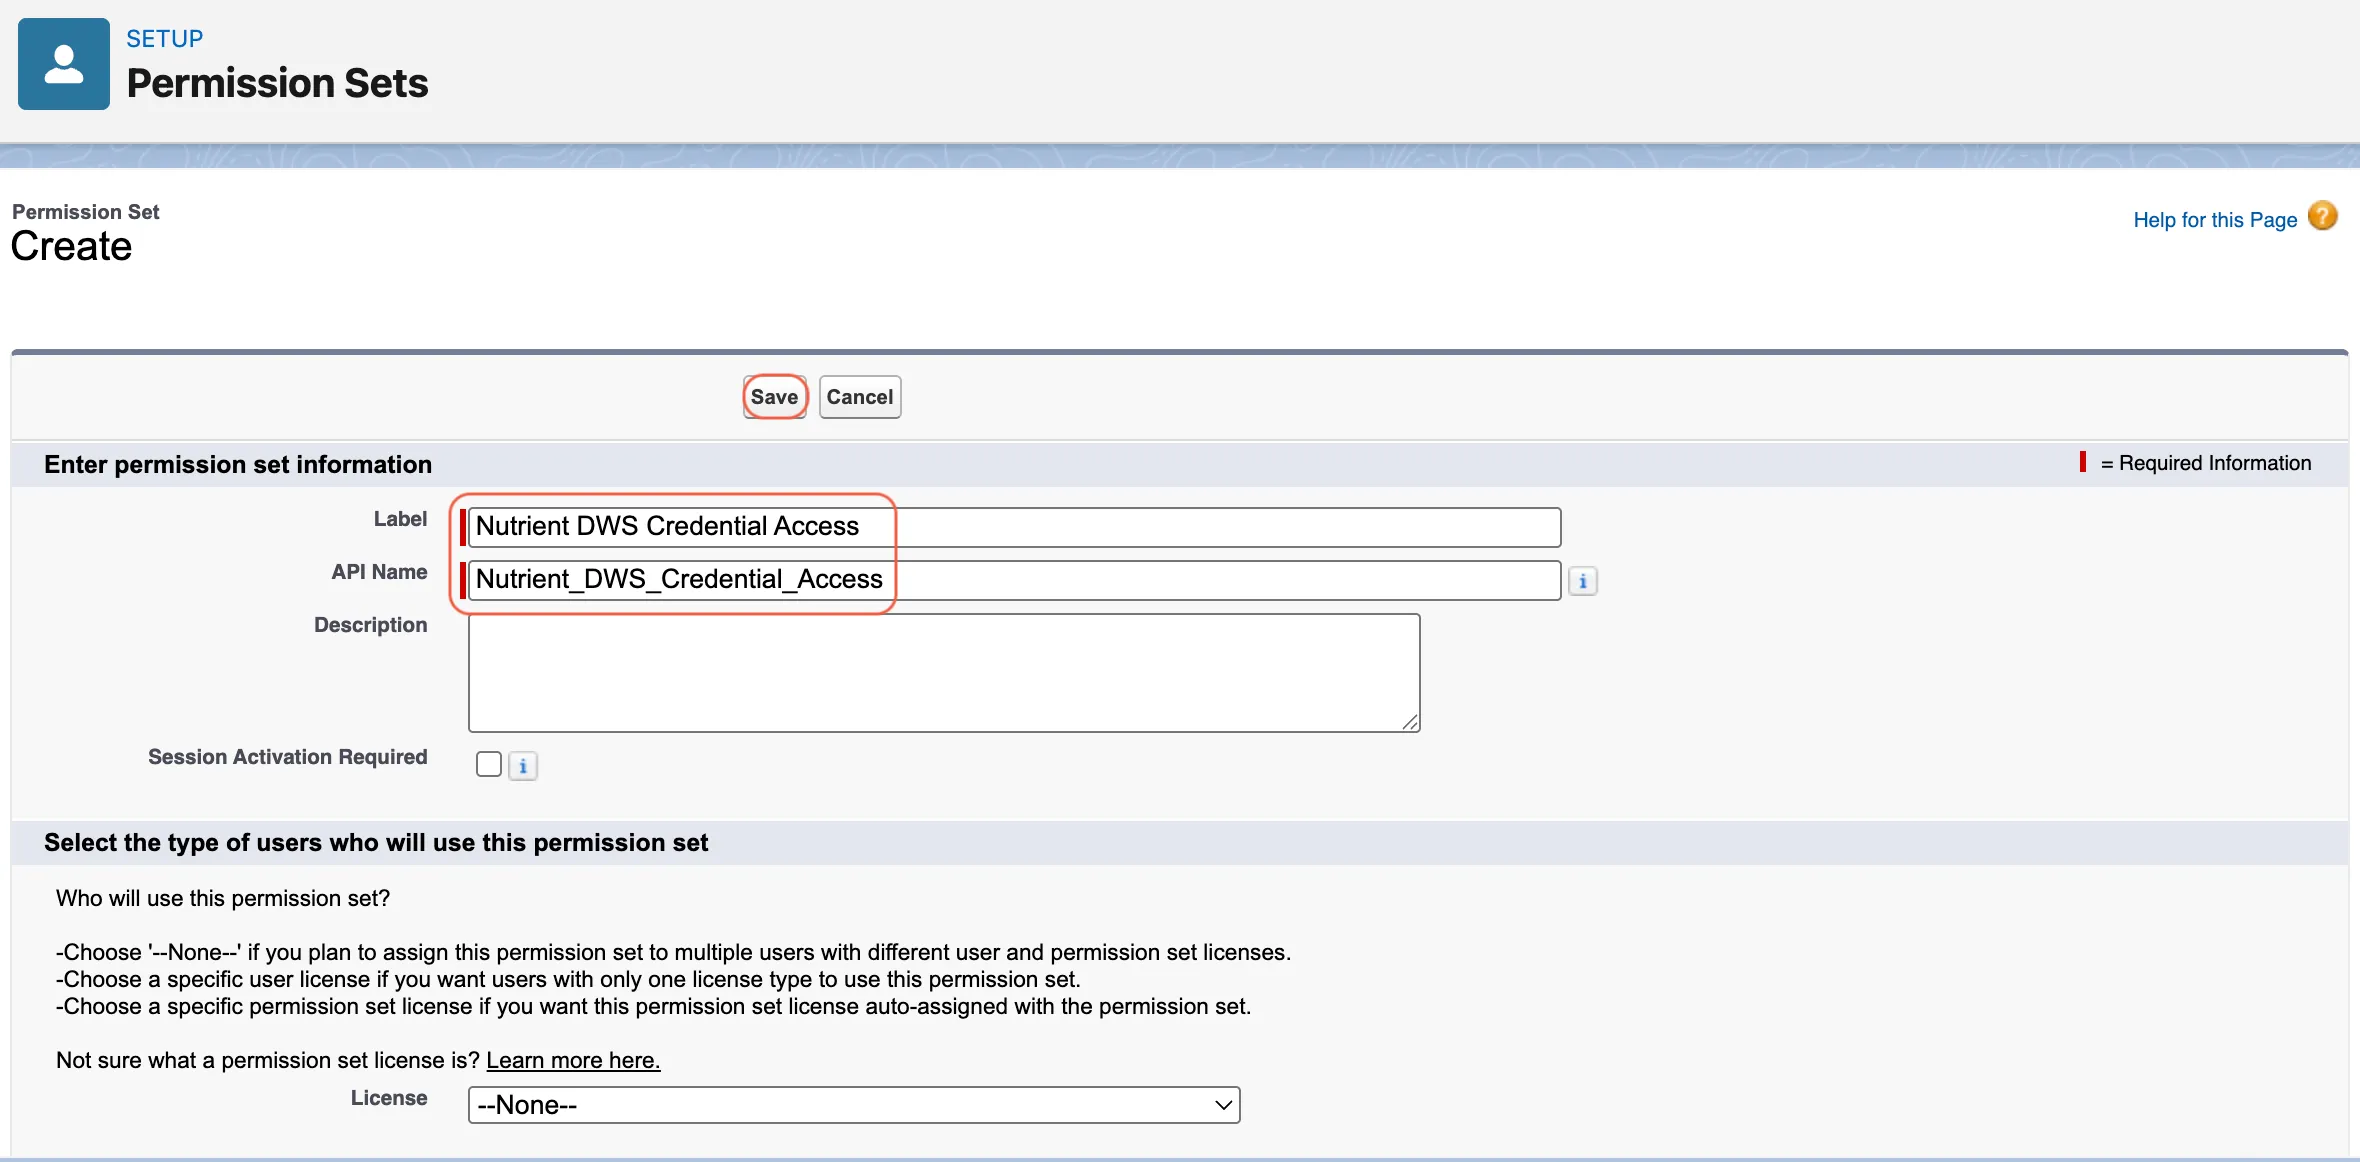
Create a new permission set in your Salesforce org. Example name: Nutrient DWS Credential Access
In Setup, search for Permission Sets in quick find.
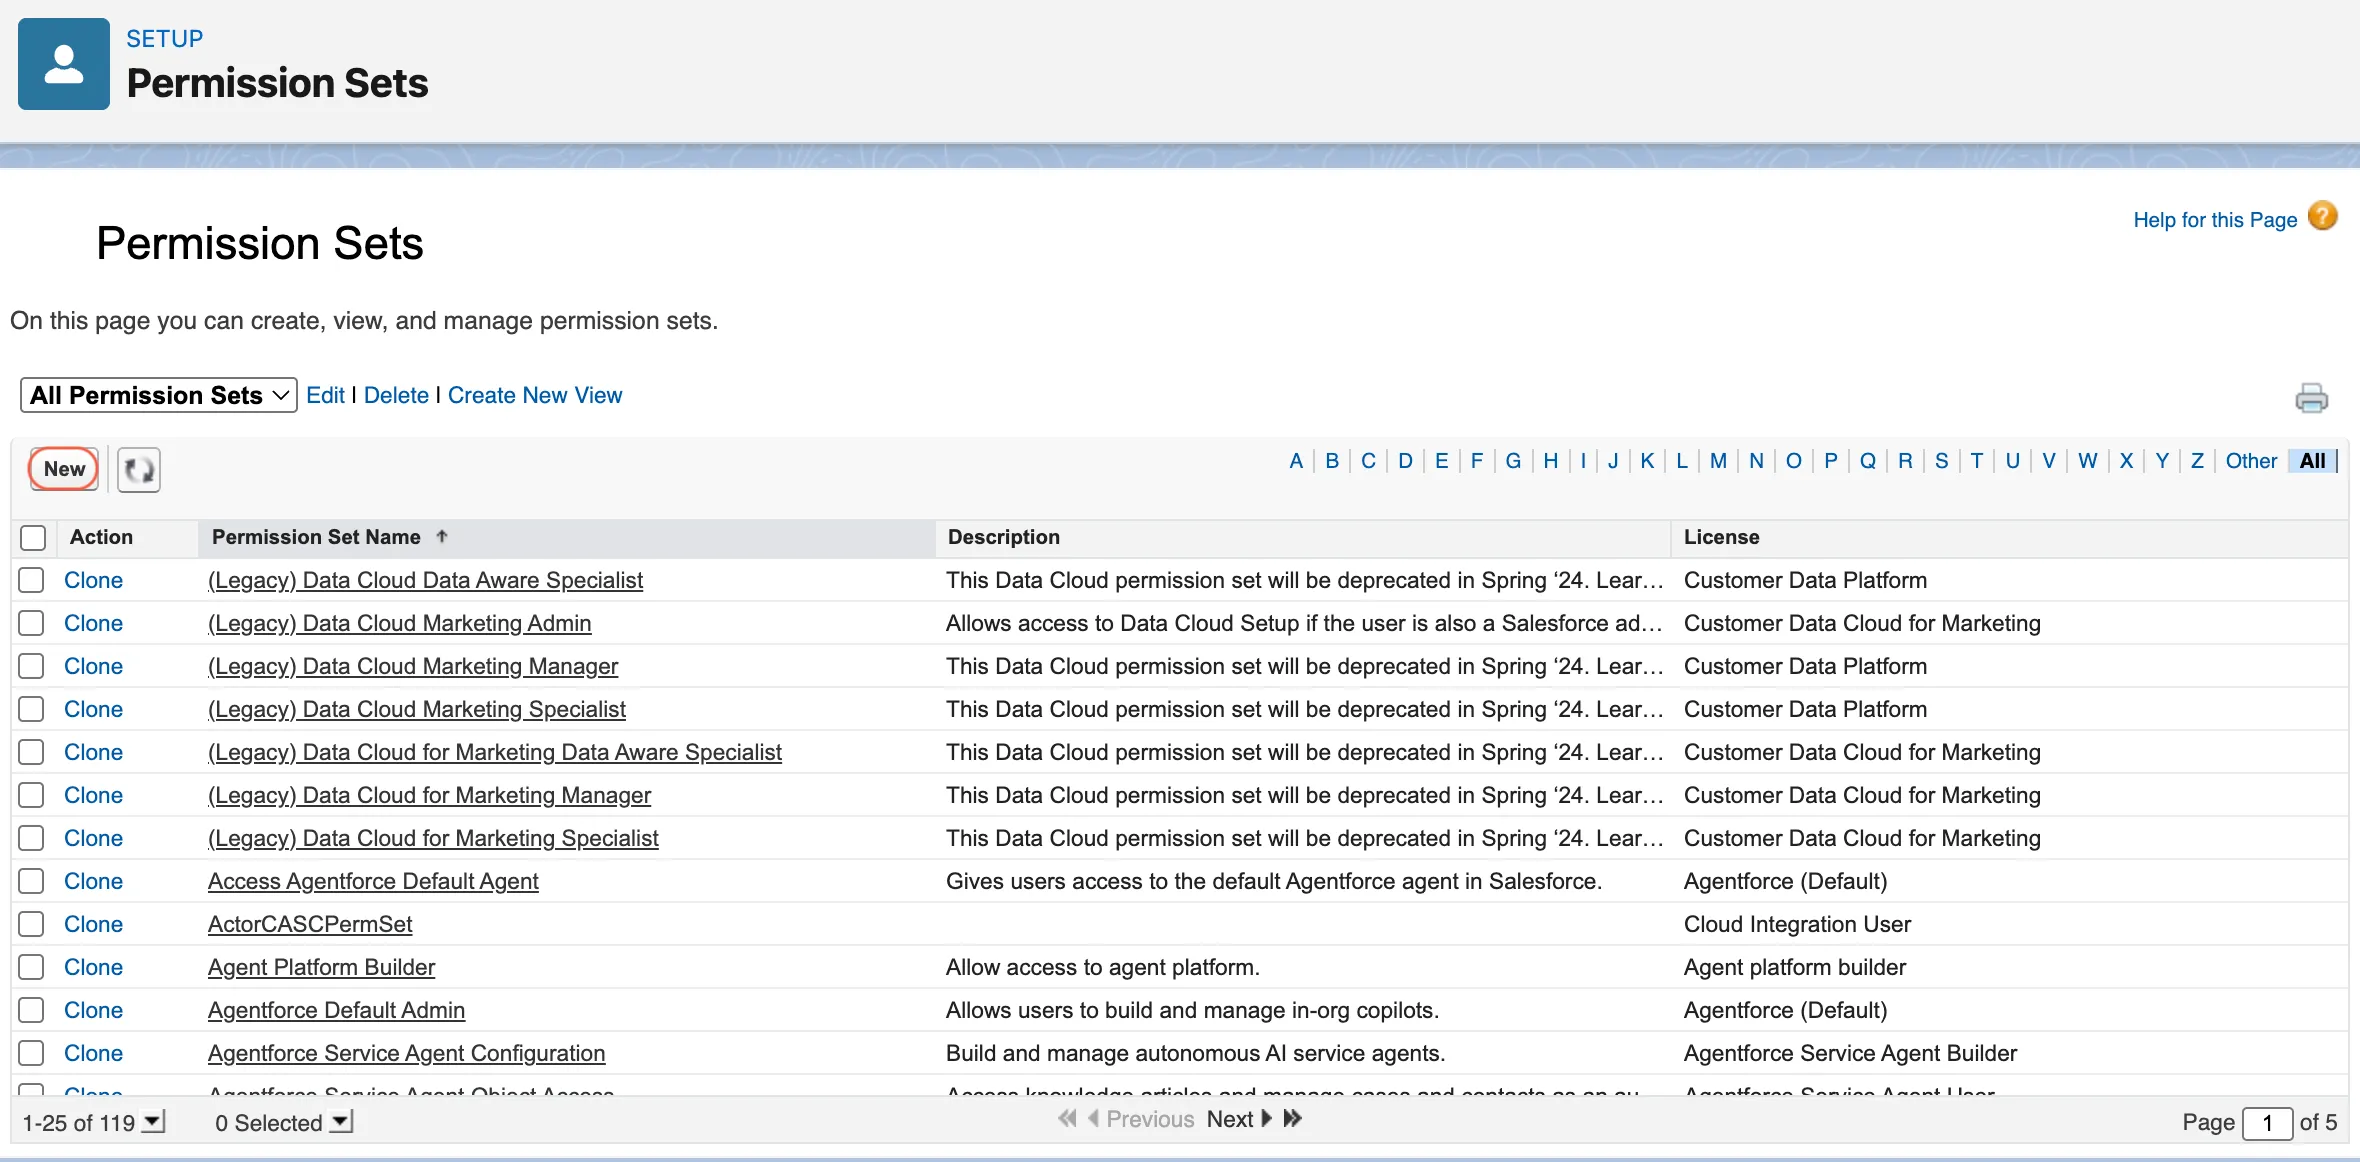
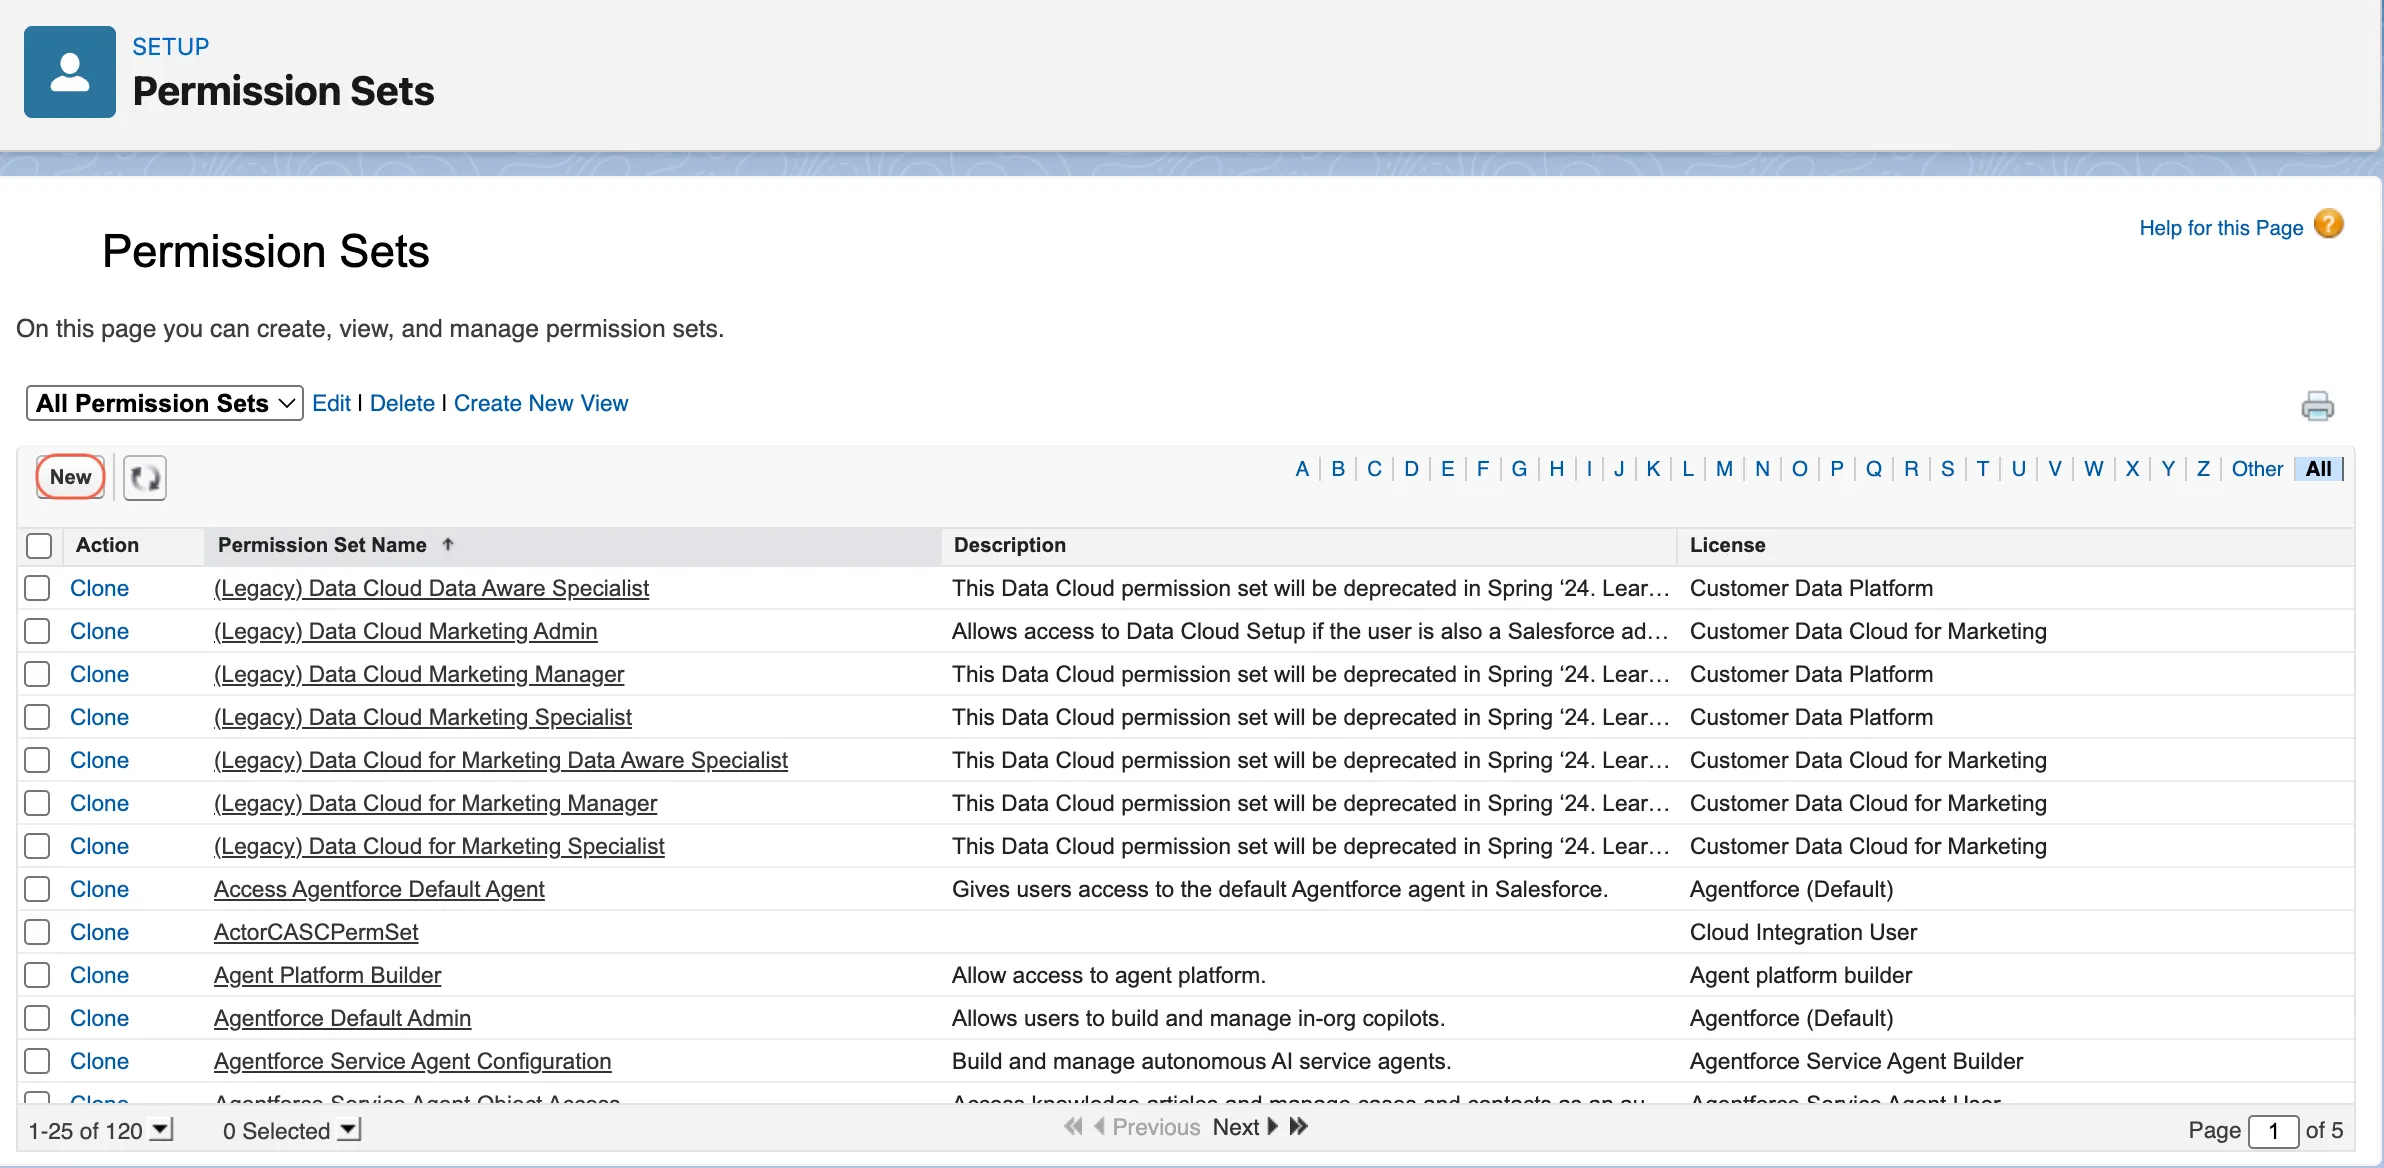
Open Permission Sets and click New.
Create the permission set and save it.
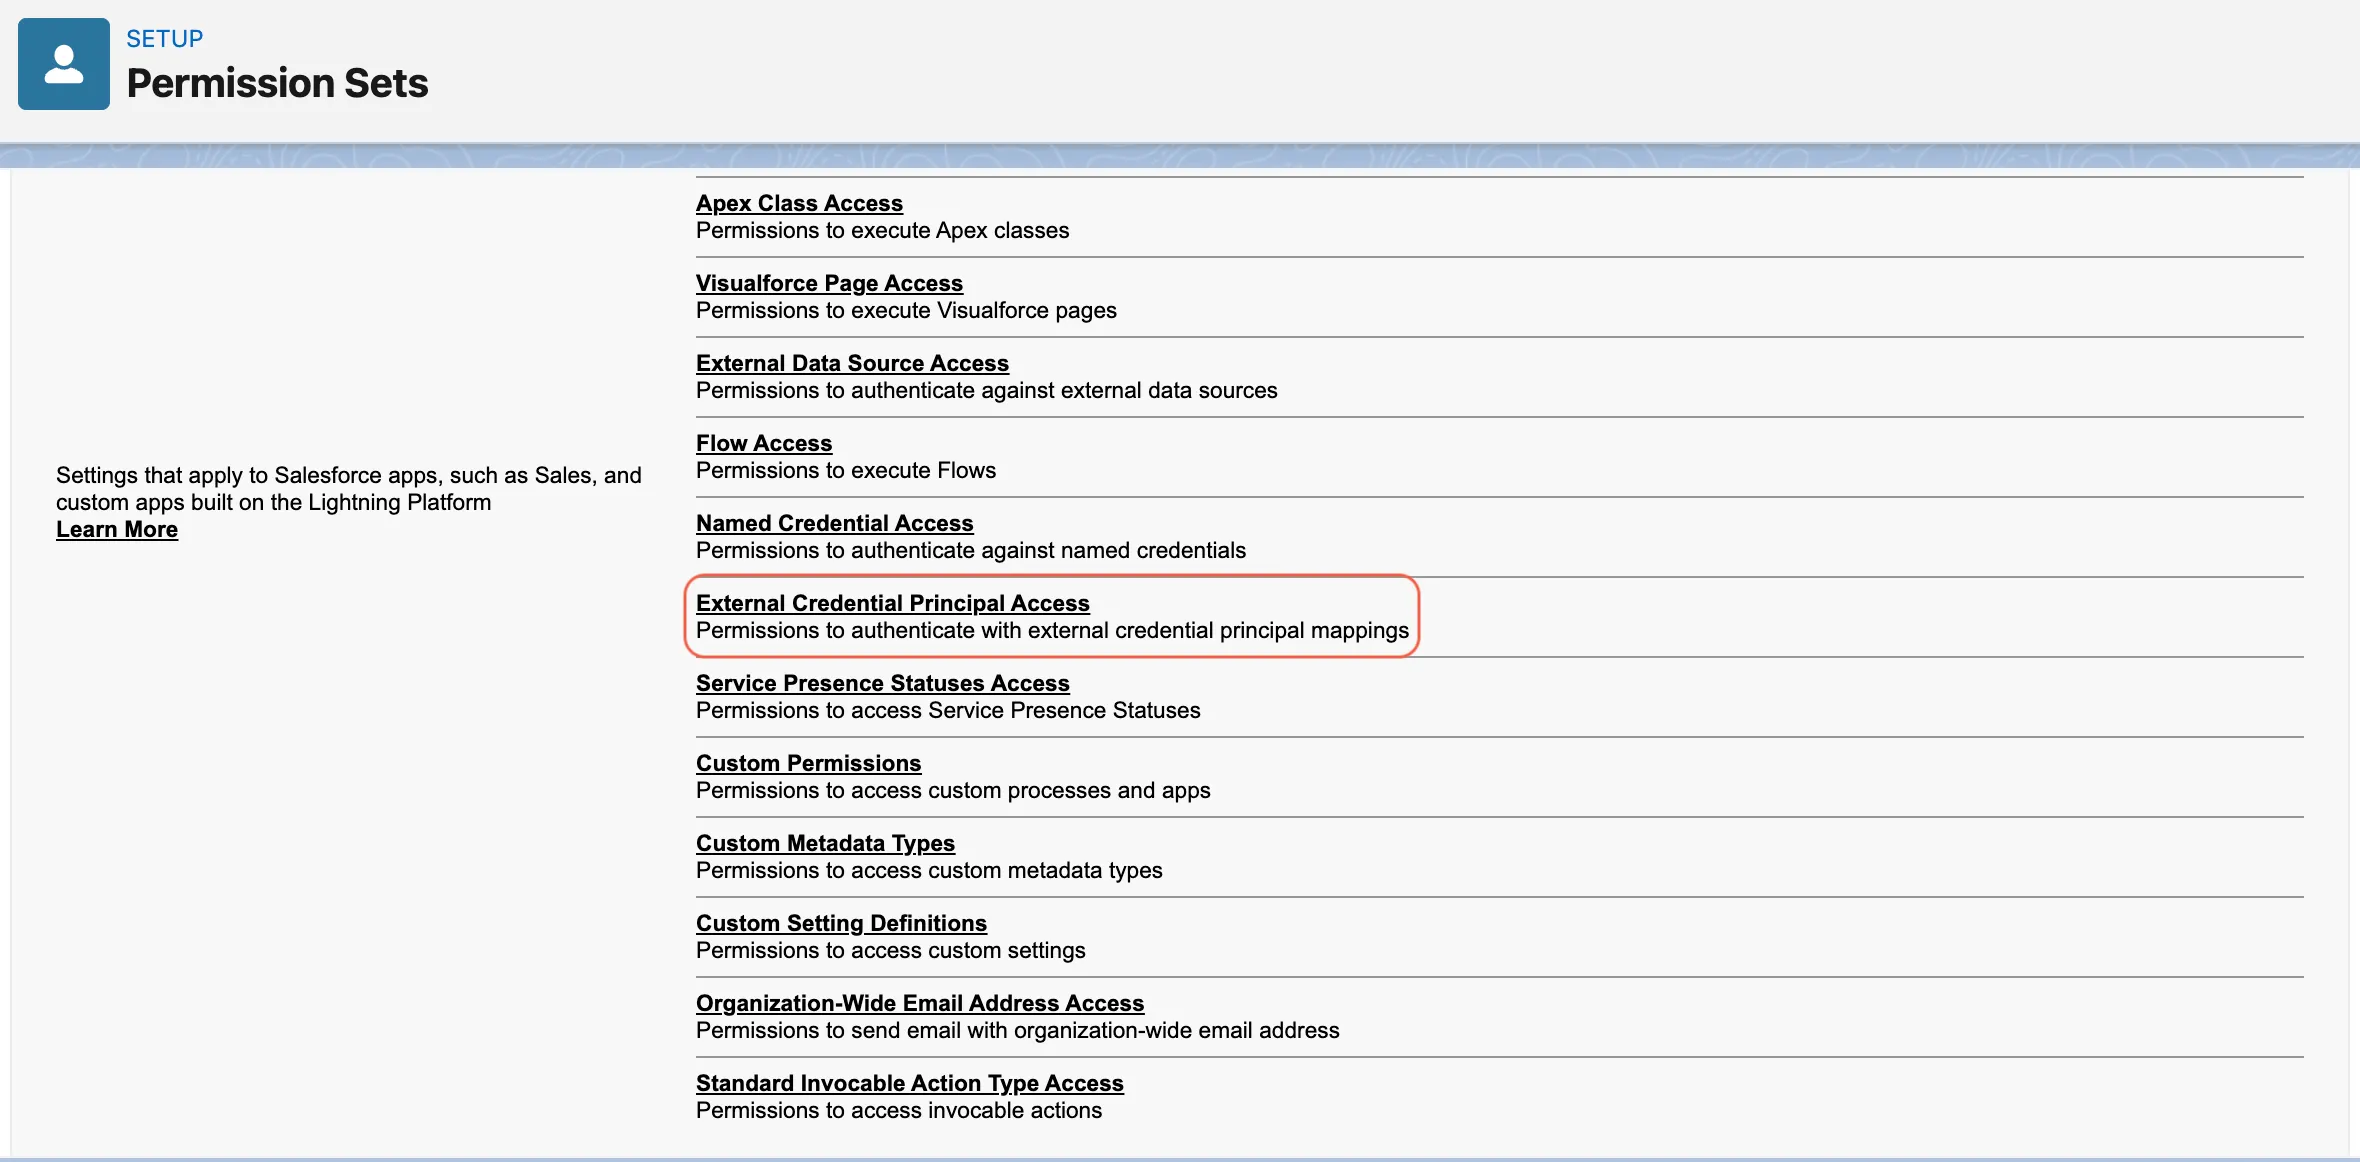
In the new permission set, open External Credential Principal Access.
Click Edit.

Enable access to the DWS signing principal, for example: NutrientDWSSigning - Signing Key
Save.
This permission set does only one thing: it enables users to use the stored DWS credential.
Optional: Add read access to User External Credentials
In some Salesforce orgs, non-admin signing users also need Read access to the User External Credentials object. If they don’t have it, they may see this error when they try to send an envelope: You don't have read permissions on the User External Credential object.
If your org requires this access, use one of these approaches:
- Add Read access to User External Credentials in your org-local Nutrient DWS Credential Access permission set.
- Or grant the same Read access in the affected users’ Salesforce profiles.
Do not rely on granting this access directly in the packaged Nutrient_Sign_Documents permission set. Package redeployments or upgrades can remove that change.
2. Bundle it with the relevant Nutrient permission sets
Create permission set groups for the main signing roles.
| Permission set group | Include these permission sets | Assign to |
|---|---|---|
Nutrient Admin with DWS | Nutrient_Admin + Nutrient DWS Credential Access | Salesforce admins who configure or test signing |
Nutrient Signing with DWS | Nutrient_Sign_Documents + Nutrient DWS Credential Access | Regular users who send documents for signing |
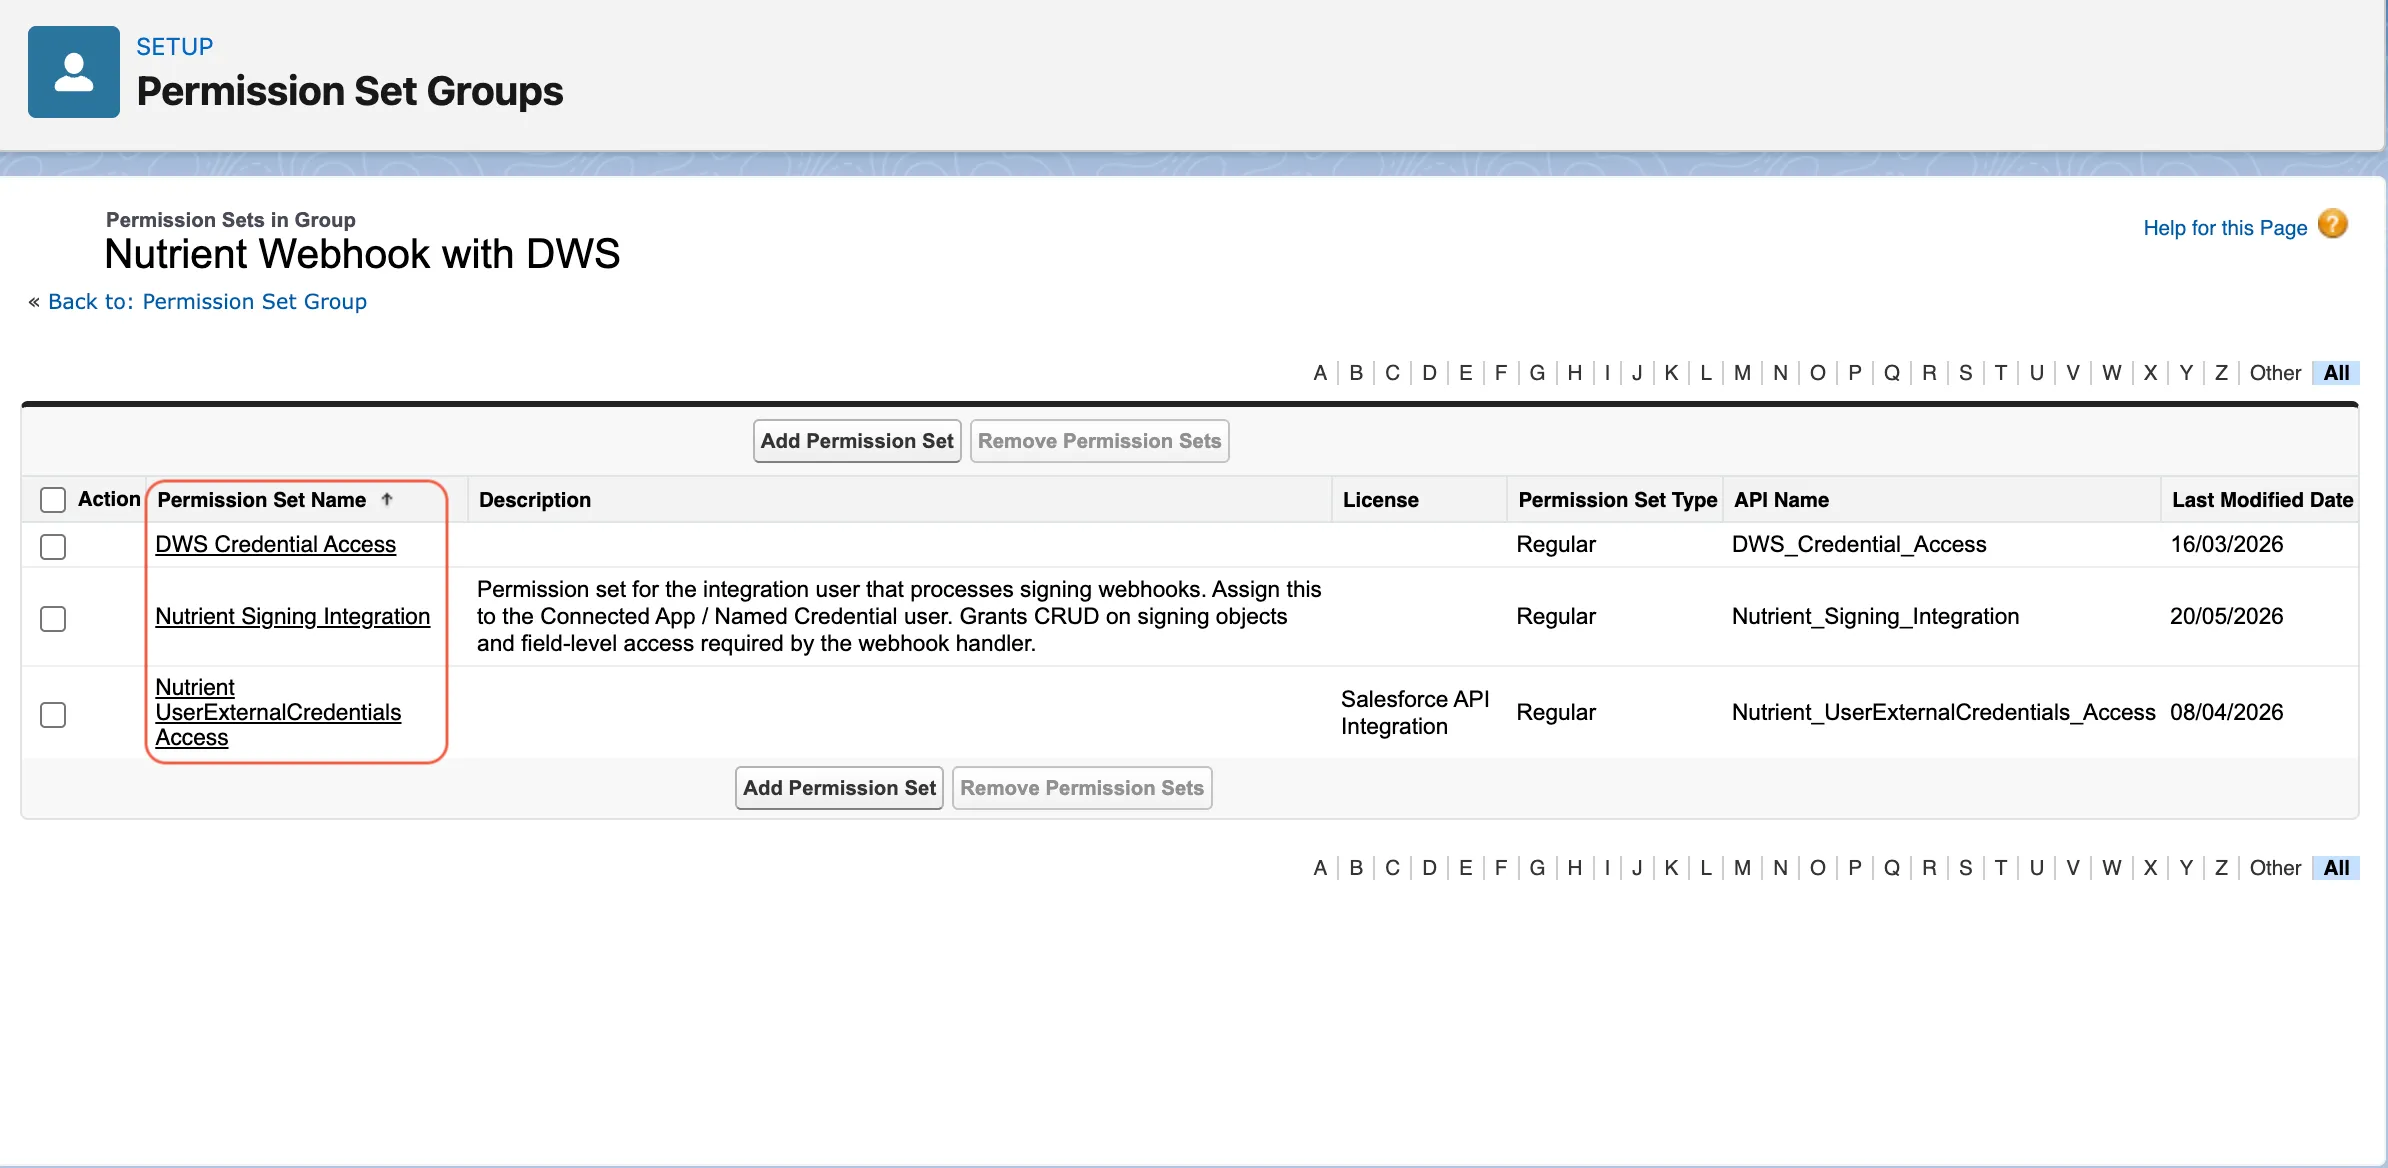
Nutrient Webhook with DWS | Nutrient_Signing_Integration + Nutrient DWS Credential Access + Nutrient UserExternalCredentials Access | Dedicated webhook or integration user |
Then assign the appropriate permission set group to each user.
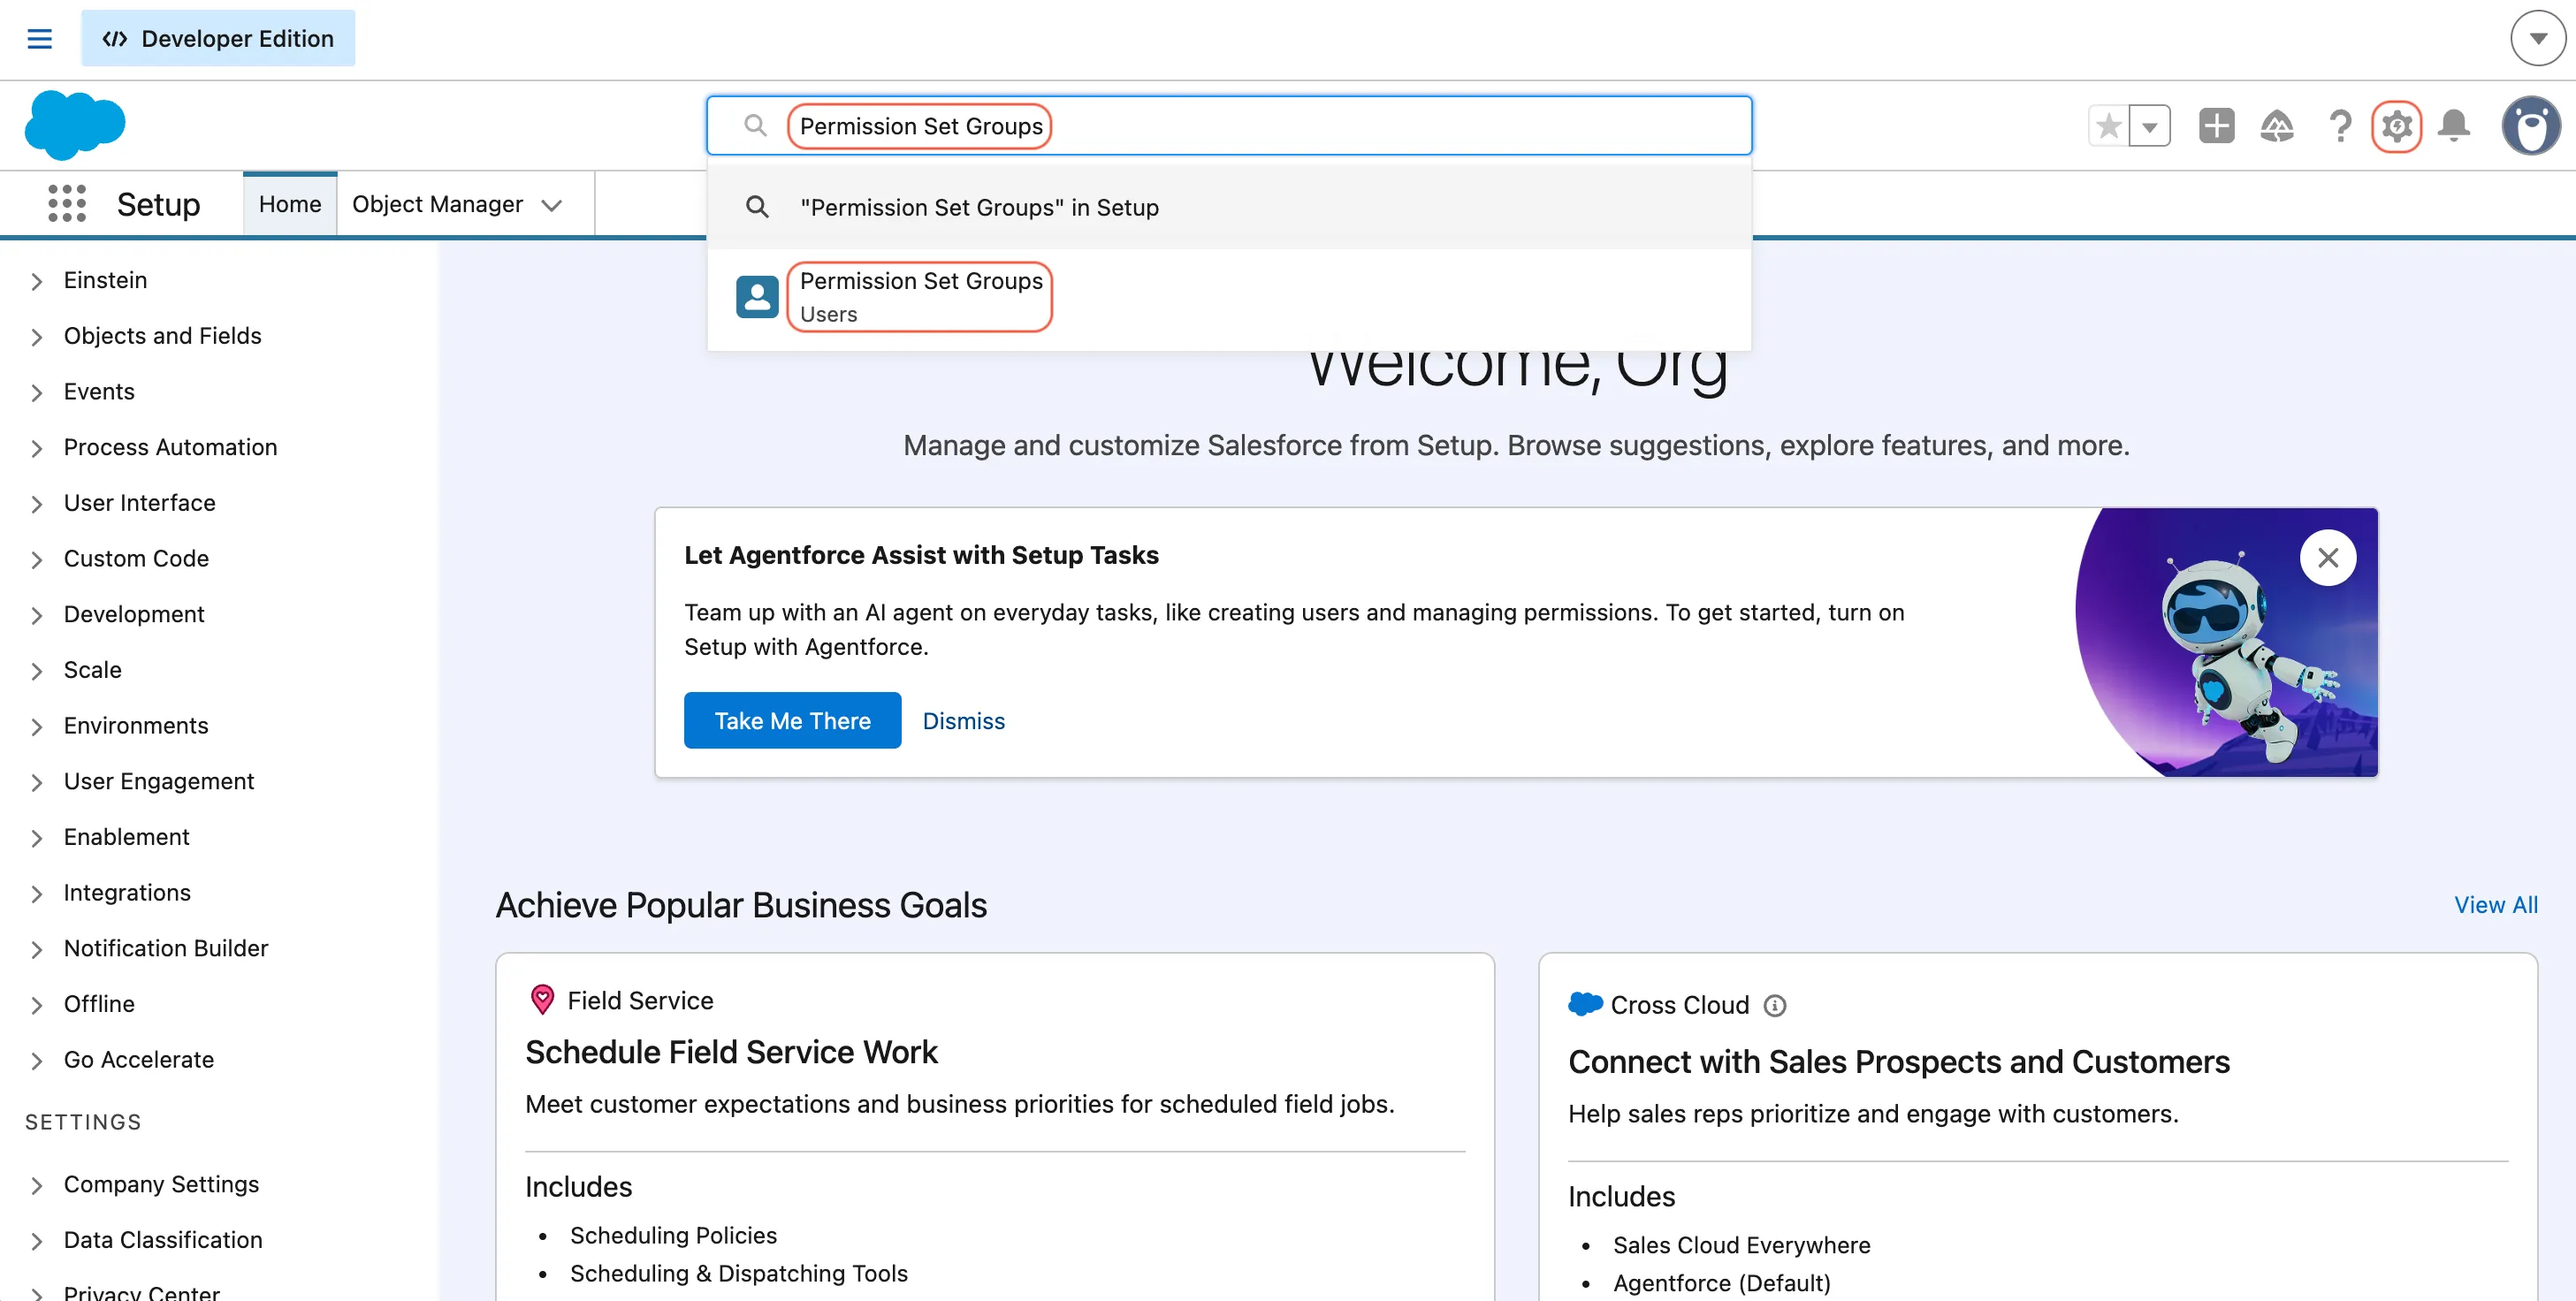
You can create and assign permission set groups by following these steps:
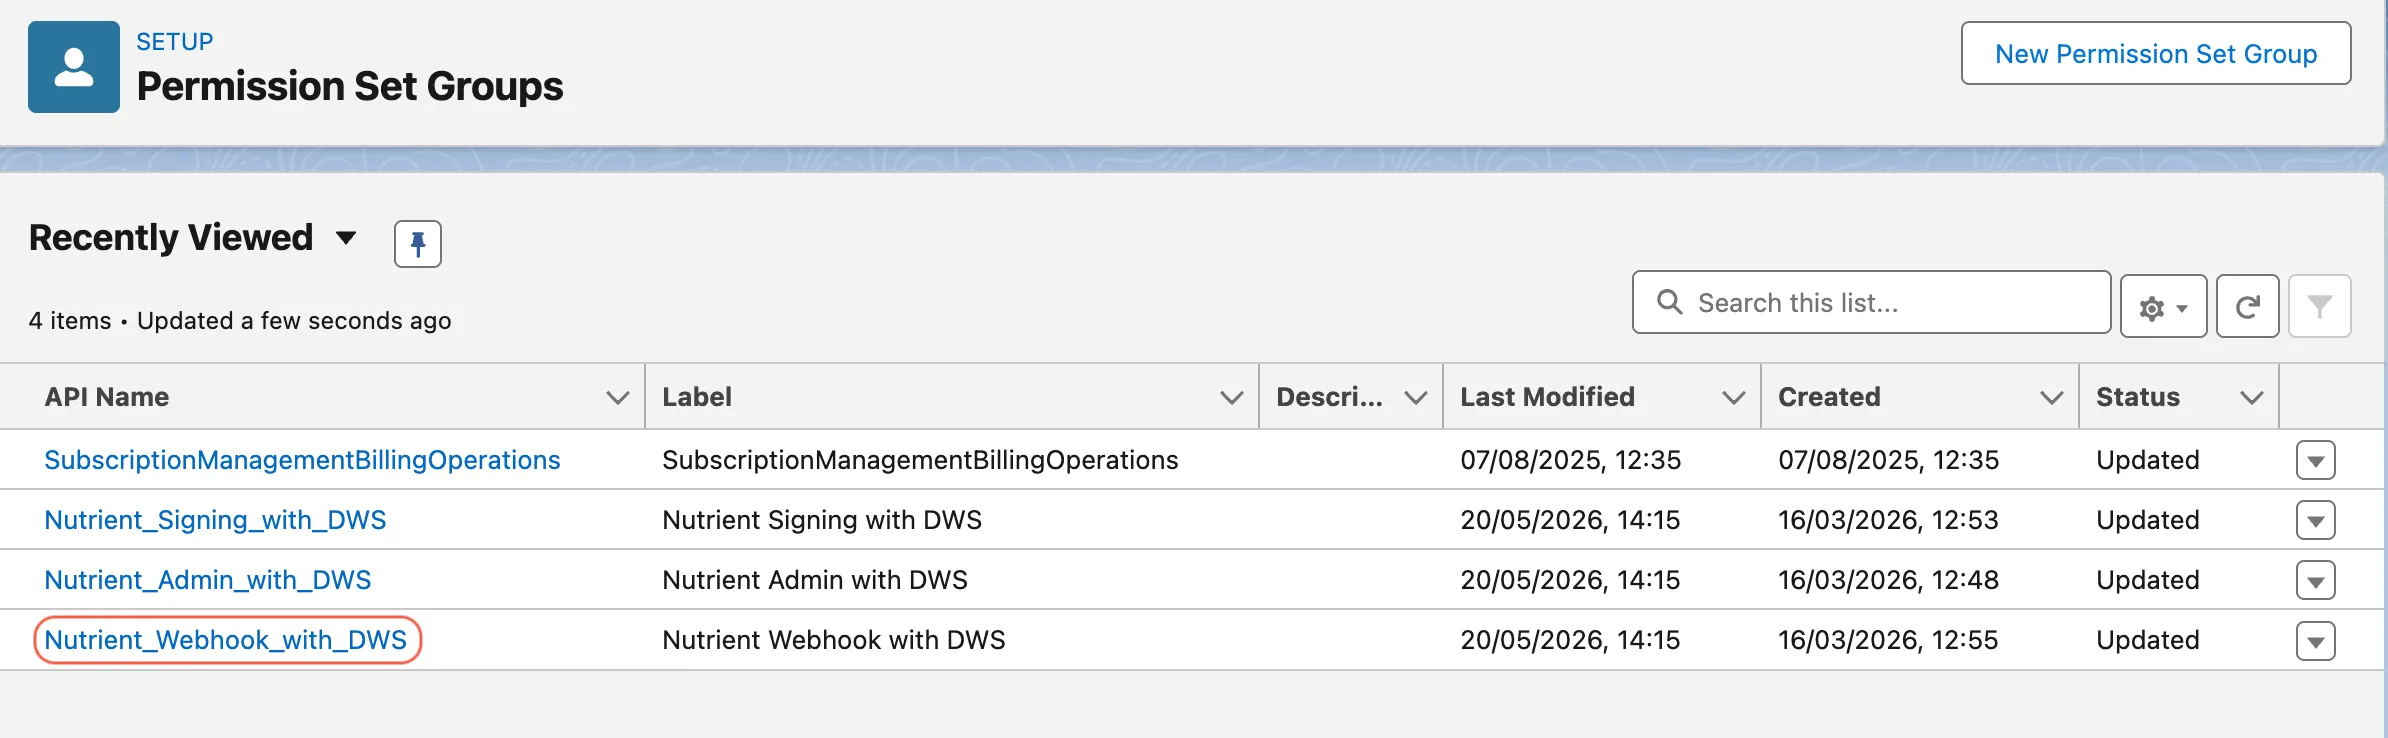
In Setup, search for Permission Set Groups in quick find.
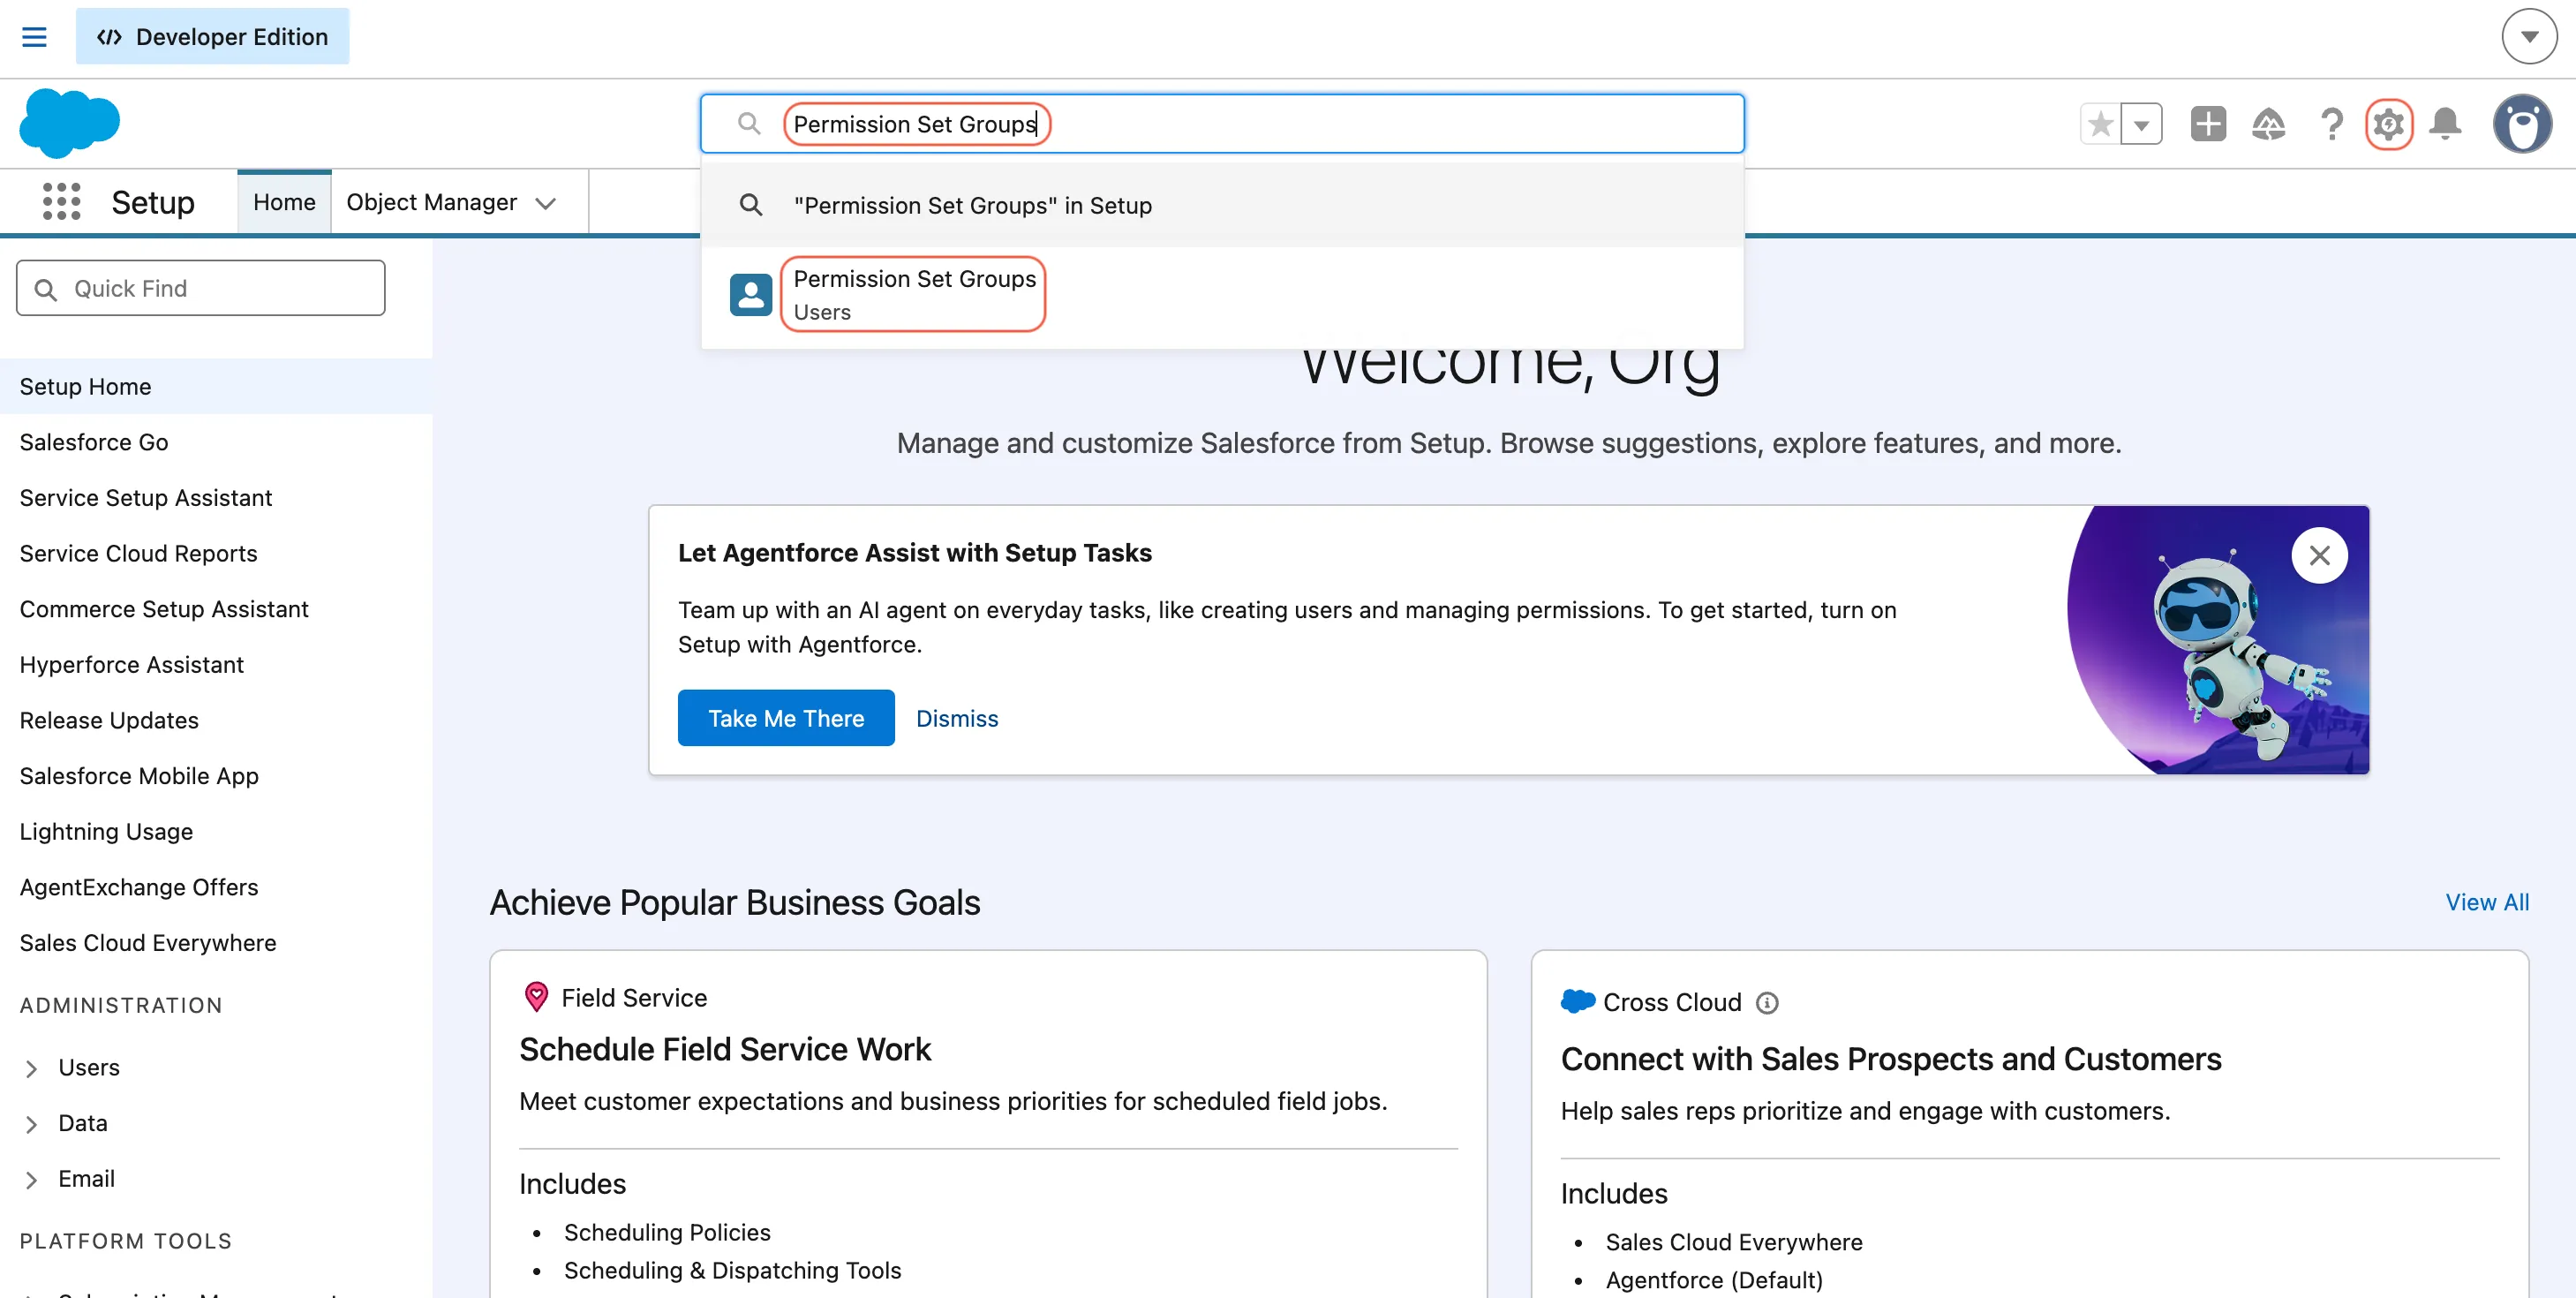
Open Permission Set Groups and click New Permission Set Group.
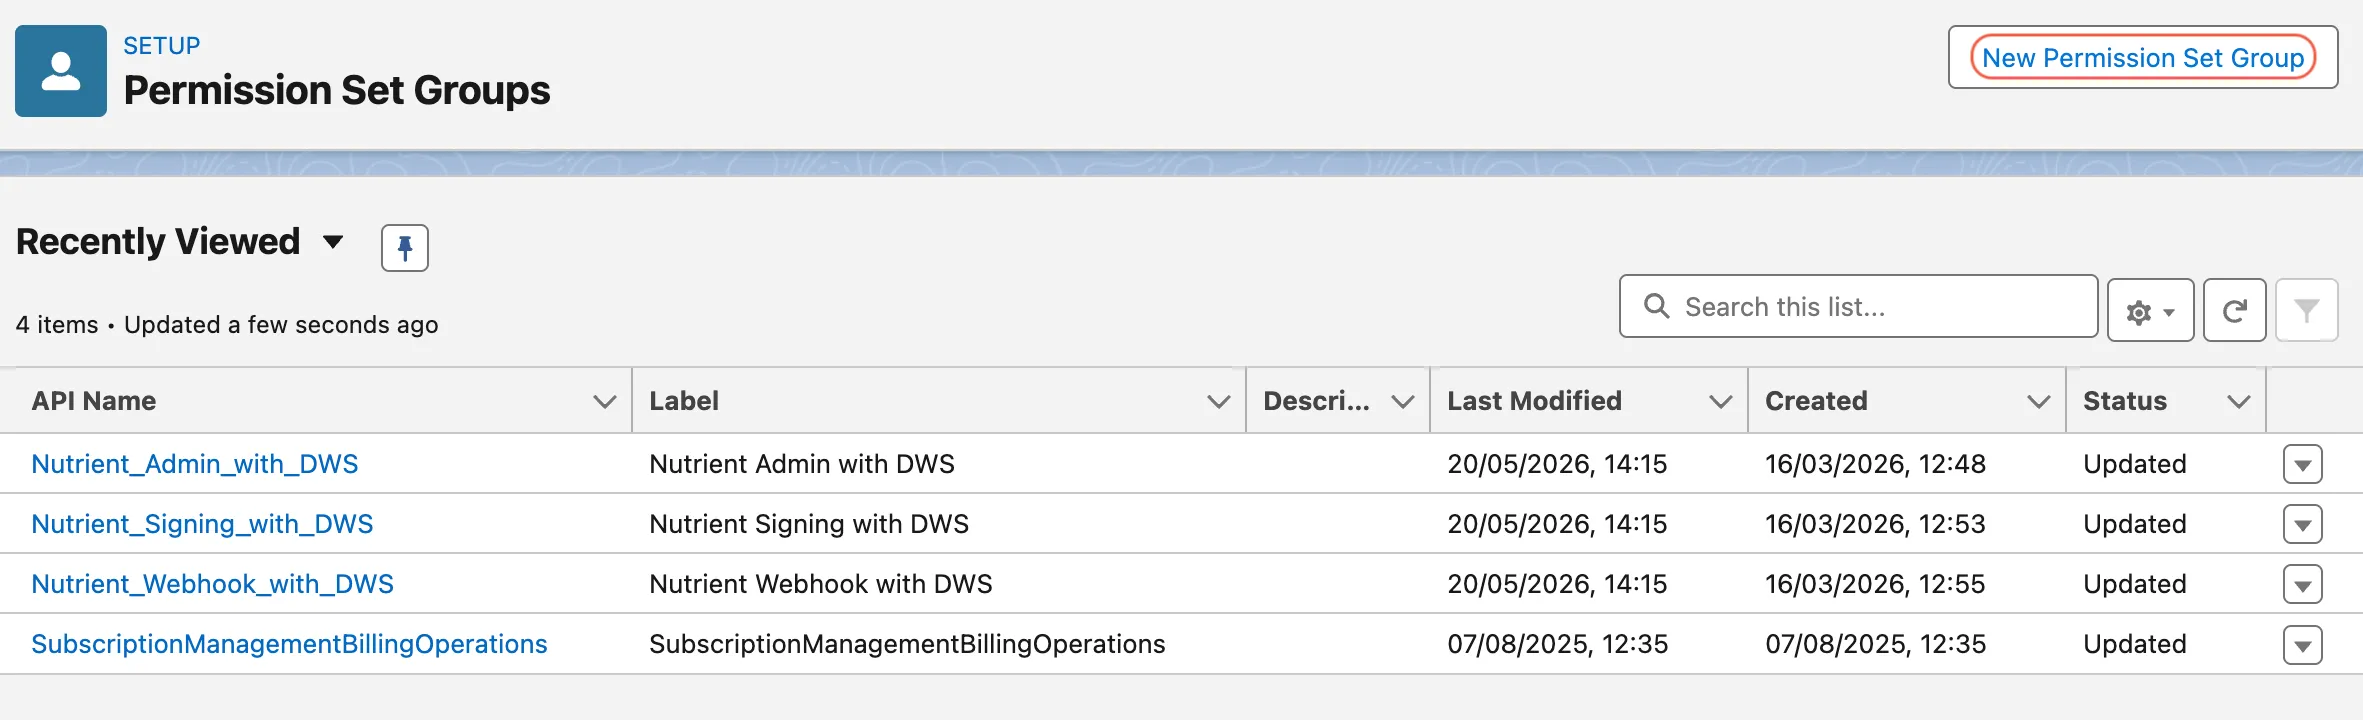
Create the group and save it.

Open the group.
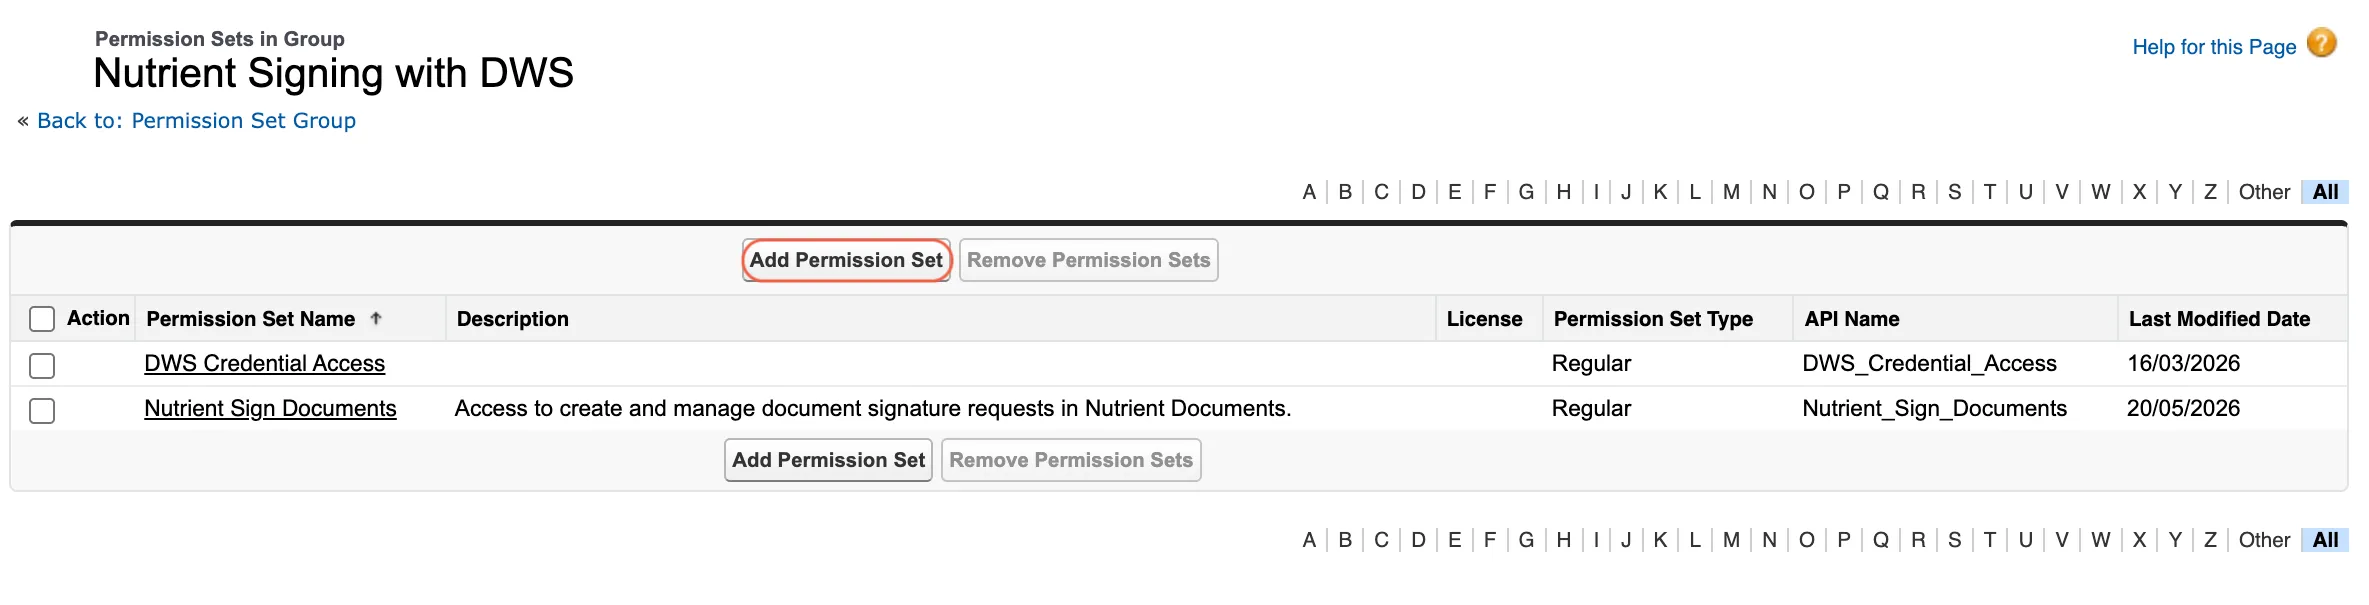
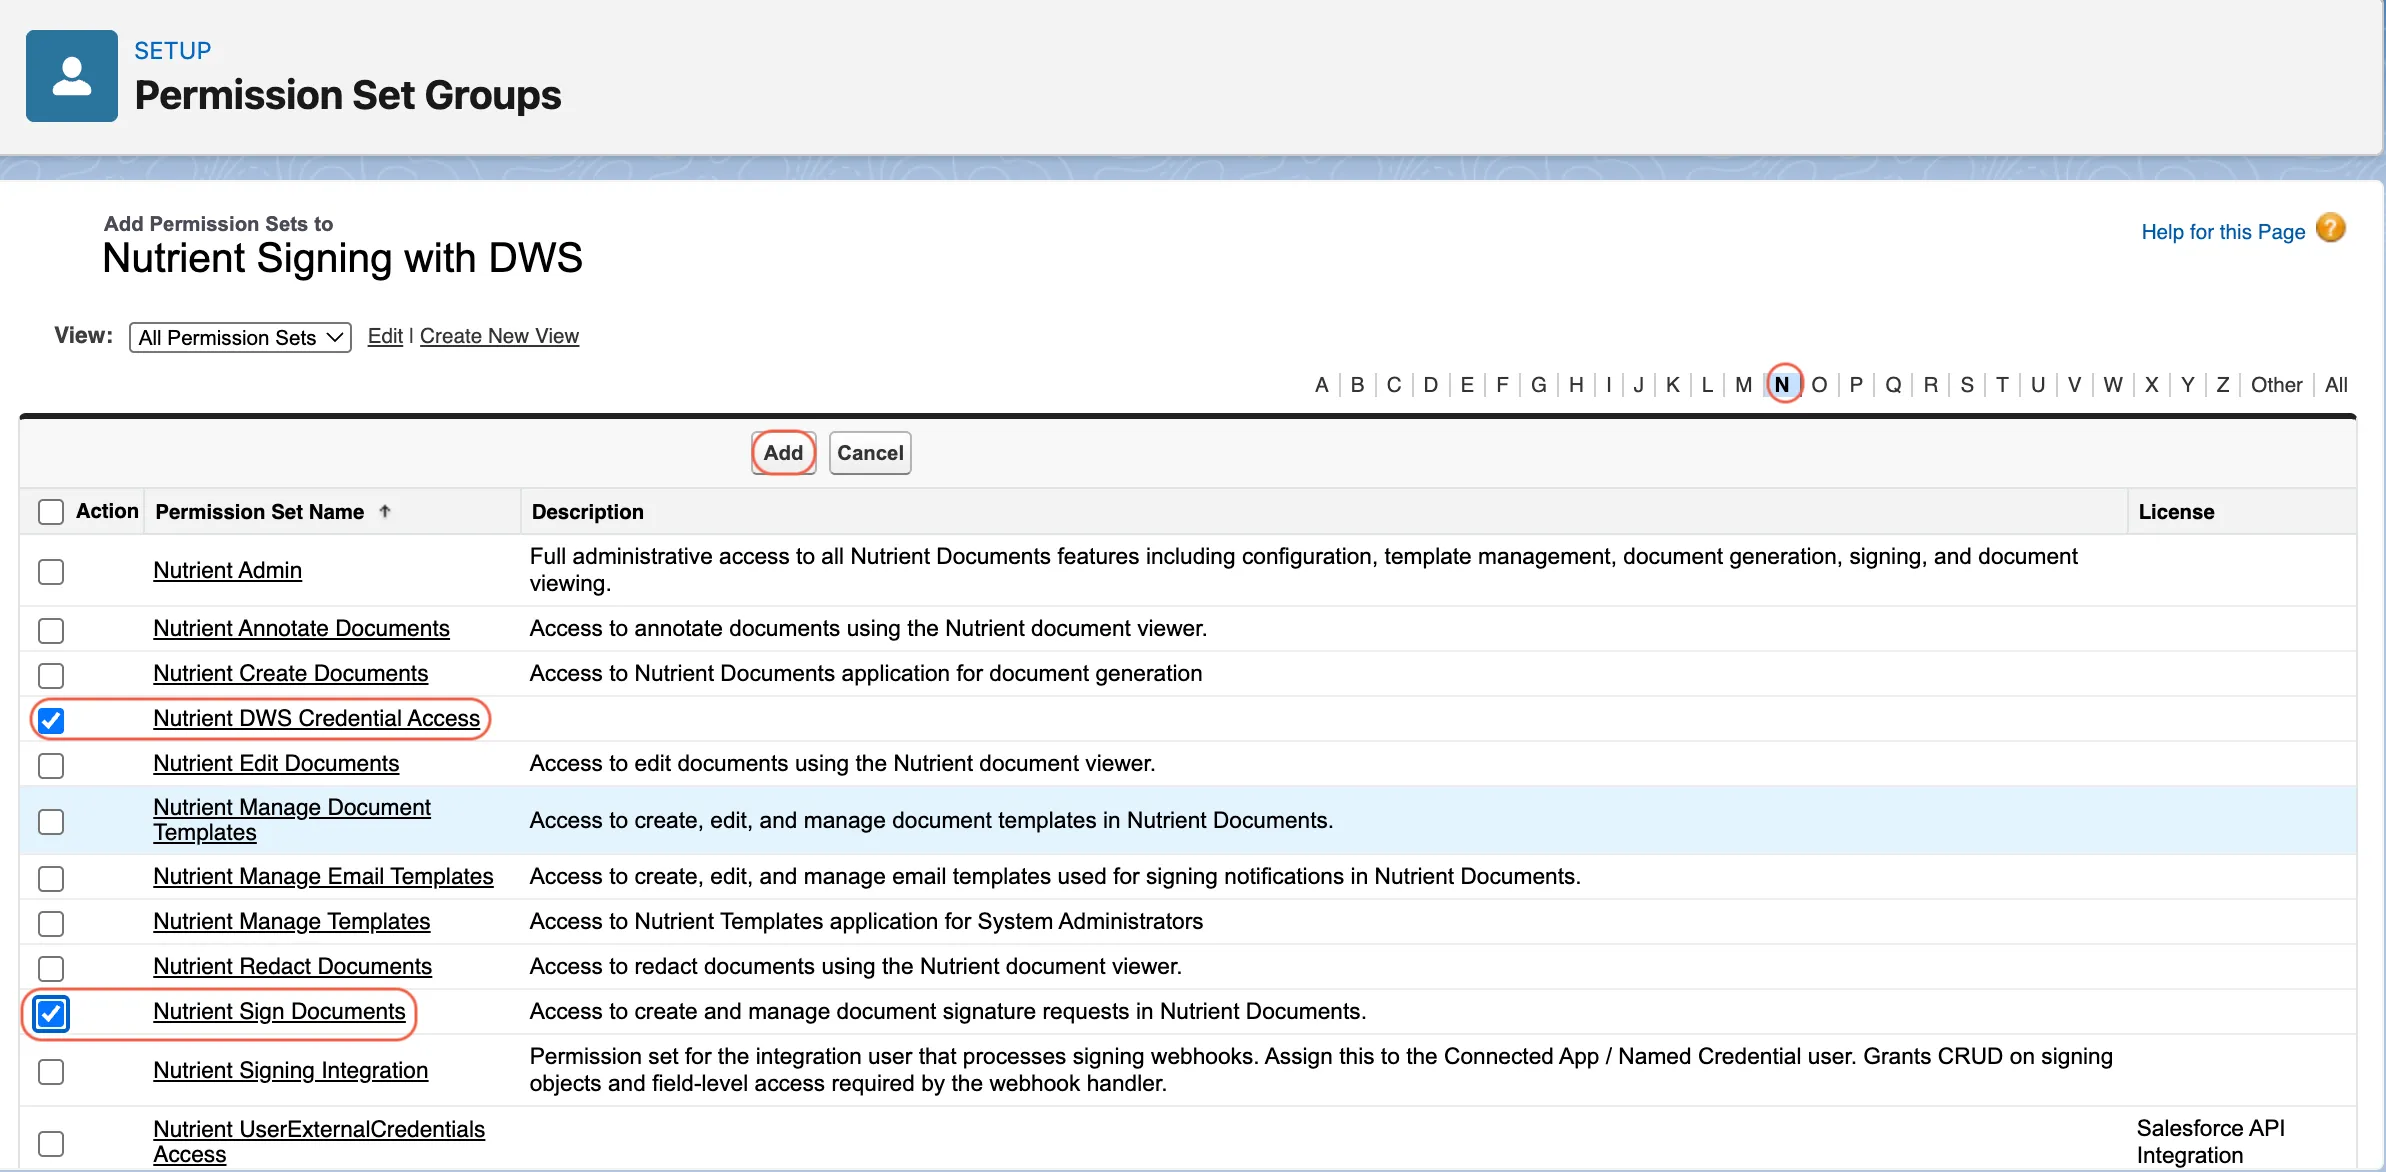
In the Permission Sets section, click Permission Sets in Group.
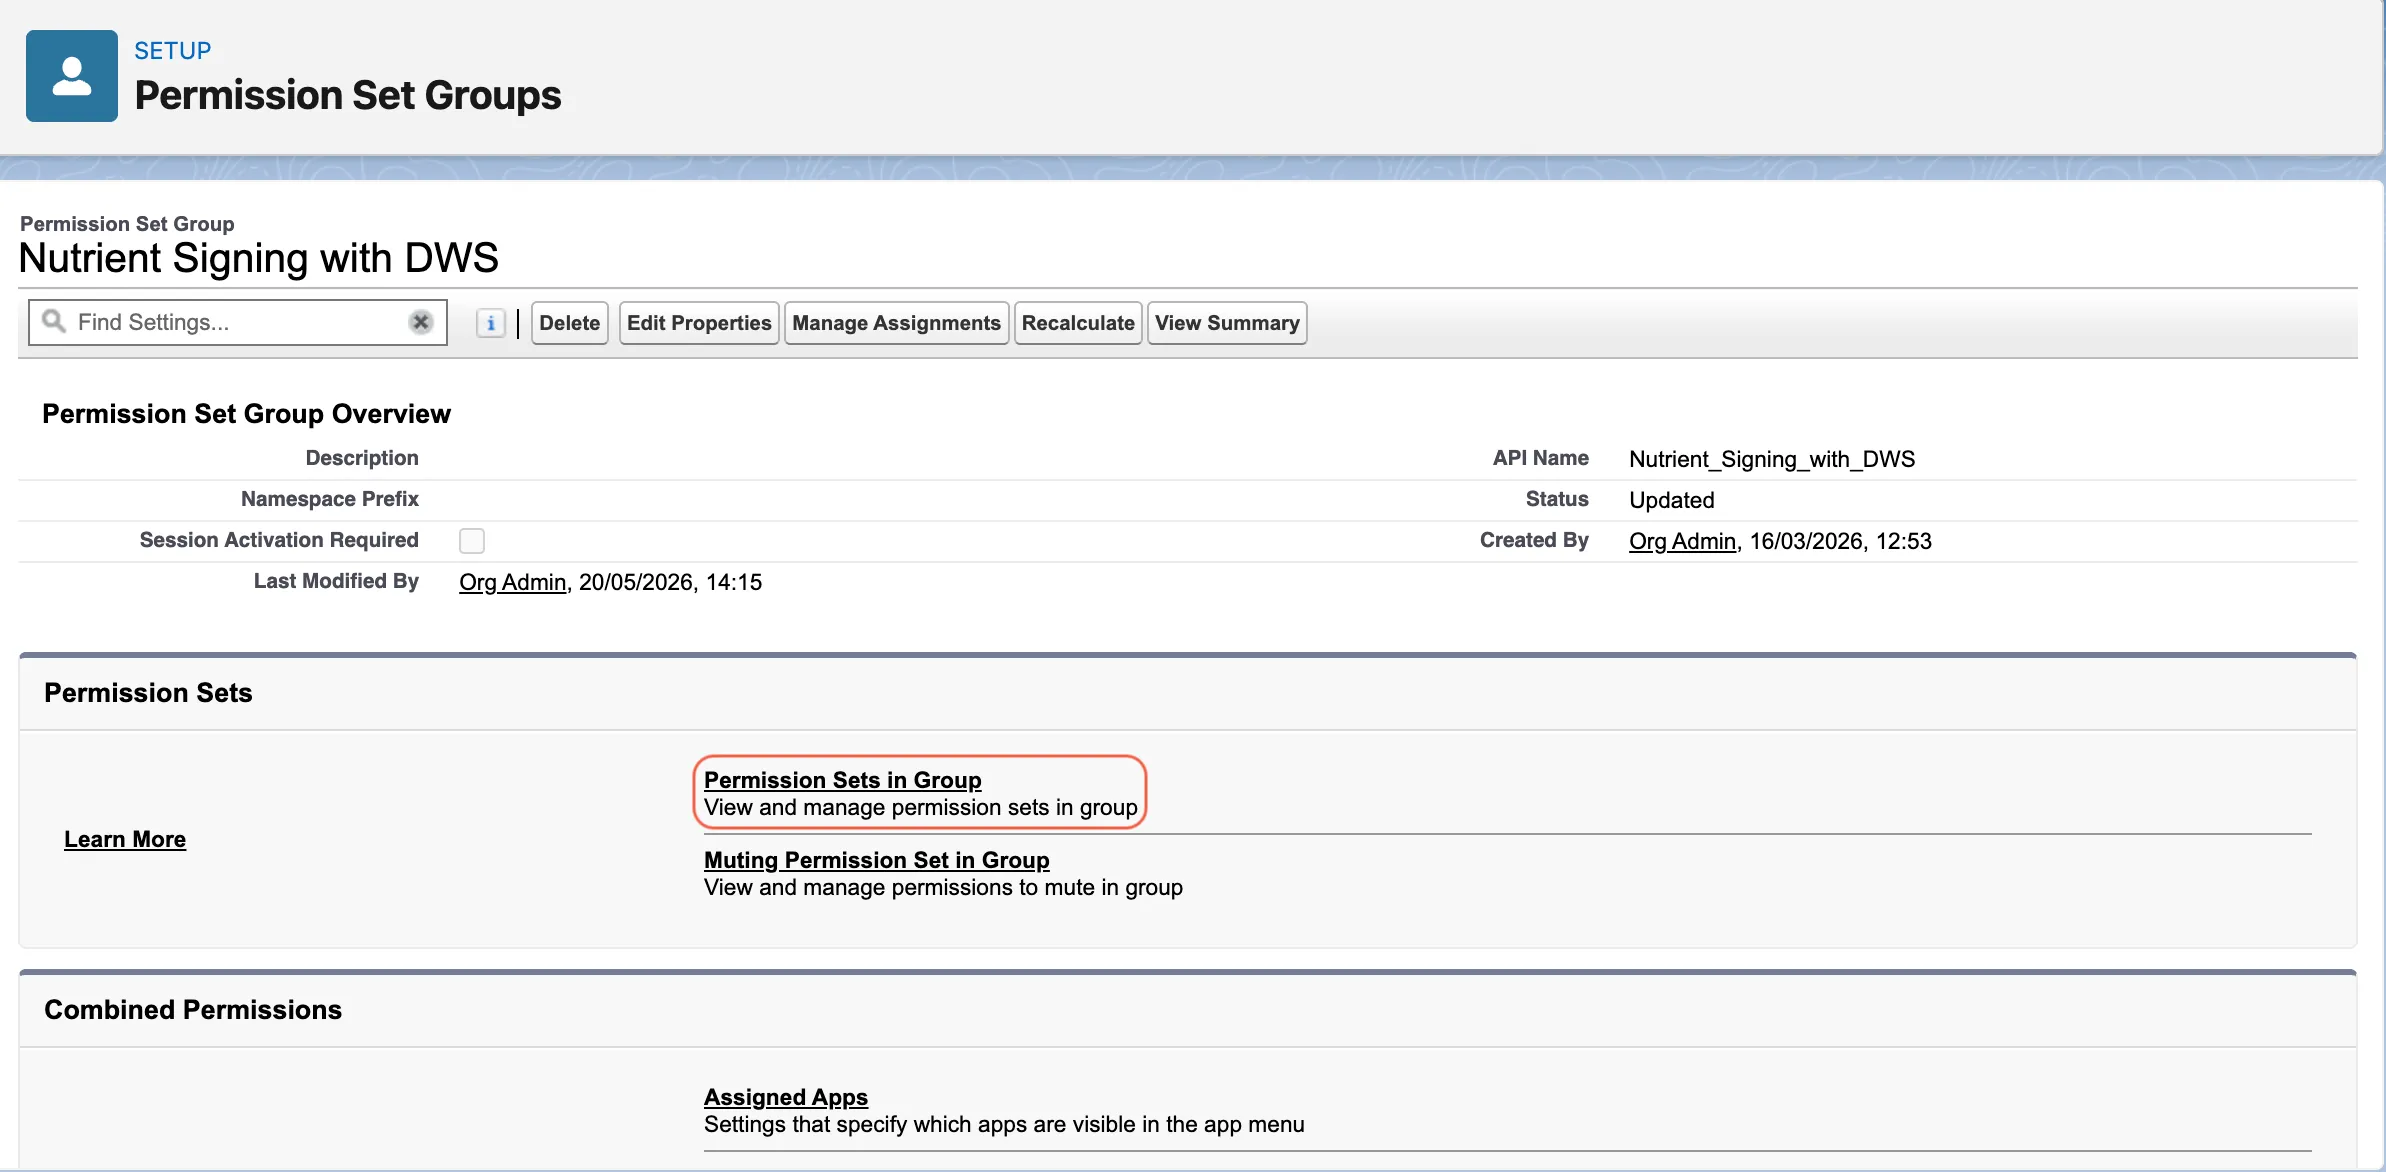
Add the required permission sets to the group.
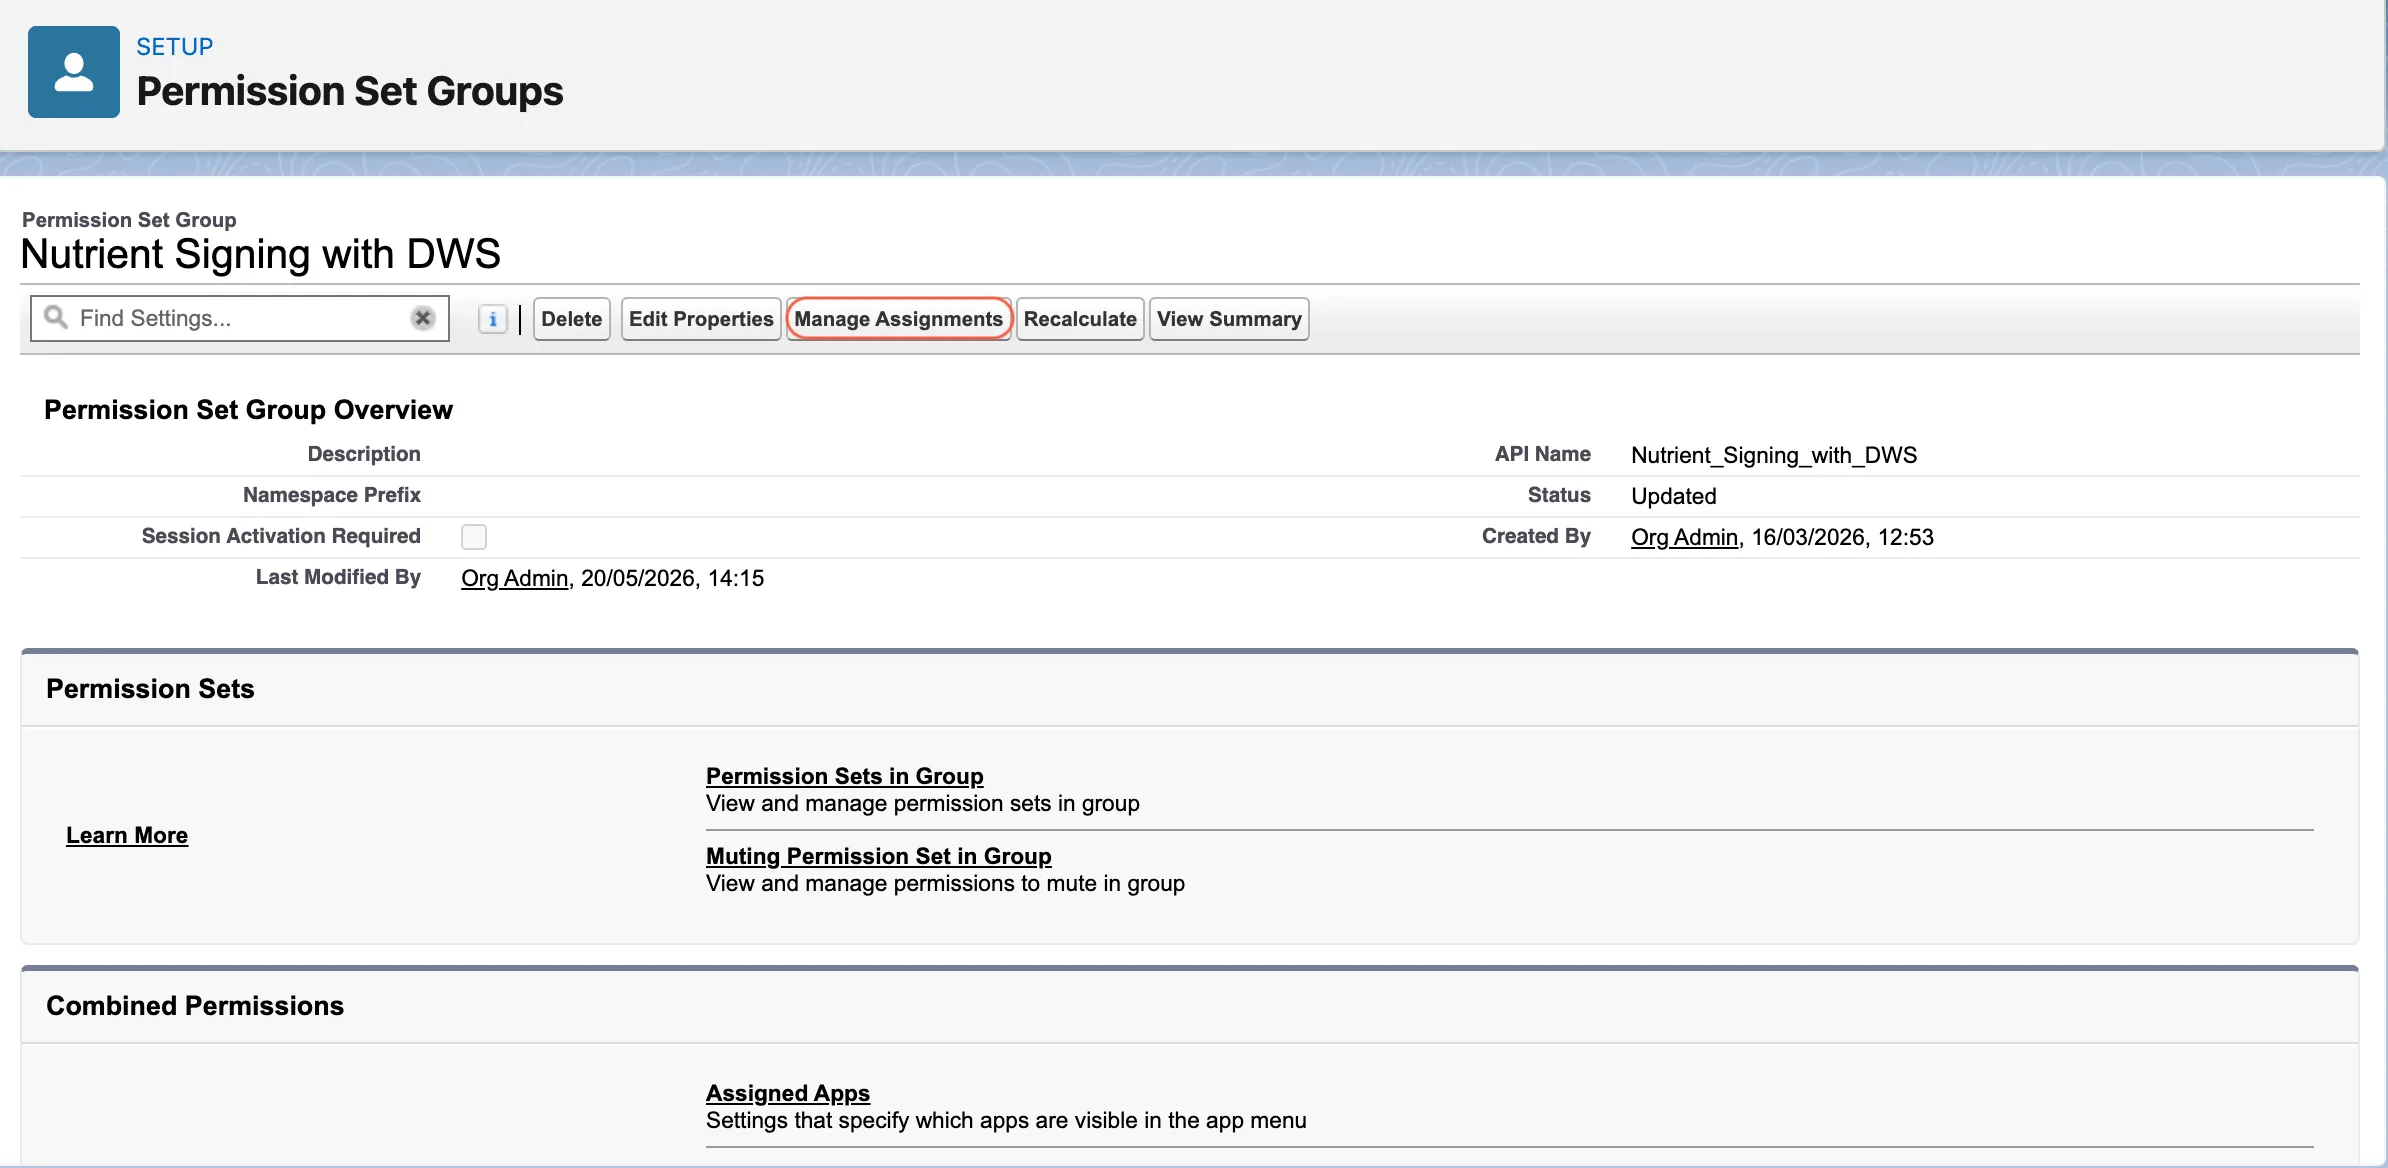
Return to the group and click Manage Assignments.
Click Add Assignment.
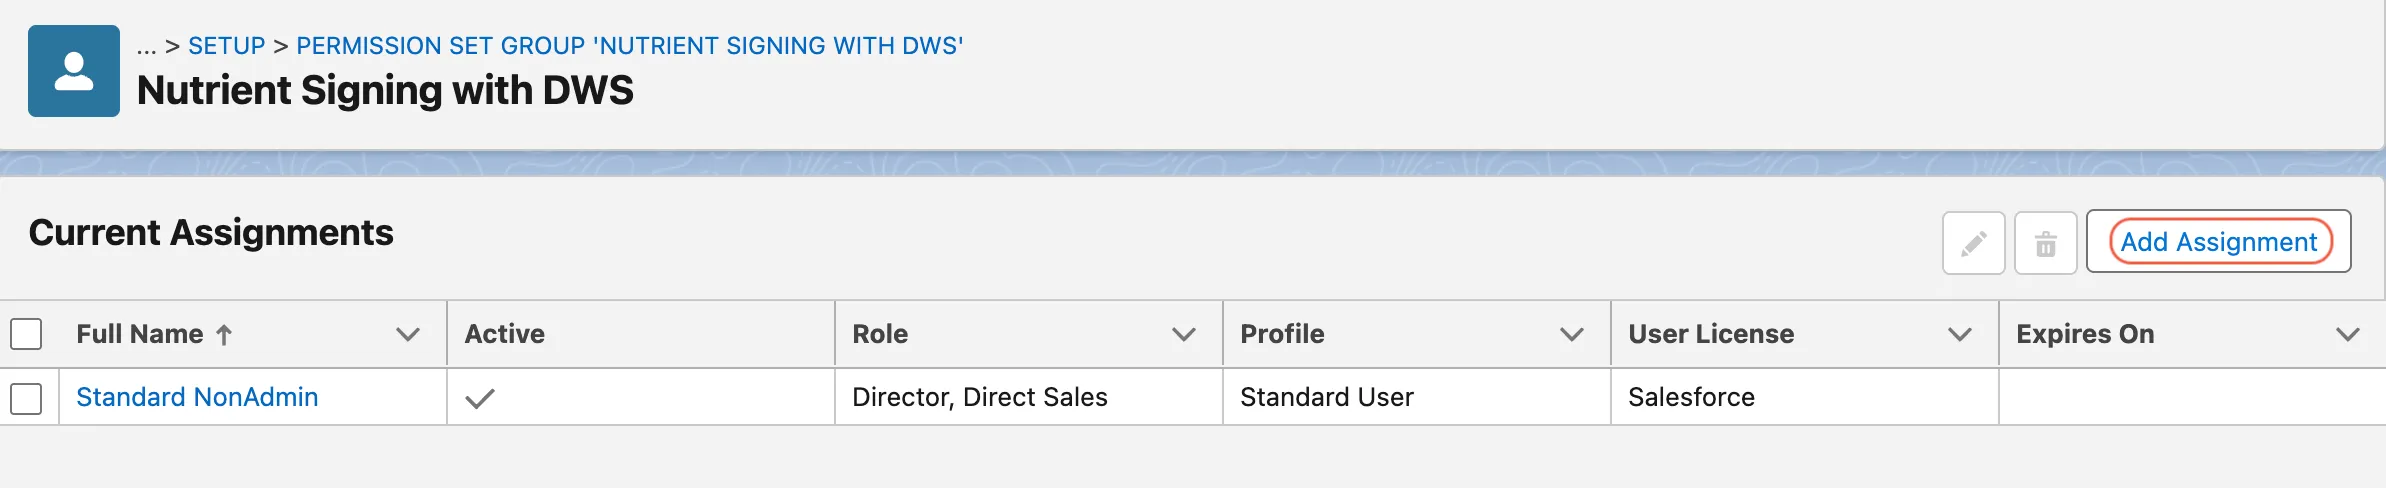
Select the target users and click Next > Assign.
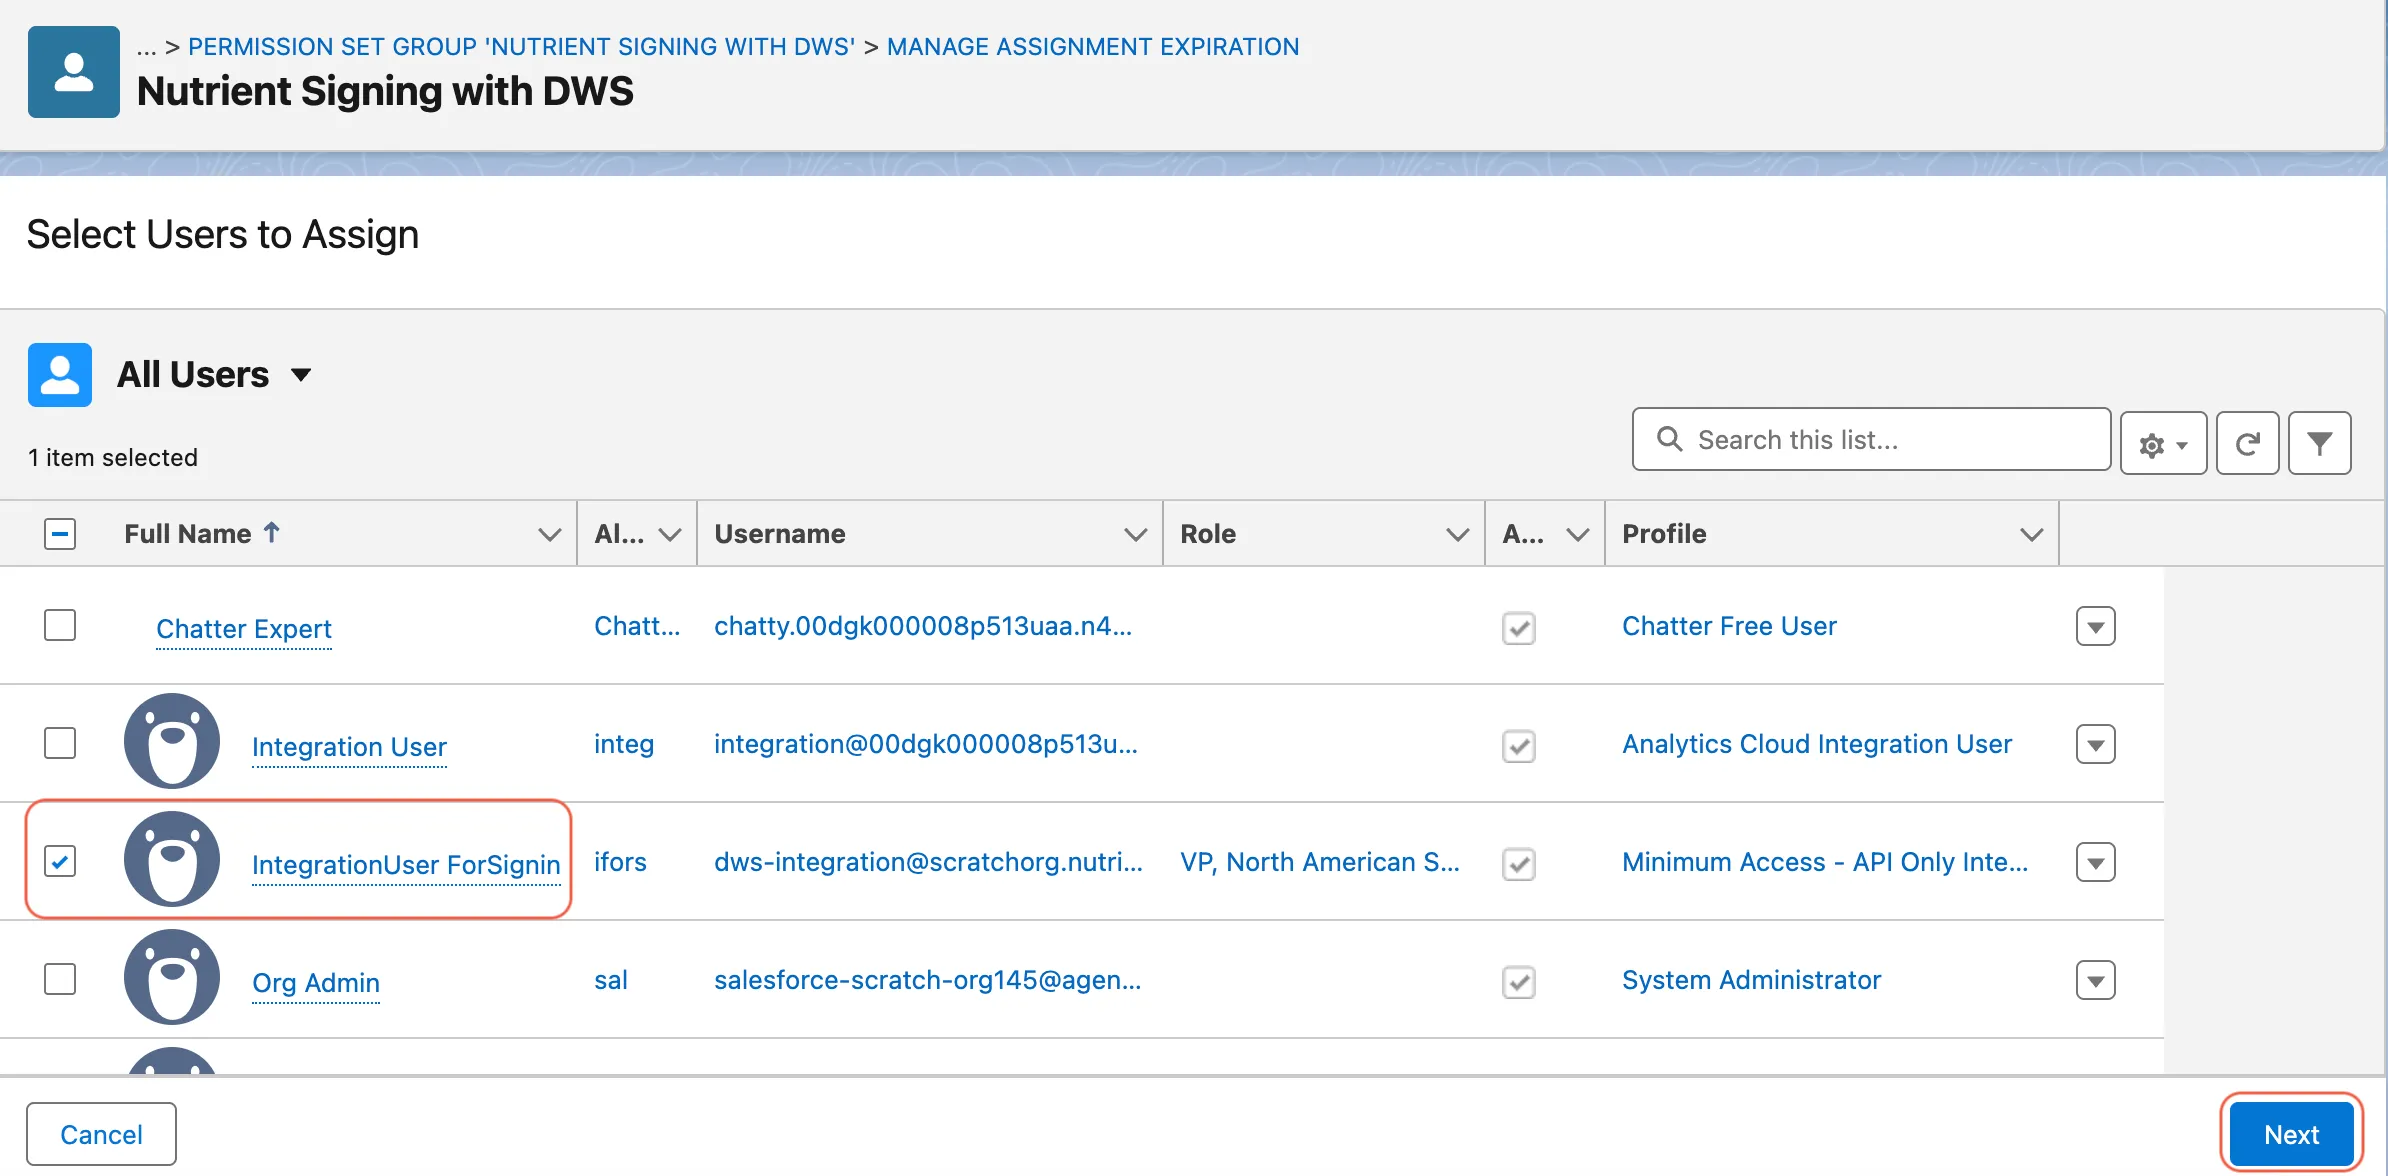
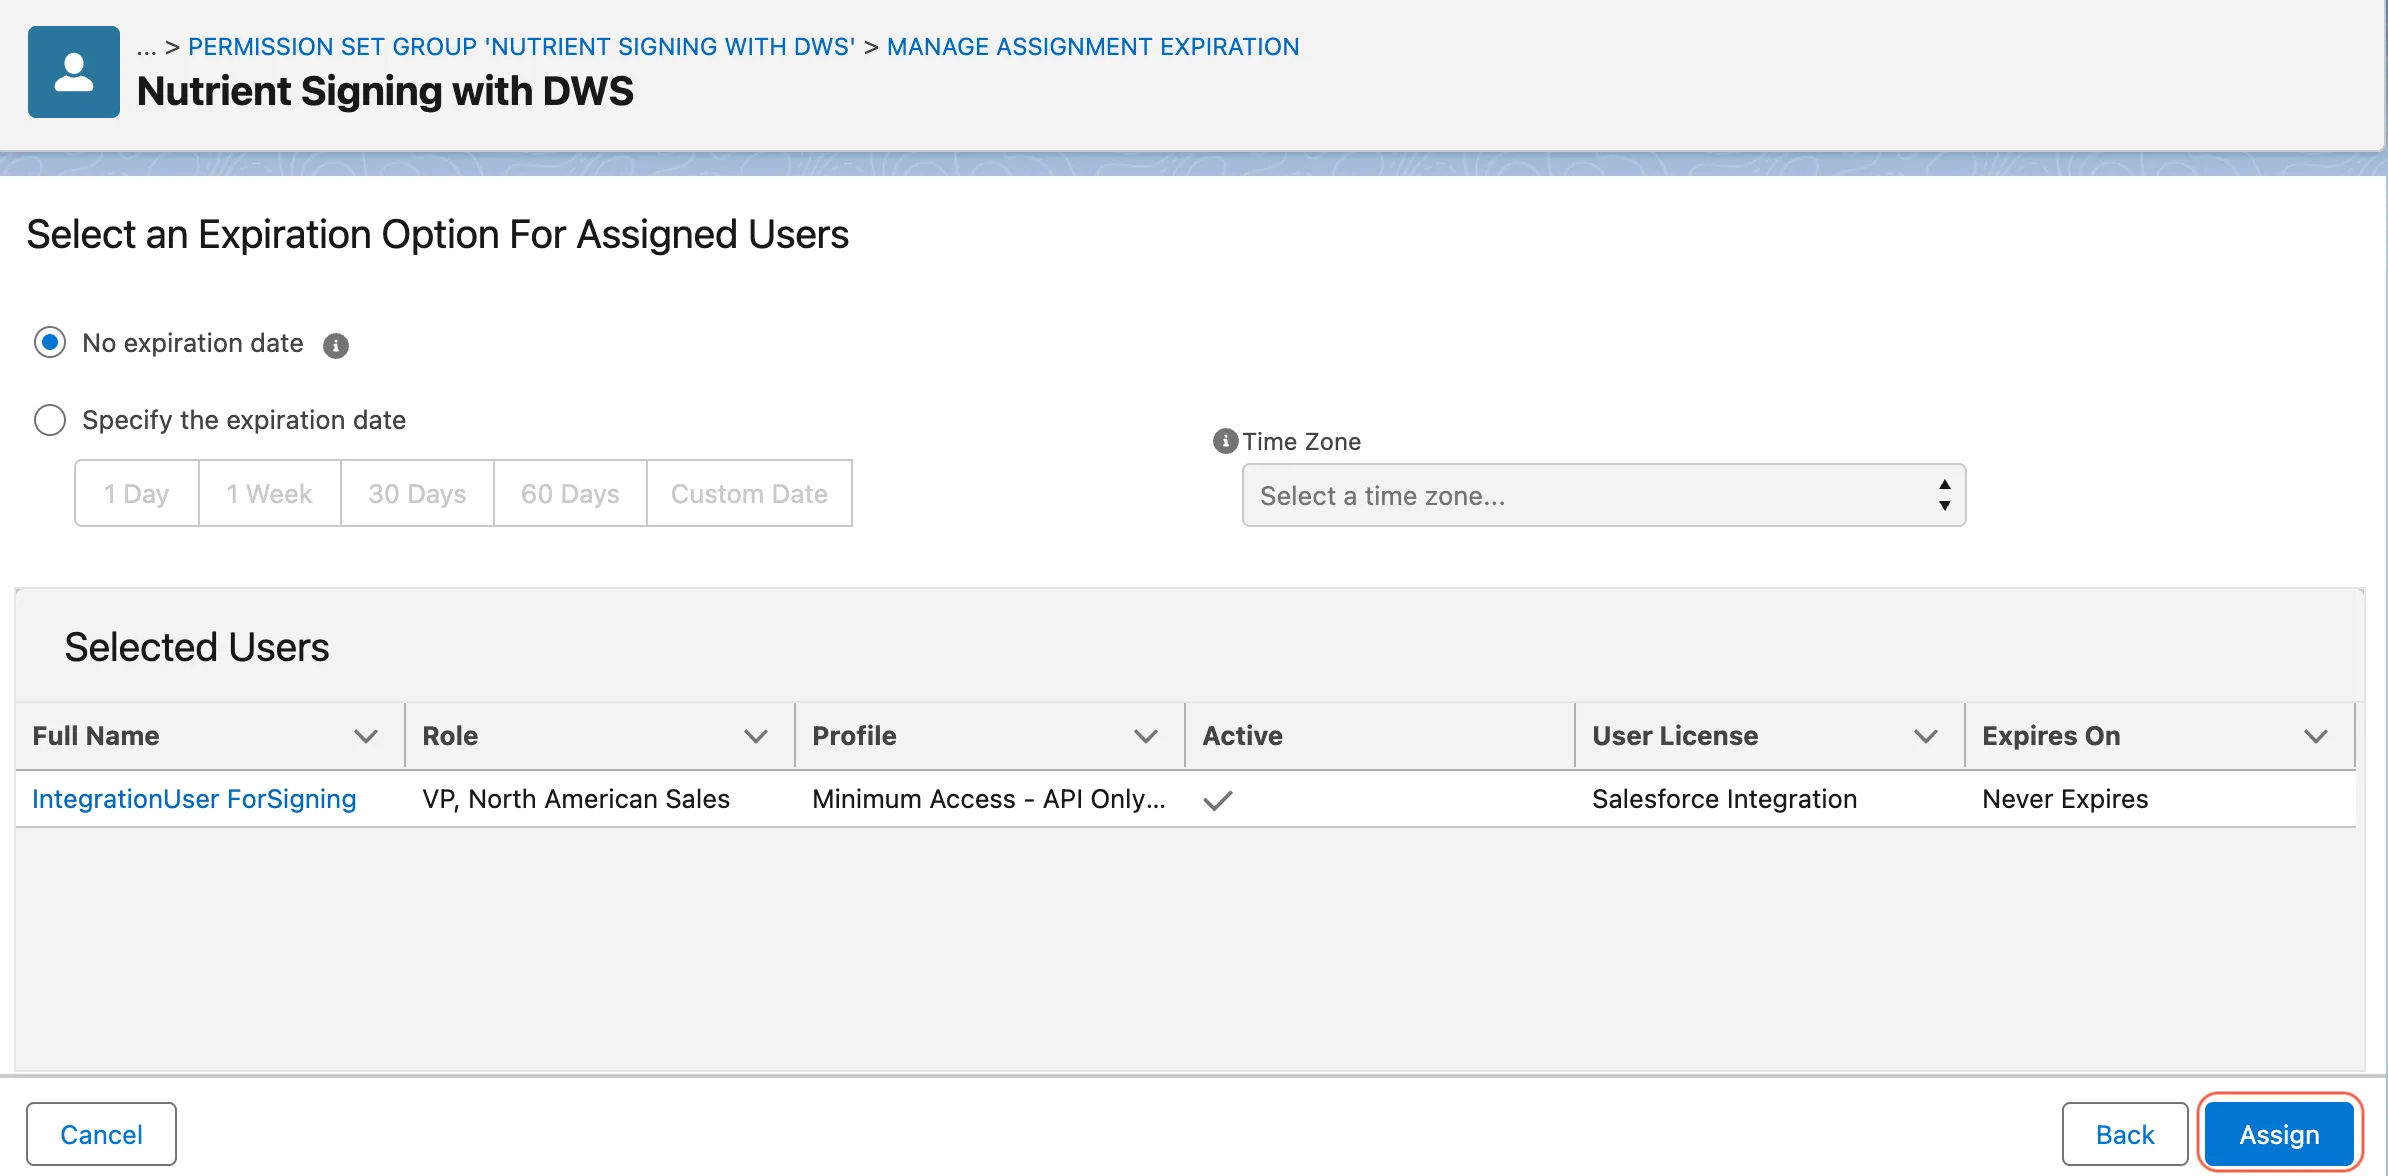
Verify that the users now appear in the assignment list.
Special case: API-only webhook integration user
If your webhook integration user uses the Salesforce API Integration license, it may also need read access to the User External Credentials object.
For this API-only user, create a separate org-local permission set and add it to the webhook permission set group. This is the recommended approach for that user type.
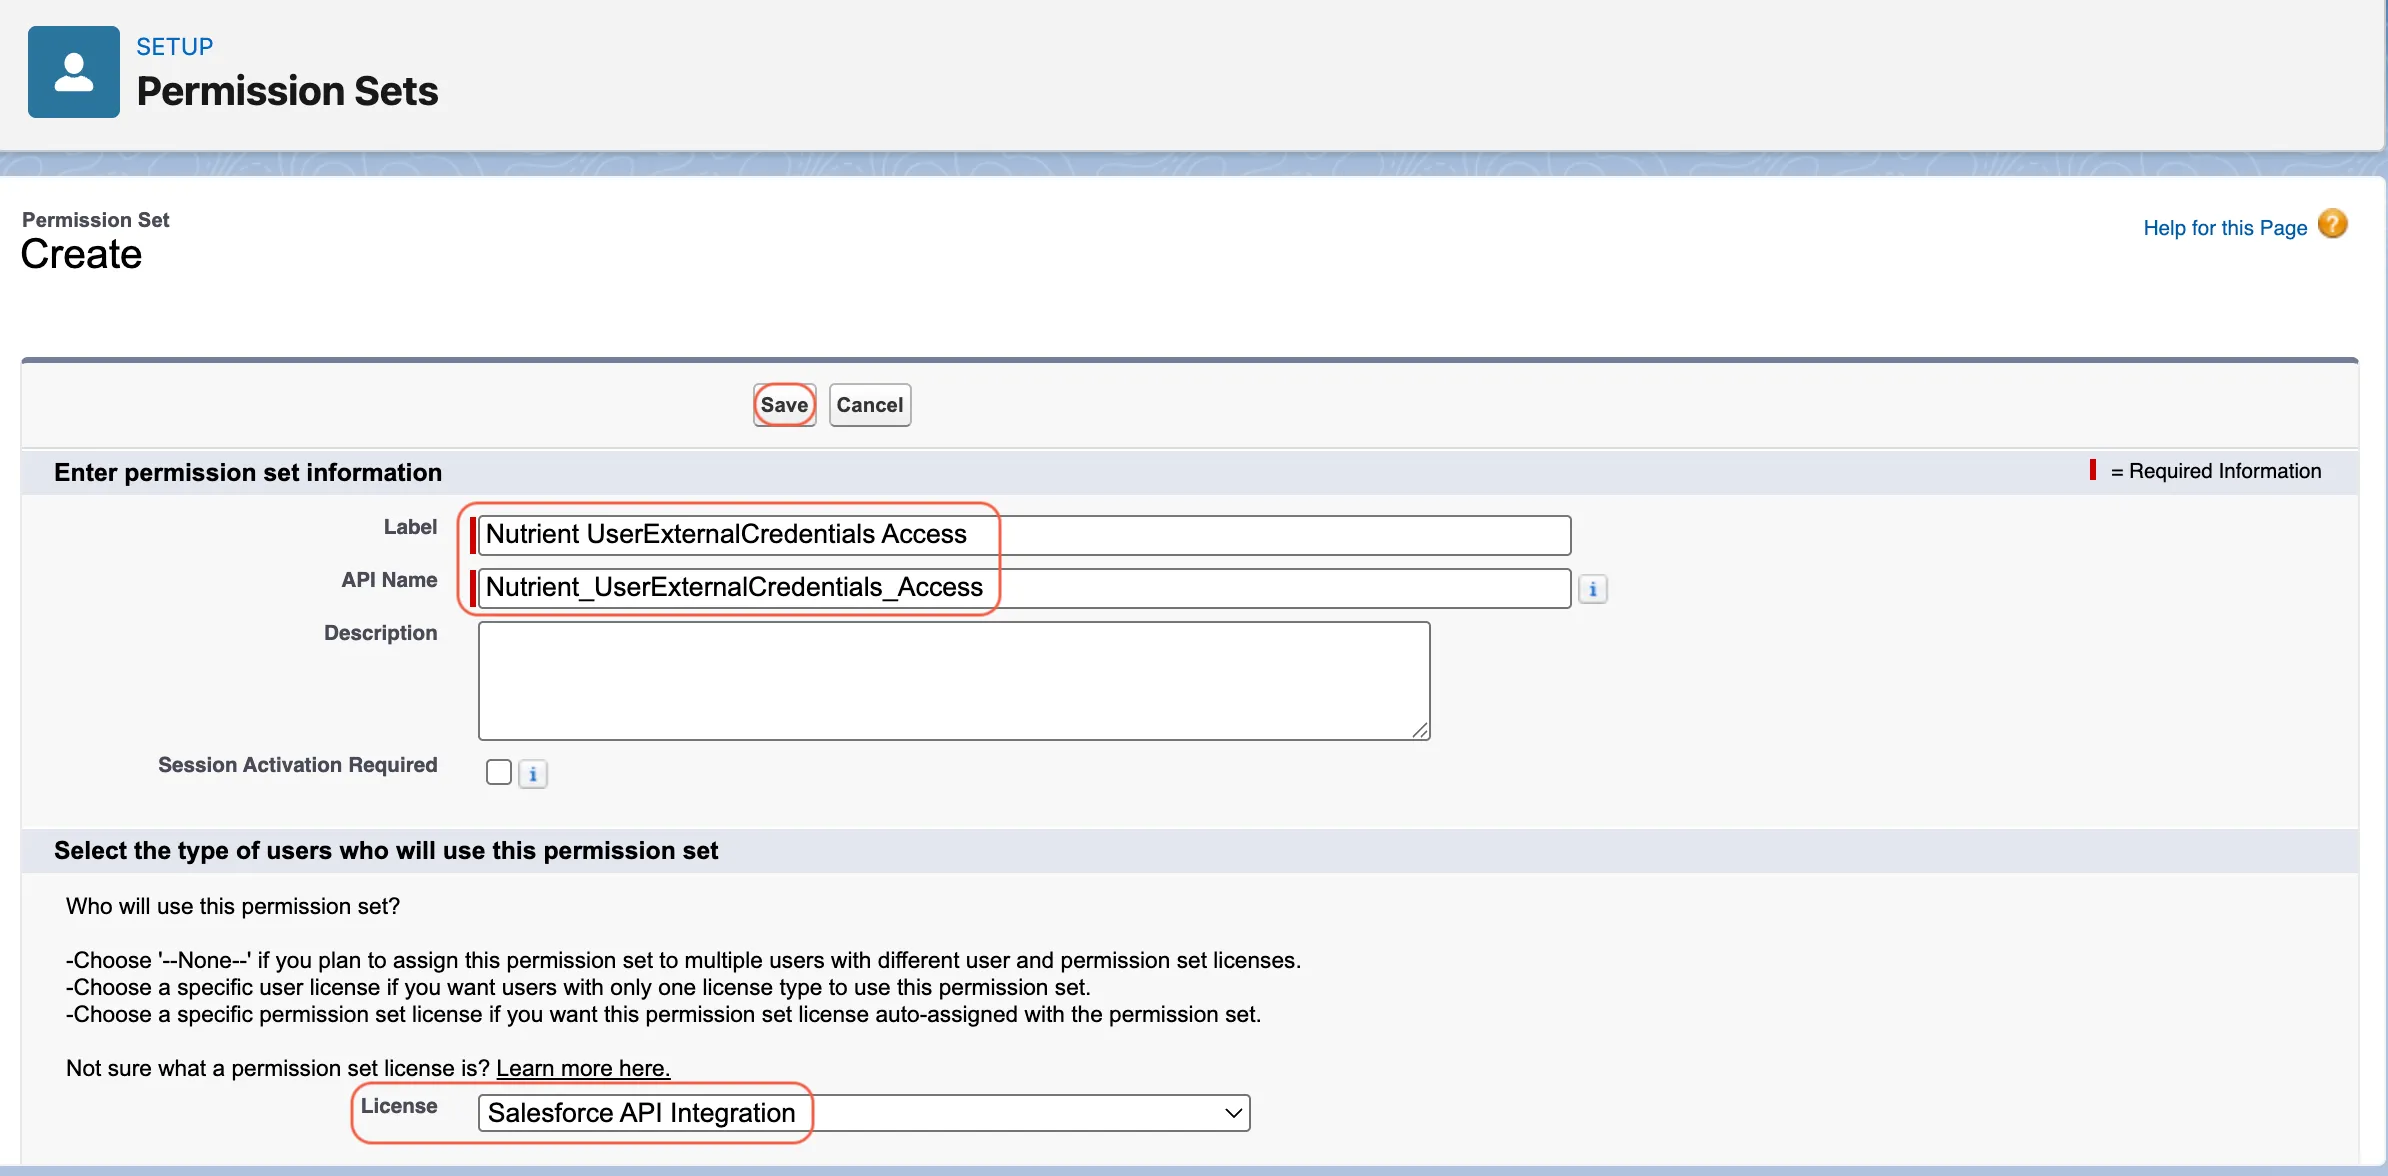
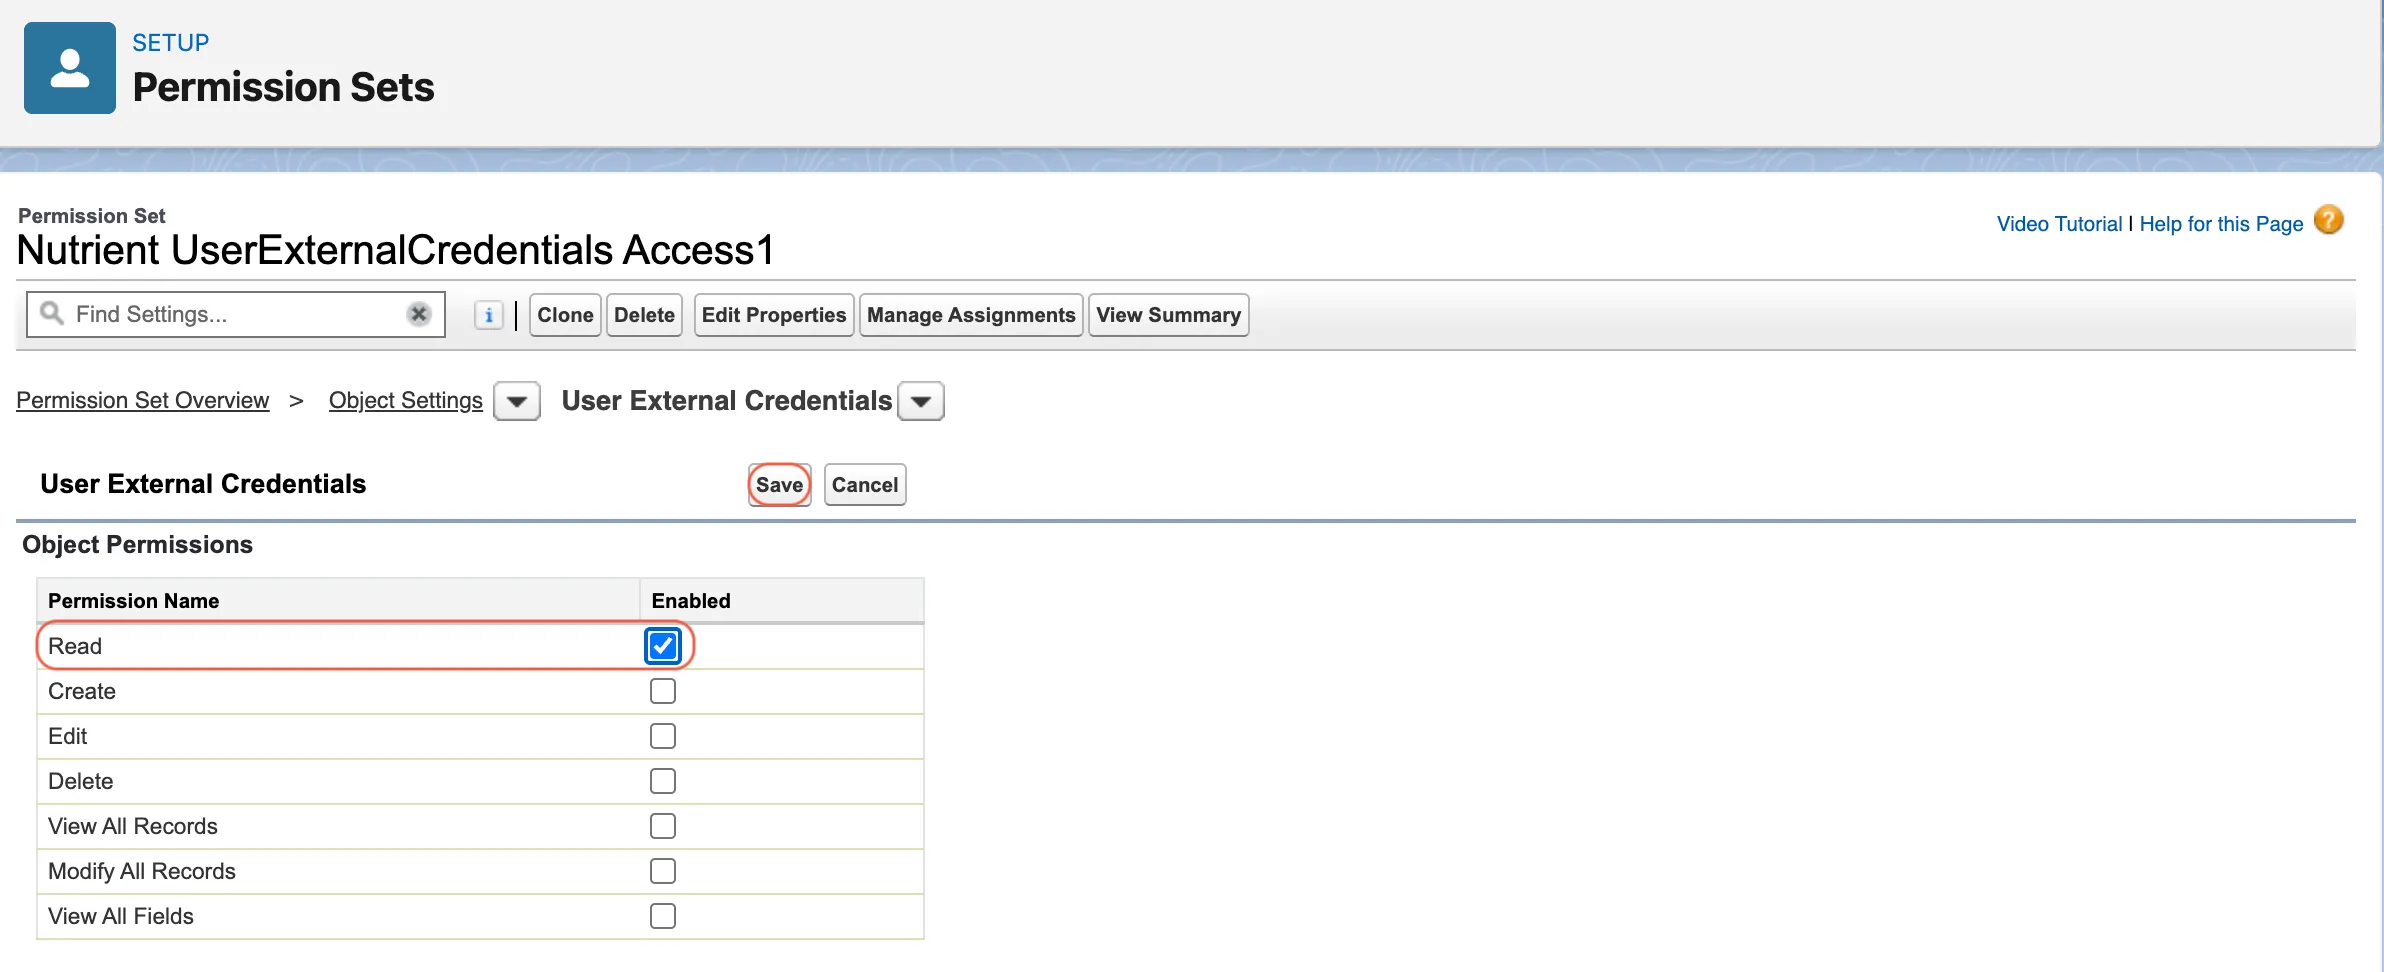
Create another local permission set. Example name: Nutrient UserExternalCredentials Access.
In Setup, search for Permission Sets in quick find.
Open Permission Sets and click New.
Create the permission set by using the Salesforce API Integration license.
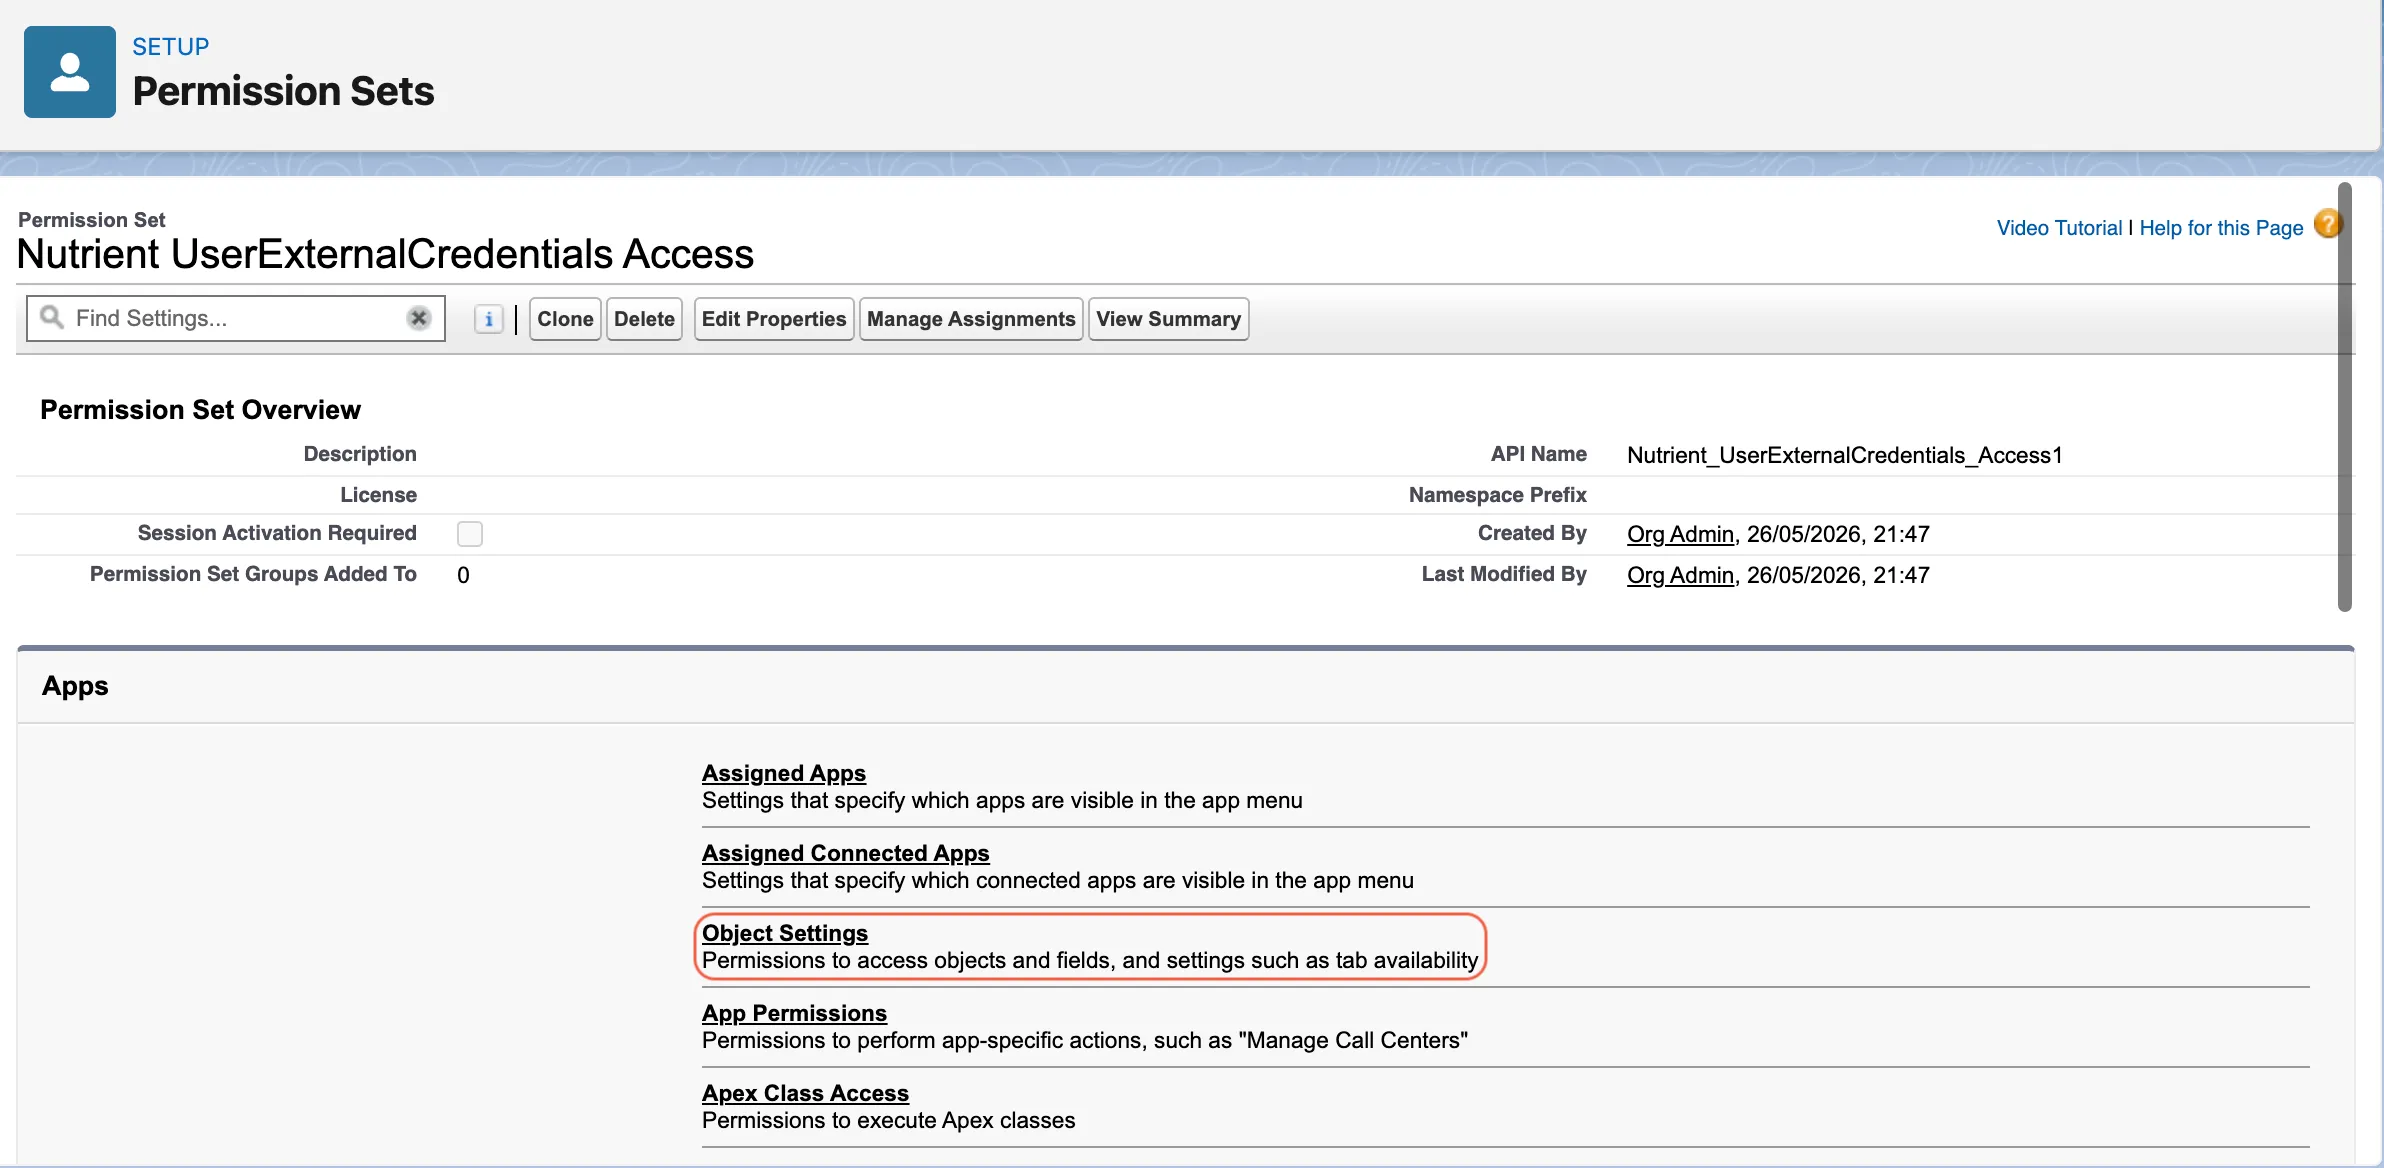
Open Object Settings.
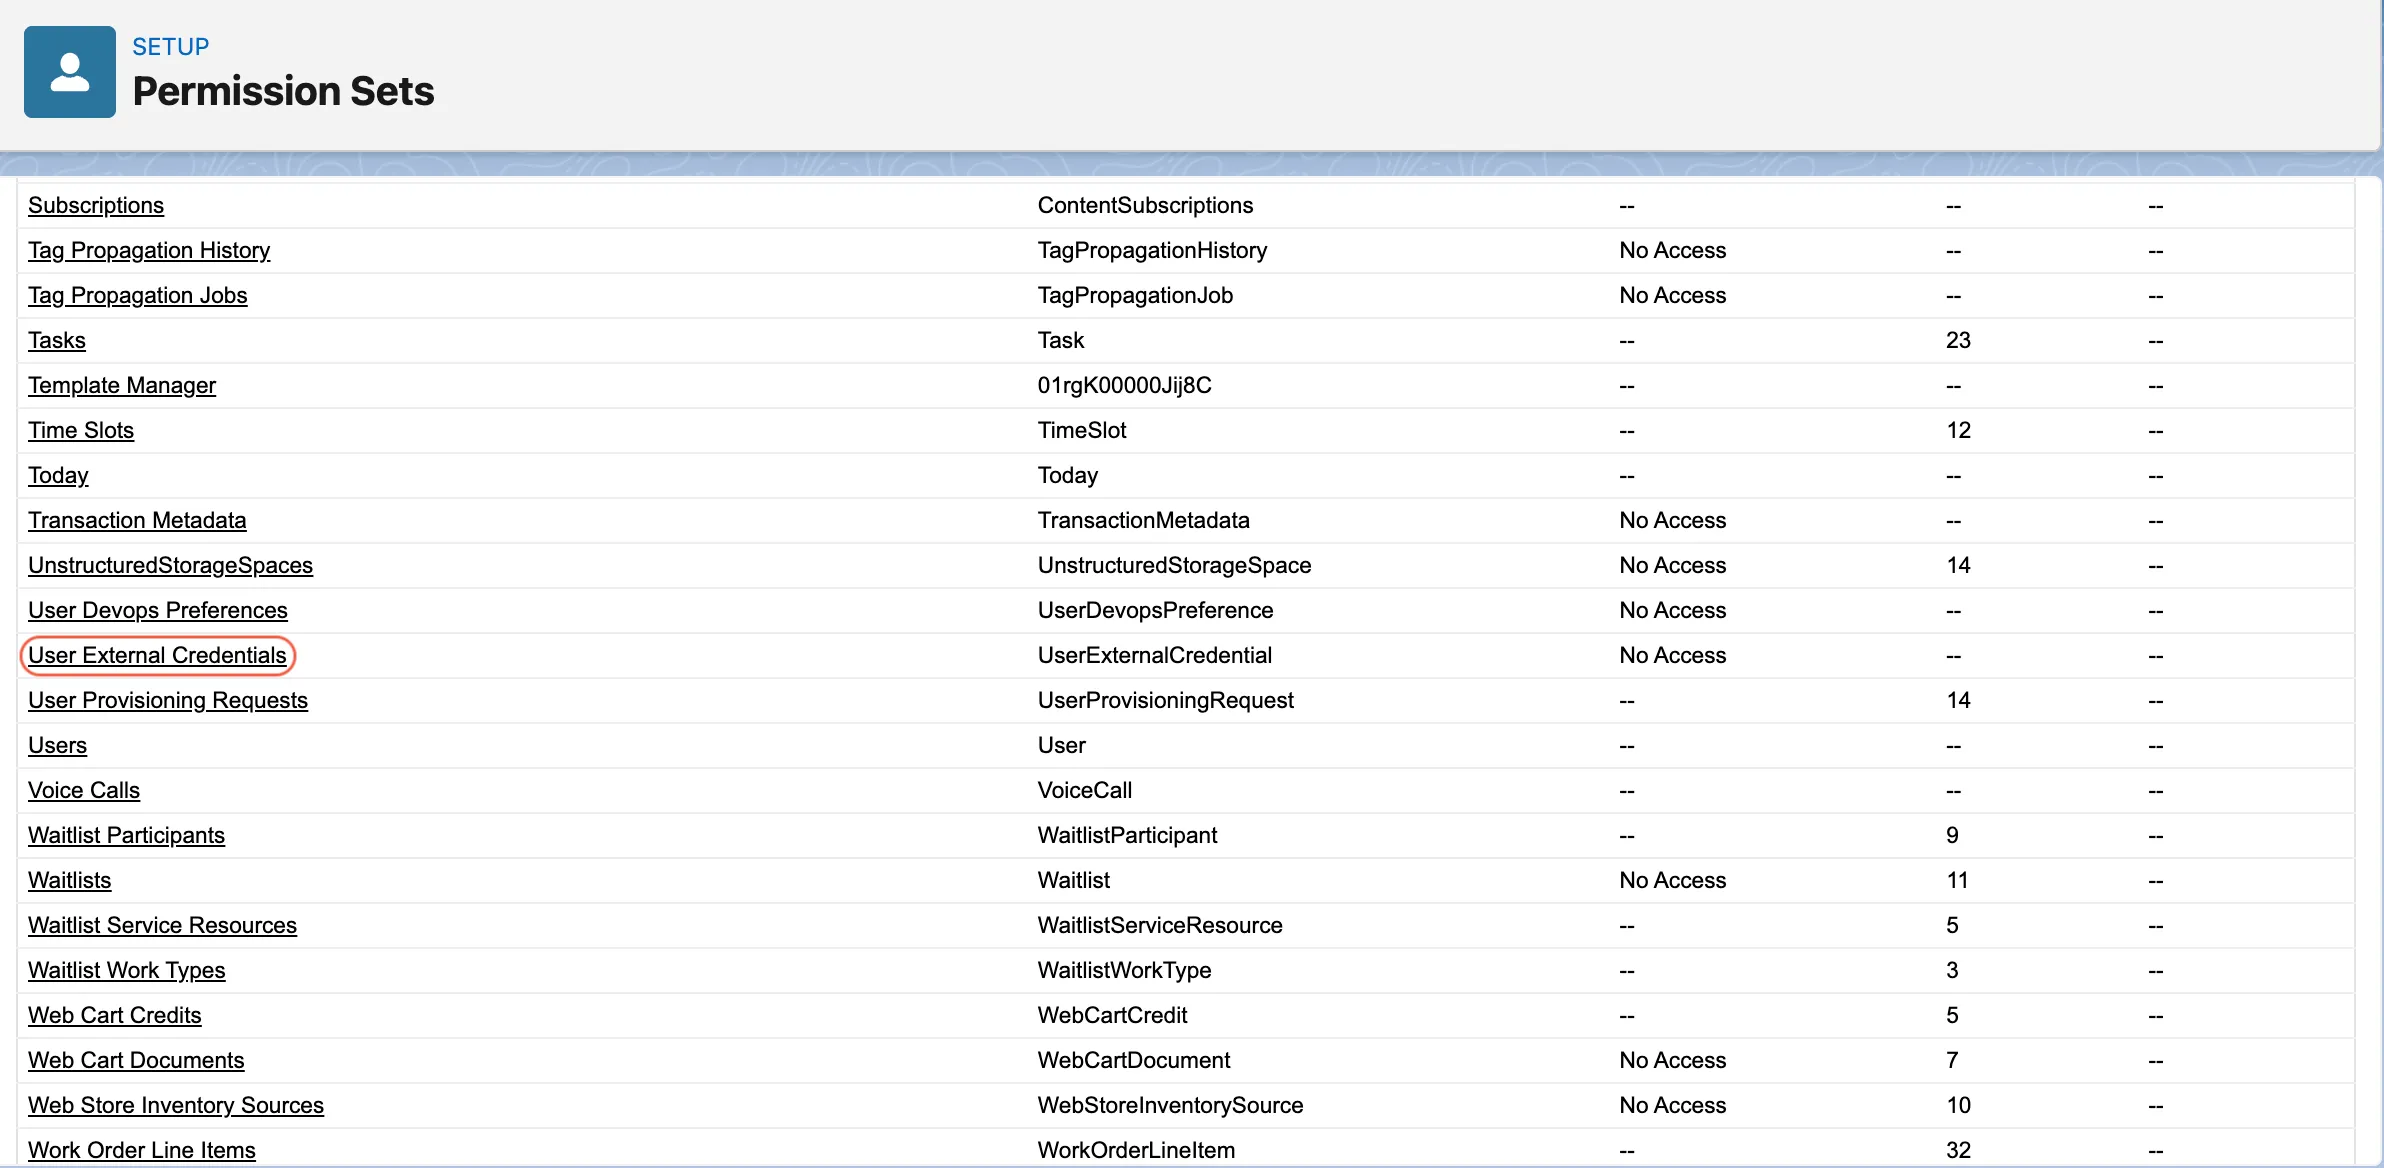
Open User External Credentials.
Click Edit.
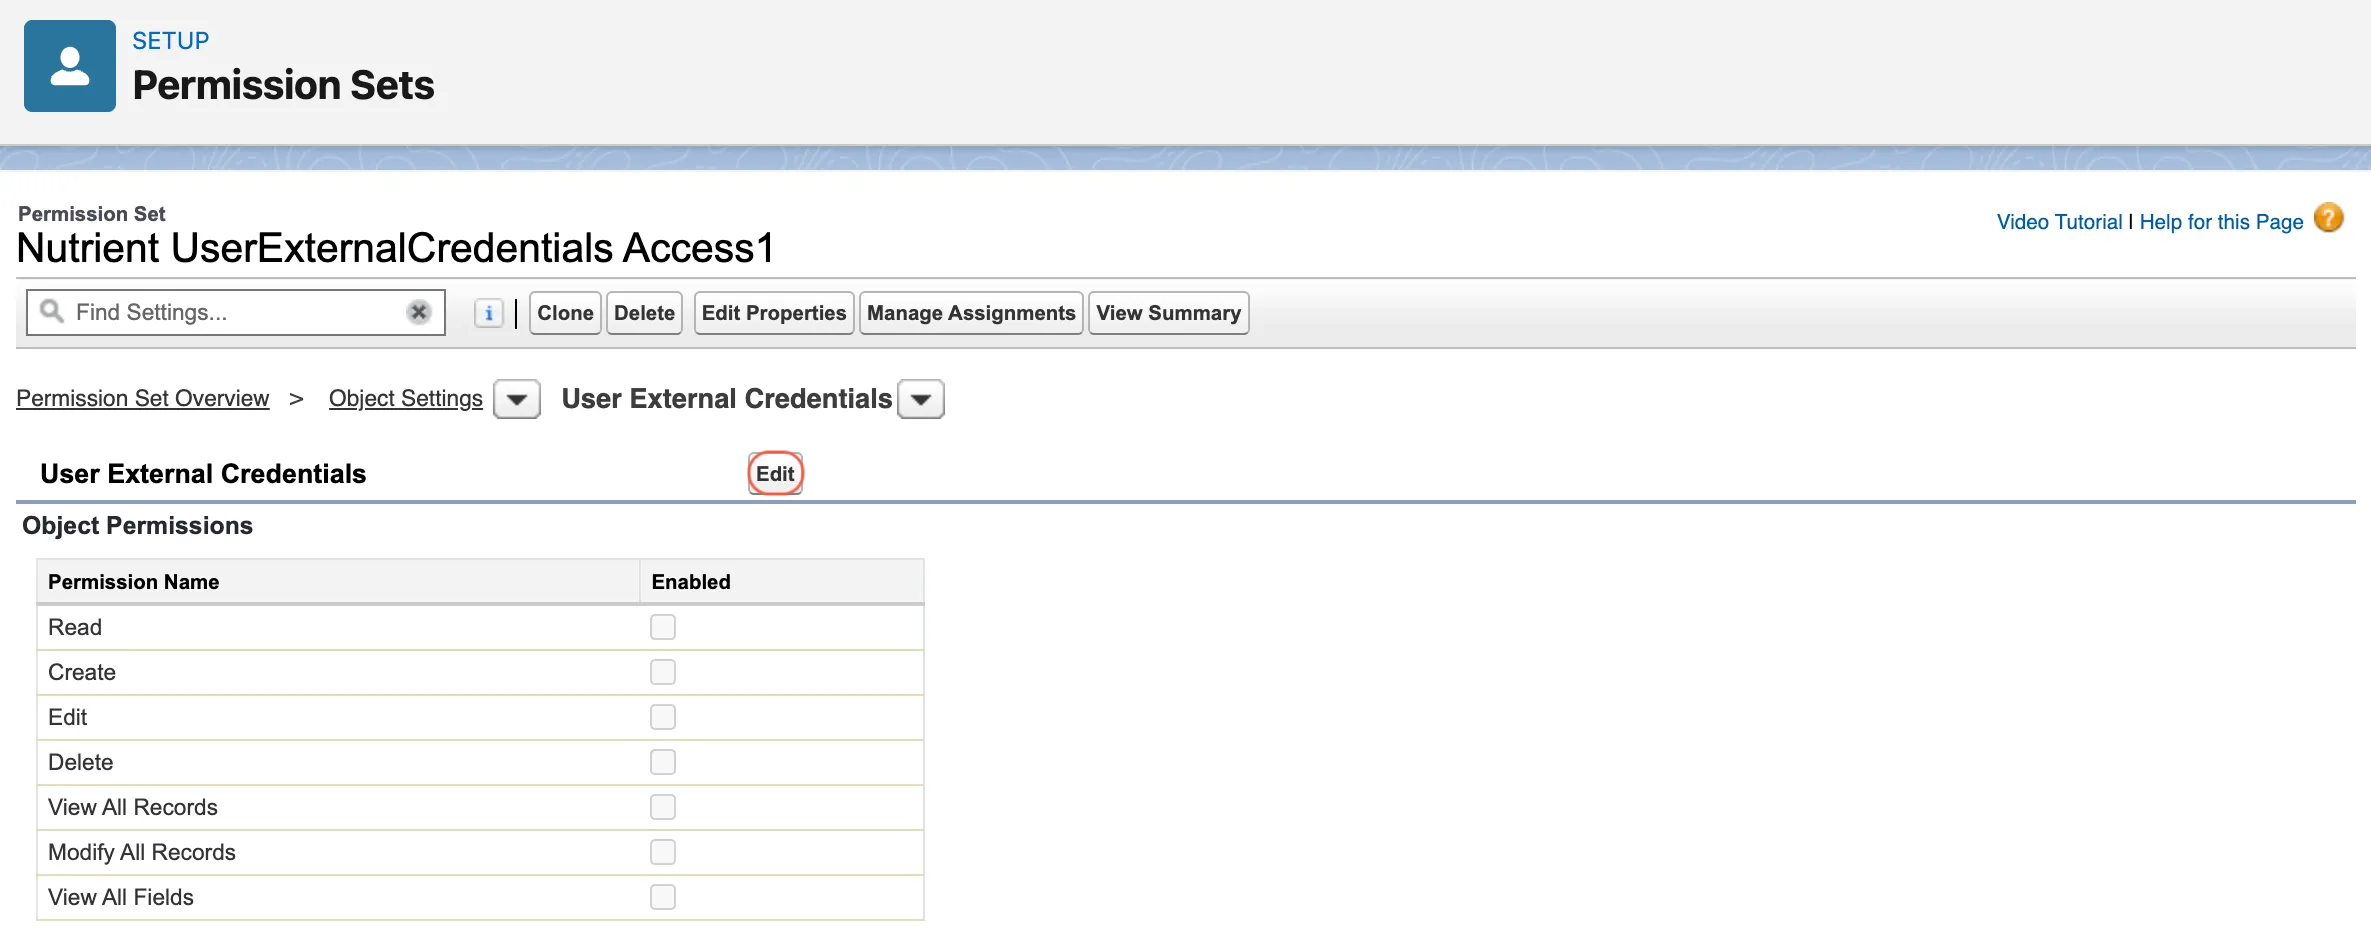
Grant Read access.
Save.
Add this permission set to the webhook integration user’s permission set group.

Do not use a Salesforce administrator as the webhook integration user. Use a dedicated integration user with only the permissions needed for the signing integration.
How to validate this step
After granting access:
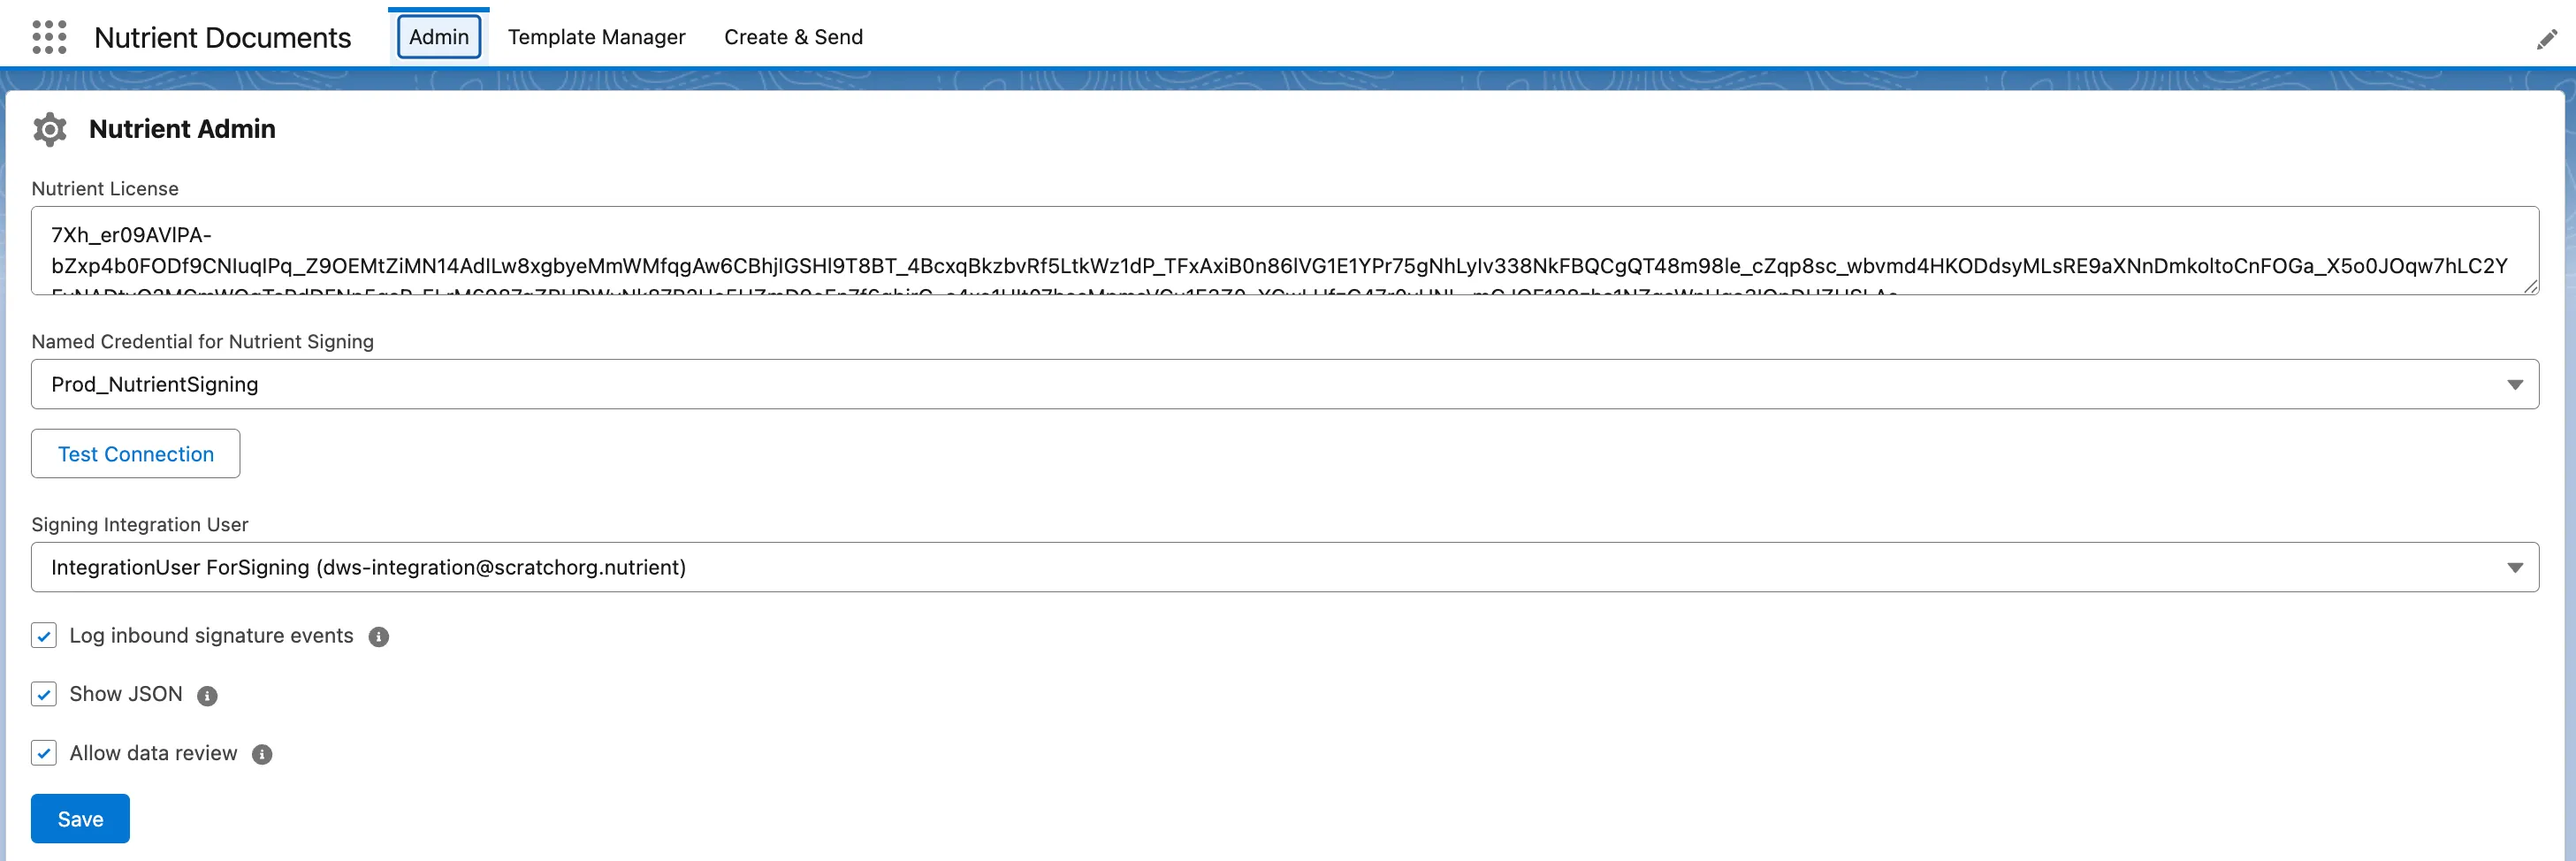
- Open the Nutrient Admin tab.
- Select Named Credential for Nutrient Signing.
- Select Signing Integration User.
- Click Test Connection.
- Confirm that a regular signing user can send a document for signing.
If signing works for administrators but fails for regular users, those users likely don’t have external credential principal access.
5. Select named credential and signing user in Nutrient tab
Open the Nutrient Documents app in Salesforce.
Go to the Nutrient Admin tab.
In Named Credential for Nutrient Signing, select the named credential created above.
In Signing Integration User, select the integration user.
- If this user isn’t ready yet, complete Part B, Step 1 first.
Save.
Click Test Connection and verify it succeeds.
Signing email templates
The installation creates a default signing email template. Salesforce admins can add additional signing email templates later as needed.
Configure a custom email domain in DWS
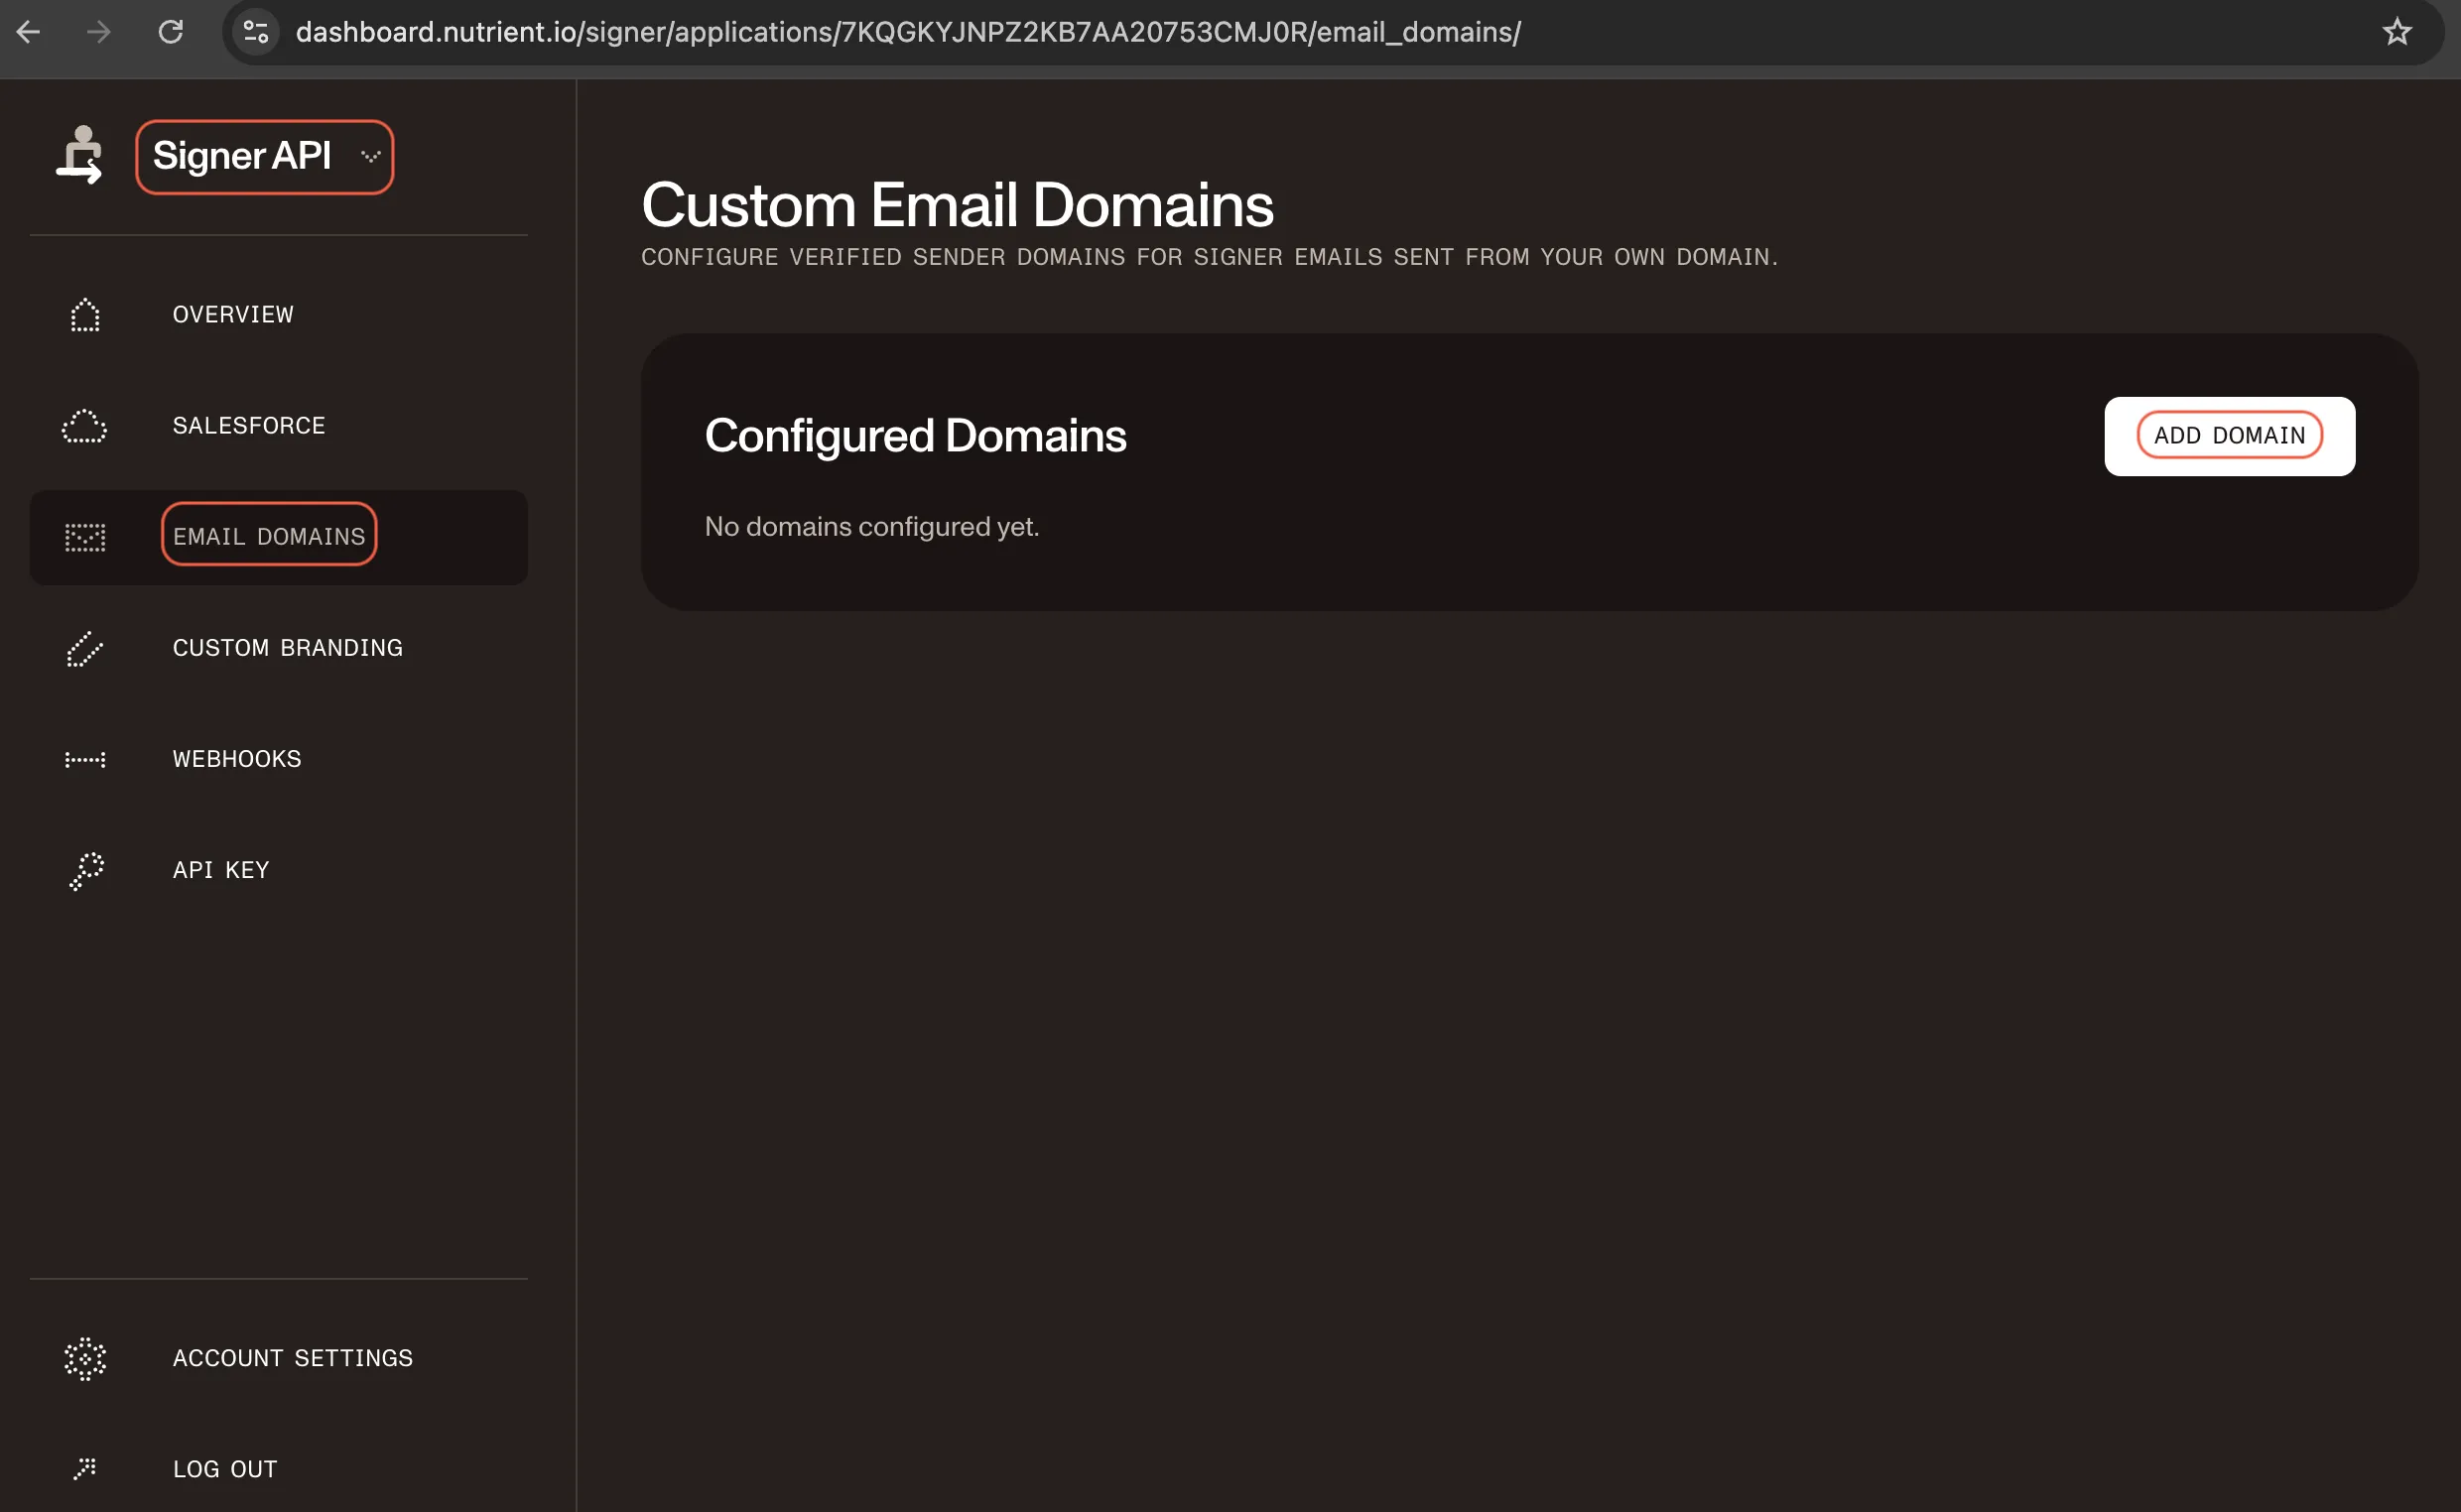
If your organization wants signer emails to come from your own domain, configure a verified custom email domain in the DWS Signer dashboard. If the domain is not already enabled for signing link sharing, contact our Sales team with the domain you want to set up. Our team can configure the signing_link_sharing flag for that domain in DWS, and then you can continue with the email domain setup explained below.
In the DWS Signer dashboard, click Email Domains in the left navigation panel and click Add Domain.
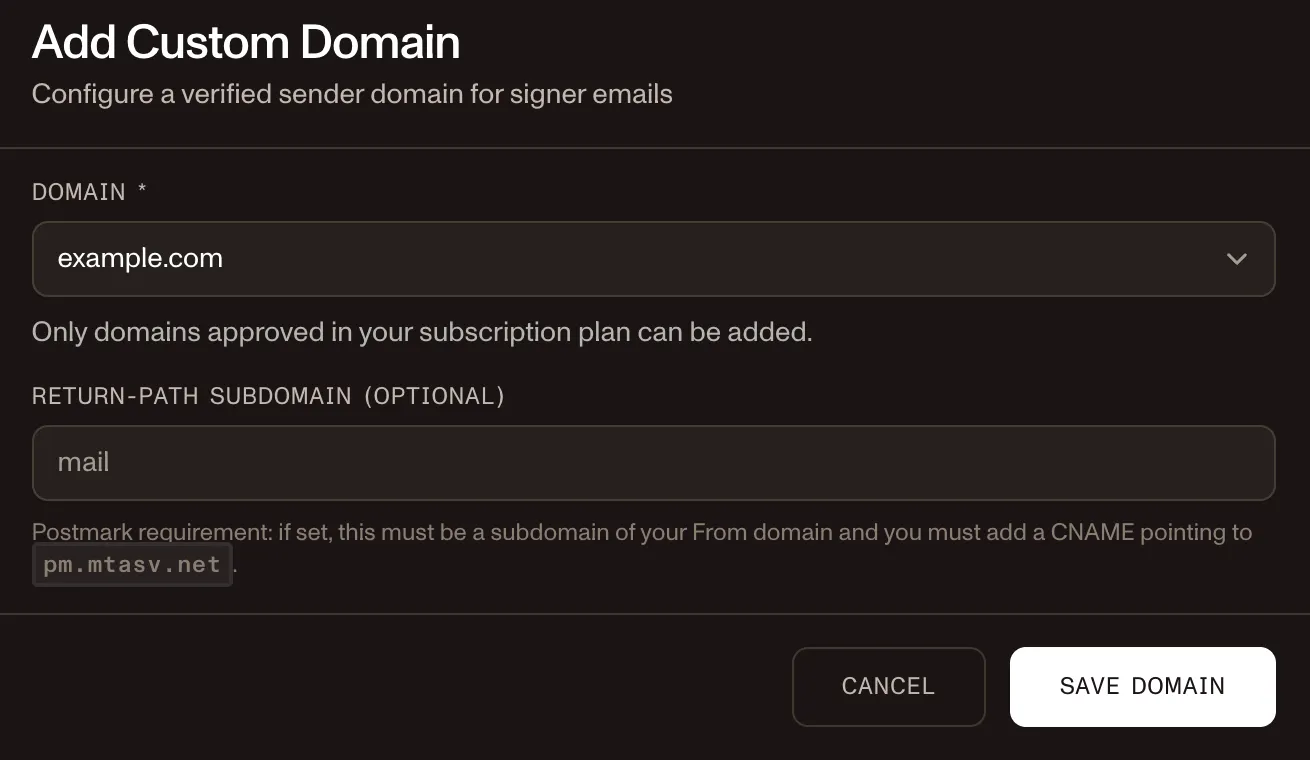
Select the Domain and, if needed, Return-Path Subdomain and click Save Domain.
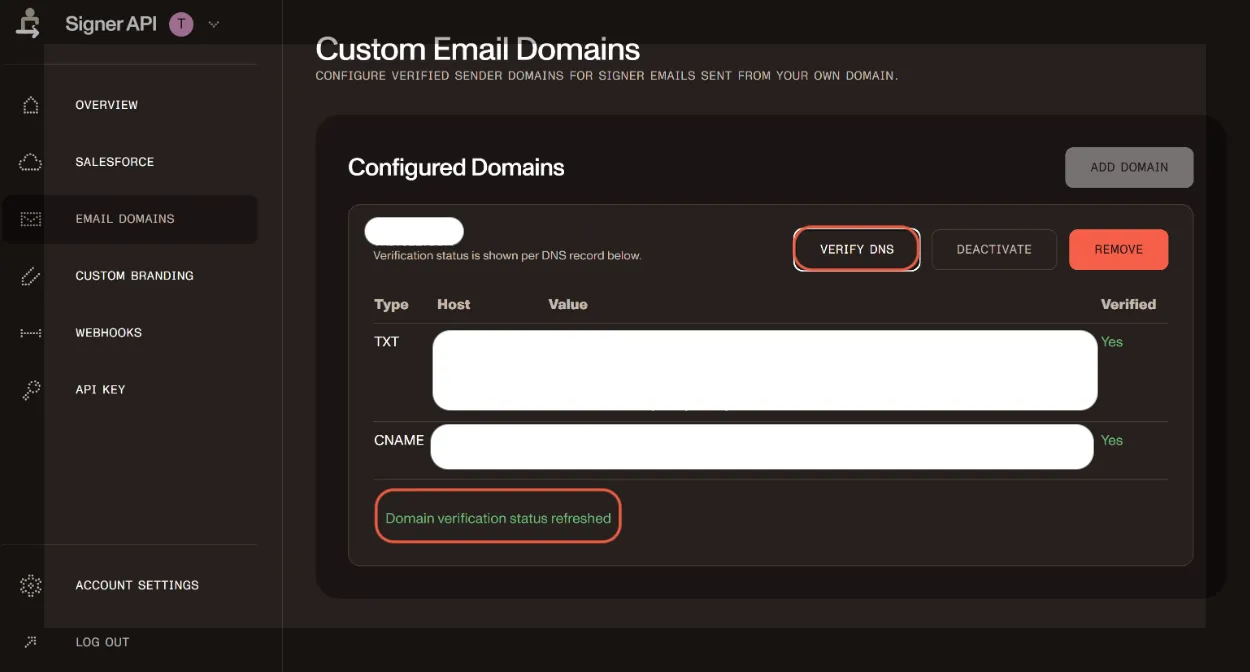
Open Cloudflare(opens in a new tab) or whichever DNS hosting service you use, then configure the respective host and value there.
Return to the DWS Signer dashboard and verify and activate the domain after DNS propagation.
The below screenshot is redacted to avoid exposing environment-specific DNS values.
Part B — Configure DWS webhooks to Salesforce (inbound)
DWS webhooks authenticate into Salesforce using OAuth 2.0 JWT Bearer Flow through an External Client App.
1. Prepare a dedicated integration user
Create or use a dedicated system user with:
- User License —
Salesforce Integration - Profile —
Minimum Access - API Only Integrations
Assign the Nutrient Webhook with DWS permission set group.
Assign the webhook permission set group before testing connection in Nutrient Admin or enabling Salesforce integration in DWS.
2. Generate a key pair for JWT signing
JWT Bearer Flow requires an X.509 certificate (public key) and a matching private key.
Run:
openssl req -x509 -nodes -days 365 -newkey rsa:2048 \ -keyout dws_jwt_private.pem \ -out dws_jwt_certificate.crt \ -subj "/CN=DWS Signer Integration/O=Your Company"Use the generated files as follows:
dws_jwt_certificate.crt— Upload to Salesforce External Client Appdws_jwt_private.pem— Paste into DWS Salesforce integration settings
- Keep
dws_jwt_private.pemsecure. Do not commit it to source control. - The generated certificate expires after the number of days passed to
-days(for example,365). Plan to rotate the certificate before expiry.
3. Configure the external client app for the JWT bearer flow
In Salesforce setup:
Search for External Client App Manager in quick find.
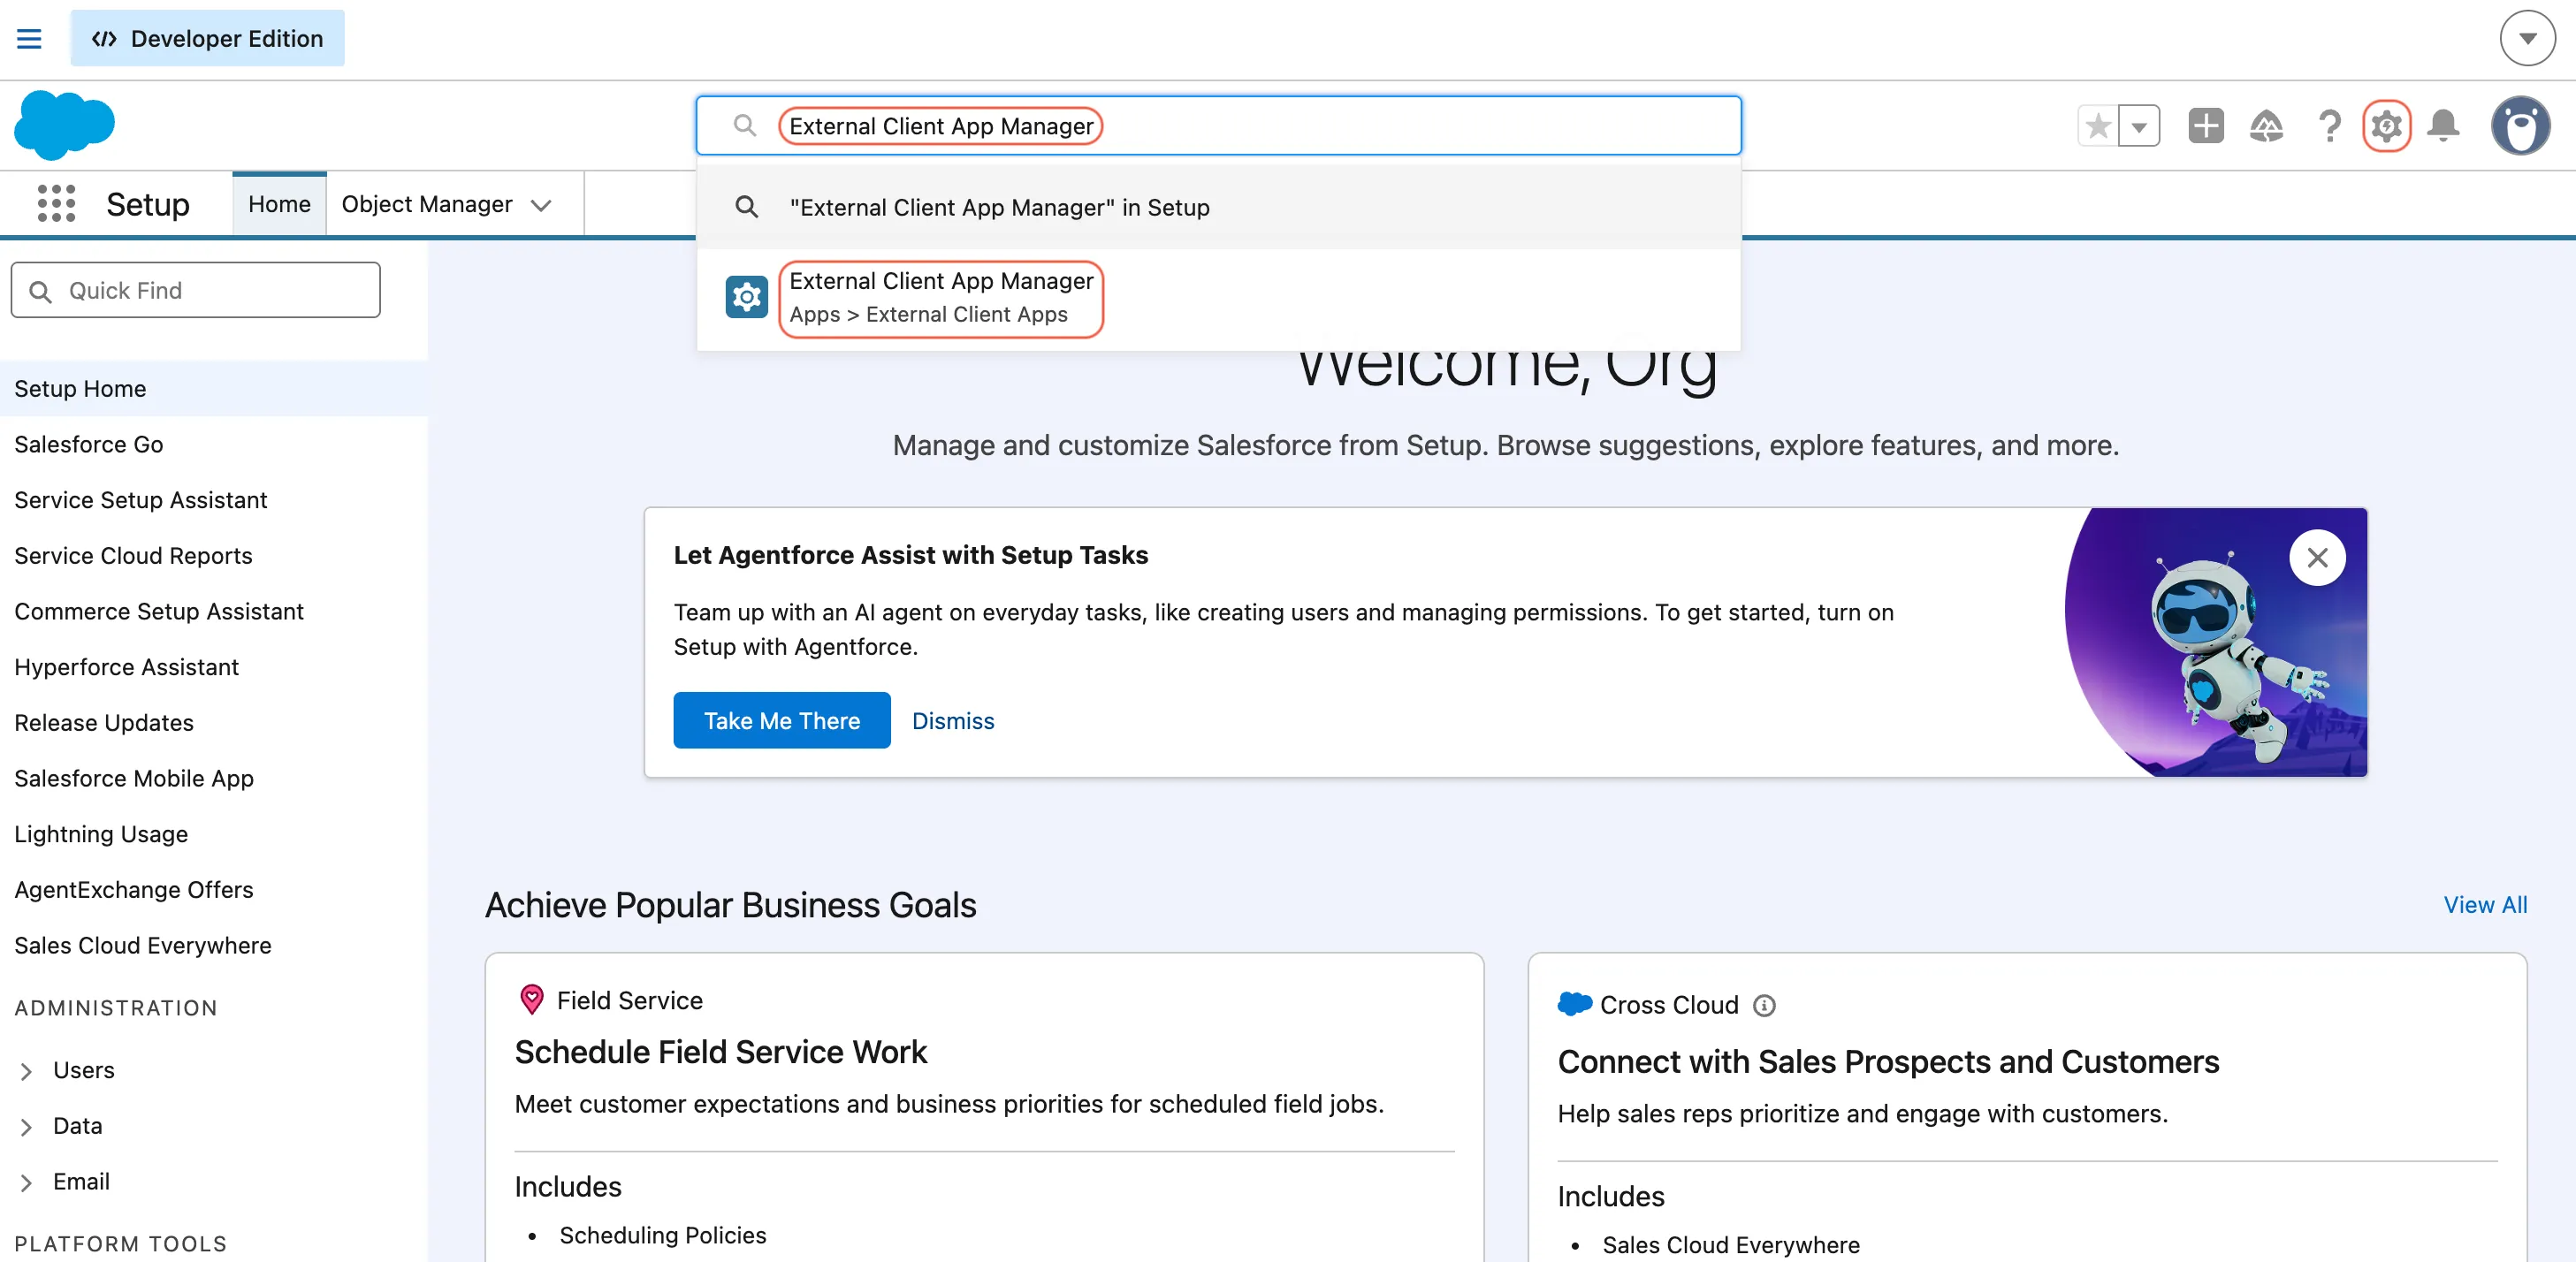
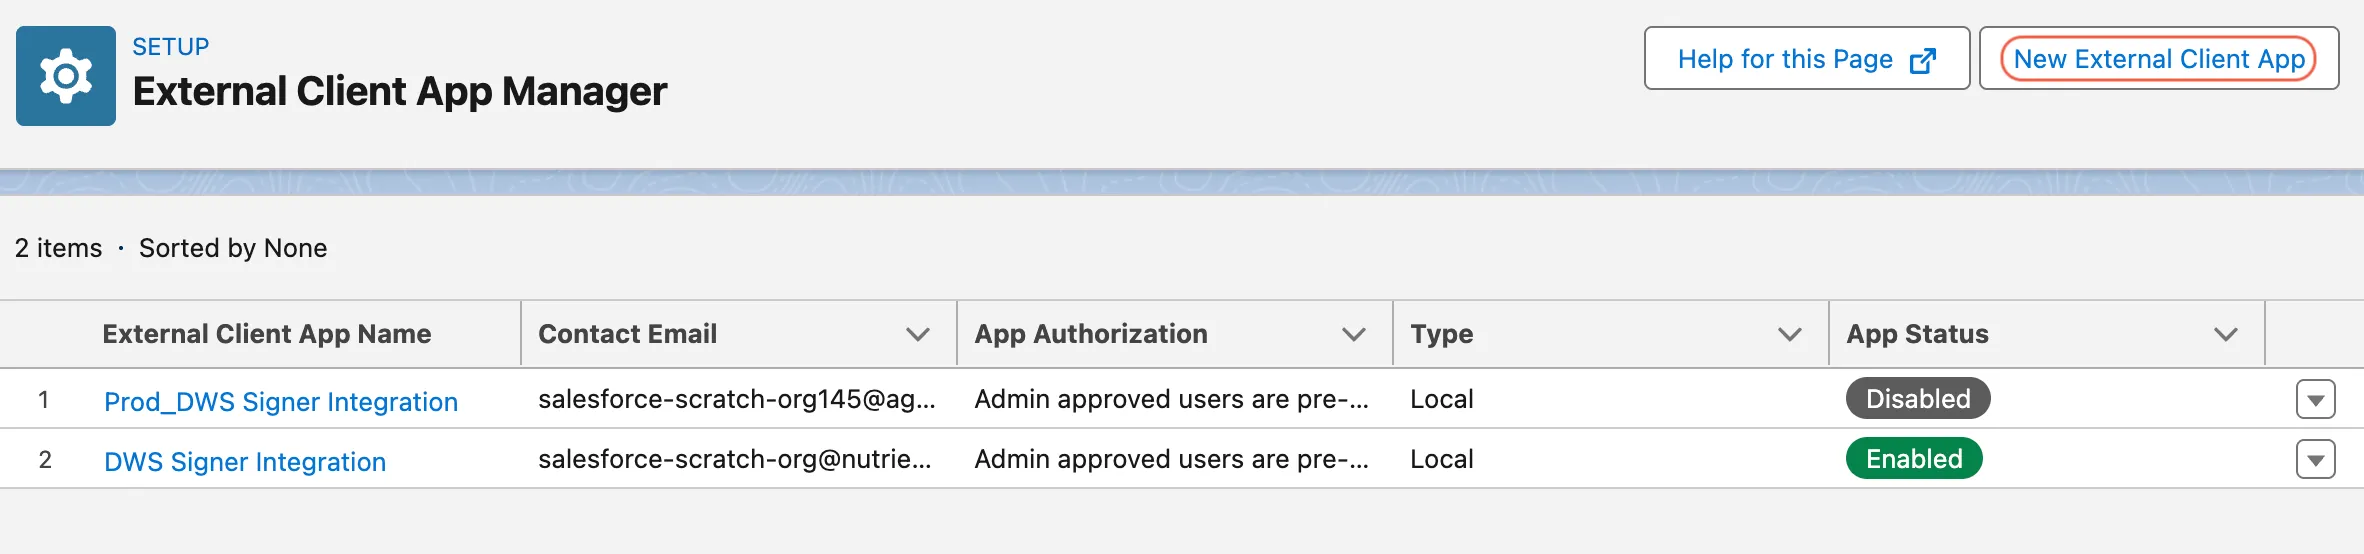
Open External Client App Manager.
Click New External Client App.
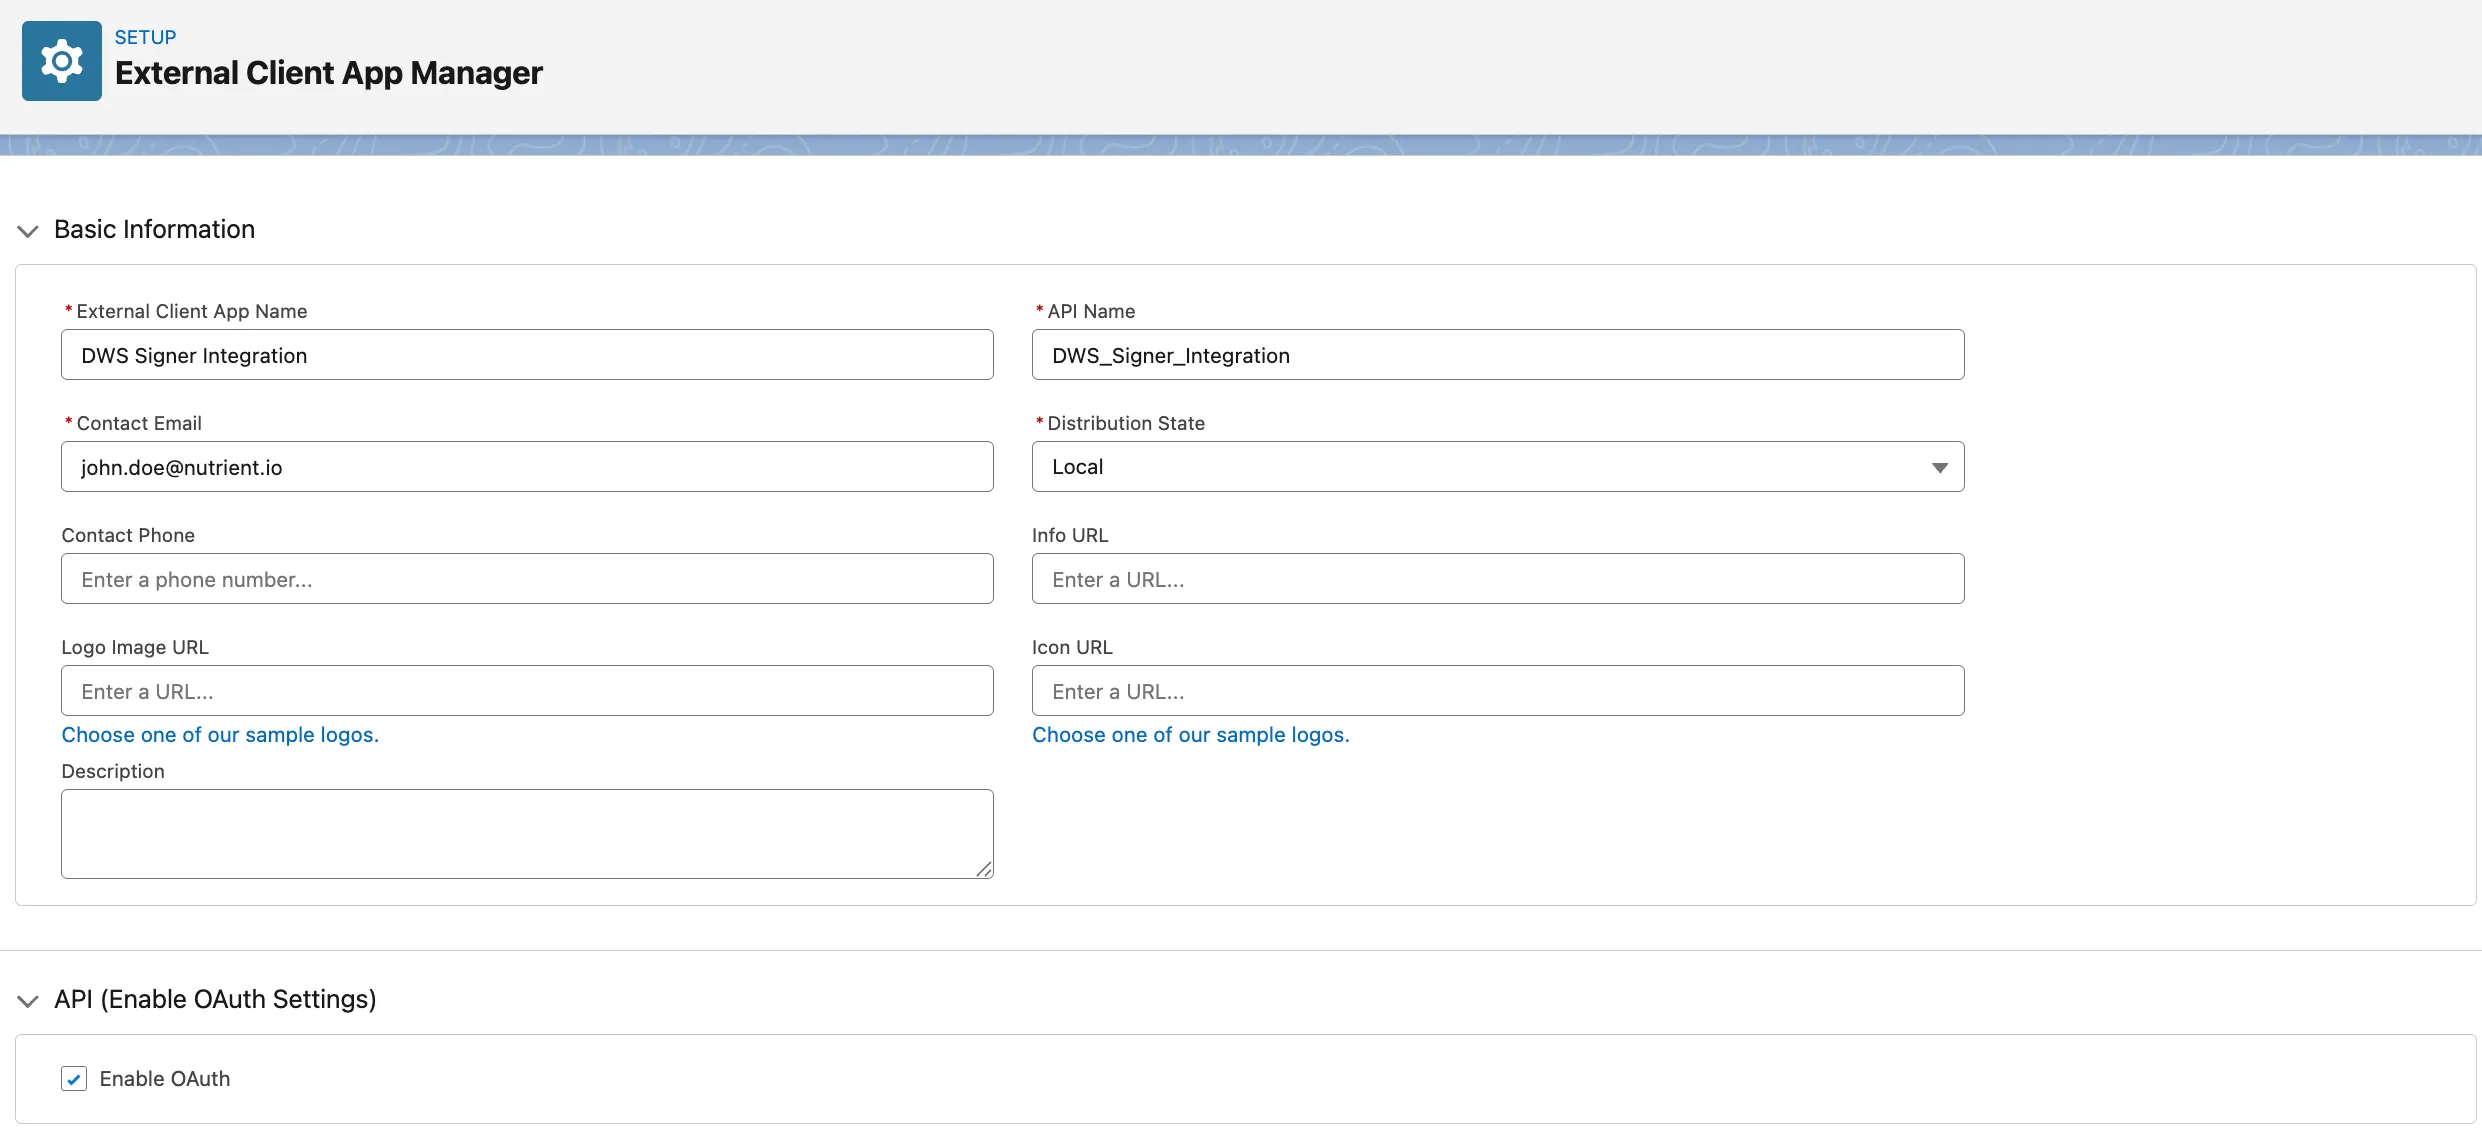
Fill basic information:
- Name —
DWS Signer Integration - Contact Email — admin email
- Distribution State —
Local
- Name —
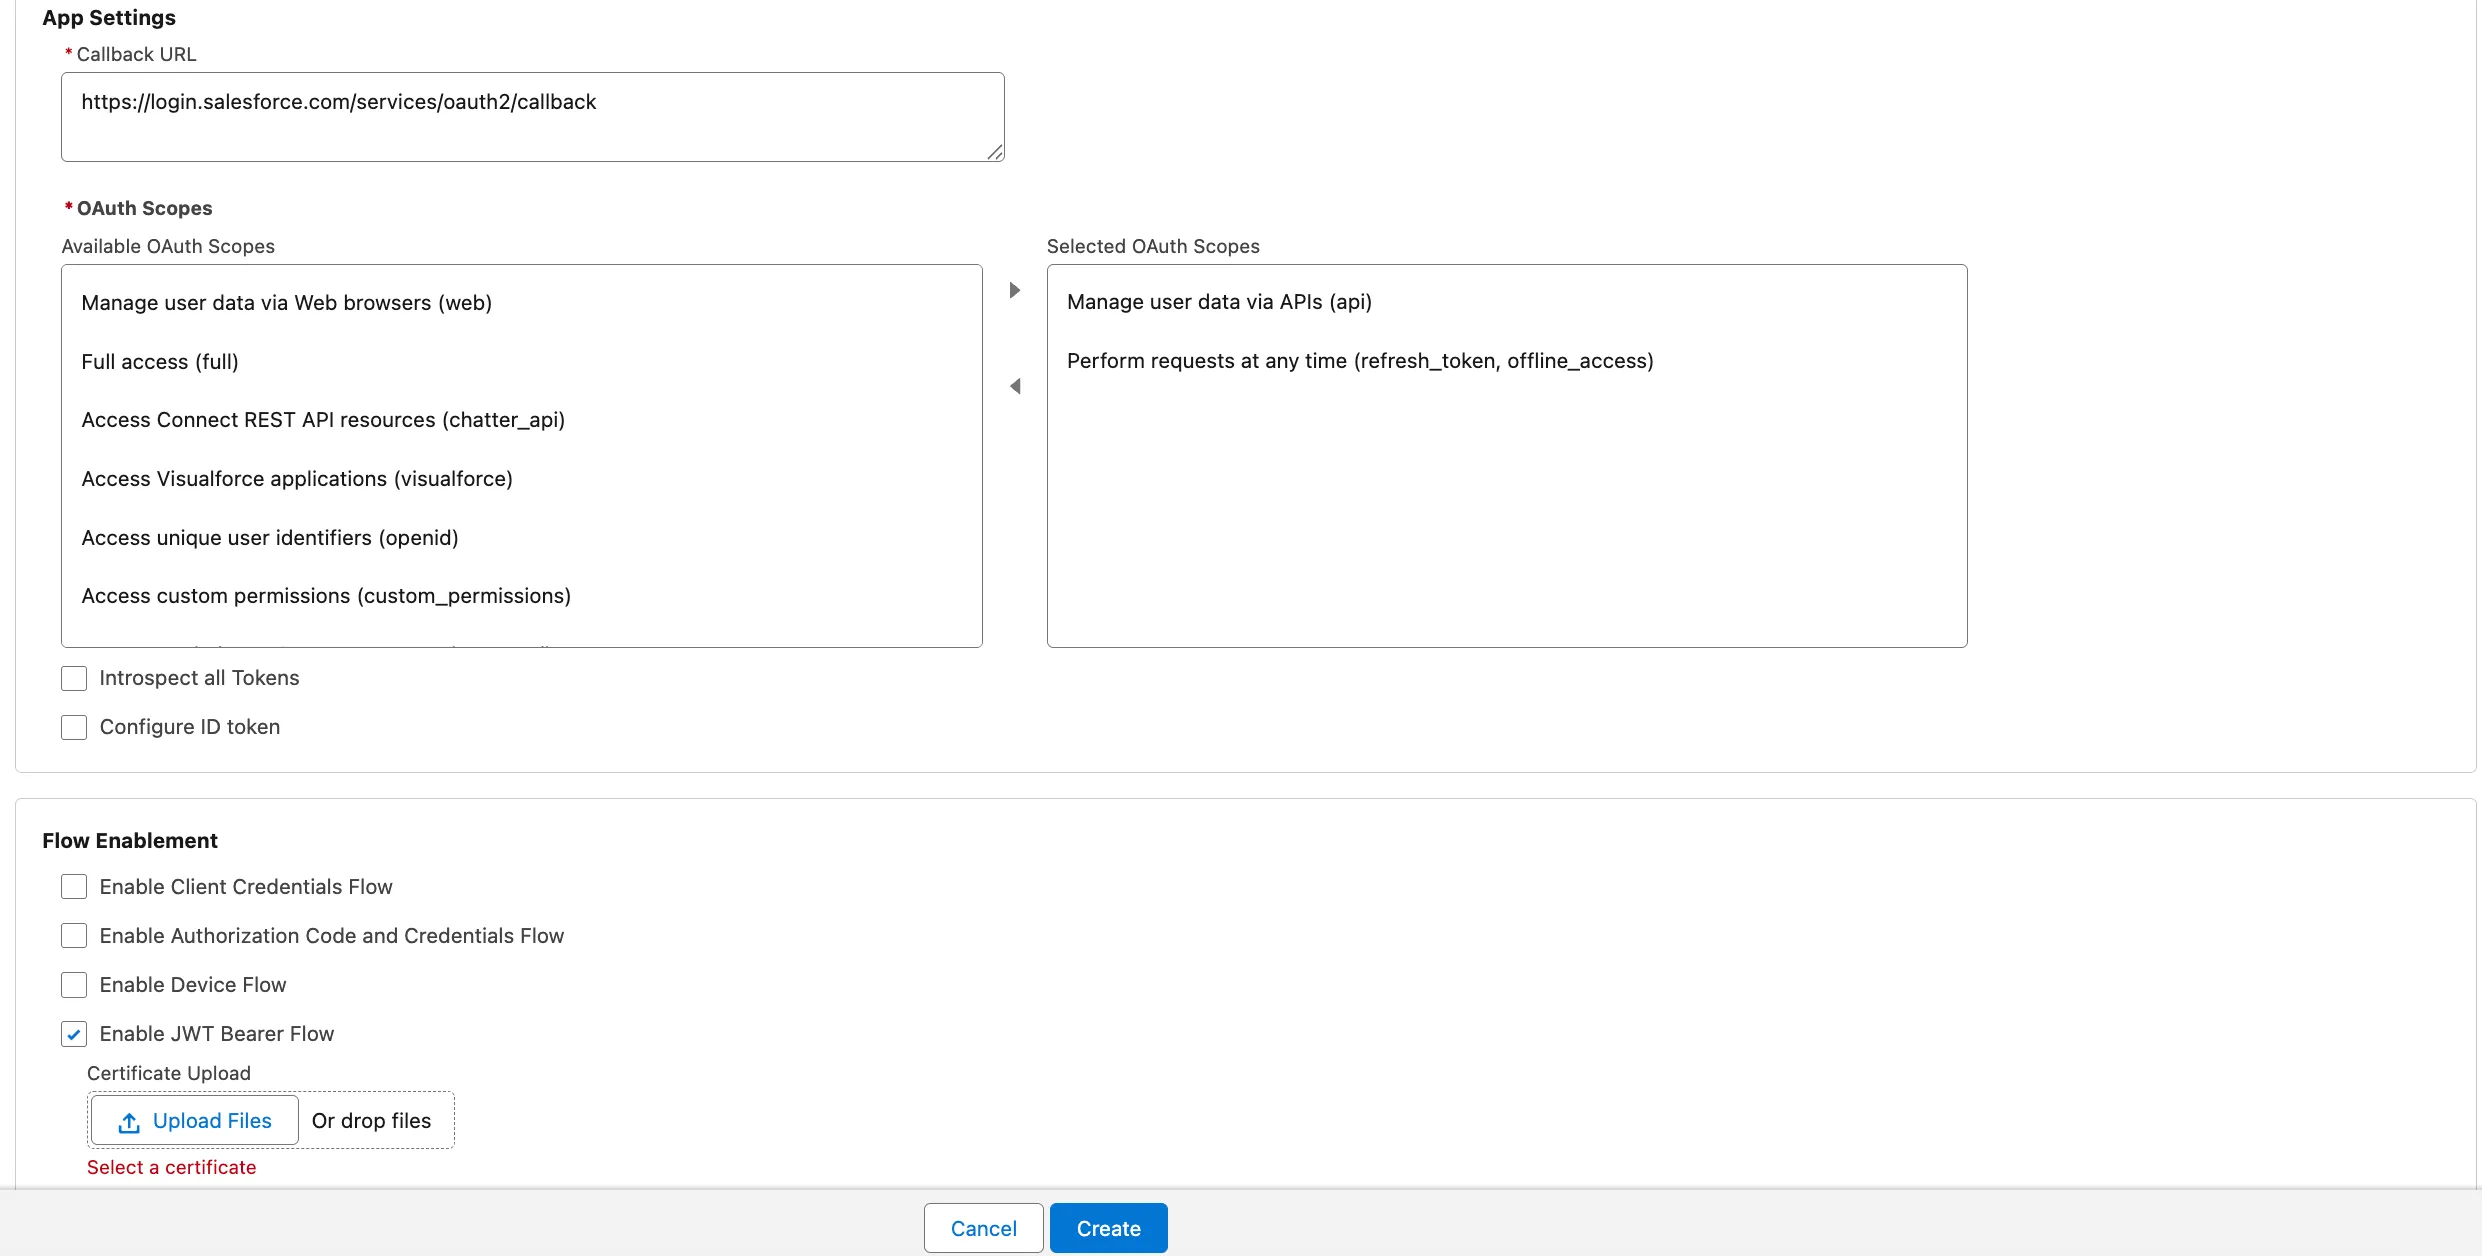
Enable OAuth and set:
- Callback URL —
https://login.salesforce.com/services/oauth2/callback - Selected OAuth Scopes:
Manage user data via APIs (api)Perform requests at any time (refresh_token, offline_access)
- Callback URL —
Under Flow Enablement, enable JWT Bearer Flow and upload your public certificate (
.crt).Click Create.
Open the created app and go to the Settings tab.
In OAuth > Consumer Key and Secret, copy the Consumer Key. This is the client ID for DWS.
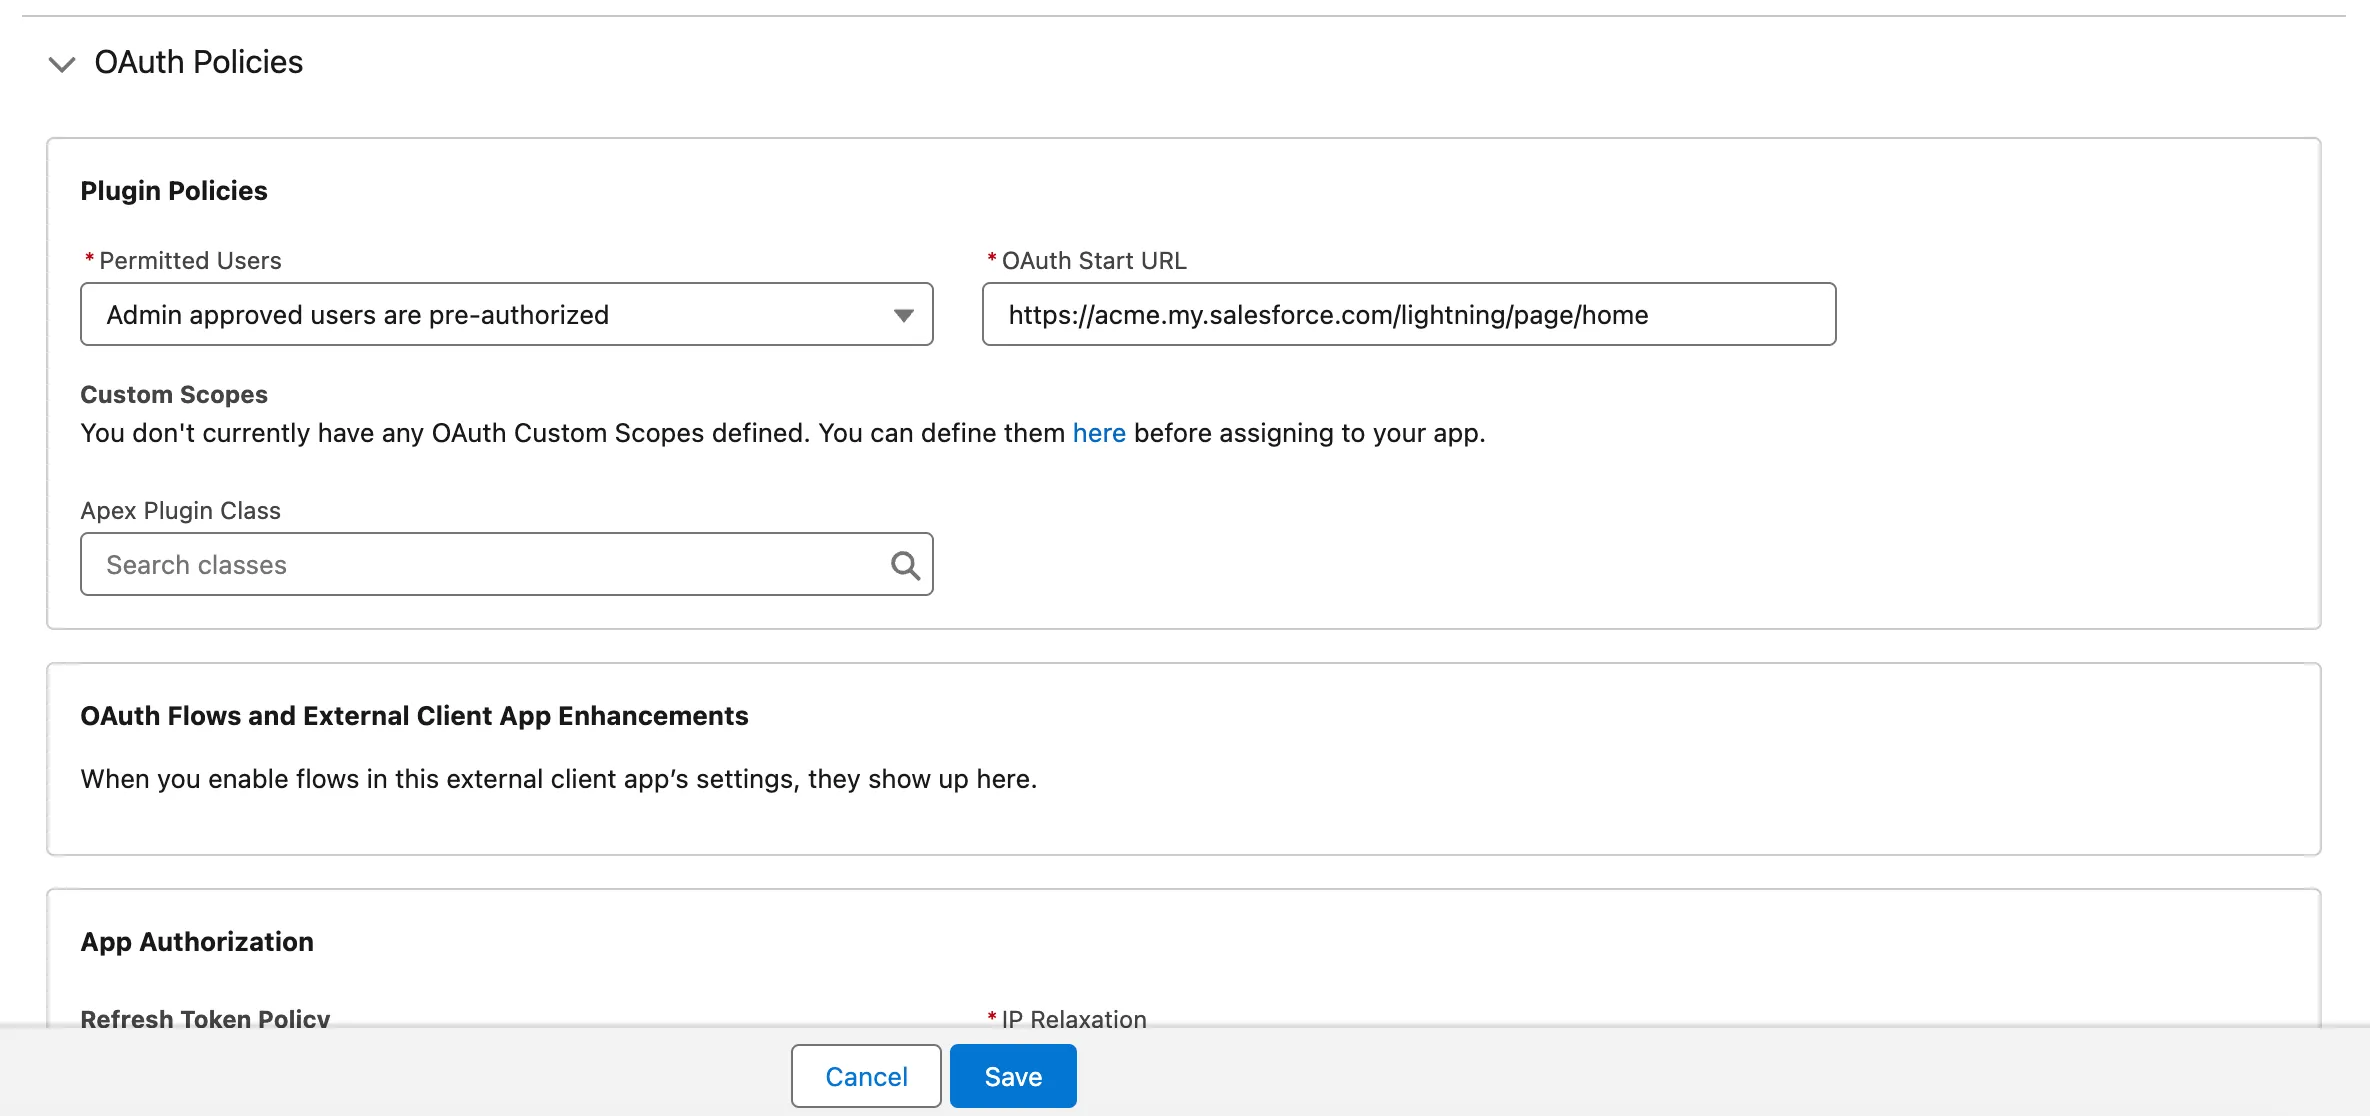
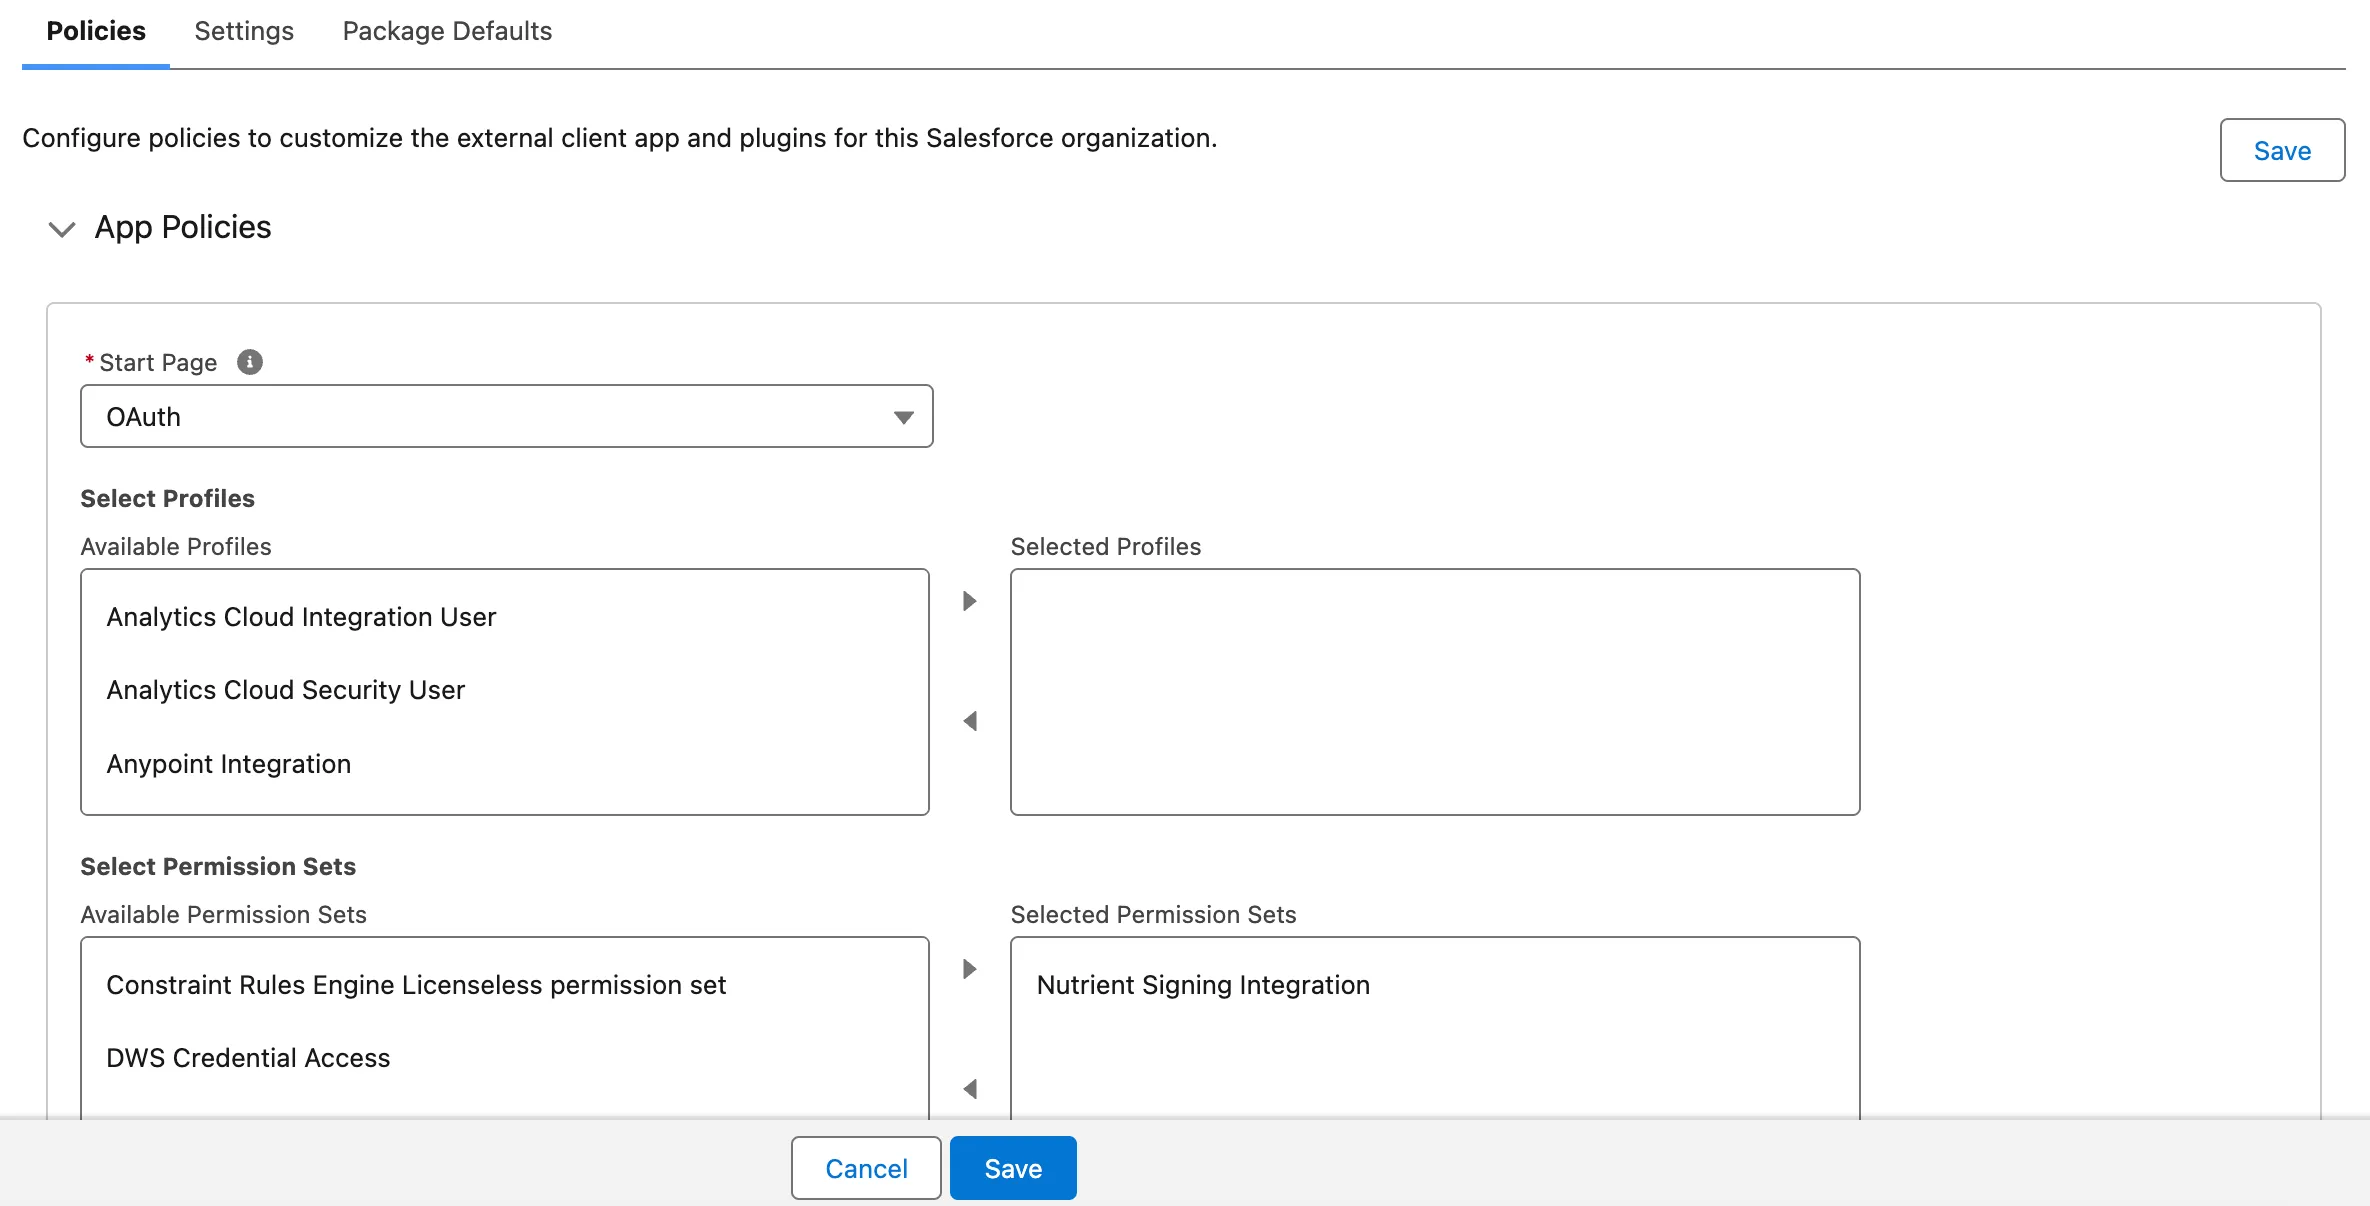
Open the Policies tab and click Edit.
In OAuth Policies, set Permitted Users to Admin approved users are pre-authorized.
In App Policies > Permission Sets, add Nutrient_Signing_Integration.
If Start URL is required in your organization, set a valid organization URL, for example
https://your-domain.my.salesforce.com/lightning/page/home.Save.
4. Configure the webhook destination in DWS Signer dashboard
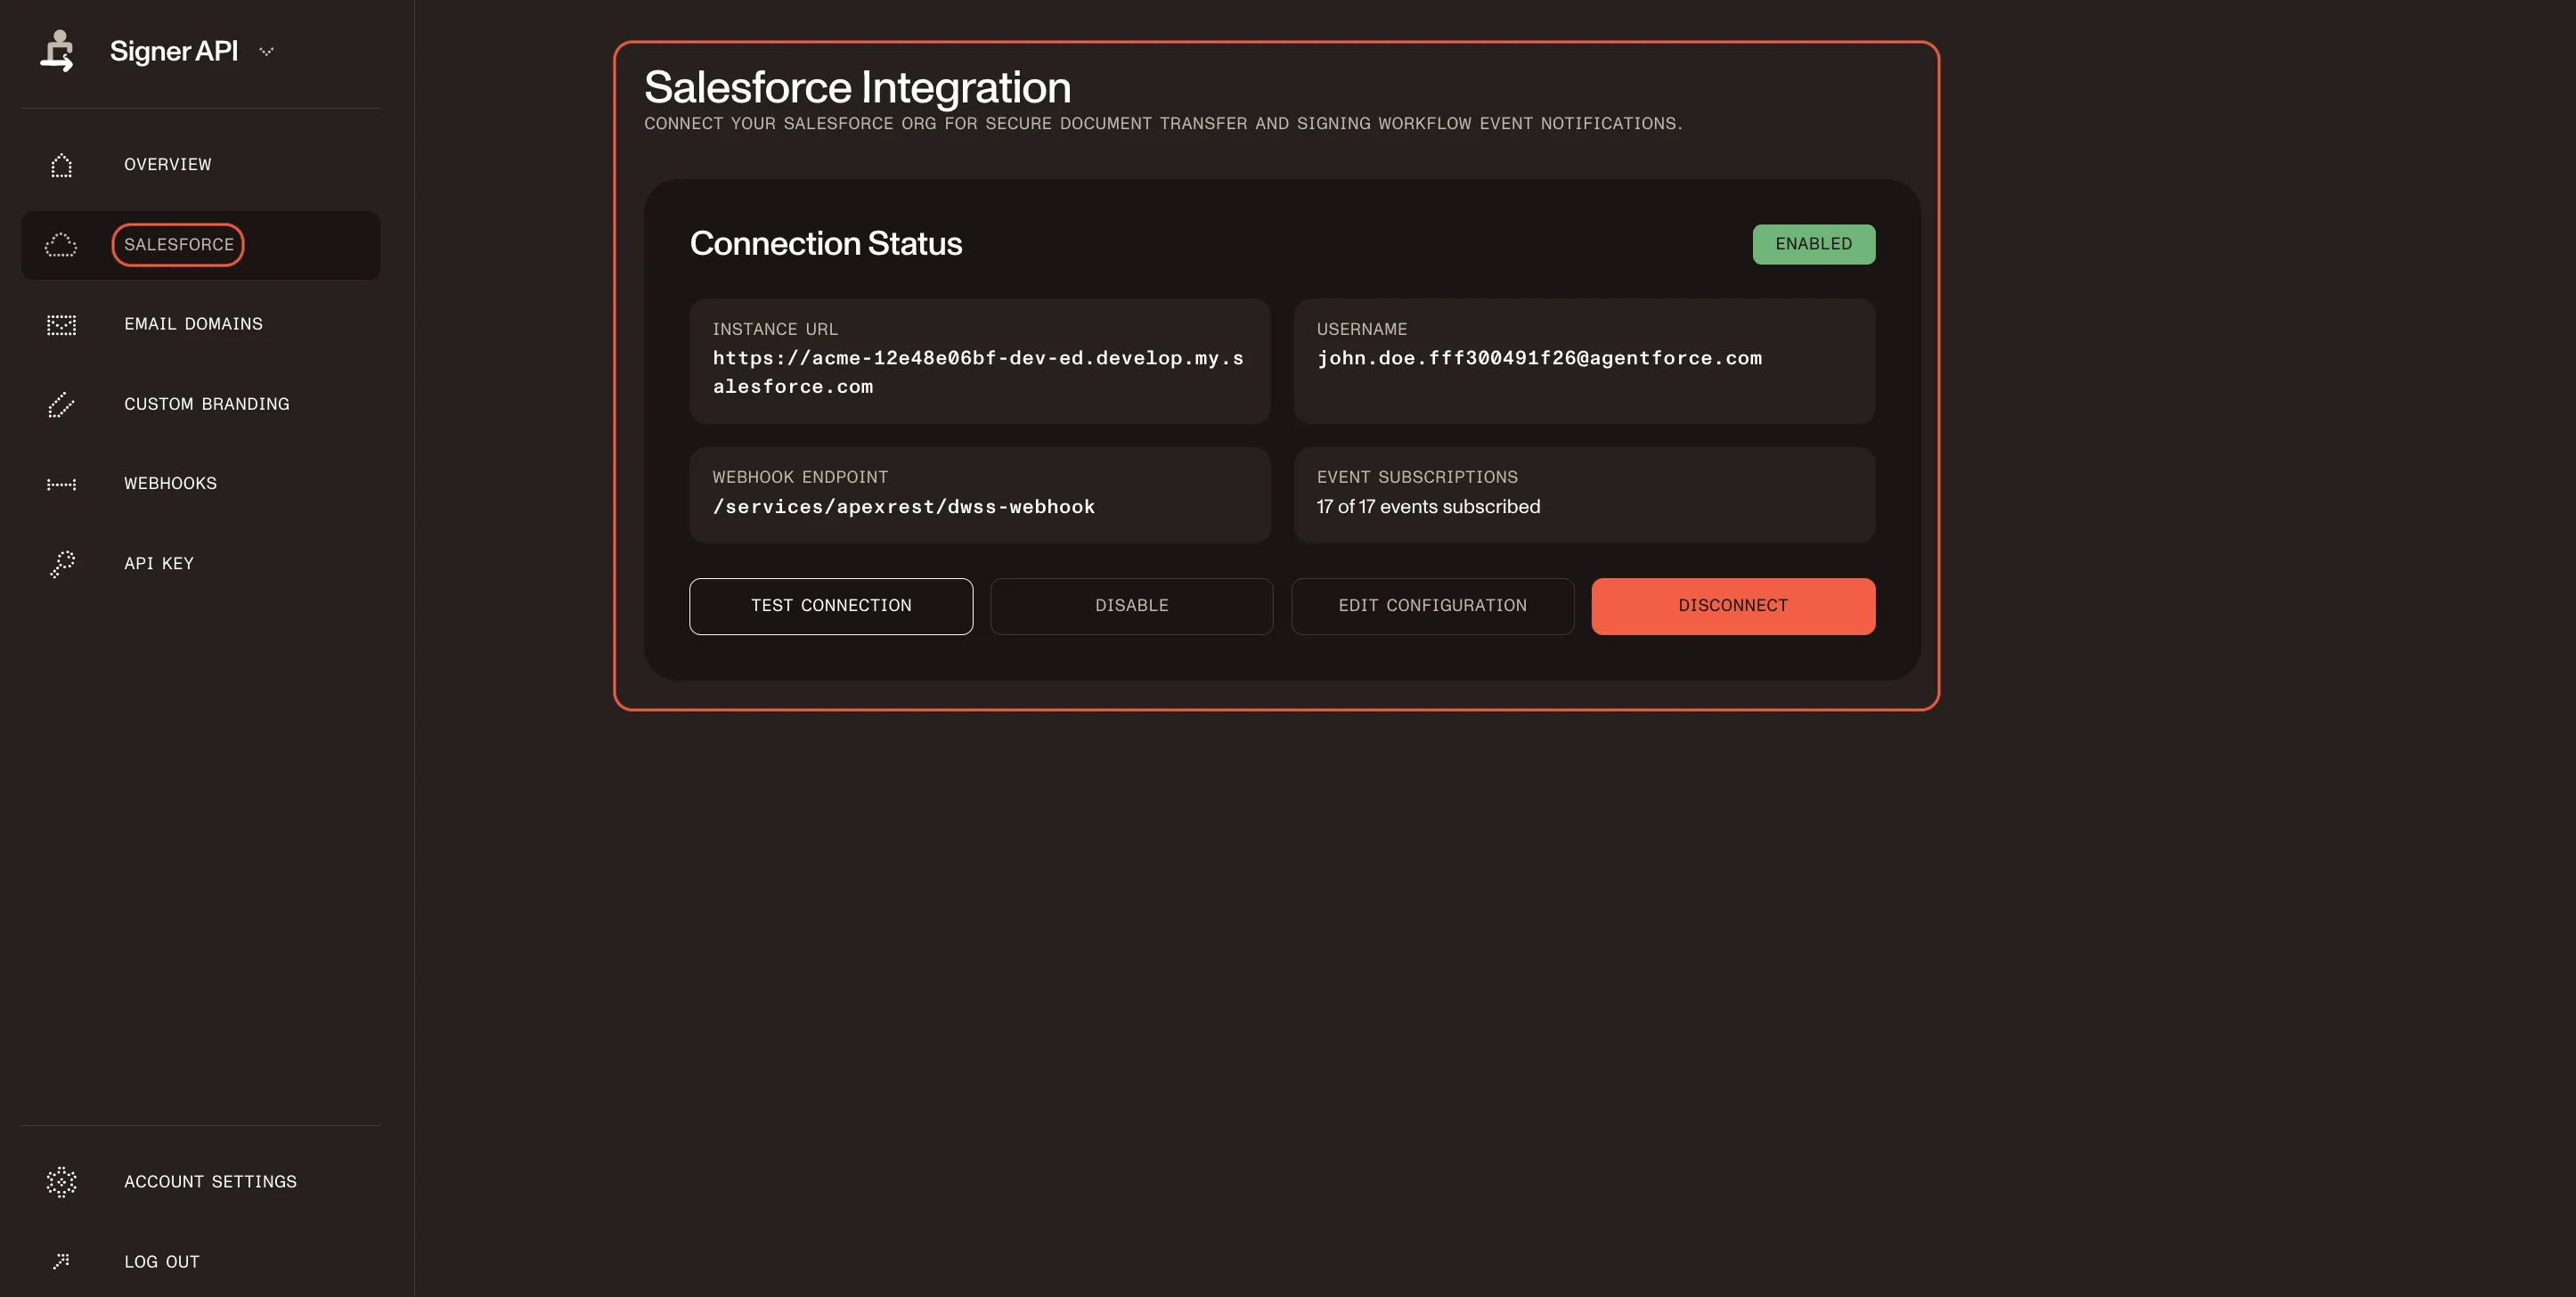
In the DWS Signer dashboard(opens in a new tab):
Open Salesforce integration configuration from the left navigation panel.
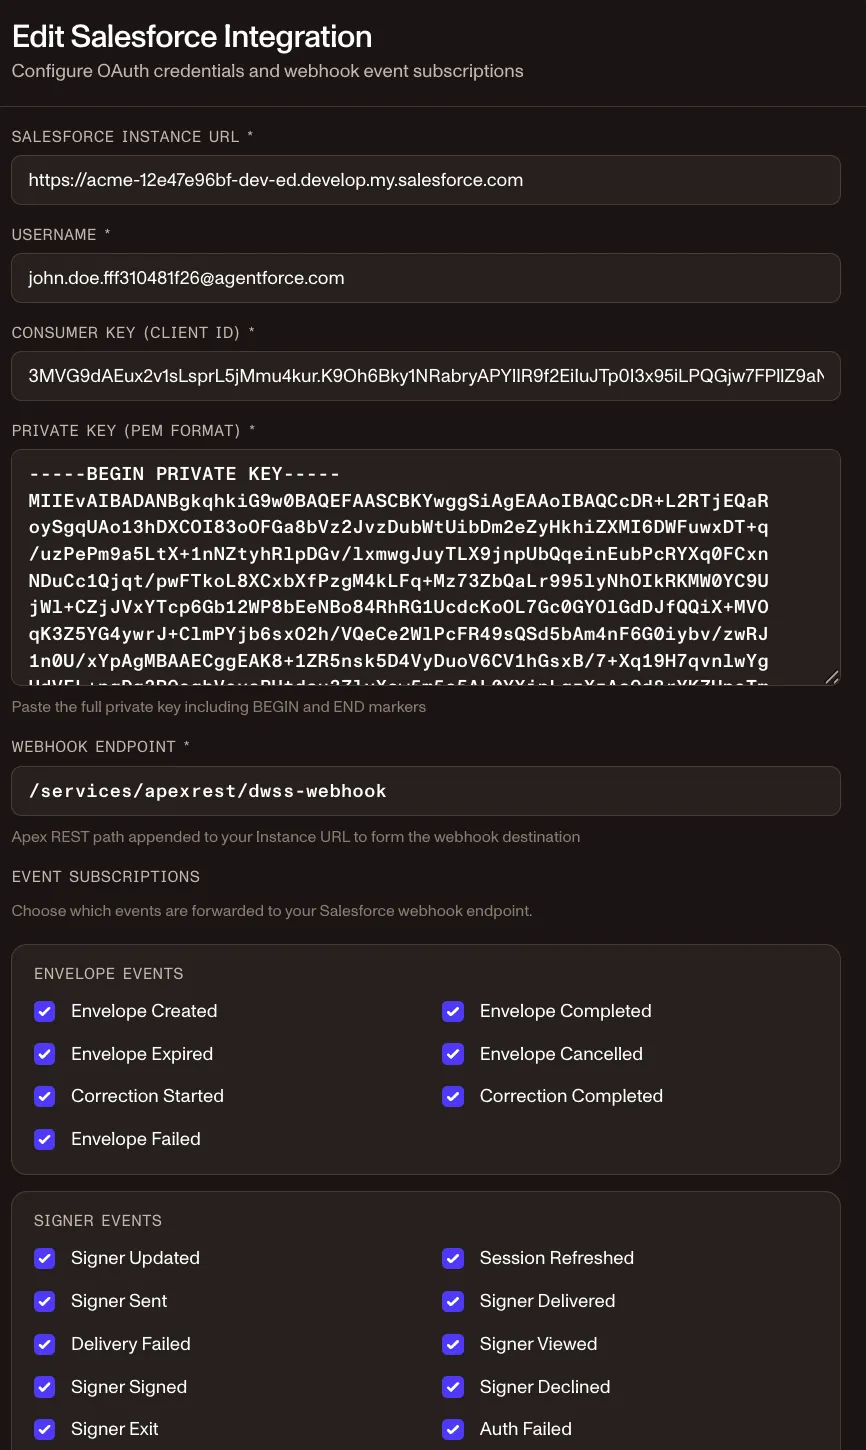
Fill OAuth fields:
- Salesforce Instance URL — Your Salesforce My Domain URL (for example,
https://your-domain.my.salesforce.com) - Username — Salesforce integration user username
- Consumer Key (Client ID) — Copied from External Client App settings
- Private Key (PEM format) — Matching private key for the uploaded certificate
- Salesforce Instance URL — Your Salesforce My Domain URL (for example,
Set Webhook Endpoint to
/services/apexrest/dwss-webhook.Enable event subscriptions. For this app, select all events except
envelope_created.Save or enable the integration and confirm that it validates.
For Salesforce Instance URL, use the My Domain URL (*.my.salesforce.com). To find it, go to Setup, search My Domain in Quick Find, and copy My Domain URL. Do not use the Lightning URL (*.lightning.force.com) or Setup URL (*.salesforce-setup.com).
Add signing widgets to record pages
To let users start signing and track envelope status on Salesforce records, configure both signing-related widgets on the record page.
First, add the document creation widget that signing users use to start the flow. Refer to the set up document generation in Salesforce guide and use the Create and Send Document with Nutrient widget for users who send documents for signing.
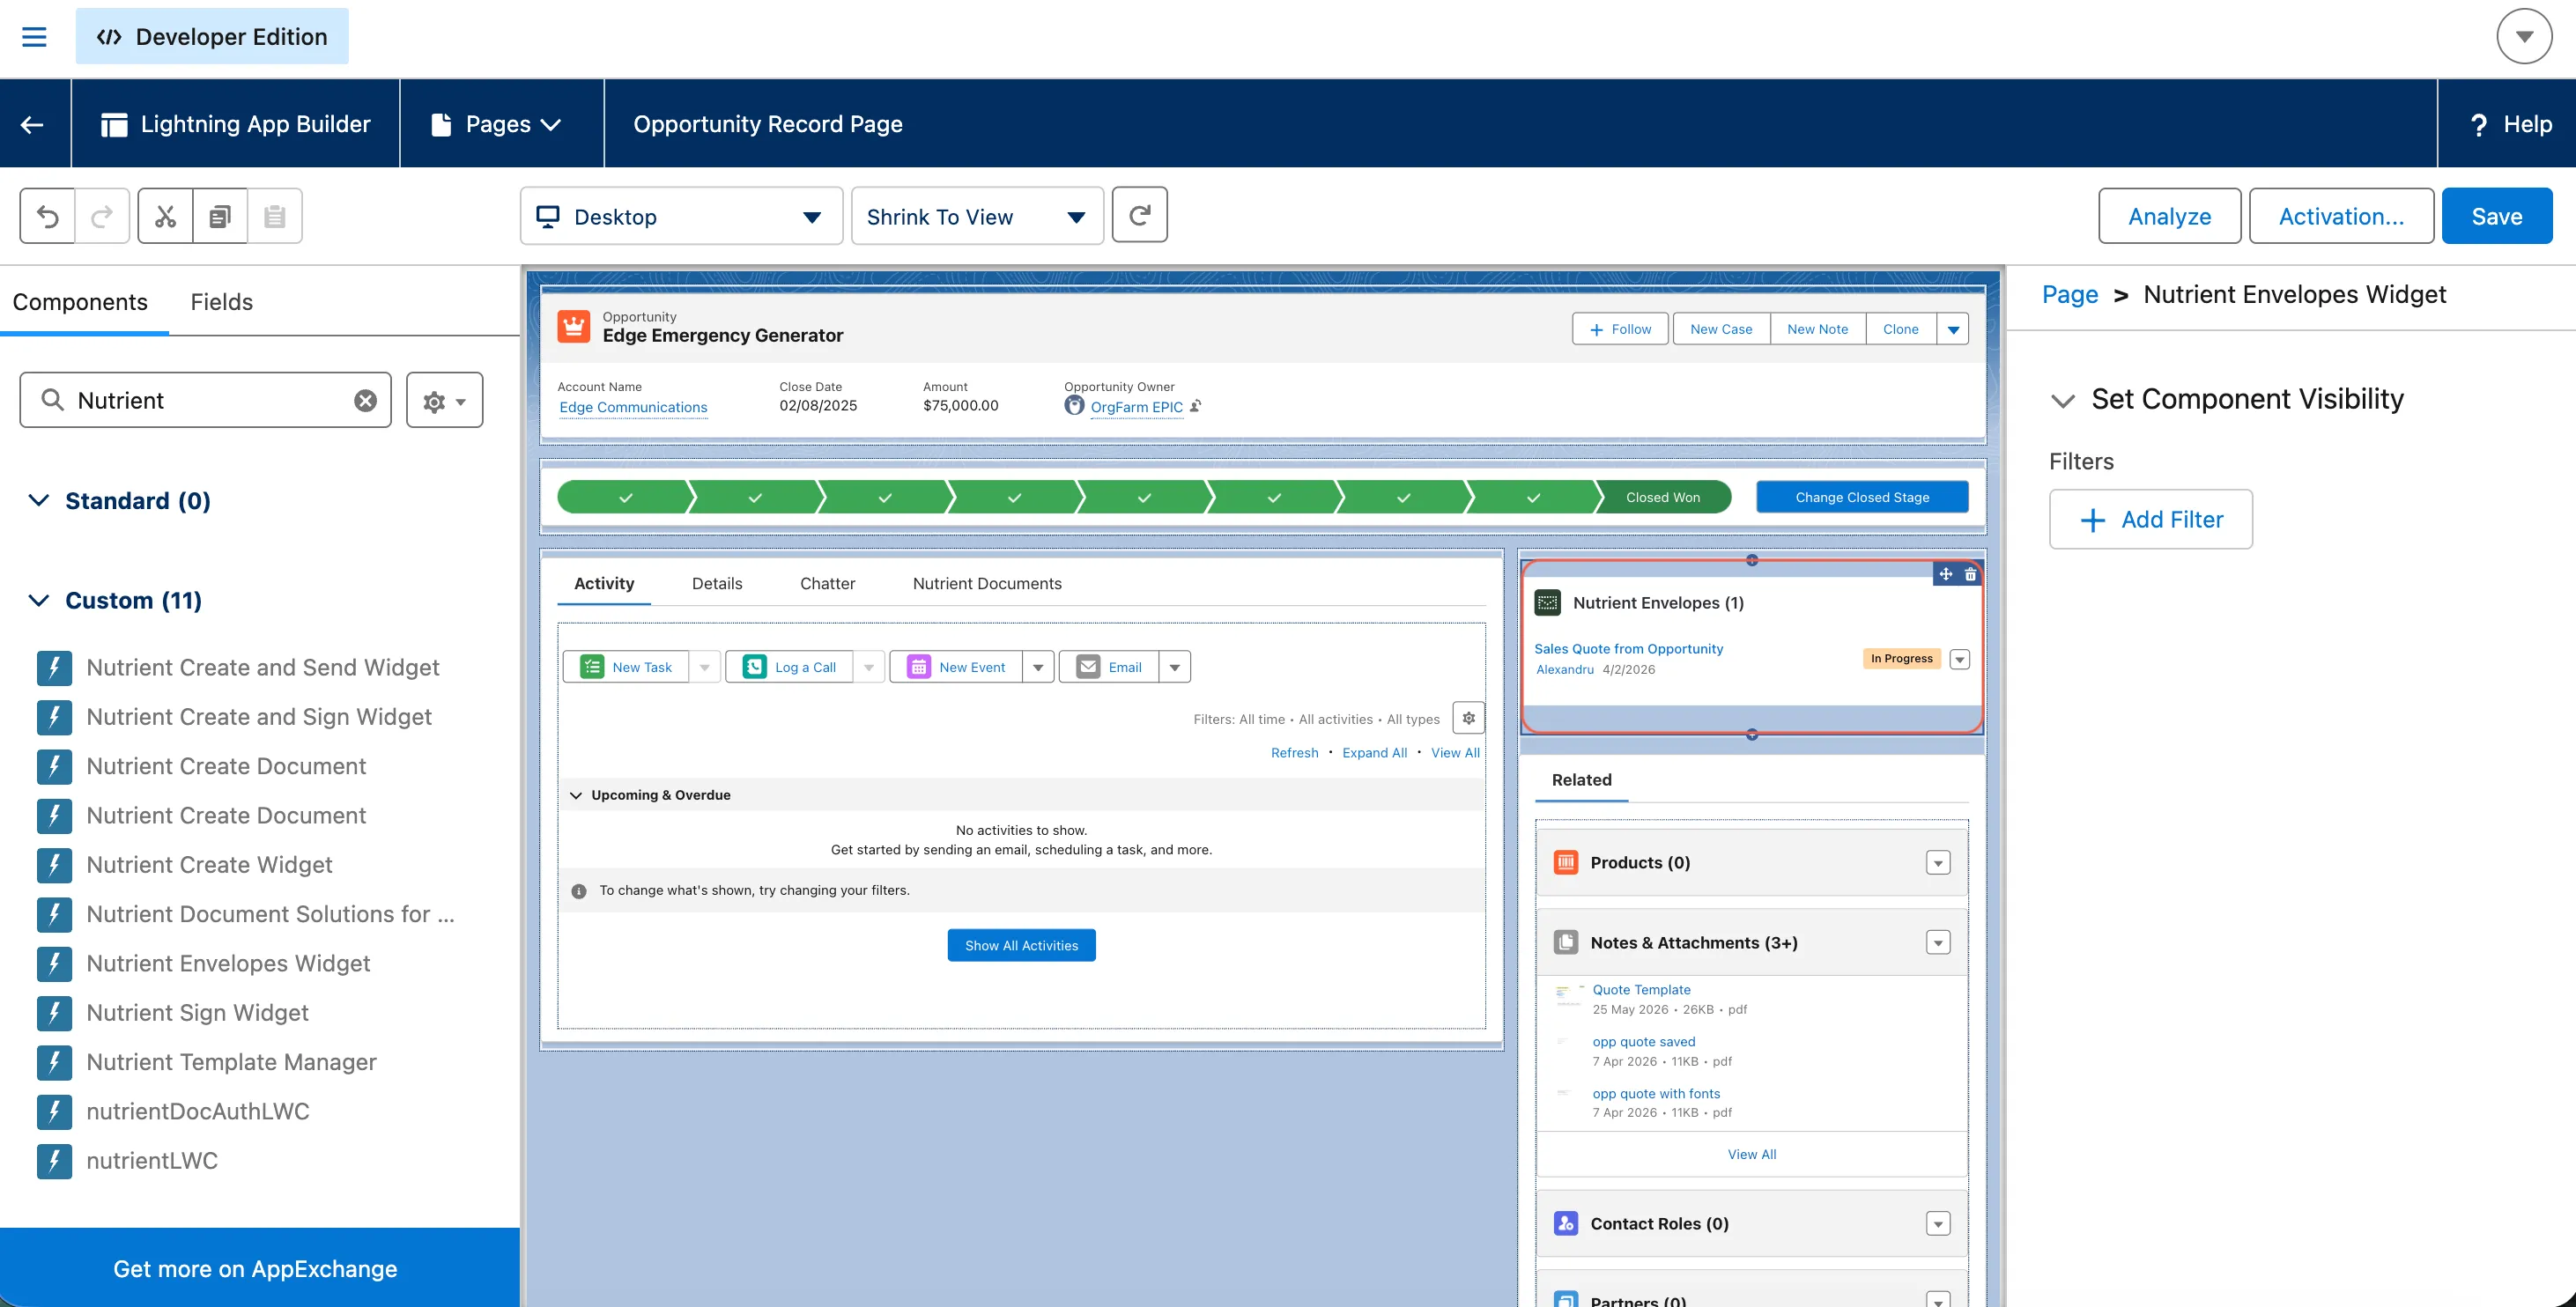
Then add the signing status widget to each Salesforce record page where users should track signing progress.
- Open the target record page in Lightning App Builder.
- In the left component panel, find Nutrient Envelopes Widget.
- Drag the component to the area where you want envelope status and sync actions to appear.
- Optional: Add component visibility rules if only certain users or conditions should show the widget.
- Click Save, and then click Activate.
- Open a record and confirm that the widget loads correctly.
Validate the setup
Run this checklist after setup:
- Test Connection in Nutrient Admin succeeds
- A signing-enabled user can create/send an envelope from Salesforce
- Recipient can open the signing session and sign
- Envelope status updates appear in Salesforce after webhook events (for example, status becomes
Completed) - No auth/callout errors are shown in Salesforce logs
Troubleshooting
The following are common issues and resolutions.
Callout fails with auth errors
- Confirm the named credential URL and selected external credential.
- Verify
APIKeyvalue is present. - Verify the
Authorizationheader formula uses the correct credential name. - Confirm principal access is granted to the user executing the callout.
DWS enable fails with OAuth credential validation failed
- Confirm Salesforce Instance URL uses My Domain (
*.my.salesforce.com), not Lightning URL (*.lightning.force.com). - Confirm the Consumer Key is copied from the same external client app where the JWT Bearer Flow was configured.
- Confirm the pasted private key matches the uploaded certificate.
- Confirm the uploaded certificate hasn’t expired. If expired, generate a new key pair, upload a new certificate to the external client app, and update the private key in DWS.
- In the external client app Policies, set Permitted Users to Admin approved users are pre-authorized.
- In App Policies > Permission Sets, add Nutrient_Signing_Integration.
Send fails with salesforce_integration_not_found
- Confirm the correct Named Credential for Nutrient Signing is selected in Nutrient Admin.
- In shared or preconfigured organizations, multiple named credentials may exist — pick the credential mapped to the active tenant/environment.
- If needed, ask the DWS team to enable Salesforce integration for your tenant/organization pairing.
Webhook events aren’t updating Salesforce
- Confirm the DWS webhook endpoint URL is correct (
/services/apexrest/dwss-webhook). - Verify the JWT Bearer Flow app configuration and key pair.
- Confirm the integration user is API-only and assigned the required permission set group.
Works for administrators but fails for regular users
- Regular users likely lack external credential principal access.
- Recheck the permission set group assignments for signing users.
Security and operations recommendations
- Rotate DWS Signer API keys regularly.
- Rotate Salesforce JWT certificates before expiration (for example, every 90–180 days based on your policy).
- Track certificate expiration dates with reminders or monitoring.
- During certificate rotation, overlap credentials to avoid downtime (upload the new certificate before removing the old one, and then update the DWS private key).
- Keep webhook integration users dedicated and least-privileged.
- Retest webhook delivery after package upgrades or auth changes.
Related guide
If your team also needs end user document generation instructions, refer to create documents in Salesforce.