


How to build a Laravel image viewer
Table of contents
Laravel(opens in a new tab) provides a clean and expressive syntax for PHP development, making it easy to integrate frontend tools like Nutrient into your app. Whether you’re building an internal document system, a customer dashboard, or a lightweight image review portal, Laravel offers a powerful backend foundation, while Nutrient provides a polished, full-featured frontend viewer.
Why Laravel?
Laravel(opens in a new tab) is one of the most popular PHP frameworks today. It’s known for:
- Elegant syntax — Laravel code is easy to read and write.
- Blade templating engine — Allows you to write clean, reusable views.
- Robust tooling — From routing and middleware to migrations and queues, Laravel comes ready for production.
- *Rapid development — With built-in commands and scaffolding tools, you can get started fast.
It’s especially powerful when paired with frontend libraries like Vue, Alpine.js, or in this case, Nutrient Web SDK, which enables you to render and manage image files entirely in the browser while handling authentication, file storage, and business logic in PHP.
What is a Laravel image viewer?
A Laravel image viewer is a web-based viewer built with Laravel that enables users to view JPG, PNG, or TIFF files directly in their browser, without requiring external image tools or downloads. When integrated with Nutrient SDK, it also supports annotations, image editing, and a fully responsive UI.
Why use the Nutrient Laravel image viewer?
The Nutrient Laravel image viewer enables you to integrate powerful image rendering and document collaboration capabilities into any Laravel-based PHP project. With just a few steps, you can:
- Render high-resolution images like PNG, JPG, and TIFF in the browser with zoom and pan support.
- Enable in-browser annotation, drawing, stamping, and commenting tools.
- Customize the interface to show only the tools and UI elements you need.
- Extend functionality to include redaction, eSignatures, and more.
Nutrient’s SDK runs entirely in the browser with WebAssembly for optimal performance, which makes it ideal for Laravel developers who want a rich client-side experience without writing frontend frameworks like React or Angular.
Example of our Laravel image viewer
To see our image viewer(opens in a new tab) in action, upload a JPG, PNG, or TIFF file by selecting Choose Example > Open Document. Once your image is displayed in the viewer, you can try drawing freehand, adding a note, or applying a crop or an eSignature.
Requirements to build a Laravel image viewer
You can install PHP via XAMPP(opens in a new tab), MAMP(opens in a new tab), or Homebrew(opens in a new tab).
If needed, add Composer to your PATH:
export PATH="$HOME/.composer/vendor/bin:$PATH"Step 1 — Create a new Laravel project
Open your terminal and run the following commands to create a new Laravel project. When prompted, select the default options by pressing Enter:
laravel new nutrient-viewercd nutrient-viewerThis sets up a fresh Laravel installation that you’ll use to integrate Nutrient Web SDK.
Step 2 — Add Nutrient Web SDK to your project
Install the SDK via npm:
npm i @nutrient-sdk/viewerpnpm add @nutrient-sdk/vieweryarn add @nutrient-sdk/viewerThen copy the SDK’s static files into your public directory:
cp -R ./node_modules/@nutrient-sdk/viewer/dist/ ./public/assets/Make sure public/assets/ now includes:
nutrient-viewer.jsnutrient-viewer-lib/directory with fonts and WebAssembly assets
Nutrient runs entirely in the browser, but it depends on assets like .wasm files and fonts that must be publicly served by Laravel.
Step 3 — Add an image file
Copy an image (e.g. image.png) into your public/ folder. This will be the file rendered in the viewer. You can use our demo image as an example.
Step 4 — Add the viewer to your Blade template
Open the resources/views/welcome.blade.php file and update its content:
<!DOCTYPE html><html lang="en">  <head>    <meta charset="UTF-8" />    <meta      name="viewport"      content="width=device-width, initial-scale=1.0"    />    <title>Nutrient Laravel Image Viewer</title>  </head>  <body>    <div id="nutrient" style="width: 100%; height: 100vh;"></div>
    <script type="module">      import '/assets/nutrient-viewer.js';
      const baseUrl = `${window.location.origin}/assets/`;
      window.addEventListener('DOMContentLoaded', () => {        NutrientViewer.load({          baseUrl,          container: '#nutrient',          document: 'image.png',        })          .then((instance) => {            console.log('Nutrient loaded', instance);          })          .catch((error) => {            console.error(error.message);          });      });    </script>  </body></html>
Make sure to serve the file using Laravel’s development server so WebAssembly assets load correctly.
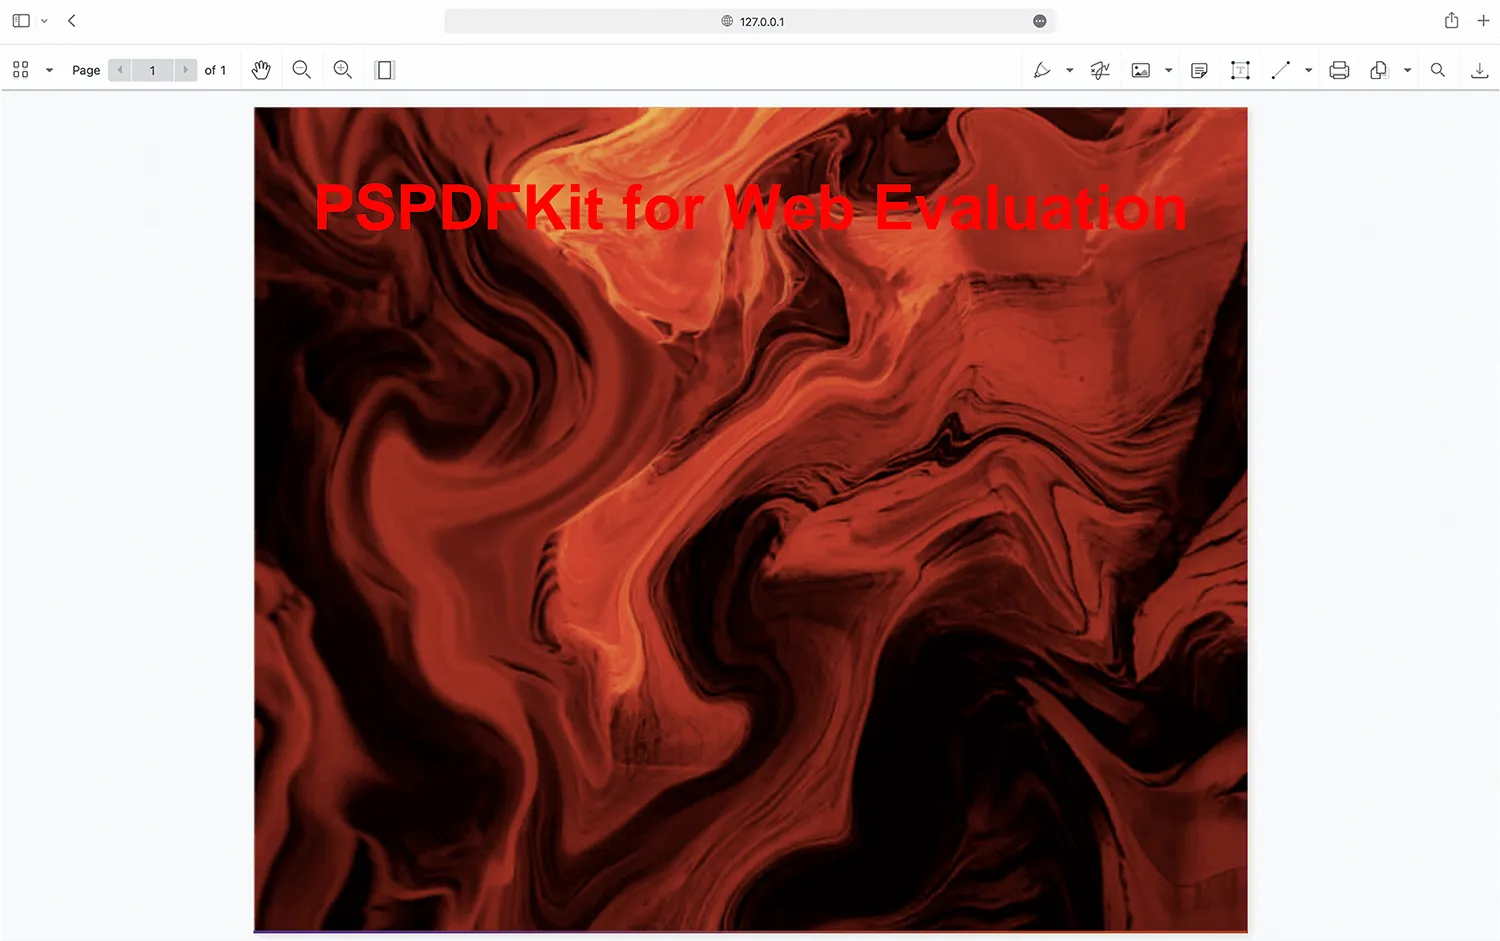
Step 5 — Run your Laravel app
From the project root, start the server:
php artisan serveVisit http://127.0.0.1:8000 in your browser, and you’ll see the image rendered inside the viewer.
Adding even more capabilities
Once you’ve deployed your viewer, you can start customizing it to meet your specific requirements or easily add more capabilities. To help you get started, here are some of our most popular Laravel guides:
- Adding annotations
- Editing documents
- Filling PDF forms
- Adding signatures to documents
- Real-time collaboration
- Redaction
- UI customization
Conclusion
With just a few lines of code, you’ve created a powerful Laravel image viewer using Nutrient Web SDK. It’s fast, responsive, and highly extensible. Try adding annotation tools or enabling support for other file types like PDFs or TIFFs to take it further.
You can also integrate our JavaScript image viewer using web frameworks like Angular and React.js. To see a list of all web frameworks, start your free trial. Or, launch our demo(opens in a new tab) to see our viewer in action.
FAQ
Yes. Nutrient supports multiple image formats like JPG and TIFF, and you can also use it to render PDFs and Office documents in the same viewer.
Yes. You can use Laravel’s file upload handling and then pass the uploaded file path into NutrientViewer.load() dynamically.
Absolutely. Nutrient allows you to configure which tools are visible, reorder the toolbar, or completely replace it with a custom interface.
No. Nutrient is framework-agnostic and works with vanilla JavaScript, Laravel Blade, jQuery, Vue, and others.
Yes. Once you host the assets locally, no external requests are required to load or display the viewer.