


How to build a Next.js image viewer
Table of contents
Next.js(opens in a new tab) is a leading React framework for building performant and scalable web applications. Nutrient Web SDK is a commercial JavaScript library that lets you display and annotate PDFs and image documents directly in the browser with no plugins or external apps required.
What is a Next.js image viewer?
A Next.js image viewer enables you to embed image documents (like JPG, PNG, or TIFF) directly in your web application’s UI. Using Nutrient, you can also enable annotation, redaction, form filling, and other collaborative tools in the browser.
Why use Nutrient Web SDK?
Nutrient Web SDK offers a polished, enterprise-grade UI out of the box. It includes:
- A prebuilt and polished UI for an improved user experience
- 15+ prebuilt annotation tools to enable document collaboration
- Support for more file types with client-side PDF, MS Office, and image viewing
- Dedicated support from engineers to speed up integration
You can also extend it with real-time collaboration and full-text search if needed.
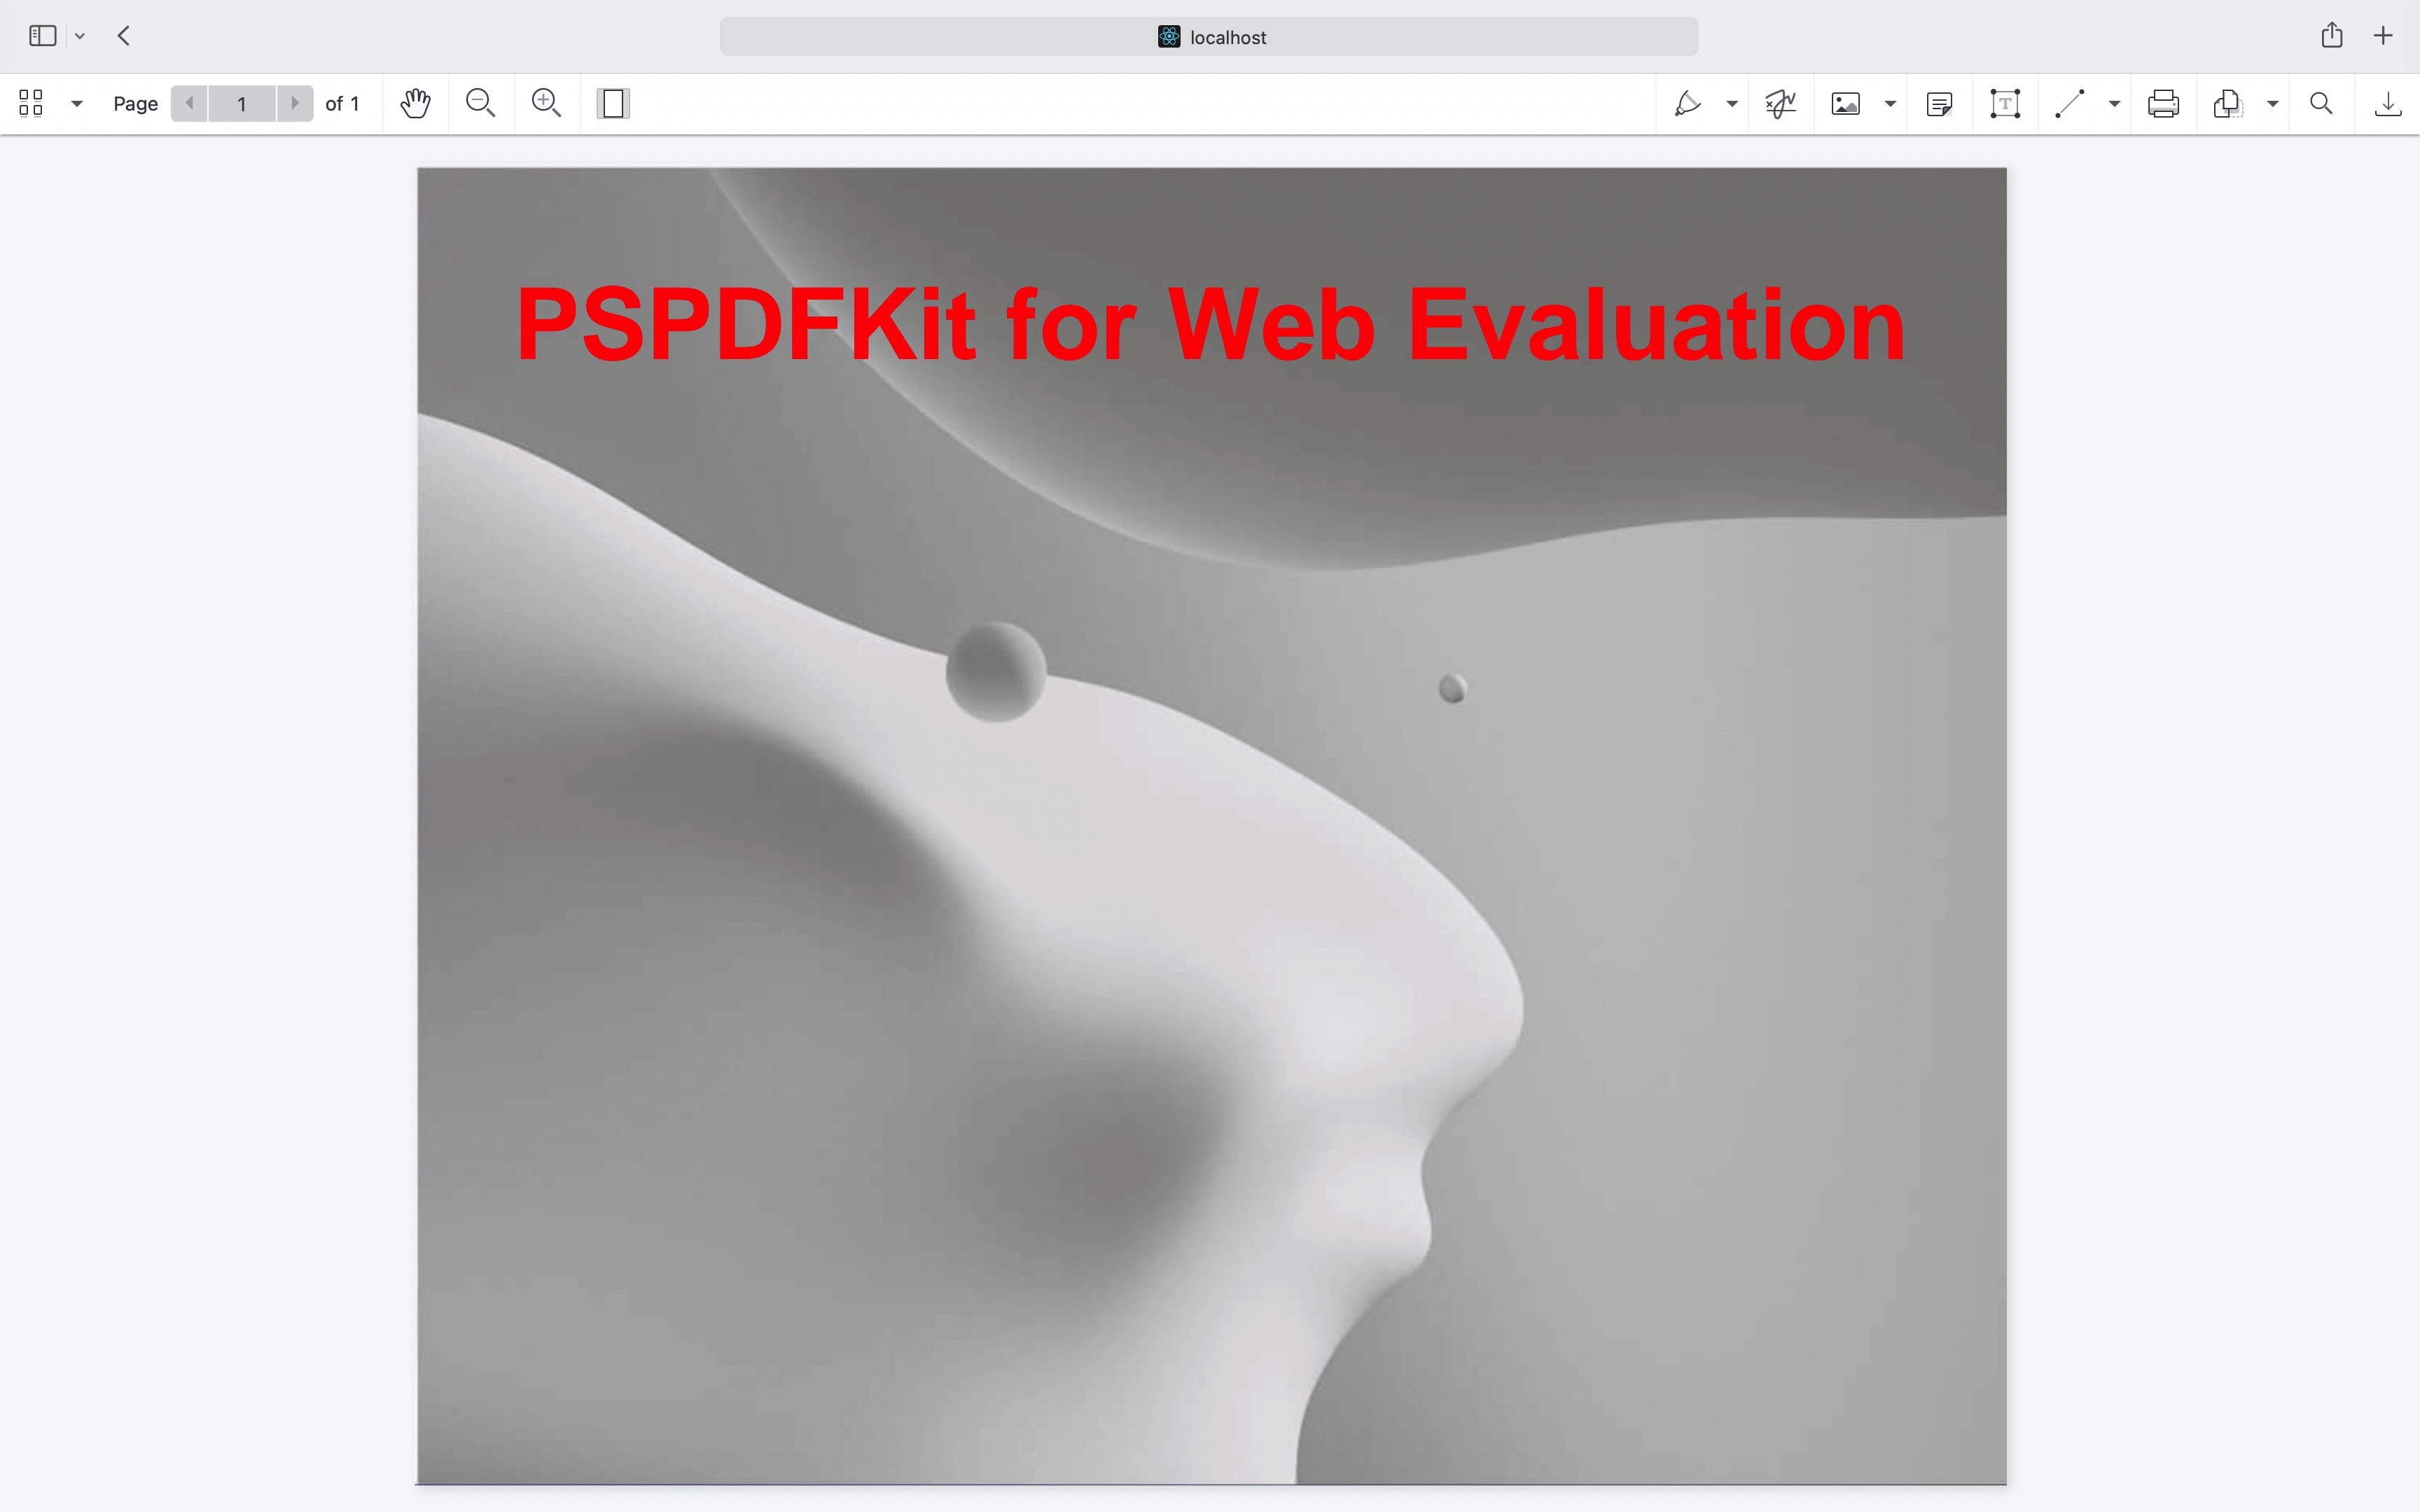
Example of our Next.js image viewer
To see our image viewer in action, upload a JPG, PNG, or TIFF file by selecting Choose Example > Open Document (if you don’t see this, switch to the Standalone option). Once your image is displayed in the viewer, you can try drawing freehand, adding a note, or applying a crop or an eSignature.
Requirements to get started
To get started, you’ll need:
- The latest stable version of Node.js(opens in a new tab).
- A package manager compatible with npm(opens in a new tab). This guide contains usage examples for the npm client(opens in a new tab) (installed with Node.js by default).
Step 1 — Create a new Next.js project
- Create a new Next.js app using the Create Next App(opens in a new tab) tool:
npx create-next-app@latest nutrient-image-viewercd nutrient-image-viewerDuring the setup process, Next.js will prompt you with a series of questions, allowing you to customize your project. One of the questions will ask if you want to use TypeScript. Respond with your preference (No or Yes) to set up your project accordingly.
Step 2 — Install the SDK
You can add the Nutrient Web SDK dependency using your preferred package manager. This guide uses npm:
npm i @nutrient-sdk/viewerpnpm add @nutrient-sdk/vieweryarn add @nutrient-sdk/viewerThis will install the SDK locally, allowing you to serve the necessary viewer files from your application’s public directory.
Step 3 — Copy the SDK assets to public folder
Once the SDK is installed, copy the distribution files into a public-facing directory so they can be accessed by the browser:
cp -R ./node_modules/@nutrient-sdk/viewer/dist/ public/nutrient-viewerYour folder structure should now include:
/public /nutrient-viewer nutrient-viewer.js nutrient-viewer-lib/To automate this process in development and production builds, update your package.json scripts:
"scripts": { "copy-assets": "cp -R ./node_modules/@nutrient-sdk/viewer/dist/ public/nutrient-viewer", "dev": "npm run copy-assets && next dev --turbo", "build": "npm run copy-assets && next build"}To prevent committing SDK binaries to version control, add public/nutrient-viewer/ to your .gitignore file.
Step 4 — Add an image file
Copy image.jpg or any supported file to your public/ folder. You can use our demo image as an example.
Step 5 — Load the image viewer
To render the viewer correctly, you’ll need to integrate the Nutrient Web SDK script into your layout and initialize the viewer in your page component. Follow the instructions outlined below.
1. Register the Nutrient script globally
The SDK uses global objects, so it must be loaded before any pages render. Modify your app/layout.tsx or app/layout.js file as follows:
import Script from 'next/script';
export default function RootLayout({ children }) {  return (    <html lang="en">      <head>        <Script          src="/nutrient-viewer/nutrient-viewer.js"          strategy="beforeInteractive"        />      </head>      <body>{children}</body>    </html>  );}
This ensures the SDK is ready before any component tries to use it.
2. Add the viewer code to your main page
In app/page.tsx or app/page.js, add a React component that initializes the viewer once the client-side DOM is available:
'use client';import { useEffect, useRef } from 'react';
export default function Viewer() {  const containerRef = useRef(null);
  useEffect(() => {    const container = containerRef.current;    const { NutrientViewer } = window;
    if (container && NutrientViewer) {      NutrientViewer.load({        container,        document: '/logo.png',      });    }
    return () => {      NutrientViewer?.unload(container);    };  }, []);
  return (    <div      ref={containerRef}      style={{ width: '100%', height: '100vh' }}    />  );}
Make sure the file /image.jpg exists in the public/ directory.
3. Optimize the build configuration
Exclude the SDK from your browser bundle by configuring Webpack in next.config.js:
const nextConfig = {  webpack: (config, { isServer }) => {    if (!isServer) {      config.externals = config.externals || [];      config.externals.push({        '@nutrient-sdk/viewer': '@nutrient-sdk/viewer',      });    }    return config;  },  experimental: {    turbo: {      resolveAlias: {        '@nutrient-sdk/viewer': '@nutrient-sdk/viewer',      },    },  },};
export default nextConfig;
This prevents the SDK from being bundled by webpack, as it’s already loaded via the script tag above.
Now you’re ready to run the viewer locally and render any supported document file.
Step 6 — Start the dev server
npm run devNavigate to http://localhost:3000/ in your browser. You can see that all the features you expect from an image viewer are present by default.
Adding even more capabilities
Once you’ve deployed your viewer, you can start customizing it to meet your specific requirements or easily add more capabilities. To help you get started, here are some of our most popular Next.js guides:
- Adding annotations
- Editing documents
- Filling PDF forms
- Adding signatures to documents
- Real-time collaboration
- Redaction
- UI customization
Conclusion
You’ve now built a feature-rich image viewer in Next.js using Nutrient Web SDK. You can tailor it to your needs with UI controls, collaboration features, or file format support.
You can also integrate our JavaScript image viewer using web frameworks like Angular and React.js. To see a list of all web frameworks, start your free trial. Or, launch our demo to see our viewer in action.
FAQ
Nutrient Web SDK is a JavaScript library for viewing, annotating, editing, and signing PDF and image documents entirely in the browser using WebAssembly.
The viewer supports image formats like JPG, PNG, and TIFF, along with full support for PDF and Microsoft Office formats in the browser.
Yes. The SDK works seamlessly in both JavaScript and TypeScript projects. During setup, you can choose to enable TypeScript support when initializing your Next.js app.
Yes. It runs entirely in the browser using WebAssembly, so you don’t need to set up any backend servers or proxy infrastructure.
A commercial license is required for production use. However, you can explore the SDK and build locally using a free trial.
