How to convert TIFF files to PDF using JavaScript
Table of contents
Convert TIFF files to PDF using our TIFF-to-PDF JavaScript API. Create a free account, get API credentials, and implement conversion using axios and form-data. Combine with 30+ other API tools for merging, OCR, and watermarking.
Convert TIFF files to PDF using our TIFF-to-PDF JavaScript API. Start with 200 free credits — no payment required. Different operations consume different credit amounts, so the number of PDF documents you can generate will vary. Create a free account(opens in a new tab) to get your API key.
Why convert TIFF to PDF?
Converting TIFF files to PDF is essential for document workflows that require standardized, shareable formats. Common use cases include:
- Universal compatibility — Convert TIFF images to PDFs that open on any device without specialized software, ensuring recipients can view documents regardless of platform.
- Reduced file sizes — Multipage TIFF files often compress better as PDFs, reducing storage costs and improving transfer speeds for document-heavy workflows.
- Enhanced security — Add password protection, digital signatures, and encryption when converting to PDF, securing sensitive scanned documents or medical records.
- Web integration — PDFs render consistently in browsers, while TIFFs require plugins or downloads, improving user experience for web-based document viewers.
- Archival compliance — Many industries require PDF/A format for long-term document preservation, making TIFF-to-PDF conversion critical for regulatory compliance.
The TIFF-to-PDF API automates this process in your workflow.
Nutrient DWS Processor API
Converting TIFF to PDF is one of 30+ operations available through our PDF API tools. Combine TIFF conversion with other tools for complex workflows:
- Converting various file formats and combining them into multi-source PDFs
- Converting TIFFs and then watermarking and flattening PDFs
- Converting images to PDF before merging them with other documents
Your account includes access to all PDF API tools.
Step 1 — Creating a free account on Nutrient
Go to our website(opens in a new tab), where you’ll see the page below, prompting you to create your free account.
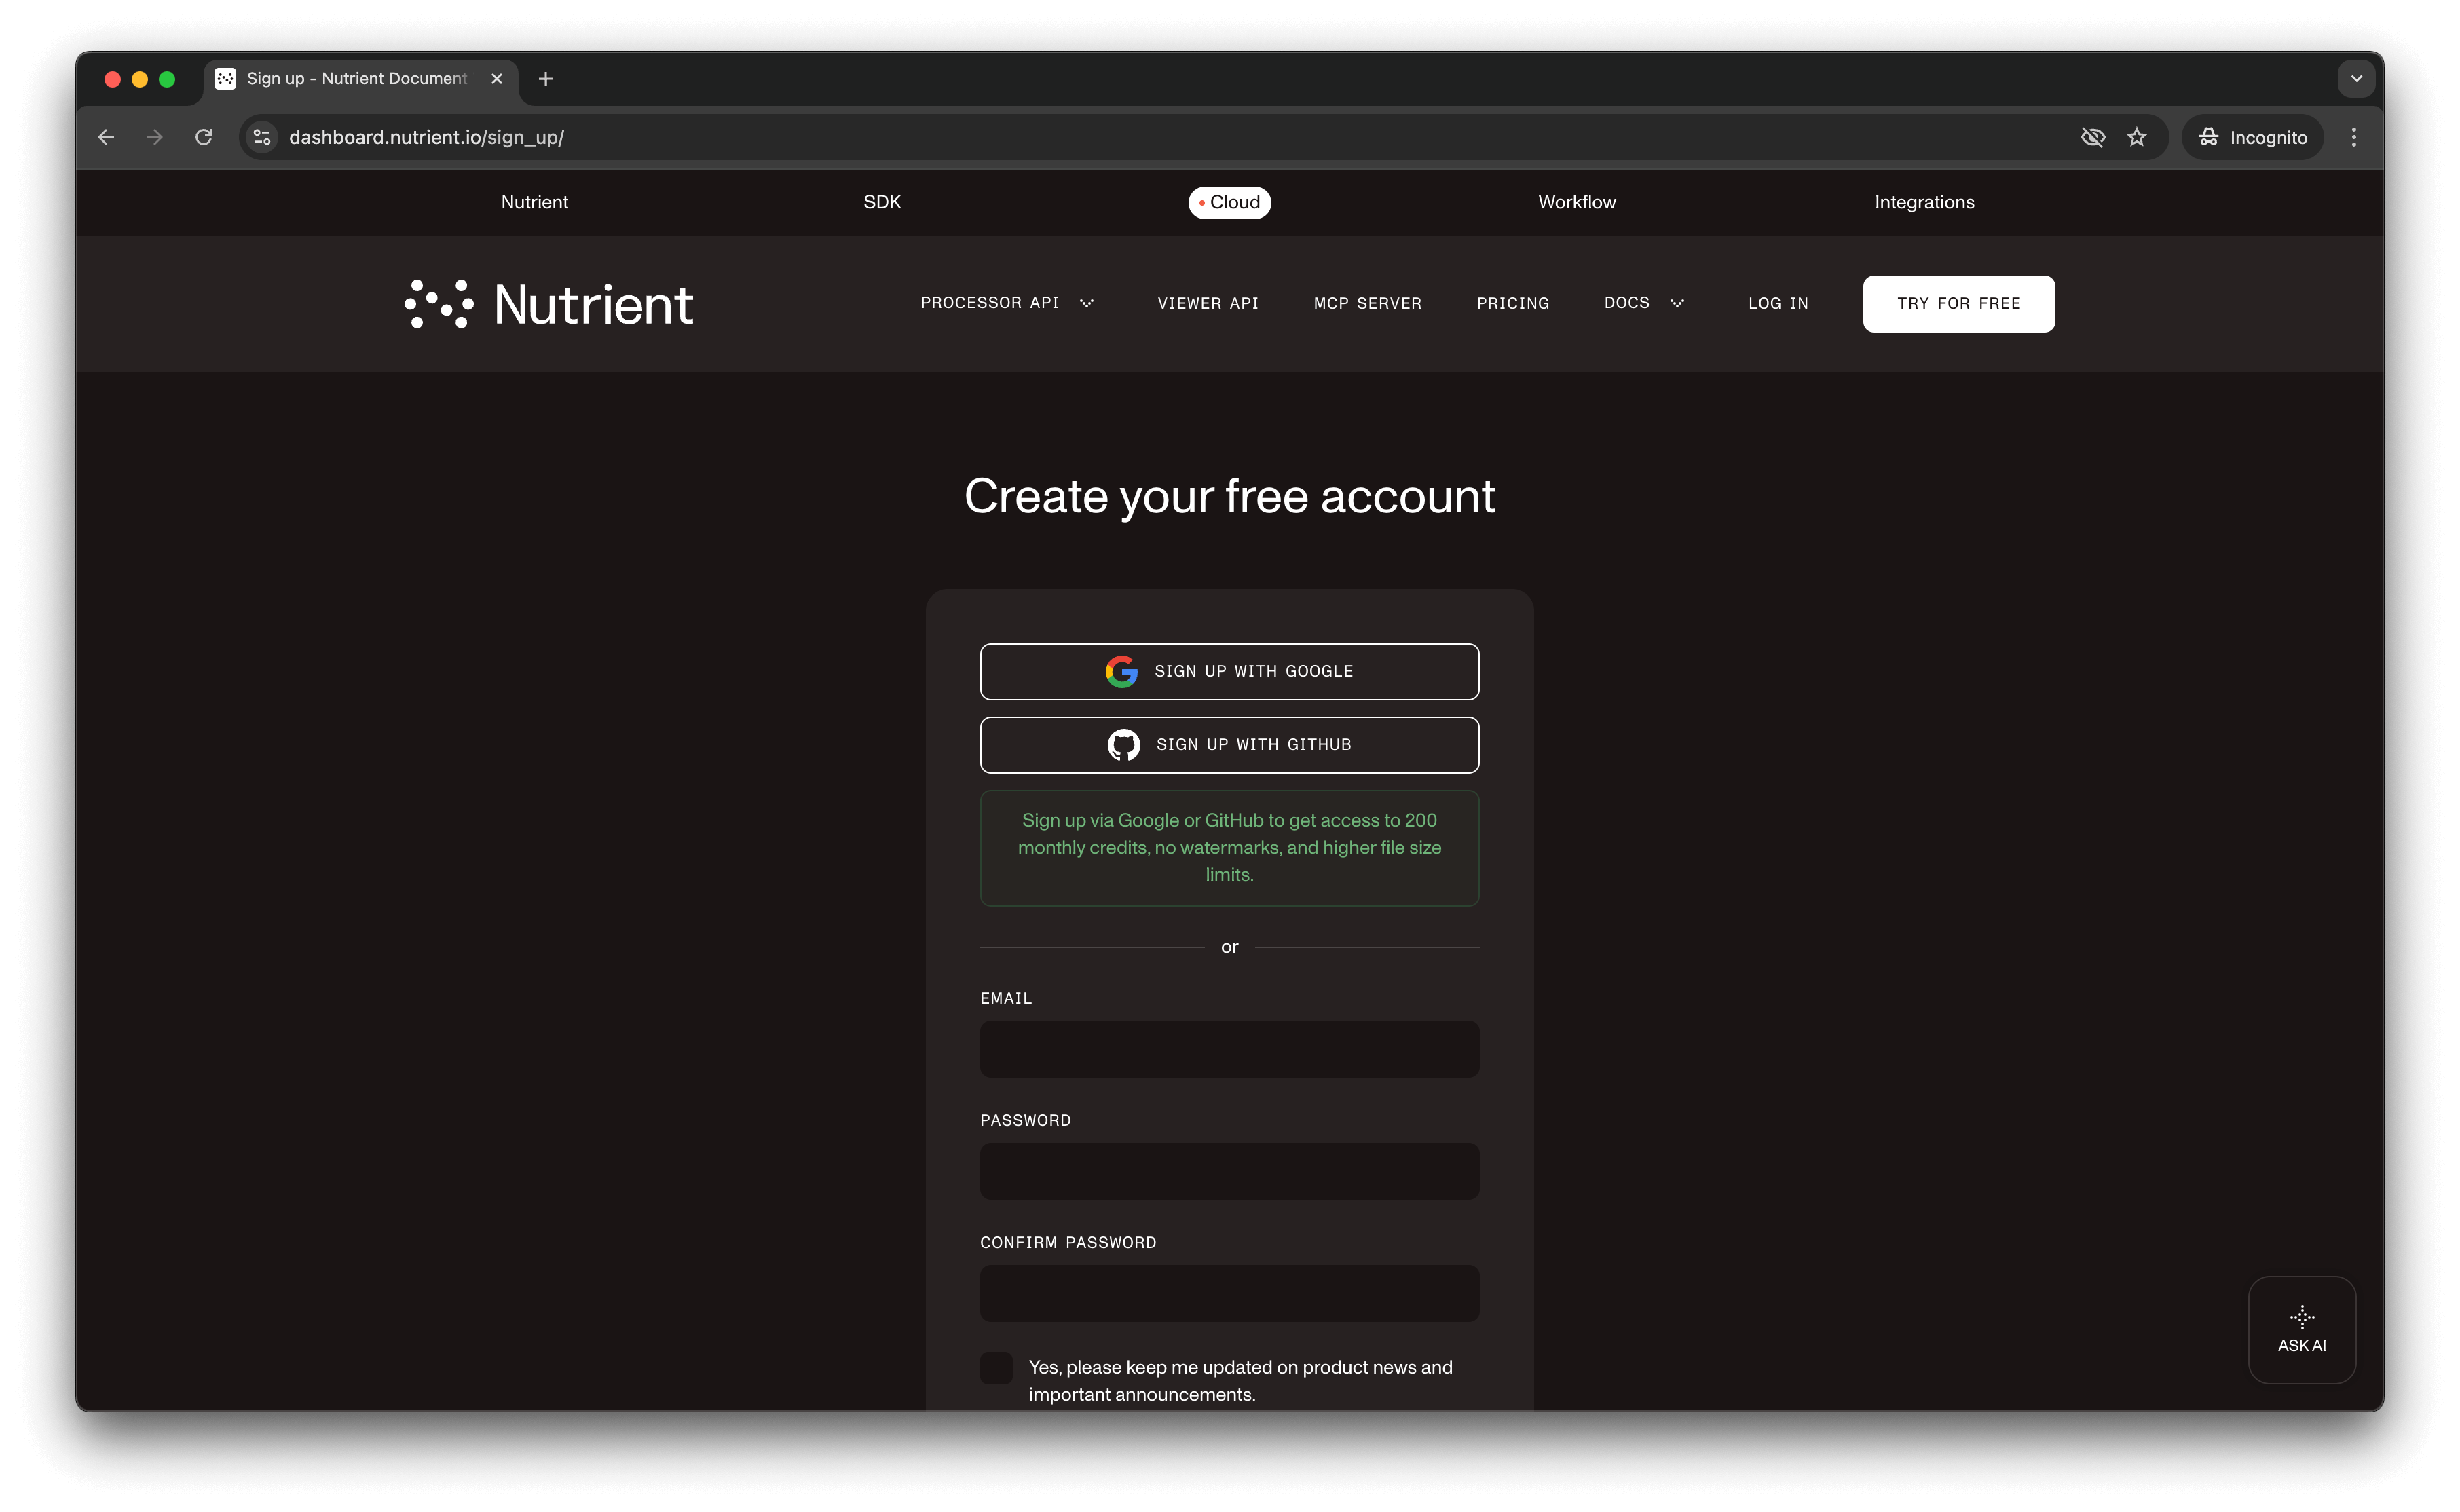
Once you’ve created your account, you’ll see a page showing an overview of your plan details.
You’ll start with 200 credits to process and can access all our PDF API tools.
Step 2 — Obtaining the API key
After you’ve verified your email, you can get your API key from the dashboard. In the menu on the left, click API keys. You’ll see the following page, which is an overview of your keys.
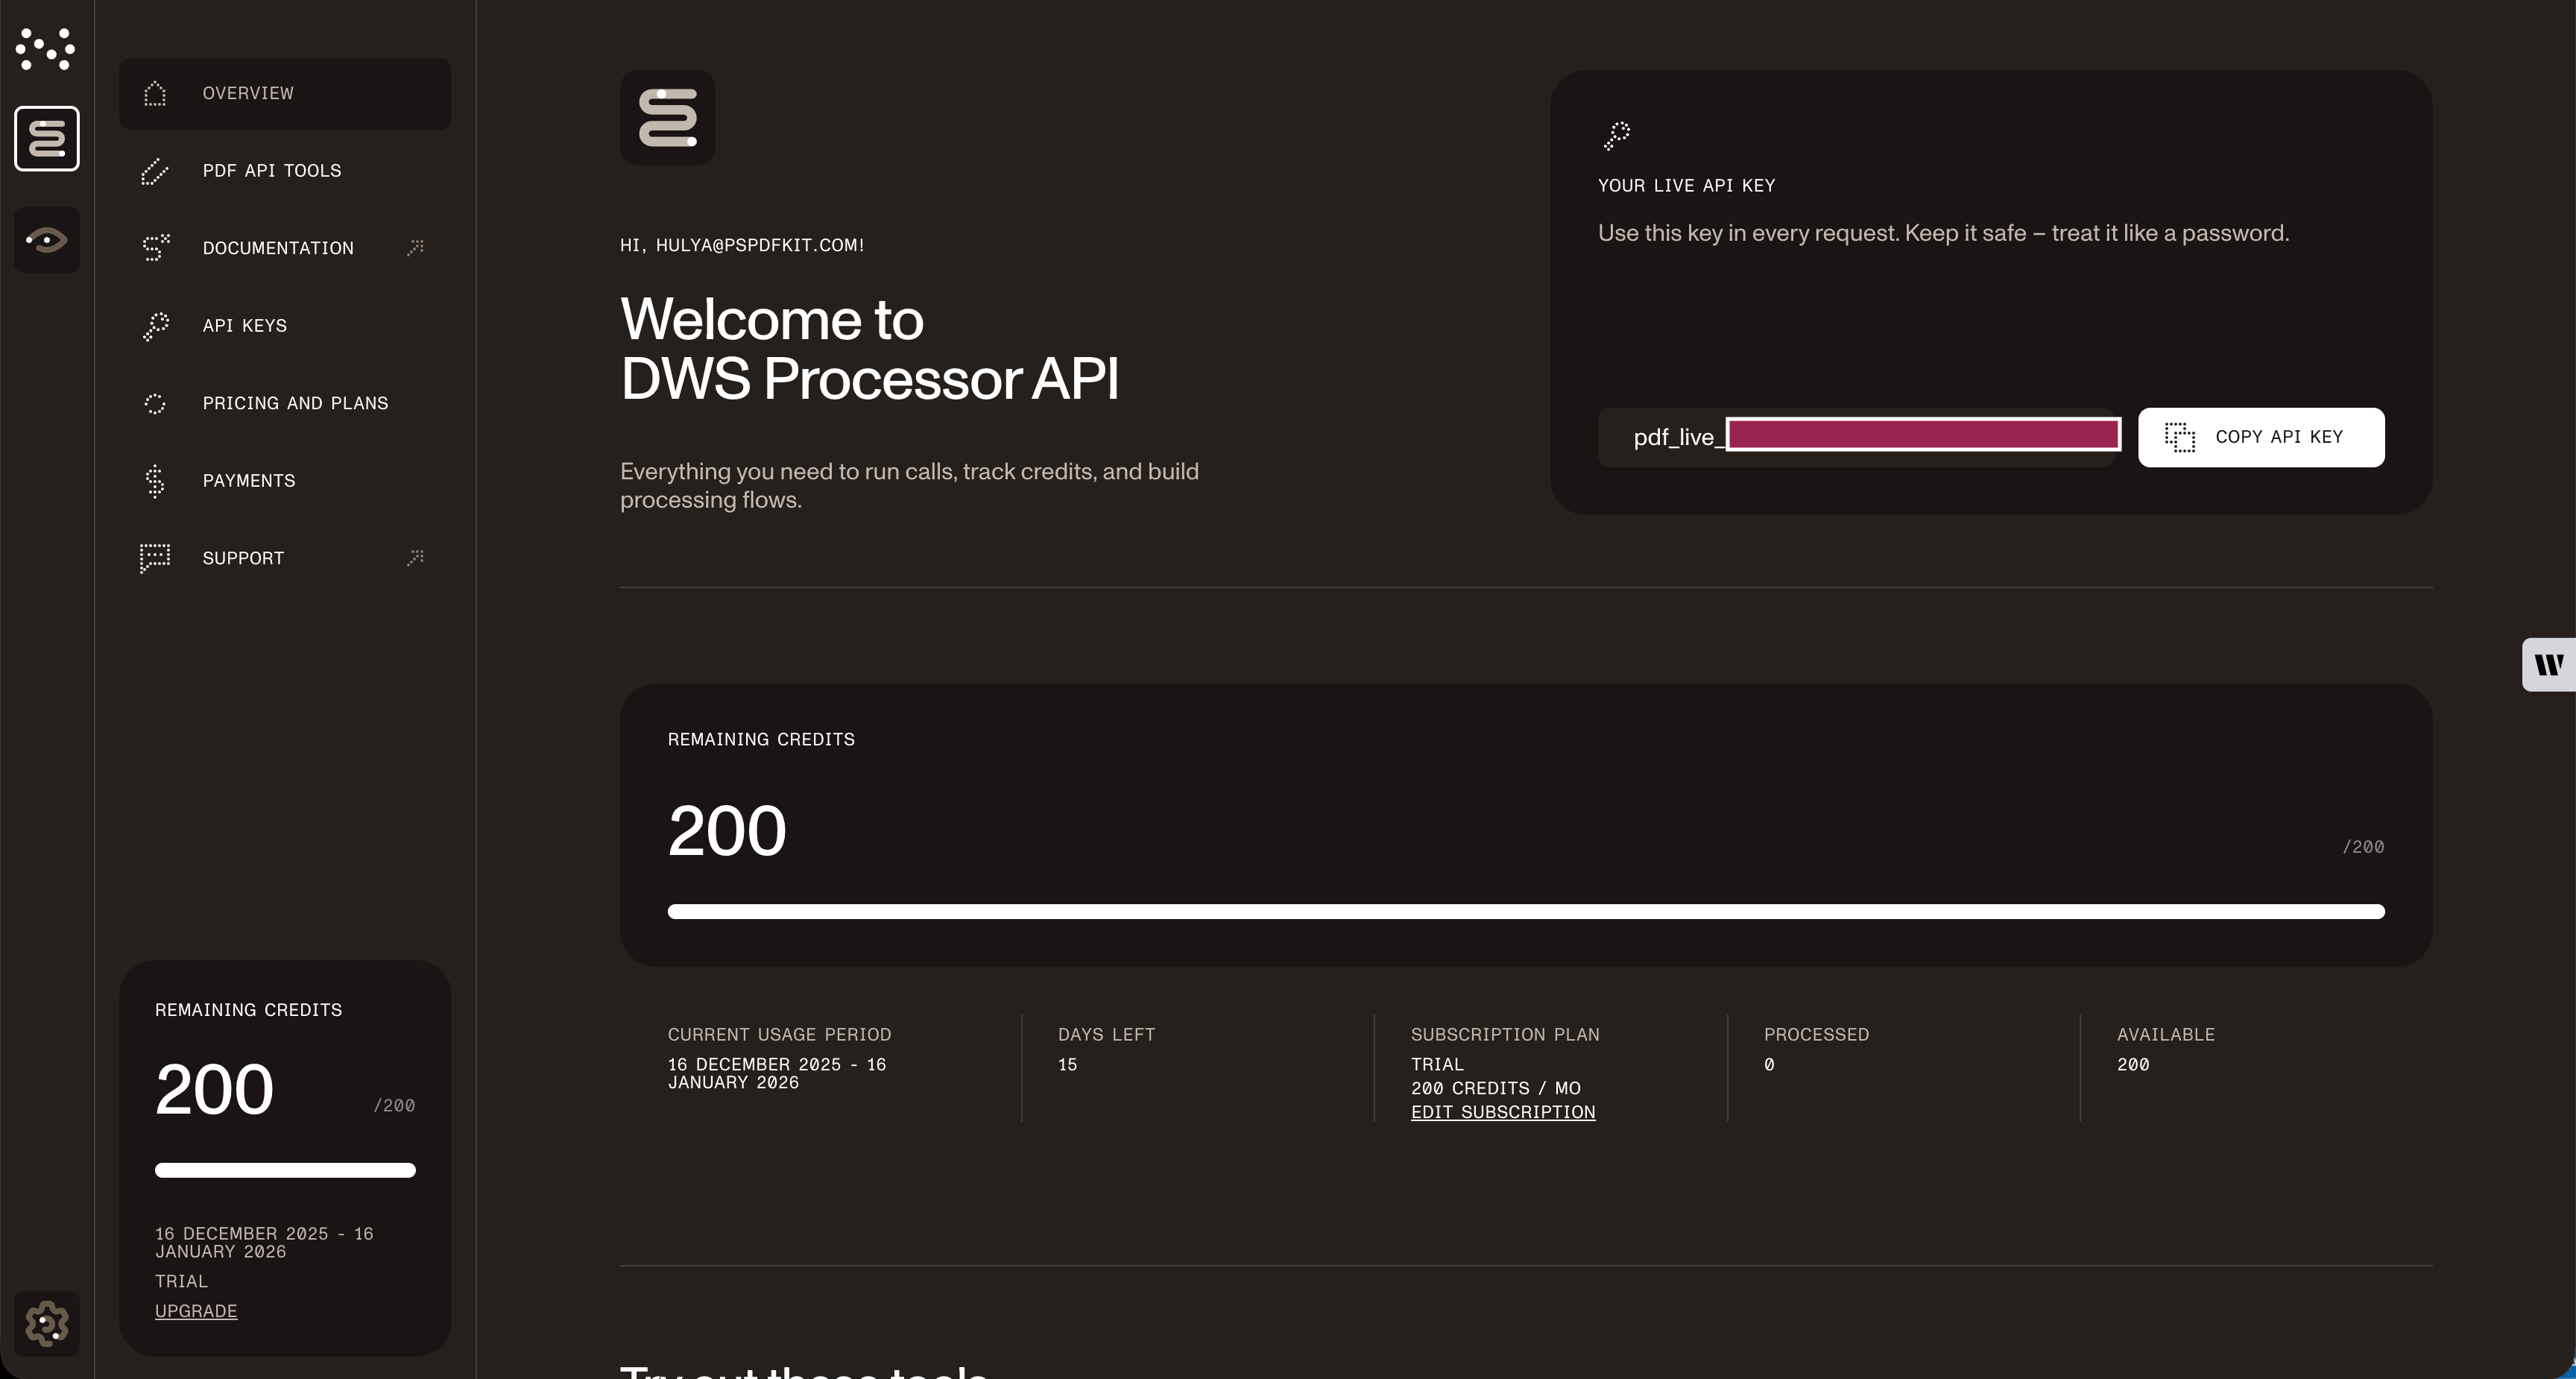
Copy the Live API key — you’ll need it for the TIFF-to-PDF API.
Step 3 — Setting up folders and files
For this tutorial, use VS Code as your code editor. Create a folder called tiff_to_pdf and open it in VS Code. Create two folders inside tiff_to_pdf called input_documents and processed_documents.
Paste your TIFF file inside the input_documents folder and rename it to image.tiff. You can use our demo image as an example.
In the root folder, create a file called processor.js. This is the file where you’ll keep your code.
Your folder structure will look like this:
tiff_to_pdf├── input_documents| └── image.tiff├── processed_documents└── processor.jsStep 4 — Installing dependencies
Install these dependencies:
- axios(opens in a new tab) — For making REST API calls
- Form-Data(opens in a new tab) — For creating form data
Install both packages:
npm install axiosnpm install form-dataStep 5 — Writing the code
This tutorial requires Node.js 14+ installed on your system.
Open processor.js and add this code:
// This code requires Node.js. Do not run this code directly in a web browser.
const axios = require('axios')const FormData = require('form-data')const fs = require('fs')
const formData = new FormData()formData.append('instructions', JSON.stringify({  parts: [    {      file: "file"    }  ]}))formData.append('file', fs.createReadStream('input_documents/image.tiff'))
;(async () => {  try {    const response = await axios.post('https://api.nutrient.io/build', formData, {      headers: formData.getHeaders({        'Authorization': 'Bearer YOUR_API_KEY_HERE'      }),      responseType: "stream"    })
    response.data.pipe(fs.createWriteStream("processed_documents/result.pdf"))  } catch (e) {    const errorString = await streamToString(e.response.data)    console.log(errorString)  }})()
function streamToString(stream) {  const chunks = []  return new Promise((resolve, reject) => {    stream.on("data", (chunk) => chunks.push(Buffer.from(chunk)))    stream.on("error", (err) => reject(err))    stream.on("end", () => resolve(Buffer.concat(chunks).toString("utf8")))  })}
Make sure to replace YOUR_API_KEY_HERE with your API key.
Code explanation
The formData variable contains the instructions for the API. createReadStream reads the input file from the input_documents folder, and axios.post() makes the POST request to the TIFF-to-PDF API. The response is saved to result.pdf in the processed_documents folder.
The streamToString function handles error responses by converting the error stream to a readable string.
This code requires Node.js and won’t run in a browser environment.
Common errors include:
- 401 Unauthorized — Invalid or missing API key.
- 400 Bad Request — Incorrect file path or malformed instructions.
- ENOENT — File not found — check that
image.tiffexists ininput_documents/
Output
Run the code:
node processor.jsOn successful execution, you’ll see the new PDF file in the processed_documents folder. The folder structure should look like this:
tiff_to_pdf├── input_documents| └── image.tiff├── processed_documents| └── result.pdf└── processor.jsAdditional resources
Explore more ways to work with Nutrient API:
- Postman collection — Test API endpoints directly in Postman
- Zapier integration — Automate document workflows without code
- MCP Server — PDF automation for LLM applications
- JavaScript SDK — Official JavaScript/TypeScript library
Conclusion
This tutorial showed how to convert TIFF files to PDF in JavaScript (Node.js) using our TIFF-to-PDF API.
Integrate TIFF conversion into your existing applications. Use the same API token for other operations like merging documents, adding watermarks, and more. Sign up(opens in a new tab) for a free trial.
FAQ
No. This code uses Node.js features like fs.createReadStream and requires the axios and form-data packages. It must run on a Node.js server. For browser-based conversion, use our Web SDK or make API calls from your backend.
Node.js 14 or higher is required. The code uses modern JavaScript features, including async/await and native promises. Check your version with node --version.
For large files, consider increasing the axios timeout or implementing chunked uploads. You can also monitor progress using axios’s onUploadProgress callback to provide feedback during long conversions.
Yes. Create multiple formData.append('file', ...) entries with different file names and reference them in the parts array. This allows batch processing of multiple TIFF images into a single PDF or separate PDFs.