


Salesforce PDF generation: A complete guide with Visualforce and Apex
Table of contents

This tutorial shows how to generate PDFs in Salesforce using Visualforce pages with the renderAs="pdf" attribute and Apex controllers. You’ll create a PDF from contact records and customize styling with CSS. For production document workflows with templates, eSignatures, and automation, consider Document Solutions for Salesforce, a low-code alternative that requires no custom Visualforce code.
In this tutorial, you’ll learn how to generate a PDF in Salesforce from a contact record(opens in a new tab). You’ll start by creating a Visualforce page that generates a PDF from a contact record(opens in a new tab) in Salesforce. You’ll then use an Apex controller to retrieve the data, and a PDF rendering engine to generate the output.
This tutorial uses contact records as an example, but the same techniques apply to other record types. Use these principles to generate reports, invoices, contracts, or other documents.
What is Salesforce PDF generation?
Salesforce PDF generation is the process of creating PDF documents directly from your CRM data using Visualforce pages and Apex code. This built-in capability lets you generate reports, invoices, contracts, and other documents without leaving Salesforce.
The main benefit: PDFs stay in sync with your Salesforce data. No manual copying, no version mismatches.
Document Solutions for Salesforce
Document Solutions for Salesforce is Nutrient’s low-code solution for document workflows. It’s 100 percent native to Salesforce (built with LWC and Apex) and includes:
- Template creation with conditions, loops, and related object data
- One-click document generation from any record
- WYSIWYG editing with PDF and DOCX export
- Legally binding eSignatures with audit trails
- Salesforce Flow integration for automation
With Document Solutions for Salesforce, data never leaves your organization. Start a free trial or contact Sales.
What is a Visualforce page?
Visualforce pages(opens in a new tab) are HTML pages that can be customized to display specific Salesforce data. You can create a Visualforce page that will display your data in a table or a chart and then convert that page into a PDF.
To create a Visualforce page, you’ll need to have a basic understanding of HTML, CSS, and Apex code. You’ll also need to create a custom controller that will allow you to access the data you want to display on the page.
What is Apex?
Apex(opens in a new tab) is a programming language used to write custom logic in Salesforce. You can use Apex code to create a PDF by writing code that will extract the data you need and format it into a PDF file.
Prerequisites
- A Salesforce developer account(opens in a new tab) or a sandbox with the necessary permissions to create and modify Visualforce pages and Apex classes.
- Specifically, you’ll need the following permissions:
- Customize Application permission(opens in a new tab) — This permission is required to create Visualforce pages and Apex classes.
- View All Data or Modify All Data permission(opens in a new tab) — This permission is required to access or modify contact records in Salesforce. If you don’t have this permission, you may need to work with your Salesforce administrator to grant you the necessary access.
If you’re using a Salesforce developer account, you’ll have these permissions by default. However, if you’re using a sandbox or another type of organization, you may need to work with your Salesforce administrator to ensure you have the necessary permissions.
Step 1 — Create an Apex controller and Visualforce page
The first step is to create a new Apex class and Visualforce page in your Salesforce organization.
Once you’ve set up your Salesforce account, log in(opens in a new tab) to your organization.
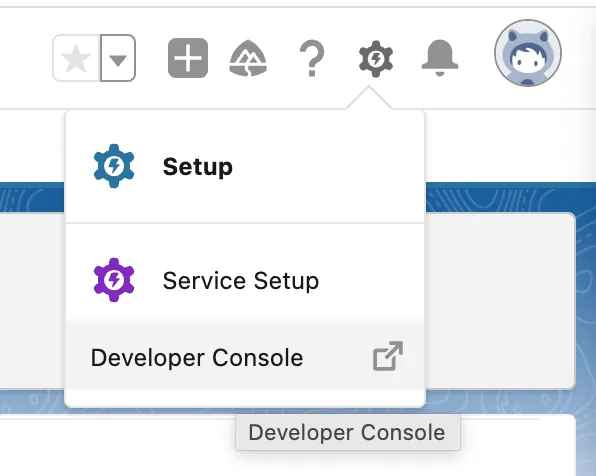
Open the Developer Console by going to Setup > Developer Console.
In the Developer Console, click File > New > Apex Class.
In the new Apex class window, enter a name for your class, such as
PDFController.Copy and paste the following code into the class editor:
public class PDFController {public List<Contact> contacts { get; set; }public PDFController() {contacts = [SELECT Name, Account.Name, Phone FROM Contact];}}This code defines an Apex controller class that retrieves a list of contact records from the Salesforce database and stores them in a property called
contacts.Save the Apex class by clicking File > Save.
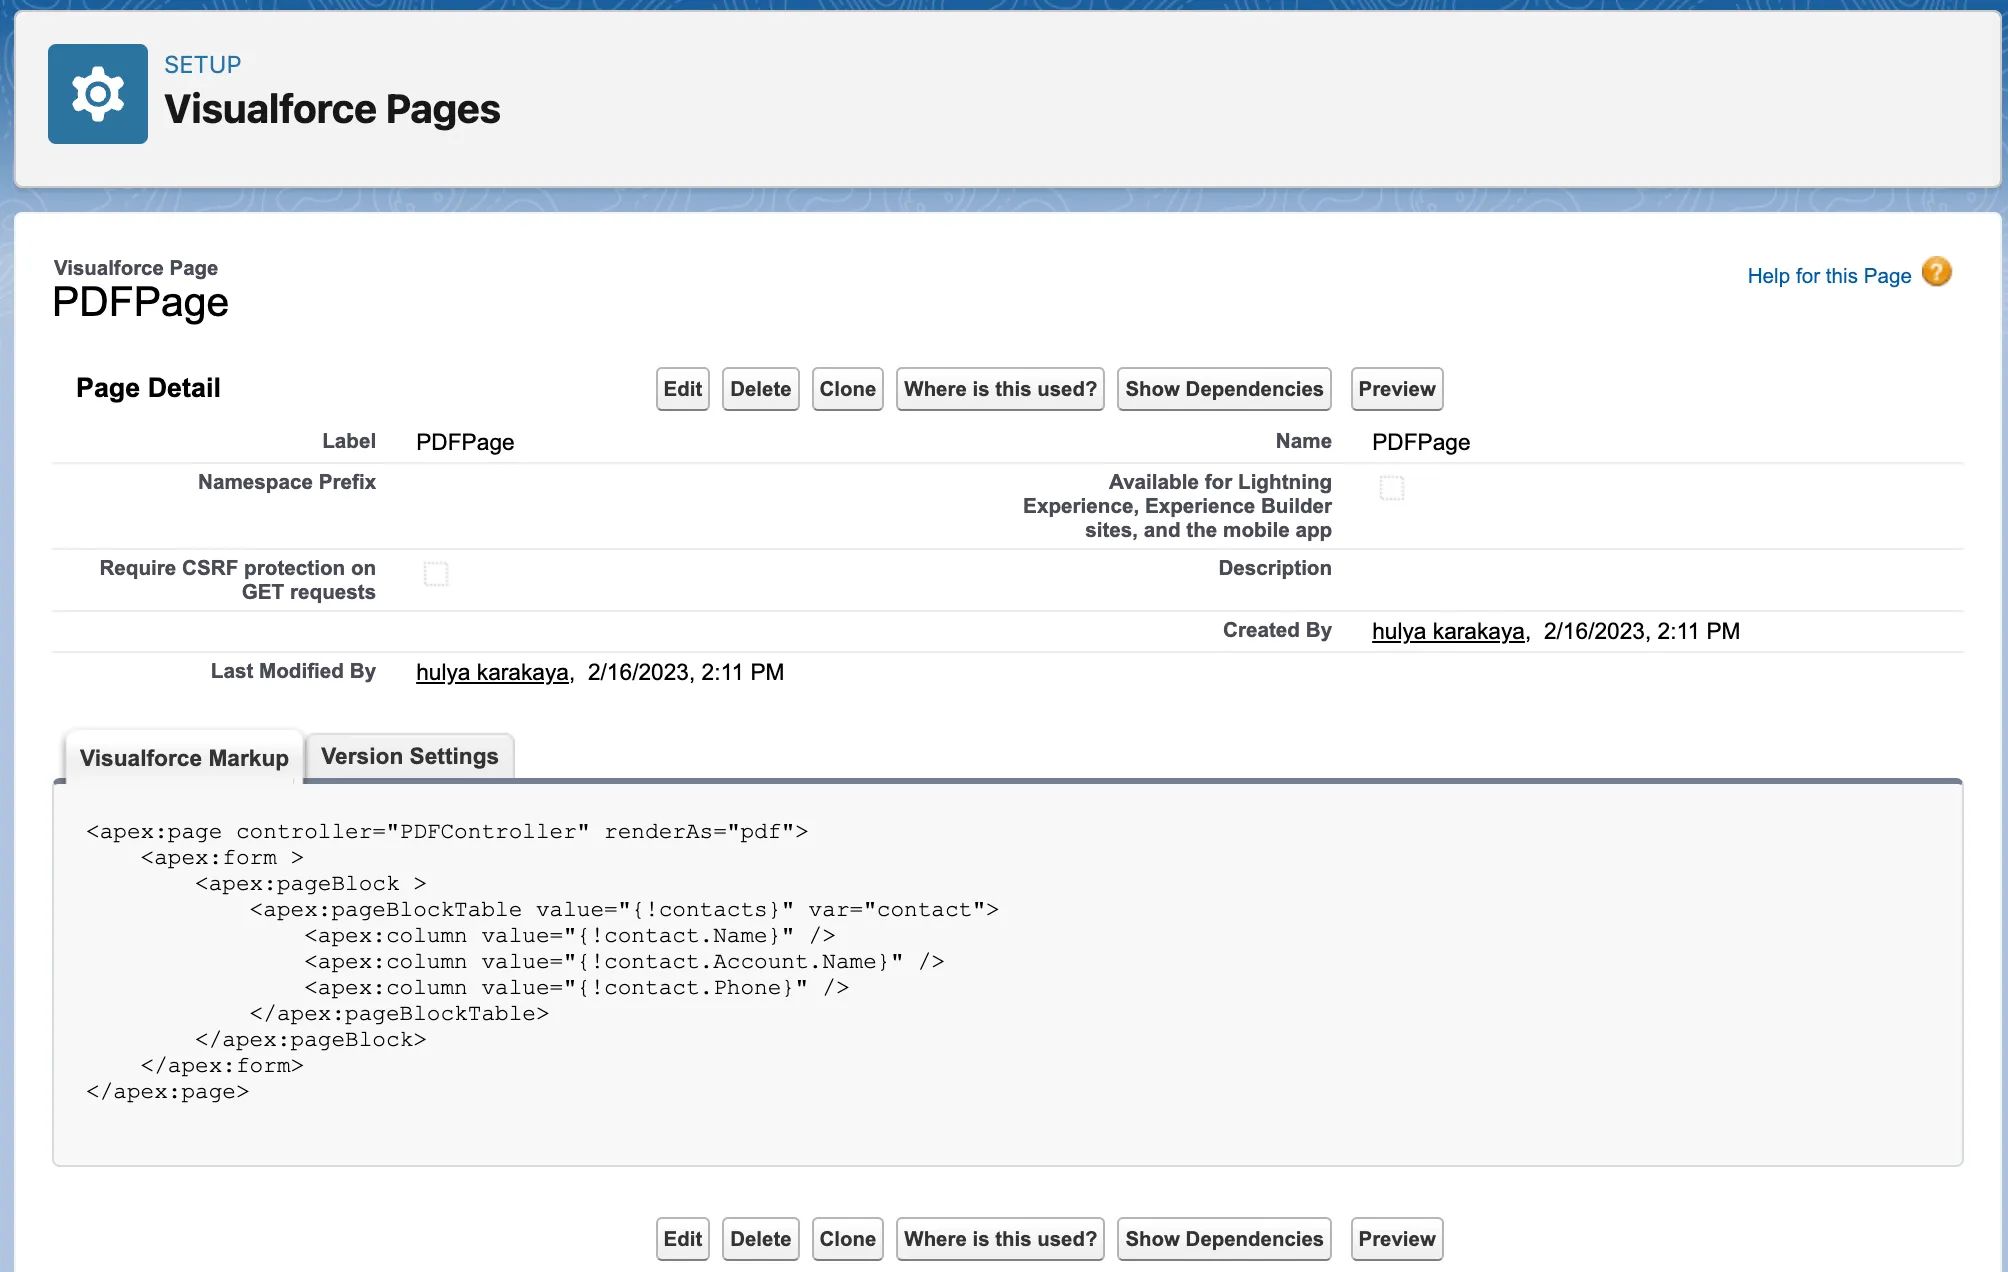
Now, create a new Visualforce page by clicking File > New > Visualforce Page.
In the new Visualforce page window, enter a name for your page, such as
PDFPage.Copy and paste the following code into the page editor:
<apex:page controller="PDFController" renderAs="pdf"><apex:form><apex:pageBlock><apex:pageBlockTable value="{!contacts}" var="contact"><apex:column value="{!contact.Name}" /><apex:column value="{!contact.Account.Name}" /><apex:column value="{!contact.Phone}" /></apex:pageBlockTable></apex:pageBlock></apex:form></apex:page>This code defines a Visualforce page that uses the Apex controller you just created to retrieve contact records and display them in a table. The
renderAsattribute(opens in a new tab) specifies that the page should be rendered as a PDF.Save the Visualforce page by clicking File > Save.
Step 2 — Test and preview the generated PDF
Test the PDF generation to verify it works correctly.
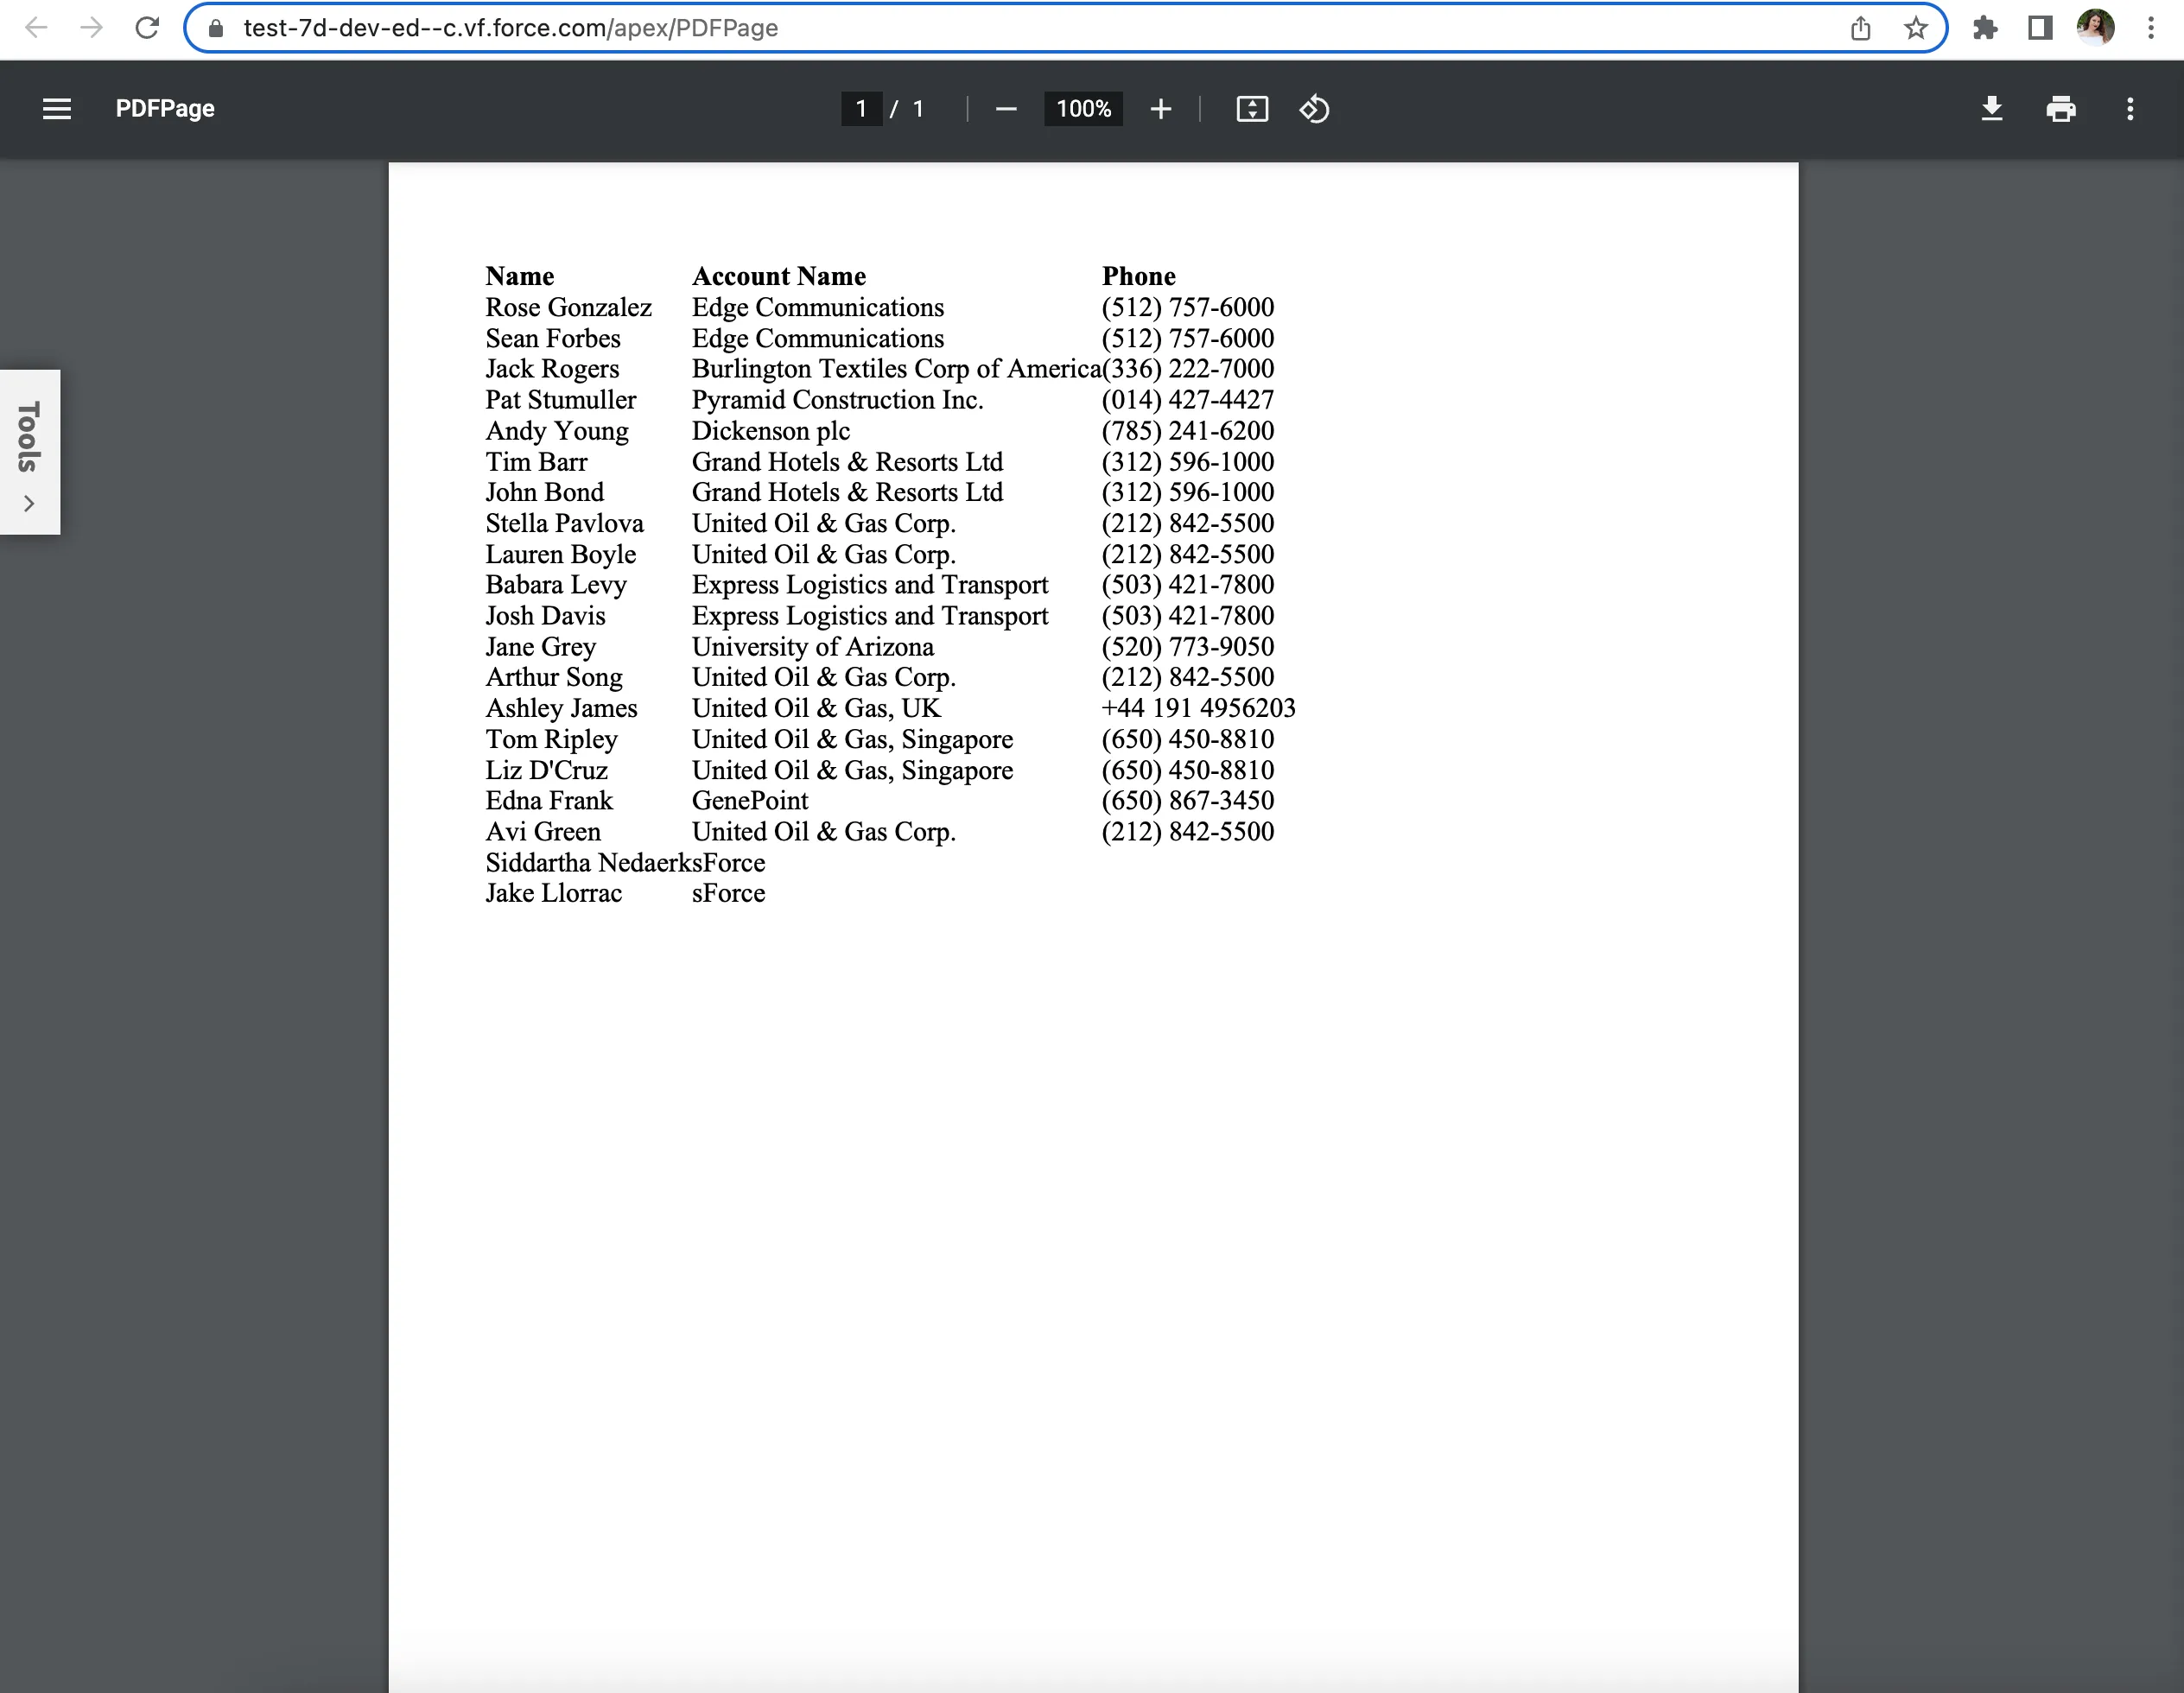
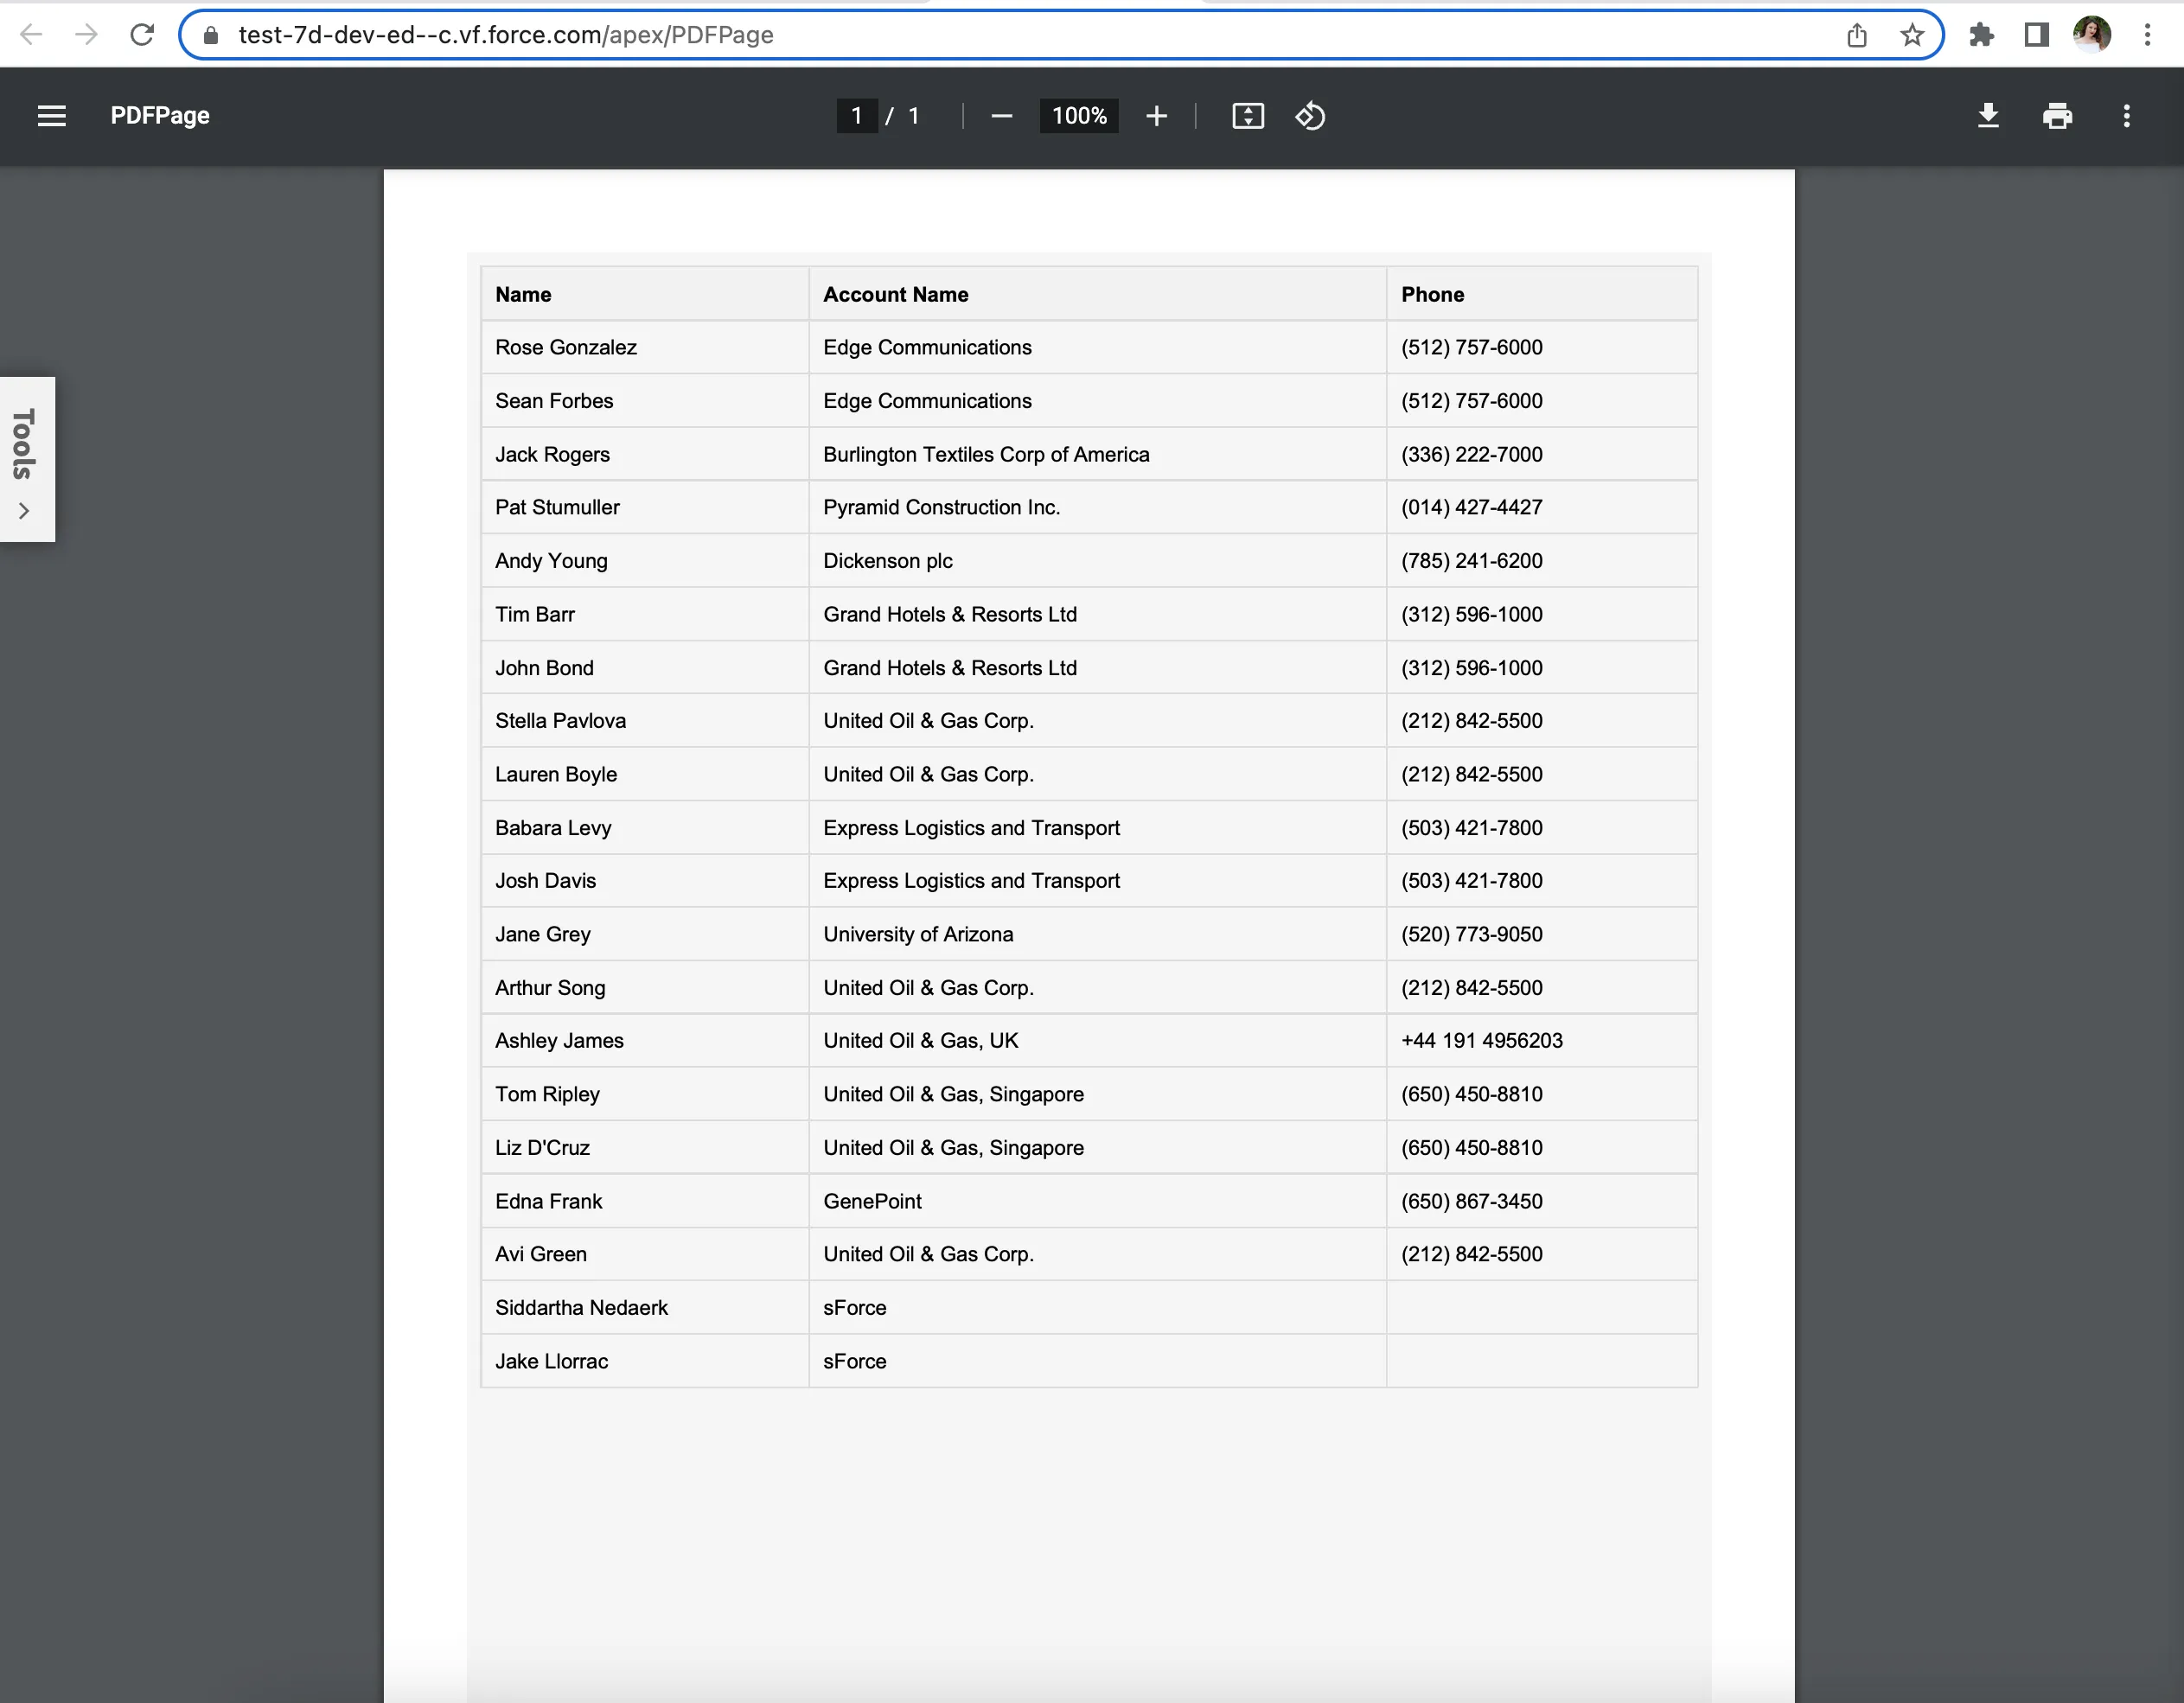
Open a new browser window or tab and navigate to your Setup Home. Here you’ll see the recently created Visualforce page. Click the page name,
PDFPage, to open it.Click the Preview button.
This will open a new browser tab and display a preview of the PDF. You can also use Salesforce APIs to retrieve the PDF programmatically.
The Visualforce page will load and display a table of contact records.
If you encounter errors, review your code and check the debug logs in the Developer Console.
Step 3 — Customize PDF styling with CSS
Next, customize the PDF output. Here are some options.
Customizing the PDF styles
By default, the PDF output generated by Visualforce uses a simple black-and-white style. However, you can customize the styles by creating a new CSS file and linking it to the Visualforce page.
In the Developer Console, create a new file by clicking File > New > Static Resource.
Enter a name for your file, such as
PDFStyles, and select thetext/cssMIME type from the dropdown menu.Copy and paste the following CSS code into the file editor:
body {background-color: #f5f5f5;font-family: Arial, sans-serif;font-size: 12px;}h1 {color: #006699;font-size: 18px;font-weight: bold;margin-bottom: 10px;}table {border-collapse: collapse;margin-bottom: 20px;width: 100%;}th,td {border: 1px solid #ddd;padding: 8px;text-align: left;}th {background-color: #f2f2f2;}.footer {margin-top: 50px;text-align: center;}This CSS sets the background color, font family, font size, and table styles for the PDF.
Save the CSS file by clicking File > Save.
Now, link the CSS file to the Visualforce page by adding the following code after the opening
<apex:page>tag:<apex:stylesheet value="{!$Resource.PDFStyles}" />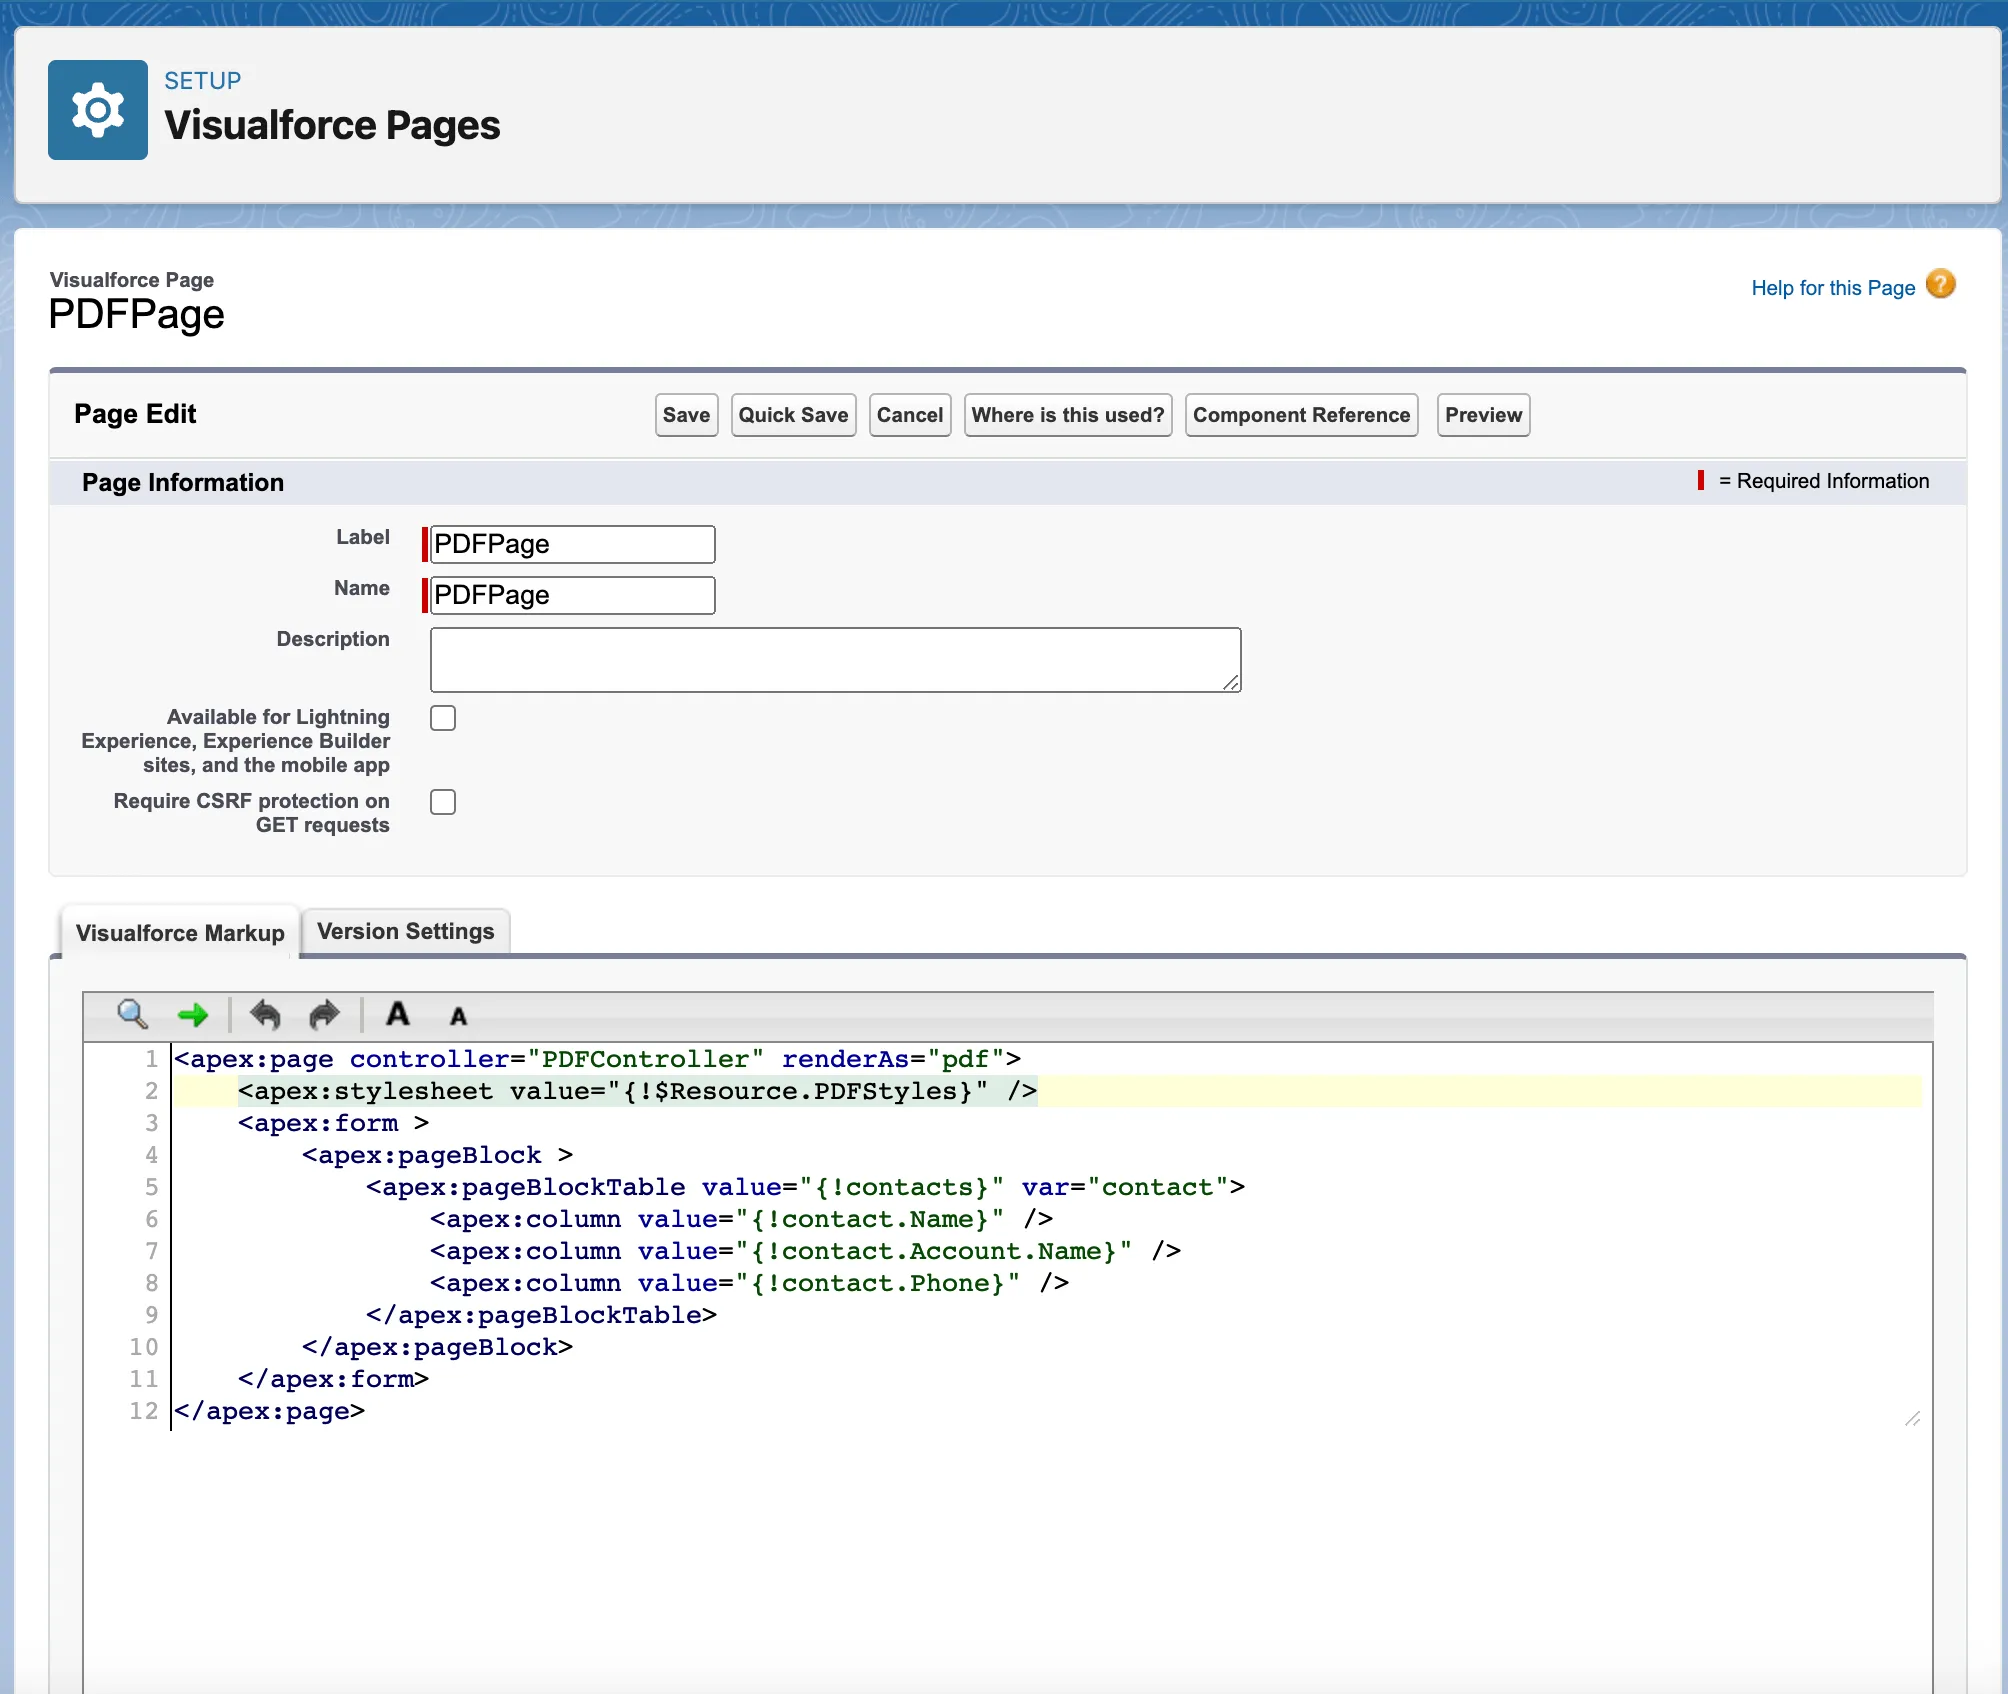
This code links the Visualforce page to the CSS file you just created using a static resource reference.
Save the Visualforce page by clicking File > Save.
Now, when you preview the Visualforce page, you’ll see the PDF output with the custom styles applied.
Customizing the PDF layout
In addition to customizing the styles, you can also customize the layout of the PDF output by modifying the Visualforce page. Here are some examples of how to do this:
- Add headers and footers to the PDF by using the
<apex:pageHeader>and<apex:pageFooter>tags. - Customize the page orientation and size by using the orientation and size attributes of the
<apex:page>tag. - Add images, logos, or other branding elements to the PDF by using the
<apex:image>tag.
Visualforce gives you control over PDF content and formatting. This is useful for professional documents and sharing Salesforce data externally.
Salesforce PDF generation workflow
The PDF generation workflow in Salesforce follows four steps:
- Identify data sources — Standard objects (Accounts, Contacts) or custom objects
- Retrieve data — Use SOQL queries in Apex to pull records
- Format output — Use Visualforce components (tables, charts) to structure the layout
- Generate PDF — Set
renderAs="pdf"on the Visualforce page
For a no-code approach to this workflow, see Salesforce document generation.
Advanced Salesforce PDF generation techniques
| Technique | Use case |
|---|---|
| Visualforce pages | Custom layouts, branding, complex formatting |
| Apex code | Dynamic content, conditional logic, personalized documents |
| JavaScript libraries | Interactive features (limited in Visualforce rendering) |
| External cloud services | Large-scale storage, additional processing (AWS S3, Google Cloud) |
For advanced document workflows — templates, eSignatures, automation — consider Document Solutions for Salesforce instead of building custom Visualforce solutions.
Limitations of PDF generation in Salesforce
Salesforce’s built-in PDF generation has several limitations:
- Limited styling — Visualforce supports custom PDFs, but styling options are restricted compared to dedicated PDF tools.
- Complex layouts — Multipage PDFs with many tables, charts, and images are difficult to build in Visualforce.
- Large datasets — Visualforce pages slow down with large datasets. Batch or paginate data for better performance.
- No direct API access — The PDF rendering engine isn’t accessible through Salesforce APIs.
- Font restrictions — Salesforce’s PDF engine doesn’t support all fonts. Stick to system fonts.
- Maintenance burden — Large Visualforce pages become difficult to maintain, and Salesforce may deprecate older technologies.
For a no-code alternative that avoids these limitations, see Salesforce document generation.
Best practices for Salesforce PDF generation
| Practice | Why |
|---|---|
| Use supported fonts | Arial, Times New Roman, system fonts. Custom fonts may not render. |
| Test with edge cases | Long text, images, large data sets. Catch issues early. |
| Add error handling | Log errors, provide fallback options. |
| Optimize queries | Use efficient SOQL, batch large data sets. |
| Compress images | Large images slow PDF generation. |
Troubleshooting
- Formatting issues — Check CSS properties, element alignment, overlaps
- Slow generation — Reduce external calls, simplify page logic
- Garbled text — Use supported fonts only
- Errors — Check Salesforce debug logs
Conclusion
This tutorial covered PDF generation in Salesforce using Visualforce and Apex. You learned to create a page that renders contact records as a PDF, customize styles with CSS, and modify layouts.
For production document workflows, consider Document Solutions for Salesforce — it handles templates, generation, editing, and eSignatures without custom Visualforce code. Start a free trial or contact Sales.
FAQ
Create a Visualforce page with renderAs="pdf" and an Apex controller to retrieve your data. When you access the page, Salesforce automatically renders it as a downloadable PDF document.
Yes. Create a Visualforce page that queries your records (contacts, accounts, opportunities) and set renderAs="pdf". You can trigger PDF generation through buttons, links, or Salesforce automation like Process Builder and Flow.
Add CSS through a Static Resource and link it to your Visualforce page using <apex:stylesheet>. You can customize fonts, colors, tables, headers, and footers. Note that Salesforce’s PDF engine has limited font support — stick to system fonts like Arial and Times New Roman.
Salesforce PDF generation has limited styling options, struggles with complex multipage layouts, slows down with large datasets, and doesn’t support all fonts. For advanced document workflows, consider a dedicated solution like Document Solutions for Salesforce.
Yes. Document Solutions for Salesforce is a low-code alternative that provides drag-and-drop templates, one-click document generation, and eSignatures — no Visualforce coding required.