

Python Tesseract OCR: Extract text from images using pytesseract
Table of contents
Use Tesseract OCR with pytesseract to extract text from images. Preprocessing (grayscale, resizing, thresholding) improves accuracy. For searchable PDFs or batch processing, use Nutrient OCR API.
To use Tesseract OCR in Python, install the pytesseract wrapper library and Tesseract engine. Then call pytesseract.image_to_string(image) to extract text from any image. The function returns recognized text as a string — no cloud services or API keys are required for basic usage.
Key capabilities of pytesseract:
- Text extraction — Extract text from JPG, PNG, TIFF, and other image formats
- 100+ languages — Support for English, French, German, Chinese, Arabic, and more
- Configurable — Control page segmentation, language, and character allowlists
- Free and open source — Apache 2.0 license with active community support
- Cross-platform — Works on Windows, macOS, and Linux
Python developers use Tesseract OCR with the pytesseract(opens in a new tab) wrapper to extract text from images and scanned documents.
What OCR does
OCR extracts text from images and scanned documents. Common uses include:
- Digitizing paper documents for search and archival
- Automating data entry from forms and invoices
- Making scanned PDFs searchable and copyable
- Indexing document content for retrieval
Tesseract OCR
Tesseract OCR(opens in a new tab) is an open source OCR engine originally developed by Hewlett-Packard (1985–2006) and now maintained by Google. It uses neural networks and traditional image processing to recognize text. Tesseract OCR supports 100+ languages, and it works with Python, Java, and C++ (Apache 2.0 license).
Use Tesseract 5.x for best results. Version 5+ uses LSTM neural networks that significantly improve accuracy over earlier versions. Check your version with tesseract --version.
Pros and cons
Pros
- Free and open source
- 100+ languages supported
- Handles various fonts and text styles
- Active community, regular updates
Cons
- Setup can be tricky on some systems
- Accuracy drops with poor image quality or complex layouts
- No built-in preprocessing — you handle that separately
- Training required for non-standard fonts
Prerequisites
You need:
- Python 3.x
- Tesseract OCR
- pytesseract(opens in a new tab)
- Pillow (Python Imaging Library)(opens in a new tab)
pytesseract wraps the Tesseract OCR engine and provides a Python interface for text recognition. It also works as a standalone script for direct Tesseract interaction.
Installing Tesseract OCR
Install Tesseract for your operating system:
- Windows — Download the installer from the official GitHub repository(opens in a new tab) and run it.
- macOS — Use Homebrew by running
brew install tesseract. - Linux (Debian/Ubuntu) — Run
sudo apt install tesseract-ocr.
For other operating systems, see the installation guide(opens in a new tab).
Setting up your Python OCR environment
- Create a new Python file in your favorite editor and name it
ocr.py. - Download the sample image used in this tutorial and save it in the same directory as the Python file.
- Install the required Python libraries using
pip:
pip install pytesseract pillowVerify the installation:
tesseract --versionIf you encounter import issues, see troubleshooting pytesseract imports.
Python Tesseract tutorial: Extract text from images
Import the libraries and load your image:
import pytesseractfrom PIL import Image
image_path = "path/to/your/image.jpg"image = Image.open(image_path)
Extracting text from the image
To extract text from the image, use the image_to_string() function from the pytesseract library:
extracted_text = pytesseract.image_to_string(image)print(extracted_text)The image_to_string() function takes an image as an input and returns the recognized text as a string.
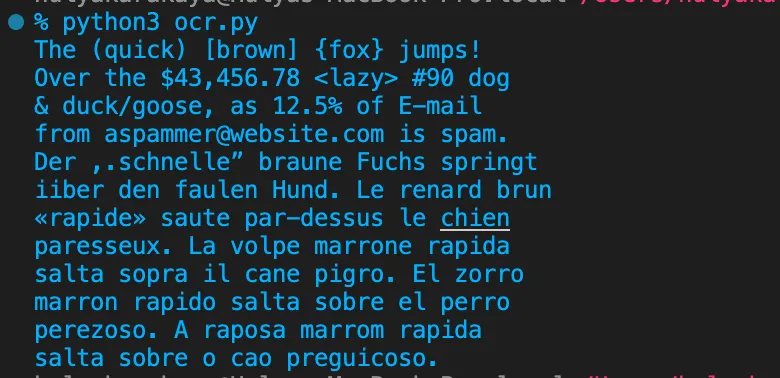
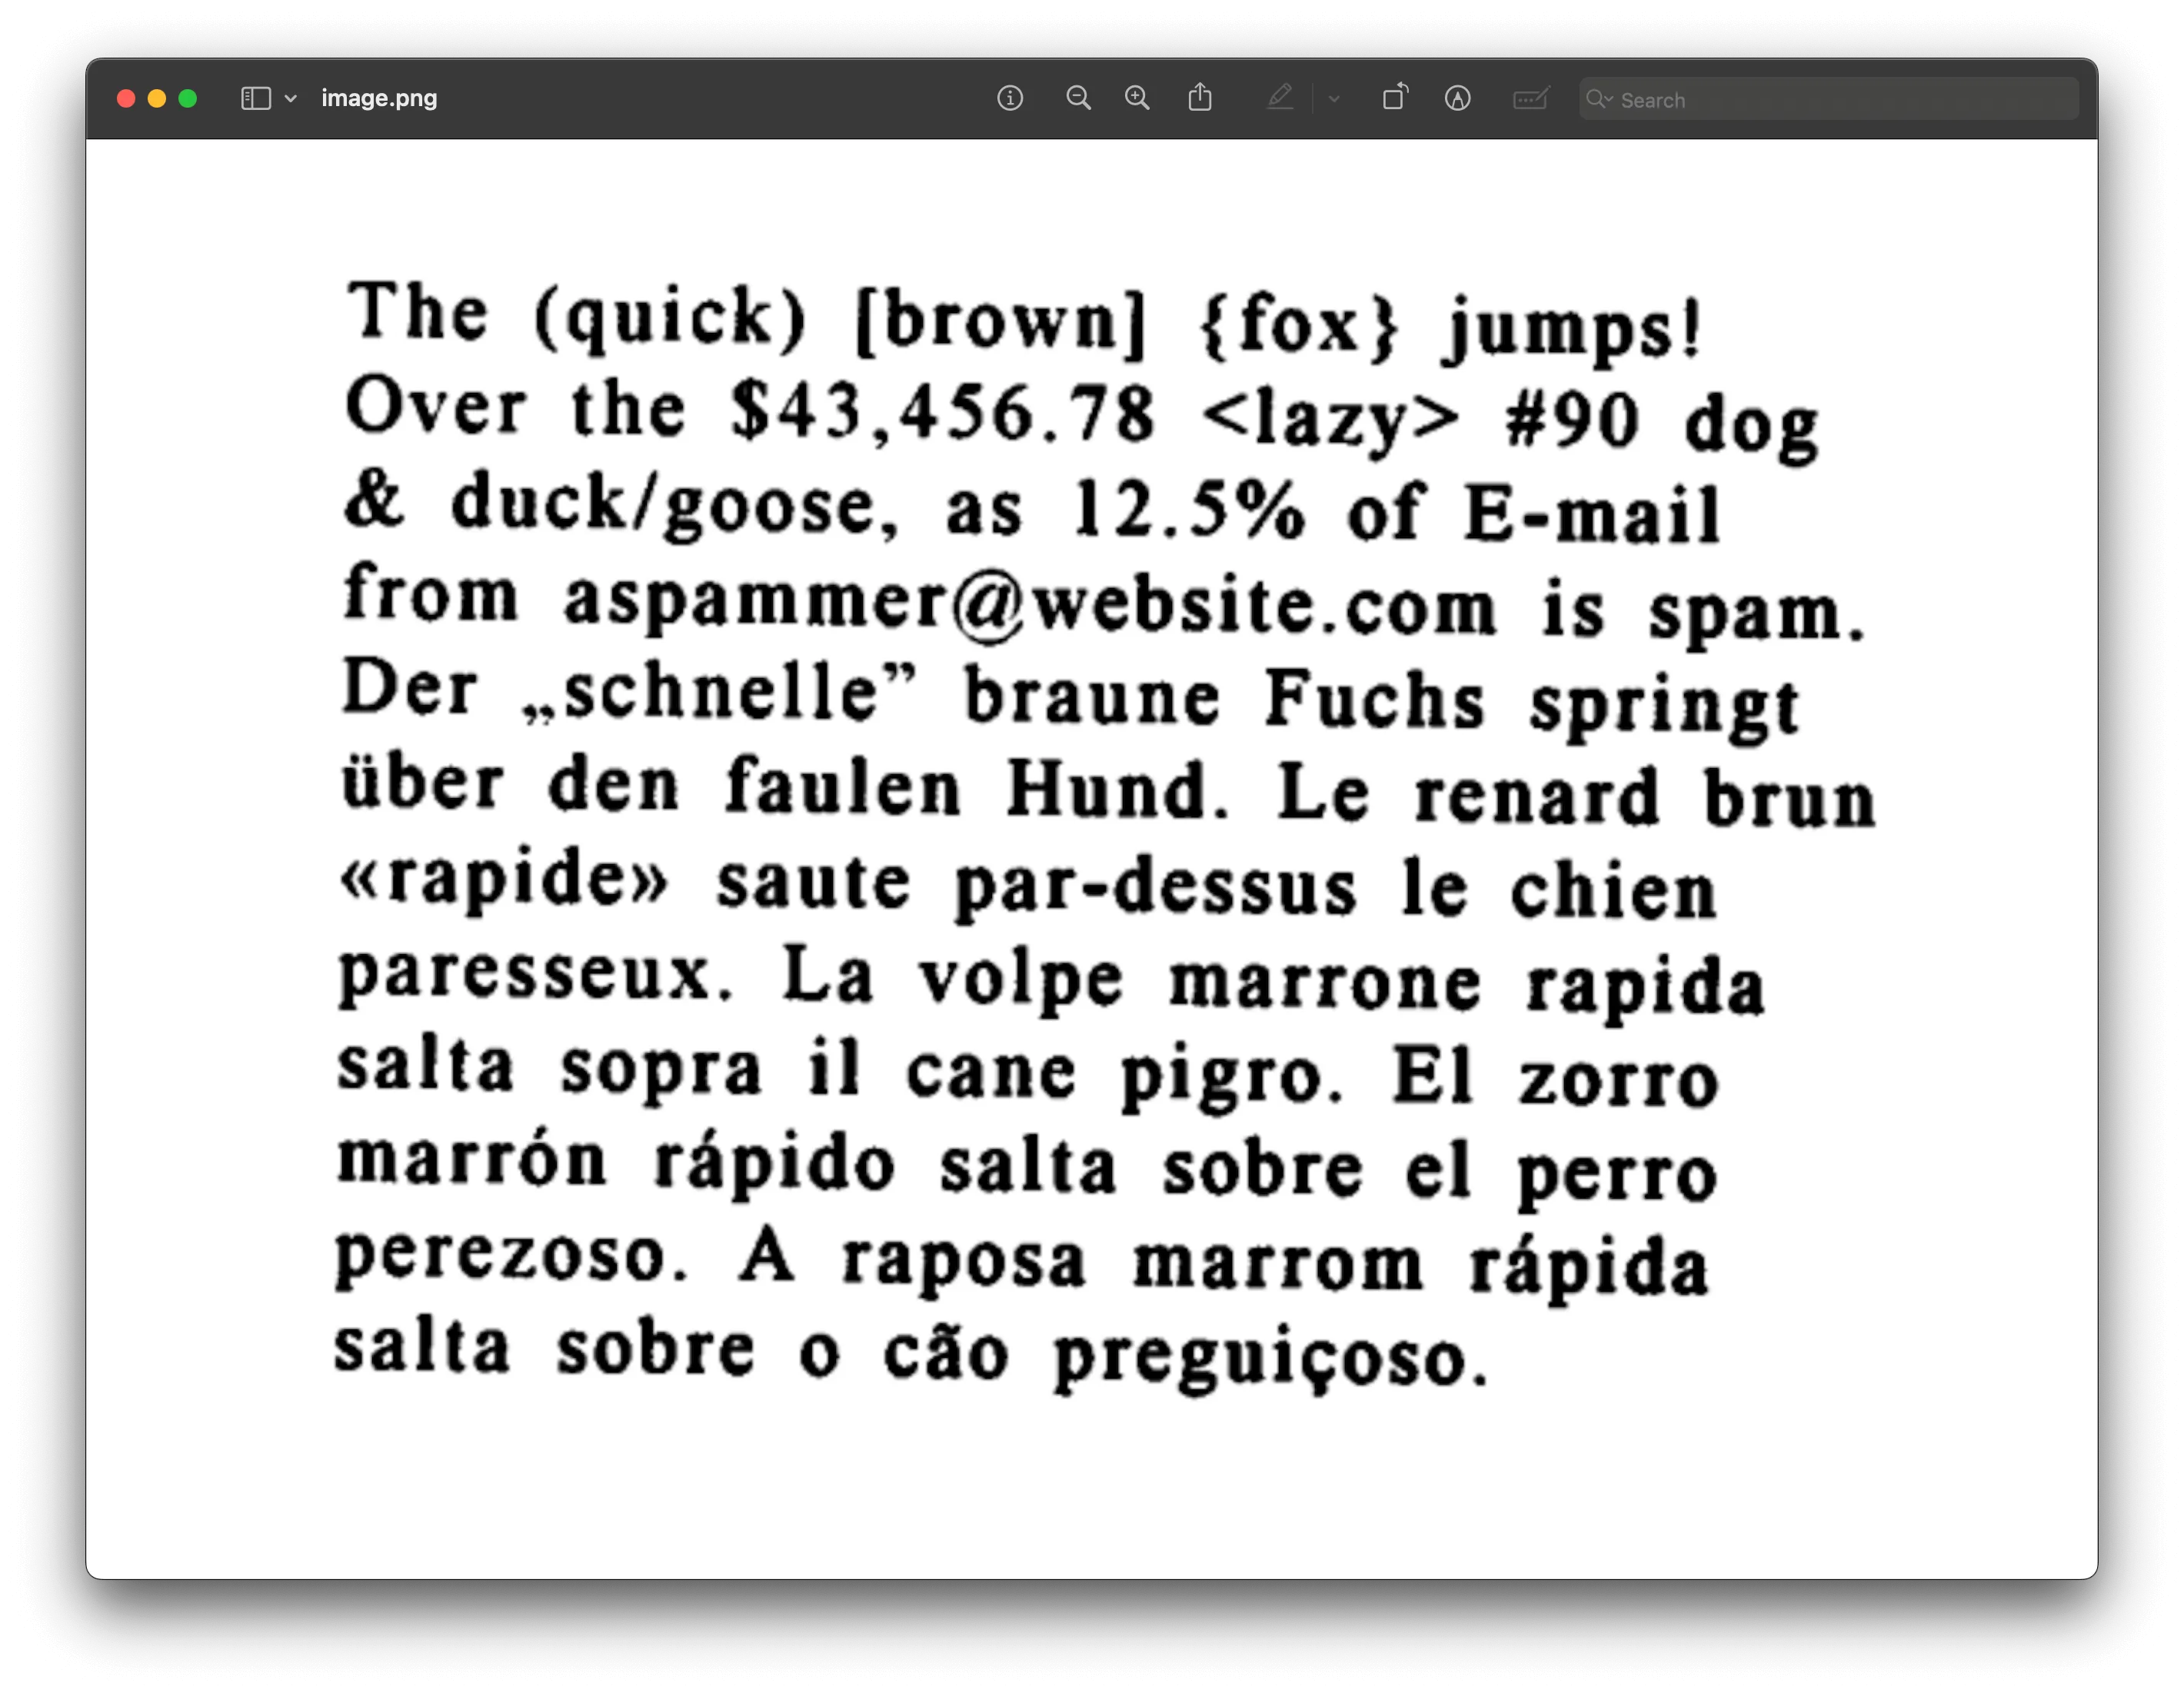
Run the Python script to see the extracted text from the sample image:
python3 ocr.pyThe image below shows the output.
Saving extracted text to a file
If you want to save the extracted text to a file, use Python’s built-in file I/O functions:
with open("output.txt", "w") as output_file: output_file.write(extracted_text)Advanced Python OCR techniques
pytesseract supports several configuration options for the OCR engine.
Configuring the OCR engine
Pass a configuration string to image_to_string() with space-separated key-value pairs. This example sets English as the language and treats the image as a single text block:
config = '--psm 6 -l eng'text = pytesseract.image_to_string(image, config=config)Page segmentation modes (PSM) reference
The --psm option controls how Tesseract analyzes page layout. Choose the mode that matches your document structure:
| PSM | Mode | Best for |
|---|---|---|
| 0 | Orientation and script detection only | Detecting page rotation |
| 1 | Automatic with OSD | General documents with mixed content |
| 3 | Fully automatic (default) | Standard documents |
| 4 | Single column of variable sizes | Articles, single-column pages |
| 6 | Single uniform block of text | Paragraphs, text blocks |
| 7 | Single text line | One-line captions, headers |
| 8 | Single word | Individual words, labels |
| 9 | Single word in a circle | Circular text like stamps |
| 10 | Single character | Individual digits or letters |
| 11 | Sparse text | Text scattered across image |
| 12 | Sparse text with OSD | Scattered text with rotation |
| 13 | Raw line | Treat as single line, no preprocessing |
For non-standard installation paths, set the Tesseract executable location:
pytesseract.pytesseract.tesseract_cmd = '/path/to/tesseract'Handling multiple languages
Tesseract supports 100+ languages. Use a plus sign to combine languages:
config = '-l eng+fra'text = pytesseract.image_to_string(image, config=config)Improving OCR accuracy with image preprocessing
Preprocessing images before OCR improves recognition accuracy.
Converting images to grayscale
Converting to grayscale improves contrast between text and the background:
from PIL import Image, ImageOps
# Open an image.image = Image.open("path_to_your_image.jpg")
# Convert image to grayscale.gray_image = ImageOps.grayscale(image)
# Save or display the grayscale image.gray_image.show()gray_image.save("path_to_save_grayscale_image.jpg")| Original image | Grayscale image |
|---|---|
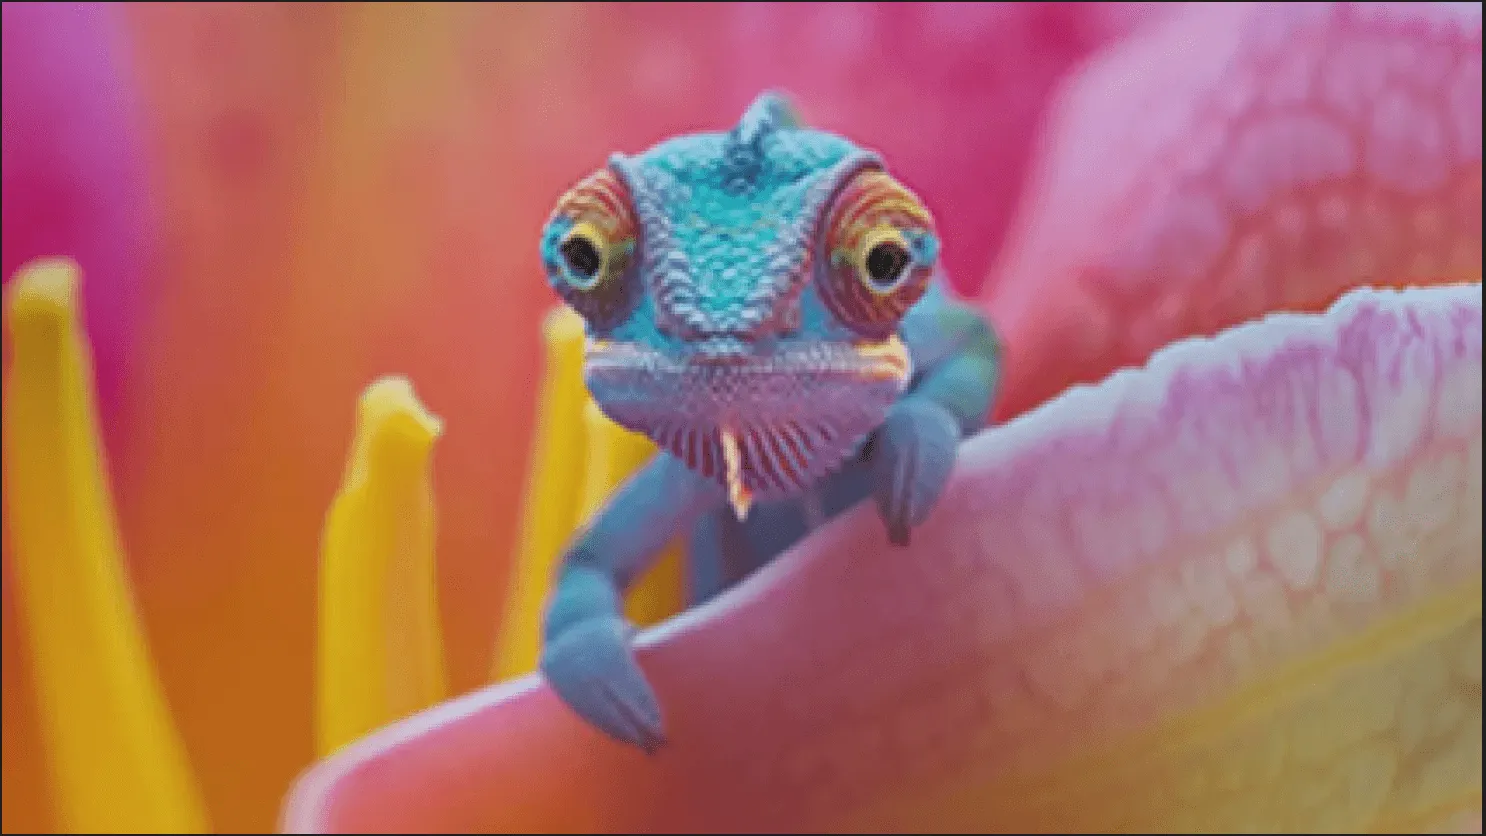 | 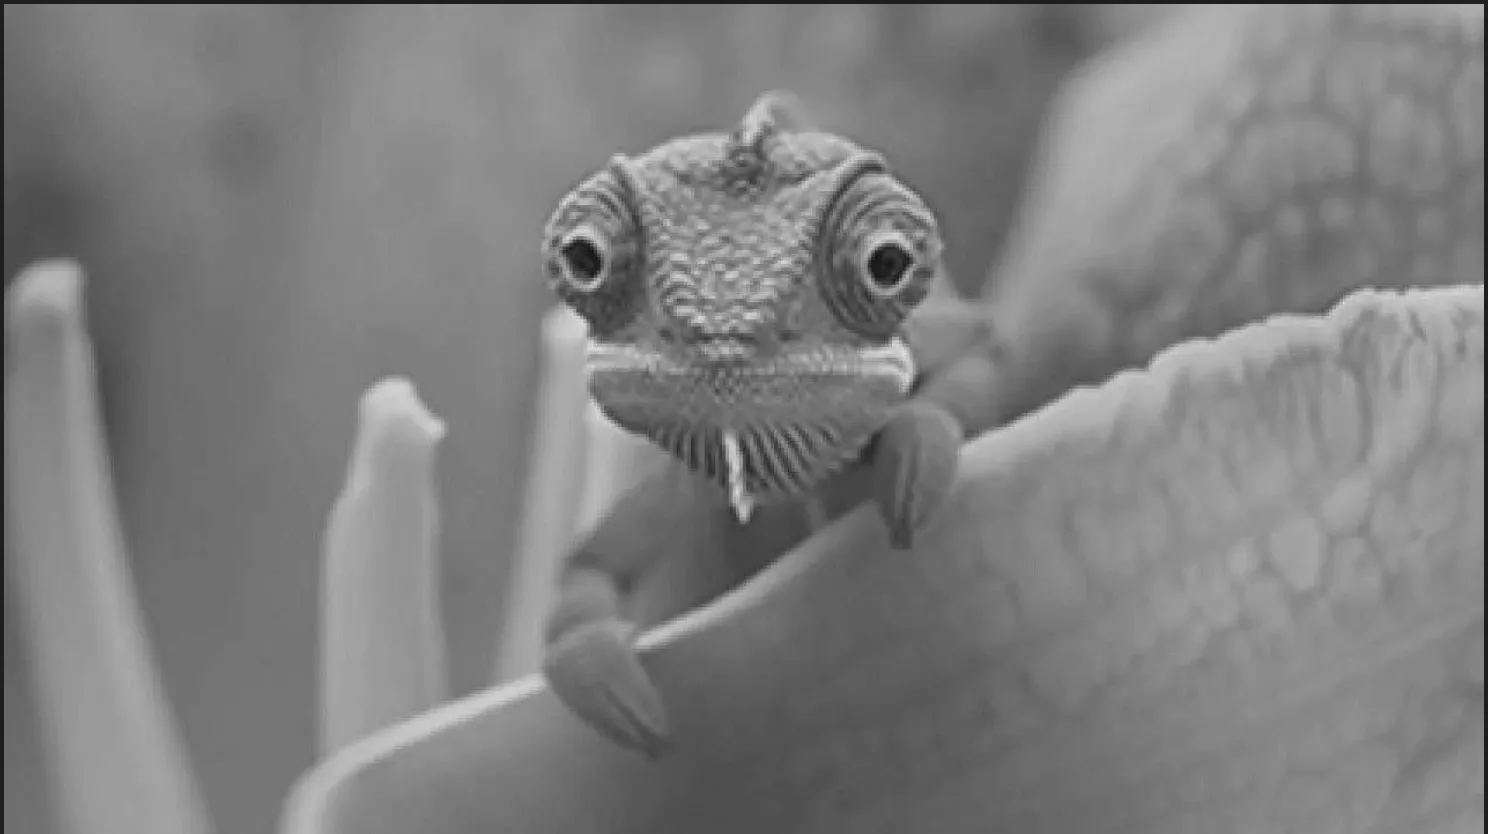 |
Resizing the image for better accuracy
Resizing to a larger size makes text easier to recognize:
# Resize the image.scale_factor = 2resized_image = gray_image.resize( (gray_image.width * scale_factor, gray_image.height * scale_factor), resample=Image.LANCZOS)This resizes the image by a factor of 2 using Lanczos resampling for high-quality results.
Applying adaptive thresholding
Adaptive thresholding creates a binary image with clear separation between text and the background:
from PIL import Image, ImageOps, ImageFilter
# Load the image.image = Image.open('image.png')
# Convert the image to grayscale.gray_image = ImageOps.grayscale(image)
# Resize the image to enhance details.scale_factor = 2resized_image = gray_image.resize(    (gray_image.width * scale_factor, gray_image.height * scale_factor),    resample=Image.LANCZOS)
# Apply edge detection filter (find edges).thresholded_image = resized_image.filter(ImageFilter.FIND_EDGES)
# Save or display the processed image.thresholded_image.show() # This will display the image.# thresholded_image.save('path_to_save_image') # This will save the image.| Original image | Thresholded image |
|---|---|
 |  |
Pass the preprocessed image to the OCR engine:
# Extract text from the preprocessed image.improved_text = pytesseract.image_to_string(thresholded_image)print(improved_text)Complete OCR script
Here’s the complete preprocessing and OCR example:
from PIL import Image, ImageOps, ImageFilterimport pytesseract
# Define the path to your image.image_path = 'image.png'
# Open the image.image = Image.open(image_path)
# Convert image to grayscale.gray_image = ImageOps.grayscale(image)
# Resize the image to enhance details.scale_factor = 2resized_image = gray_image.resize(    (gray_image.width * scale_factor, gray_image.height * scale_factor),    resample=Image.LANCZOS)
# Apply adaptive thresholding using the `FIND_EDGES` filter.thresholded_image = resized_image.filter(ImageFilter.FIND_EDGES)
# Extract text from the preprocessed image.improved_text = pytesseract.image_to_string(thresholded_image)
# Print the extracted text.print(improved_text)
# Optional: Save the preprocessed image for review.thresholded_image.save('preprocessed_image.jpg')
Recognizing digits only
To extract only digits, use --psm 6 and filter with regular expressions:
import pytesseractfrom PIL import Image, ImageOpsimport re
image_path = "image.png"image = Image.open(image_path)
config = '--psm 6'text = pytesseract.image_to_string(image, config=config)digits = re.findall(r'\d+', text)print(digits)
The re.findall() method extracts all digit sequences from the OCR output.
Character restrictions
Restrict OCR to specific characters using tessedit_char_whitelist:
# Only recognize uppercase letters and numbers.config = '--psm 6 -c tessedit_char_whitelist=ABCDEFGHIJKLMNOPQRSTUVWXYZ0123456789'text = pytesseract.image_to_string(image, config=config)To preserve spaces between words when using an allowlist, add preserve_interword_spaces=1:
config = '--psm 6 -c preserve_interword_spaces=1 -c tessedit_char_whitelist=ABCDEFGHIJKLMNOPQRSTUVWXYZ0123456789'Use tessedit_char_blacklist to exclude specific characters instead.
Getting bounding boxes
Extract character positions with image_to_boxes:
import pytesseractfrom PIL import Image
image = Image.open('image.png')boxes = pytesseract.image_to_boxes(image)h = image.height
for box in boxes.splitlines():    b = box.split()    char, x1, y1, x2, y2 = b[0], int(b[1]), int(b[2]), int(b[3]), int(b[4])    # Note: y-coordinates are from image bottom, convert to top-origin    print(f"Character '{char}' at ({x1}, {h - y2}) to ({x2}, {h - y1})")
For word-level bounding boxes with confidence scores, use image_to_data (requires pip install pandas):
import pytesseractfrom PIL import Image
image = Image.open('image.png')data = pytesseract.image_to_data(image, output_type=pytesseract.Output.DATAFRAME)
# Filter: conf > 0 removes non-text rows, conf > 60 keeps high-confidence wordswords = data[(data['conf'] > 60) & (data['text'].str.strip() != '')]for _, row in words.iterrows():    print(f"'{row['text']}' (conf: {row['conf']}) at ({row['left']}, {row['top']})")
Orientation and script detection
Detect the page rotation and script type with image_to_osd:
import pytesseractfrom PIL import Image
image = Image.open('rotated_image.png')osd = pytesseract.image_to_osd(image)print(osd)
# Output includes:# - Page orientation (0, 90, 180, 270 degrees)# - Script type (Latin, Cyrillic, Arabic, etc.)# - Confidence scores
This helps preprocess images that need rotation correction before OCR.
Training Tesseract with custom data
Training Tesseract improves accuracy for specific fonts, languages, or layouts not well-represented in the default model. The neural network engine learns from structured training data.
You need a dataset of images with corresponding text files containing the expected output. Tesseract provides tesstrain and text2image tools for generating and labeling training data.
Training is time-intensive but worthwhile for specialized applications with unique fonts, symbols, or languages.
Best practices
- Preprocess images — Grayscale, resize, threshold. Clean images produce better results.
- Set the right PSM — Page segmentation mode (
--psm) affects how Tesseract interprets layout. Try different values for your document type. - Specify the language — Use
-l engfor English, and-l eng+frafor multiple languages. - Use tessdata_fast for production — The
tessdata_fastmodels are smaller and faster than default models, with minimal accuracy loss. Download from tessdata_fast repository(opens in a new tab). - Filter by confidence — Use
image_to_dataand filter results by confidence score (greater than 60 percent) to reduce errors. - Train for custom fonts — Non-standard fonts need custom training data.
- Test on representative samples — Accuracy varies by document type. Test before deploying.
Troubleshooting pytesseract imports
If pytesseract fails to import, the issue is usually installation, environment configuration, or system paths.
Common causes of pytesseract import errors
Incorrect installation
- Ensure pytesseract is installed in the correct Python environment.
- Verify installation by running:
Terminal window pip show pytesseractIf it’s not installed, install it using:
Terminal window pip install pytesseractMultiple Python versions
If you have multiple versions of Python installed, ensure
pytesseractis installed in the environment corresponding to the Python version you’re using.- Check your Python version with:
Terminal window python3 --version- Use the correct pip version:
Terminal window python3 -m pip install pytesseractEnvironment issues
- If you’re using virtual environments, activate the correct environment before installing or running your script.
- Check if the environment is activated:
Terminal window source your_env_name/bin/activateInstall
pytesseractwithin the activated environment.System path issues
- Ensure the Python and pip paths are correctly set in your system environment variables.
- Check your current Python path:
which python3Additional tips
- Reinstall
pytesseract— If problems persist, try uninstalling and reinstallingpytesseract:
pip uninstall pytesseractpip install pytesseract- Check the Tesseract installation — Verify with:
tesseract --version- Upgrade pip — Upgrading pip can resolve issues:
python3 -m pip install --upgrade pipInstall packages on managed environments — For externally managed environments (like macOS with Homebrew):
- Use a virtual environment:
Terminal window python3 -m venv myenvsource myenv/bin/activatepip install pytesseract- Use
pipx(opens in a new tab) for isolated environments:
Terminal window brew install pipxpipx install pytesseract- Override the restriction (not recommended):
Terminal window python3 -m pip install pytesseract --break-system-packages
Check PEP 668(opens in a new tab) for details.
Limitations of Tesseract
- Accuracy varies with image quality, language, and document complexity. Output may contain errors or miss text.
- Non-standard fonts and handwriting require custom training data.
- Complex layouts, graphics, and tables reduce accuracy.
- Not all languages and scripts are supported.
- No built-in preprocessing. You must handle resizing, skew correction, and noise removal separately.
Comparing pytesseract and Nutrient OCR API
| Feature | pytesseract (Tesseract) | Nutrient OCR API |
|---|---|---|
| Output format | Plain text string | Searchable PDF with text layer |
| Installation | Local engine + Python wrapper | No installation (cloud API) |
| Preprocessing | Manual (grayscale, threshold) | Automatic |
| Languages | 100+ (install language packs) | 20 languages built in |
| Batch processing | Write your own code | Single API call |
| PDF support | Requires pdf2image conversion | Native PDF input/output |
| Cost | Free (open source) | 50 free credits/month, then paid |
| Best for | Local text extraction, prototypes | Production searchable PDFs |
Nutrient API for OCR
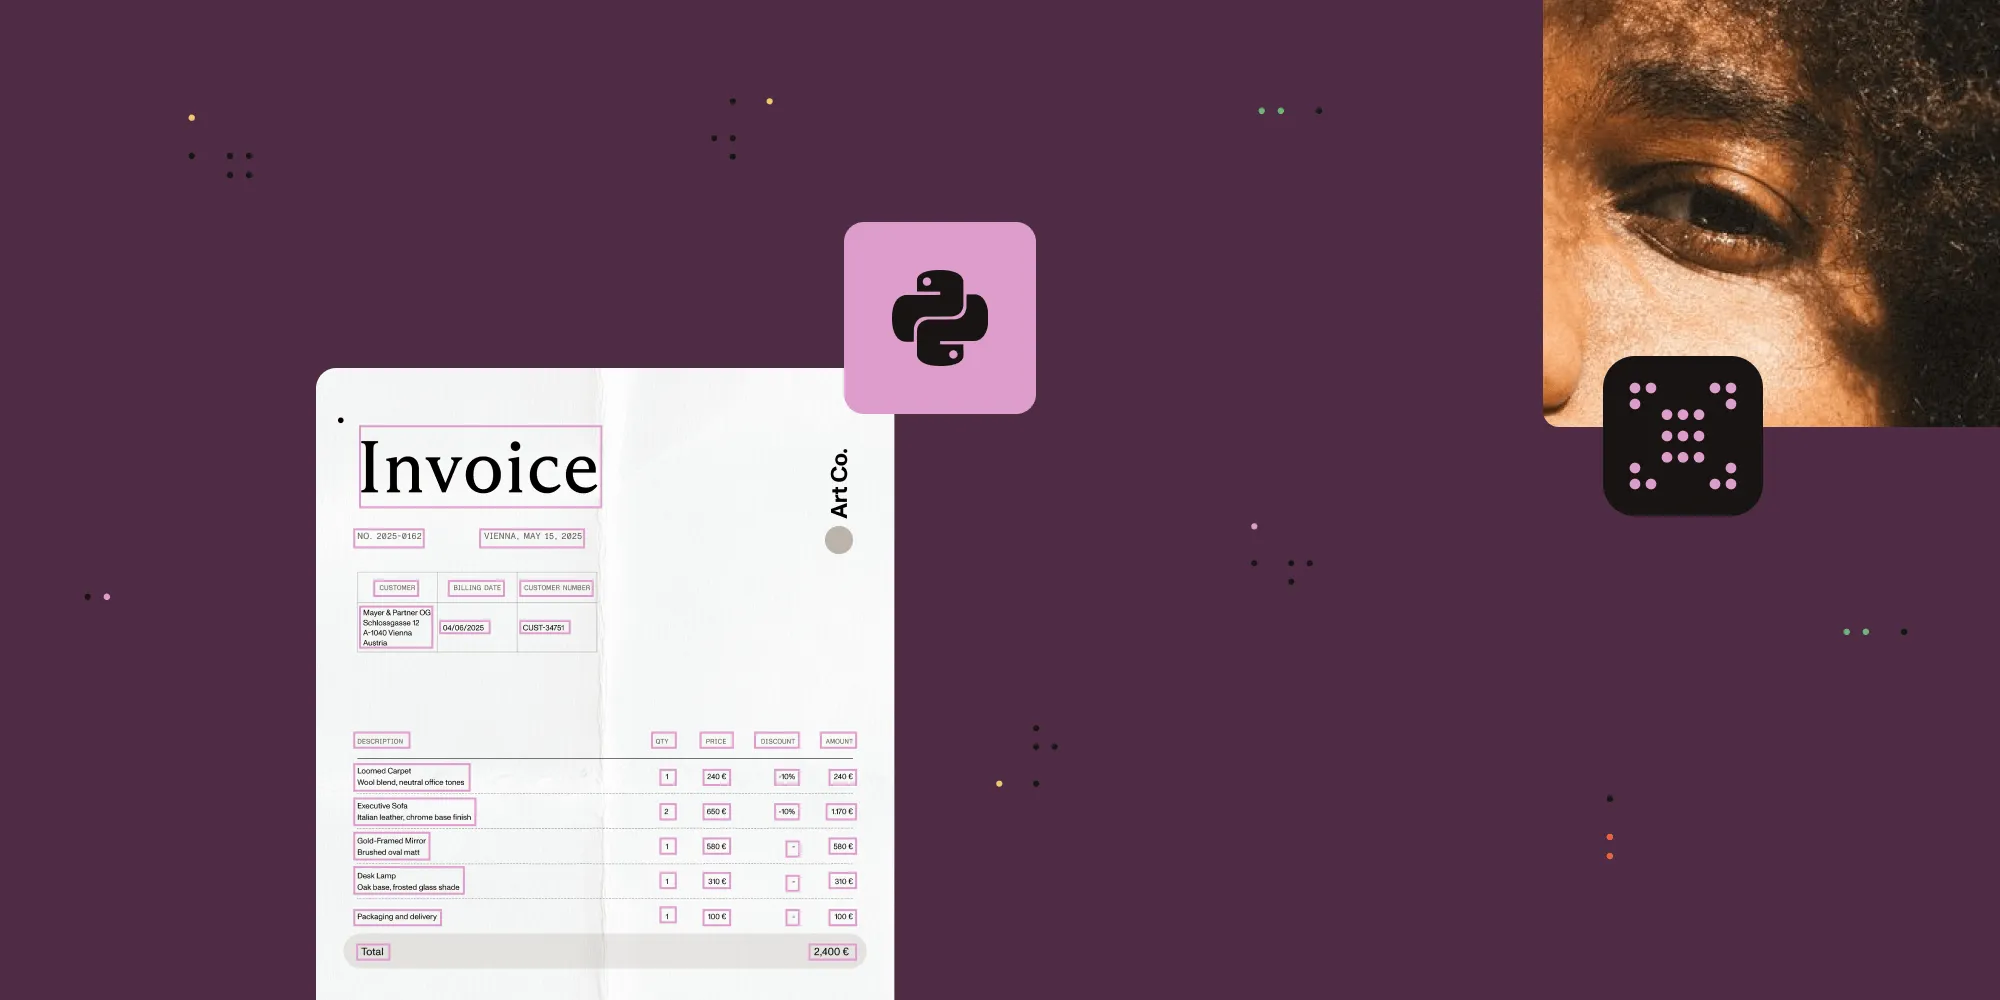
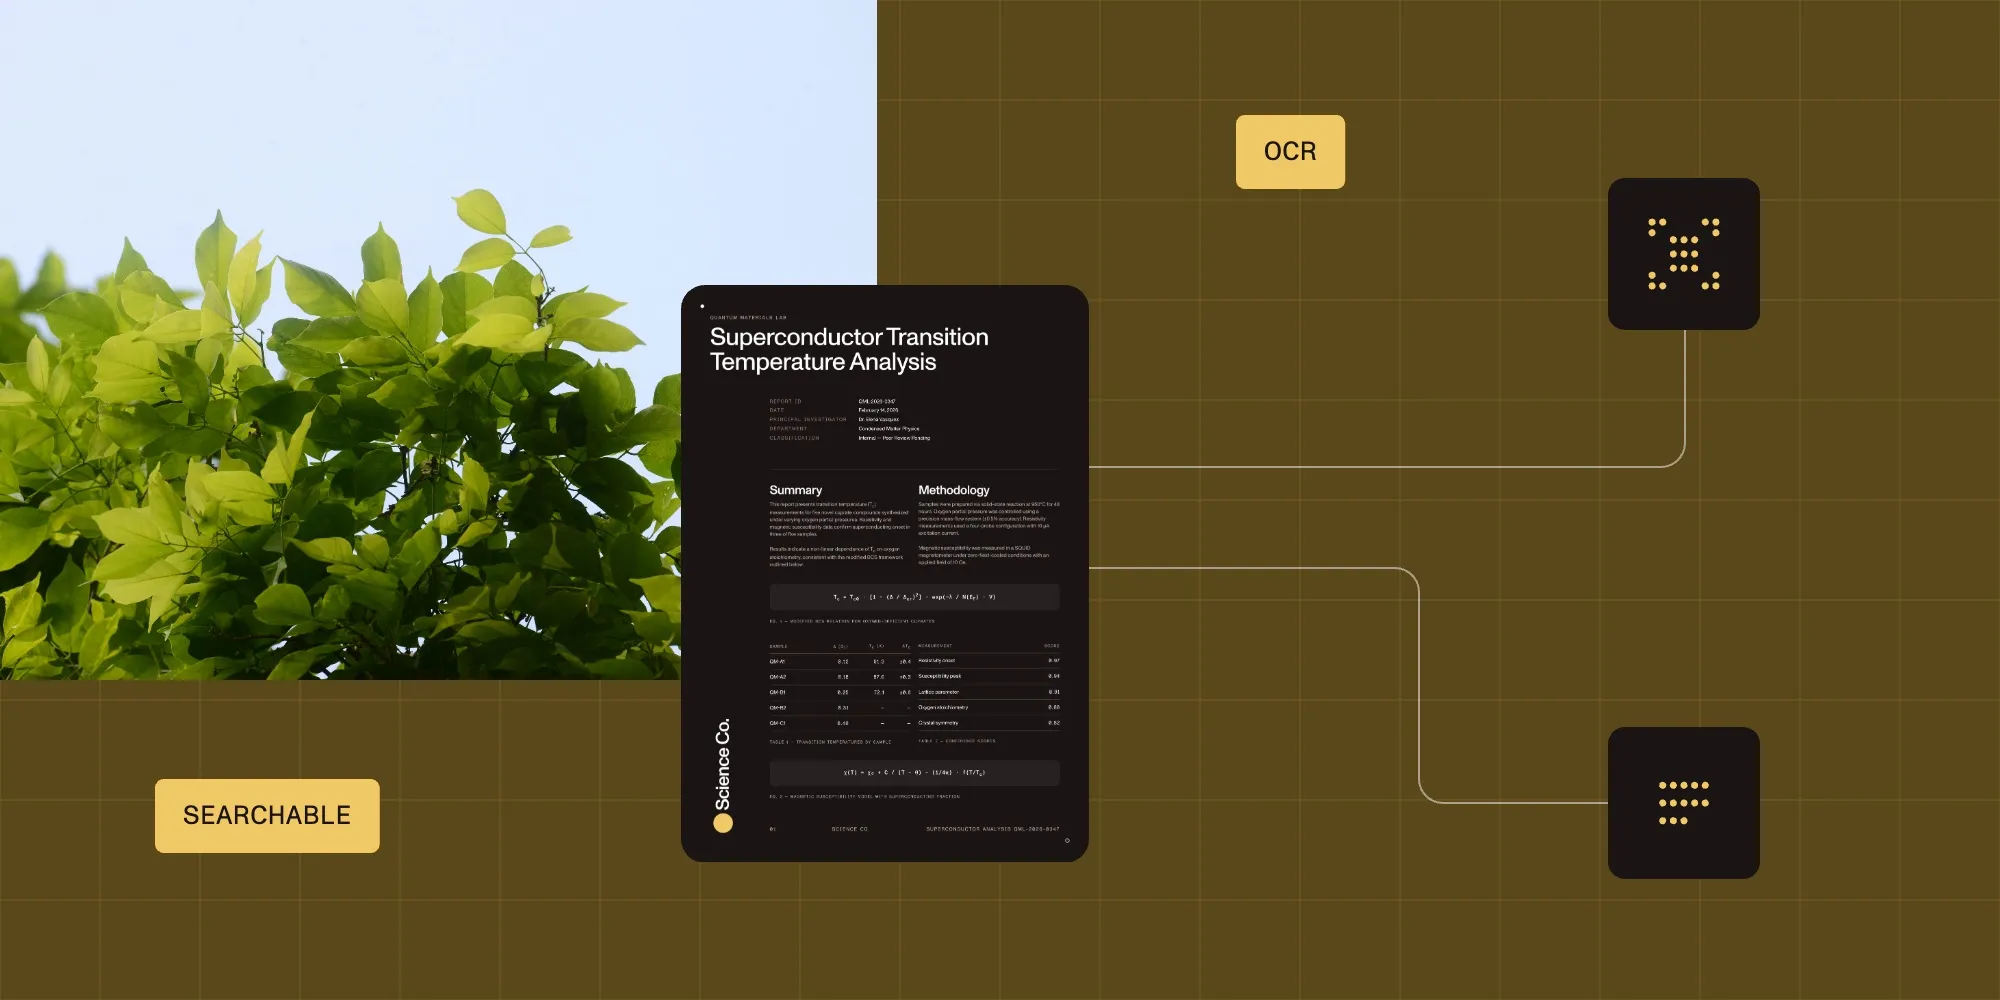
Tesseract extracts text. Nutrient’s OCR API creates searchable PDFs — the text layer is embedded in the PDF so users can search, select, and copy text.
When to use Nutrient instead of Tesseract:
- You need searchable PDFs, not just raw text
- You’re processing batches of scanned documents
- You want to merge multiple scanned pages into one PDF
- You need 20 languages without installing language packs
- You want consistent results without preprocessing each image
The API is SOC 2-audited, stores no document data, and offers 50 free credits/month to start.
Requirements
You need:
- A Nutrient API key (sign up for a free account(opens in a new tab), and then find your key in Dashboard > API keys(opens in a new tab))
- Python 3.x
- pip(opens in a new tab)
- The Requests library(opens in a new tab)
Install the requests library:
python3 -m pip install requestsUsing the OCR API
1. Import required modules
import requestsimport json2. Define the OCR instructions
data = { 'instructions': json.dumps({ 'parts': [ { 'file': 'scanned' } ], 'actions': [ { 'type': 'ocr', 'language': 'english' } ] })}"file": "scanned"references the uploaded file"type": "ocr"applies OCR"language": "english"sets the OCR language
3. Send the OCR request to the Nutrient API
Make a POST request to the https://api.nutrient.io/build endpoint:
response = requests.request( 'POST', 'https://api.nutrient.io/build', headers = { 'Authorization': 'Bearer your_api_key_here' }, files = { 'scanned': open('image.png', 'rb') }, data = { 'instructions': json.dumps({ 'parts': [ { 'file': 'scanned' } ], 'actions': [ { 'type': 'ocr', 'language': 'english' } ] }) }, stream = True)Replace 'your_api_key_here' with your actual API key. The request sends the file, includes OCR instructions, and streams the response for efficient handling of large files.
You can use the sample document here(opens in a new tab) to test the OCR API.
4. Save the OCR result to a file
Write the result to disk if successful:
if response.ok: with open('result.pdf', 'wb') as fd: for chunk in response.iter_content(chunk_size=8096): fd.write(chunk)else: print(response.text) exit()This streams the OCR output into result.pdf and prints error messages if the request fails.
Advanced OCR with Python: Merge multiple scanned pages into a searchable PDF using Nutrient API
The Nutrient OCR API merges batches of scanned pages into a single searchable PDF in one API call, unlike pytesseract, which requires processing each page and merging afterward.
Example: Merge four scanned images with OCR enabled
import requestsimport json
response = requests.request(  'POST',  'https://api.nutrient.io/build',  headers={    'Authorization': 'Bearer your_api_key_here'  },  files={    'page1': open('page1.jpg', 'rb'),    'page2': open('page2.jpg', 'rb'),    'page3': open('page3.jpg', 'rb'),    'page4': open('page4.jpg', 'rb')  },  data={    'instructions': json.dumps({      'parts': [        { 'file': 'page1' },        { 'file': 'page2' },        { 'file': 'page3' },        { 'file': 'page4' }      ],      'actions': [        {          'type': 'ocr',          'language': 'english'        }      ]    })  },  stream=True)
if response.ok:  with open('merged_scanned.pdf', 'wb') as fd:    for chunk in response.iter_content(chunk_size=8096):      fd.write(chunk)else:  print(response.text)  exit()
When to use this instead of pytesseract
pytesseract: Extract text from individual images, handle preprocessing yourself, write code to merge results.
Nutrient API: Upload images, get a searchable PDF back. One API call handles OCR, merging, and PDF creation.
Conclusion
Tesseract with pytesseract handles basic text extraction. Preprocess images (grayscale, resize, threshold) for better accuracy. For searchable PDFs or batch processing, use the Nutrient OCR API.
FAQ
Tesseract OCR is an open source engine for recognizing text from images and scanned documents. Developed by Hewlett-Packard and now sponsored by Google, it supports more than 100 languages and various text styles.
To install Tesseract OCR, download the installer from GitHub for Windows(opens in a new tab), use brew install tesseract on macOS, or run sudo apt install tesseract-ocr on Debian/Ubuntu.
Install pytesseract using pip: pip install pytesseract. You also need Tesseract OCR installed on your system. On Windows, download from GitHub. On macOS, use brew install tesseract. On Linux, use sudo apt install tesseract-ocr.
Tesseract is the OCR engine (written in C++) that performs text recognition. pytesseract is a Python wrapper library that provides a simple interface to use Tesseract from Python code. You need both: Tesseract for the OCR functionality and pytesseract for the Python API.
Common causes include poor image quality, incorrect PSM mode, or missing preprocessing. Try converting to grayscale, increasing image resolution, applying thresholding, and using the correct --psm value for your document type. Also verify Tesseract is properly installed with tesseract --version.
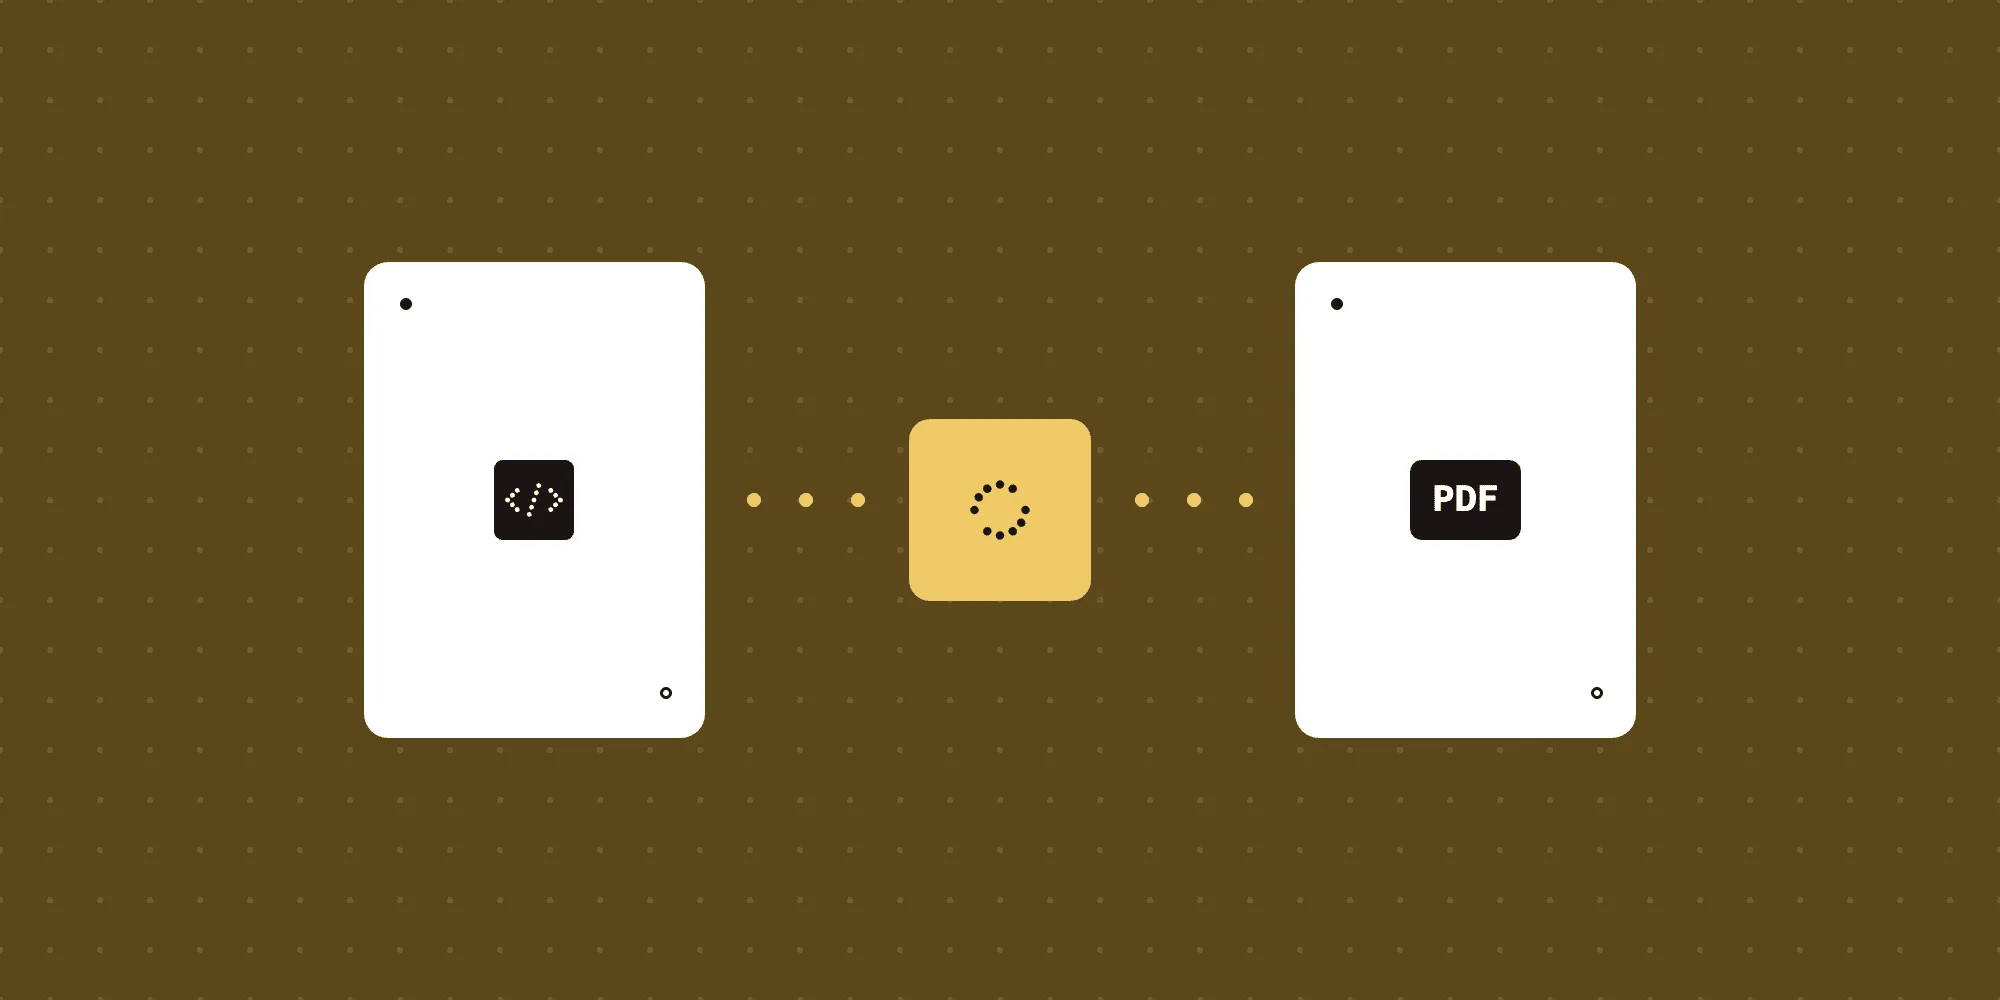
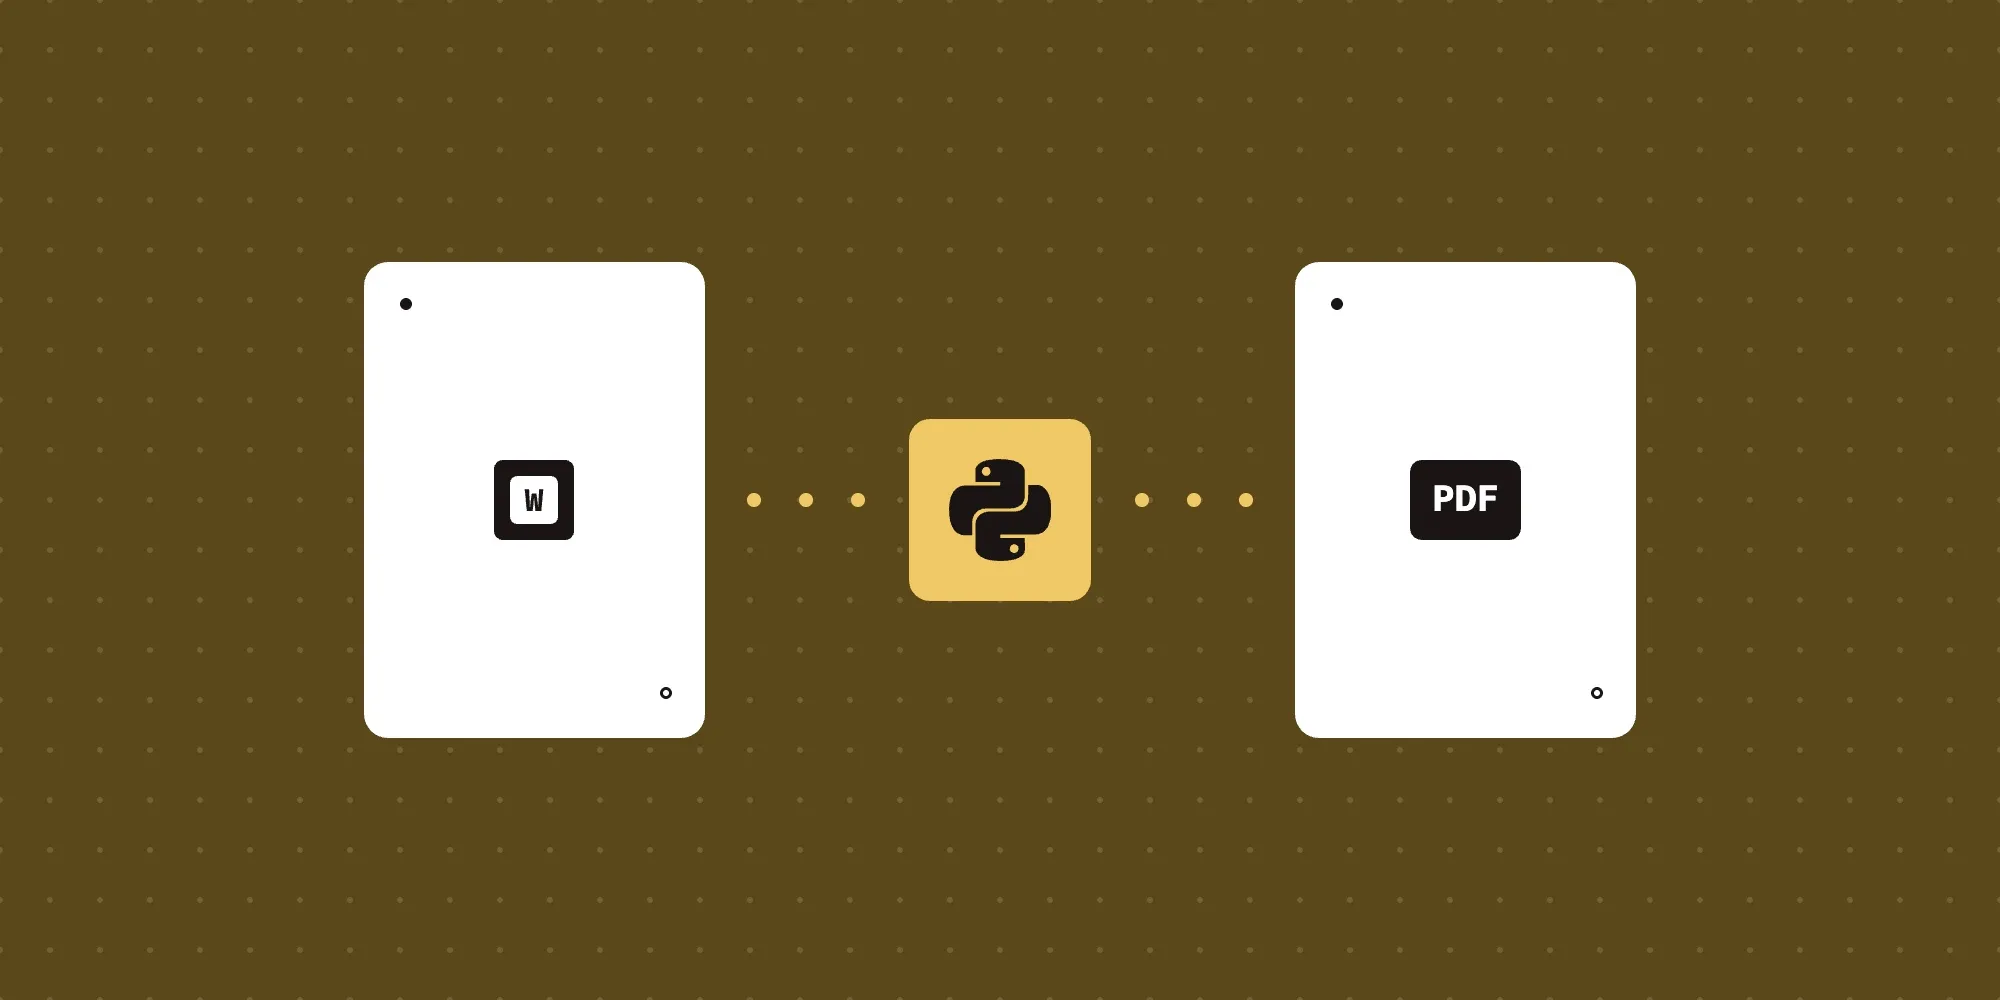
pytesseract doesn’t directly support PDFs. First convert PDF pages to images using pdf2image library: from pdf2image import convert_from_path; images = convert_from_path('file.pdf'). Then run pytesseract.image_to_string() on each image. For native PDF OCR, use Nutrient’s OCR API instead.
You can improve OCR accuracy by converting an image to grayscale, resizing it to make the text larger, and applying adaptive thresholding to enhance text contrast.
Yes. Tesseract supports multiple languages. Use a plus sign (+) in the configuration string, like -l eng+fra for English and French.
Tesseract’s limitations include varying accuracy based on image quality, difficulty with non-standard fonts, and limited support for complex layouts and languages. It also lacks built-in image preprocessing.
Upload scanned images or PDFs, and get searchable PDFs back. The API supports 20 languages, preserves layout, and handles multipage documents. It’s SOC 2-audited with 50 free credits/month.
Install the requests library and send a POST request to https://api.nutrient.io/build with your API key and document. The response is the searchable PDF.
Yes. You can merge multiple images into a single searchable PDF. Adjust the file handling and instructions in your API request to include all pages.
pytesseract is a Python wrapper for the open source Tesseract OCR engine. It enables developers to extract text from images using a simple Python API.
Install the pytesseract and Pillow libraries, open the image using PIL.Image.open(), and pass it to pytesseract.image_to_string() to extract text.
This error means Python can’t find the Tesseract executable. Either add Tesseract to your system PATH, or set the path explicitly in Python: pytesseract.pytesseract.tesseract_cmd = r'C:\Program Files\Tesseract-OCR\tesseract.exe' (Windows) or pytesseract.pytesseract.tesseract_cmd = '/usr/local/bin/tesseract' (macOS/Linux).
Use the --psm 6 mode with a digits-only allowlist: config = '--psm 6 -c tessedit_char_whitelist=0123456789' and pass it to pytesseract.image_to_string(image, config=config). Alternatively, extract all text and filter with regex: re.findall(r'\d+', text).
Yes. Both Tesseract OCR and pytesseract are free and open source under the Apache 2.0 license. You can use them in commercial projects without licensing fees. However, accuracy and preprocessing are your responsibility.