Install Document Converter for SharePoint
Microsoft retired SharePoint Add-ins on 1 July 2024, so you can no longer get them from the public marketplace.
Nutrient Document Converter for SharePoint (Online) uses a SharePoint Framework (SPFx) web part and extension with Microsoft Entra ID authentication.
This guide explains how to deploy the SPFx app in your SharePoint Online tenant.
- Applies to — Nutrient Document Converter for SharePoint (Online) and SharePoint Online tenants
- Use case — Replace deprecated SharePoint Add-ins with modern SPFx web parts
Prerequisites before deployment
Before you deploy the Nutrient SPFx extension, verify that you have:
- Global administrator or tenant administrator privileges in your SharePoint Online tenant
- Administrator privileges on your Windows machine to run the installer script
- An execution policy for external scripts set in your PowerShell session:
Set-ExecutionPolicy -ExecutionPolicy RemoteSigned -Scope Process -Force - An app catalog in your tenant — if you don’t have one, refer to the create an app catalog(opens in a new tab) guide.
Installation files
Download the installation script(opens in a new tab) and the application package(opens in a new tab). Put both files in the same folder.
Step 1: Register the Entra ID app
Open PowerShell 7 as an administrator, navigate to the folder that contains the files, and run PDFConverterForSPOnlineInstallationScript.ps1.
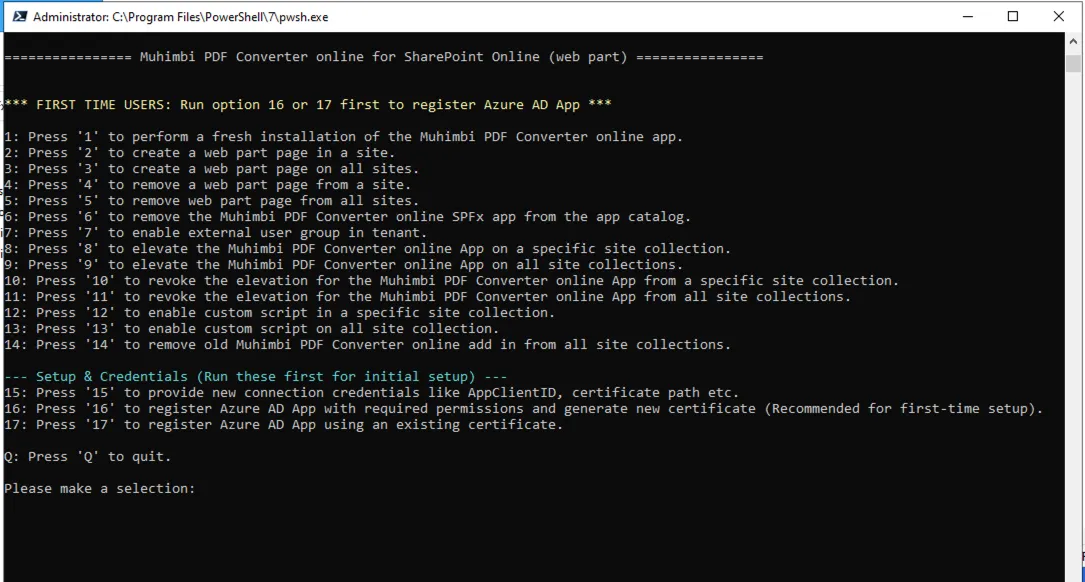
The script shows 17 options.
Option A: Generate a new certificate (recommended)
For first-time installation, use option 16:
- Press
16to register an Entra ID app with a new certificate. - Enter the application name, or press Enter to use the default value:
PnPPowerShellAppForSPFxInstallation(Nutrient). - Enter your Entra tenant domain — for example,
yourcompany.onmicrosoft.com. - Enter a password for the certificate.
- Authenticate to your Microsoft 365 tenant when prompted.
- Grant consent on behalf of your organization.
- The script creates a new certificate in the same folder and registers the Entra ID app.
- The script displays the client ID and tenant ID in PowerShell.
Option B: Use an existing certificate
If you already have a .pfx certificate, use option 17:
- Press
17to register with an existing certificate. - Provide the full path to your
.pfxcertificate file. - Enter the certificate password.
- Authenticate to your Microsoft 365 tenant when prompted.
- Grant consent on behalf of your organization.
- The script registers a new Entra ID app with the certificate you provided.
- The script displays the client ID and tenant ID in PowerShell.
After registration, save the application (client) ID, tenant domain, and certificate path. The script stores these values only for the current PowerShell session.
Option C: Use an existing Entra ID app
If you already registered an Entra ID app, press 15 and provide the client ID when prompted.
Step 2: Install the SPFx app
After you register the Entra ID app, install the SPFx app.
Press
1to run a fresh installation.Choose the upload location.
- Press
1for the tenant app catalog (recommended). The script doesn’t deploy to all sites automatically; it asks in the next step. - Press
2for a site app catalog for single-site deployment.
- Press
Enter your SharePoint URL.
- Tenant:
https://yourcompany.sharepoint.com - Site:
https://yourcompany.sharepoint.com/sites/yoursite
- Tenant:
When the script prompts, “Do you want to deploy the app to all sites in the tenant?”, select a deployment scope.
[Y]for tenant-wide deployment[N]for site-specific deployment
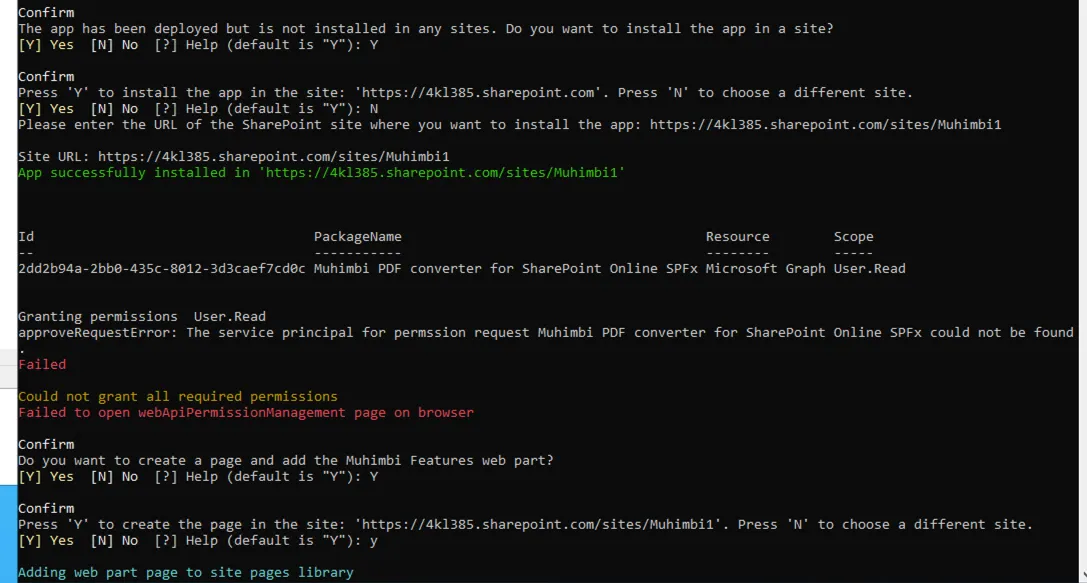
If you select
N, the script asks whether to install on a specific site collection.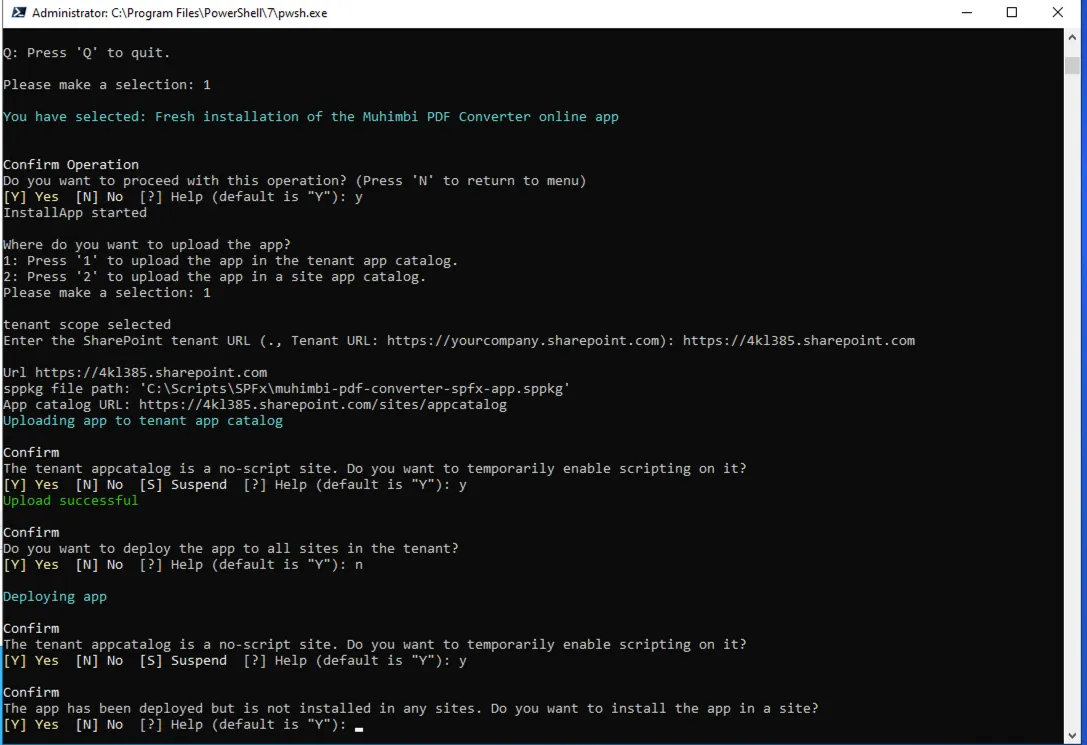
Decide whether to create a page and add the Muhimbi Features web part to the site collection.
- Select
[Y]to add the web part. The script creates a page in the Site Pages library and adds the web part. - Select
[N]if you want to add the web part later. You can add it later by pressing2when you run the script again.
- Select
Approve API permissions in SharePoint Admin Center.
Behavior depends on tenant configuration. Some tenants require manual approval, while others auto-approve.
- Go to
https://<yourtenant>-admin.sharepoint.com/_layouts/15/online/AdminHome.aspx#/webApiPermissionManagement. - Grant the required permissions.
- A global administrator must complete this step.
- Go to
If you didn’t add the web part in the previous step, add it now.
- Press
2to add the web part to a site collection. - Enter the URL of the site collection where you want to add the web part.
- The script creates a page in the Site Pages library and adds the web part.
- Press
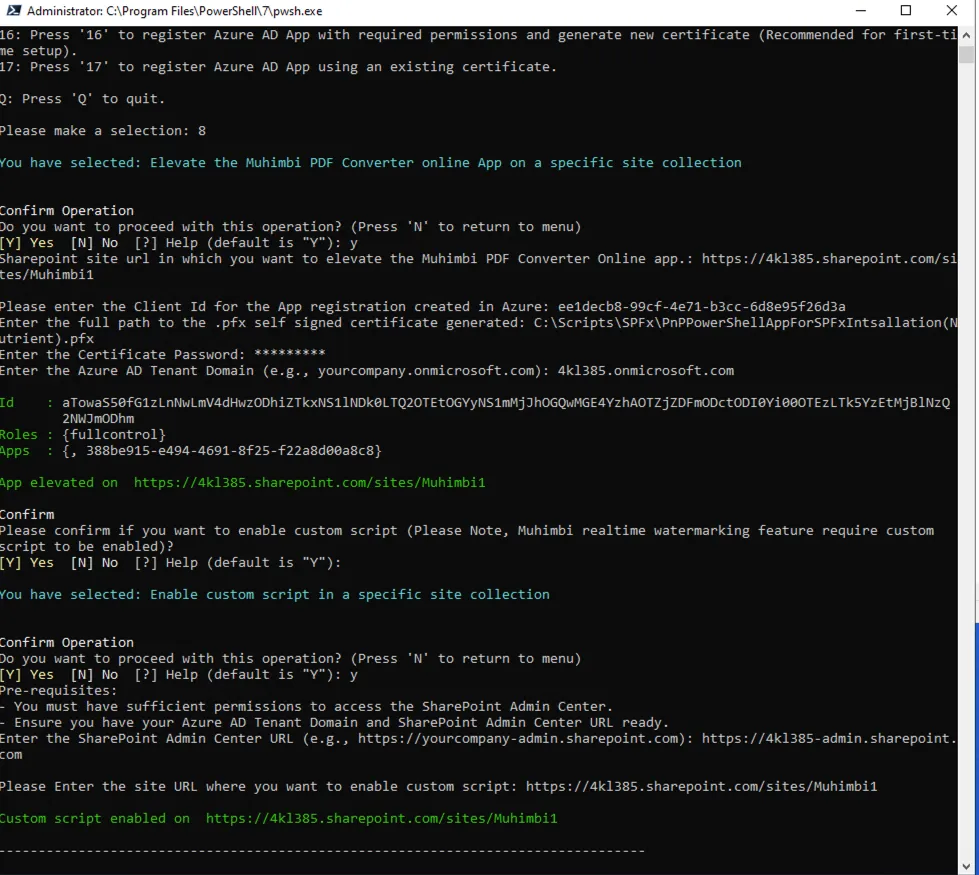
Elevate app permissions in the site collection and enable custom scripting.
- Press
8to elevate permissions. - When prompted to enable custom scripts, select
[Y]. - The web part requires custom scripts. You can also enable them later by pressing
12when you run the script. - The web part won’t work until you enable custom scripts.
The application is now installed.
- Press
Verify the installation.
- Go to the Site Contents page for the site collection where you installed the app.
- Confirm that the Muhimbi PDF Converter SPFx app, now Nutrient Document Converter, appears in the list.
Use the Convert to PDF action in document libraries.
- Select a document.
- Click Convert to PDF in the list view command set or content menu.

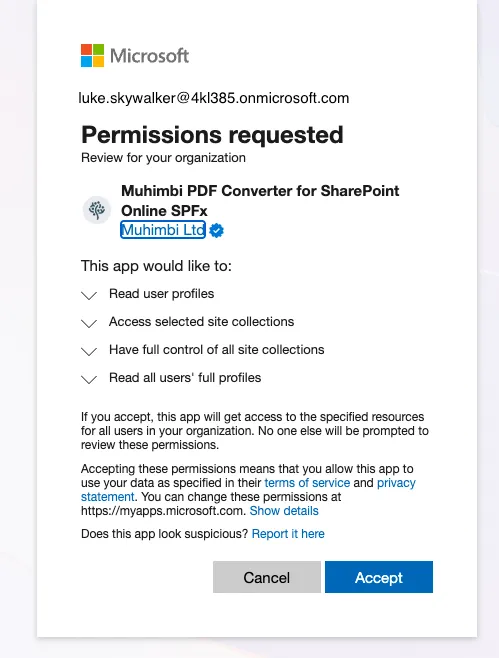
- The first time you use Convert to PDF, the app prompts you to authenticate and grant permissions for SharePoint access.
- A global administrator should complete this step.
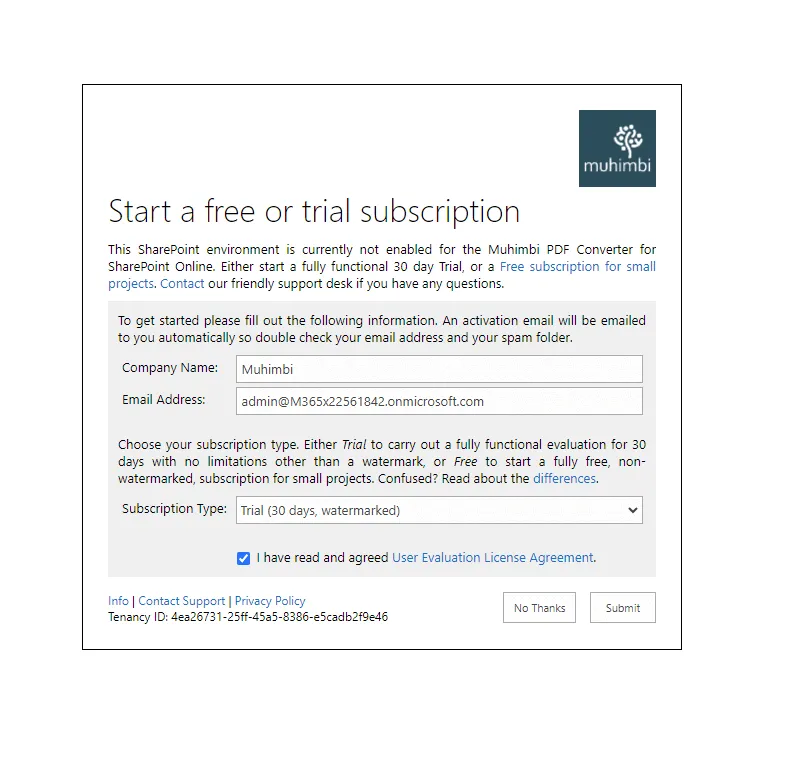
If this is a new tenant, start the trial after you grant permissions.
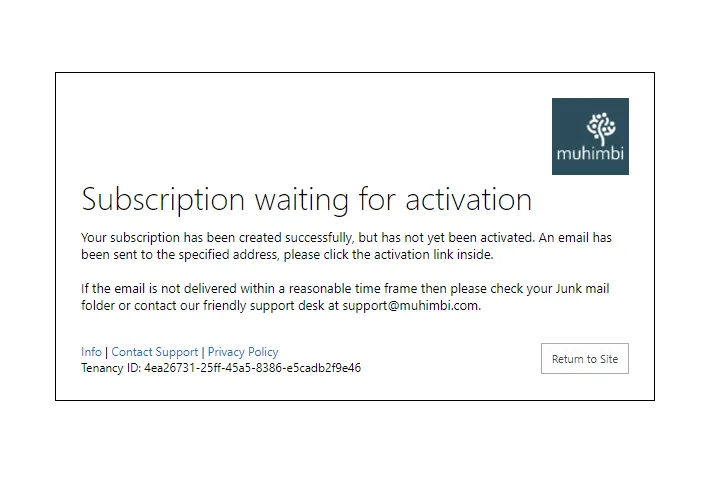
After you sign up, you’ll receive a confirmation email to activate the trial.
After activation, you can convert, secure, watermark, and merge documents in the SharePoint interface.