Getting started on Flutter
This guide walks you through the steps necessary to integrate Nutrient Flutter dependency into your Android, iOS, or web project. By the end, you’ll be able to load a PDF document in the default Nutrient user interface (UI).
You can find our Flutter library on pub.dev(opens in a new tab) and GitHub(opens in a new tab).
Requirements
Install the following required packages depending on your platform (Android, iOS, or web):
- The latest stable version of Flutter(opens in a new tab)
- The latest stable version of Android Studio(opens in a new tab)
- The Android NDK(opens in a new tab)
- An Android Virtual Device(opens in a new tab) or a hardware device
- The latest stable version of Xcode(opens in a new tab)
- The latest stable version of CocoaPods(opens in a new tab). If you don’t already have CocoaPods installed, follow the CocoaPods installation guide(opens in a new tab) to install CocoaPods on your Mac. You can check your version of CocoaPods using
pod --version. - The latest stable version of Chrome(opens in a new tab)
Creating a new project
If you already have an existing project that runs on Android, iOS, and web using the latest version of Flutter, skip to the Installation step. Otherwise, create a new one called nutrient_demo with the flutter CLI:
flutter create --org com.example.nutrient_demo nutrient_demoInstalling the Nutrient dependency
In the terminal app, change the location of the current working directory to your project and run the following command to add the Nutrient dependency to your project:
flutter pub add nutrient_flutterDepending on the platform (Android, iOS, or Web) you want to run your project on, follow the setup instructions below.
Android setup
Open the app’s Gradle build file,
android/app/build.gradle:Terminal window open android/app/build.gradleModify the compile SDK version and the minimum SDK version:
android {compileSdkVersion flutter.compileSdkVersioncompileSdkVersion 35...defaultConfig {minSdkVersion flutter.minSdkVersionminSdkVersion 21...}compileOptions {sourceCompatibility JavaVersion.VERSION_1_8targetCompatibility JavaVersion.VERSION_1_8sourceCompatibility JavaVersion.VERSION_17targetCompatibility JavaVersion.VERSION_17}// If you have this block, update the `jvmTarget` to 17.kotlinOptions {jvmTarget = '1.8'jvmTarget = '17'}...}Add the AppCompat AndroidX library to your
android/app/build.gradlefile:dependencies {...implementation "androidx.appcompat:appcompat:<version>"}- Replace
<version>with the latest version of the AppCompat library. You’ll find the latest version in the Maven repository(opens in a new tab).
- If your project is using Android Gradle Plugin 7.., refer to the Android Gradle plugin troubleshooting guide for additional setup information.
- Replace
Change the base
Activityto extendFlutterAppCompatActivity:import io.flutter.embedding.android.FlutterActivity;import io.flutter.embedding.android.FlutterAppCompatActivity;public class MainActivity extends FlutterActivity {public class MainActivity extends FlutterAppCompatActivity {}Alternatively, update the
AndroidManifest.xmlfile to useFlutterAppCompatActivityas the launcher activity:<activityandroid:name=".MainActivity"android:name="io.flutter.embedding.android.FlutterAppCompatActivity"android:launchMode="singleTop"android:theme="@style/LaunchTheme"android:configChanges="orientation|keyboardHidden|keyboard|screenSize|locale|layoutDirection|fontScale|screenLayout|density|uiMode"android:hardwareAccelerated="true"android:windowSoftInputMode="adjustResize"android:exported="true">FlutterAppCompatActivityisn’t an official part of the Flutter SDK. It’s a customActivitythat extendsAppCompatActivityfrom the AndroidX AppCompat library, and it’s necessary to use Nutrient Android SDK with Flutter.Update the theme in
android/app/src/main/res/values/styles.xmlandandroid/app/src/main/res/values-night/styles.xmlto usePSPDFKit.Theme.defaultas the parent:<style name="NormalTheme" parent="Theme.AppCompat.Light.NoActionBar"><style name="NormalTheme" parent="PSPDFKit.Theme.Default">This is to customize the theme of the Nutrient UI. You can read more about this in the appearance styling guide.
iOS setup
Open
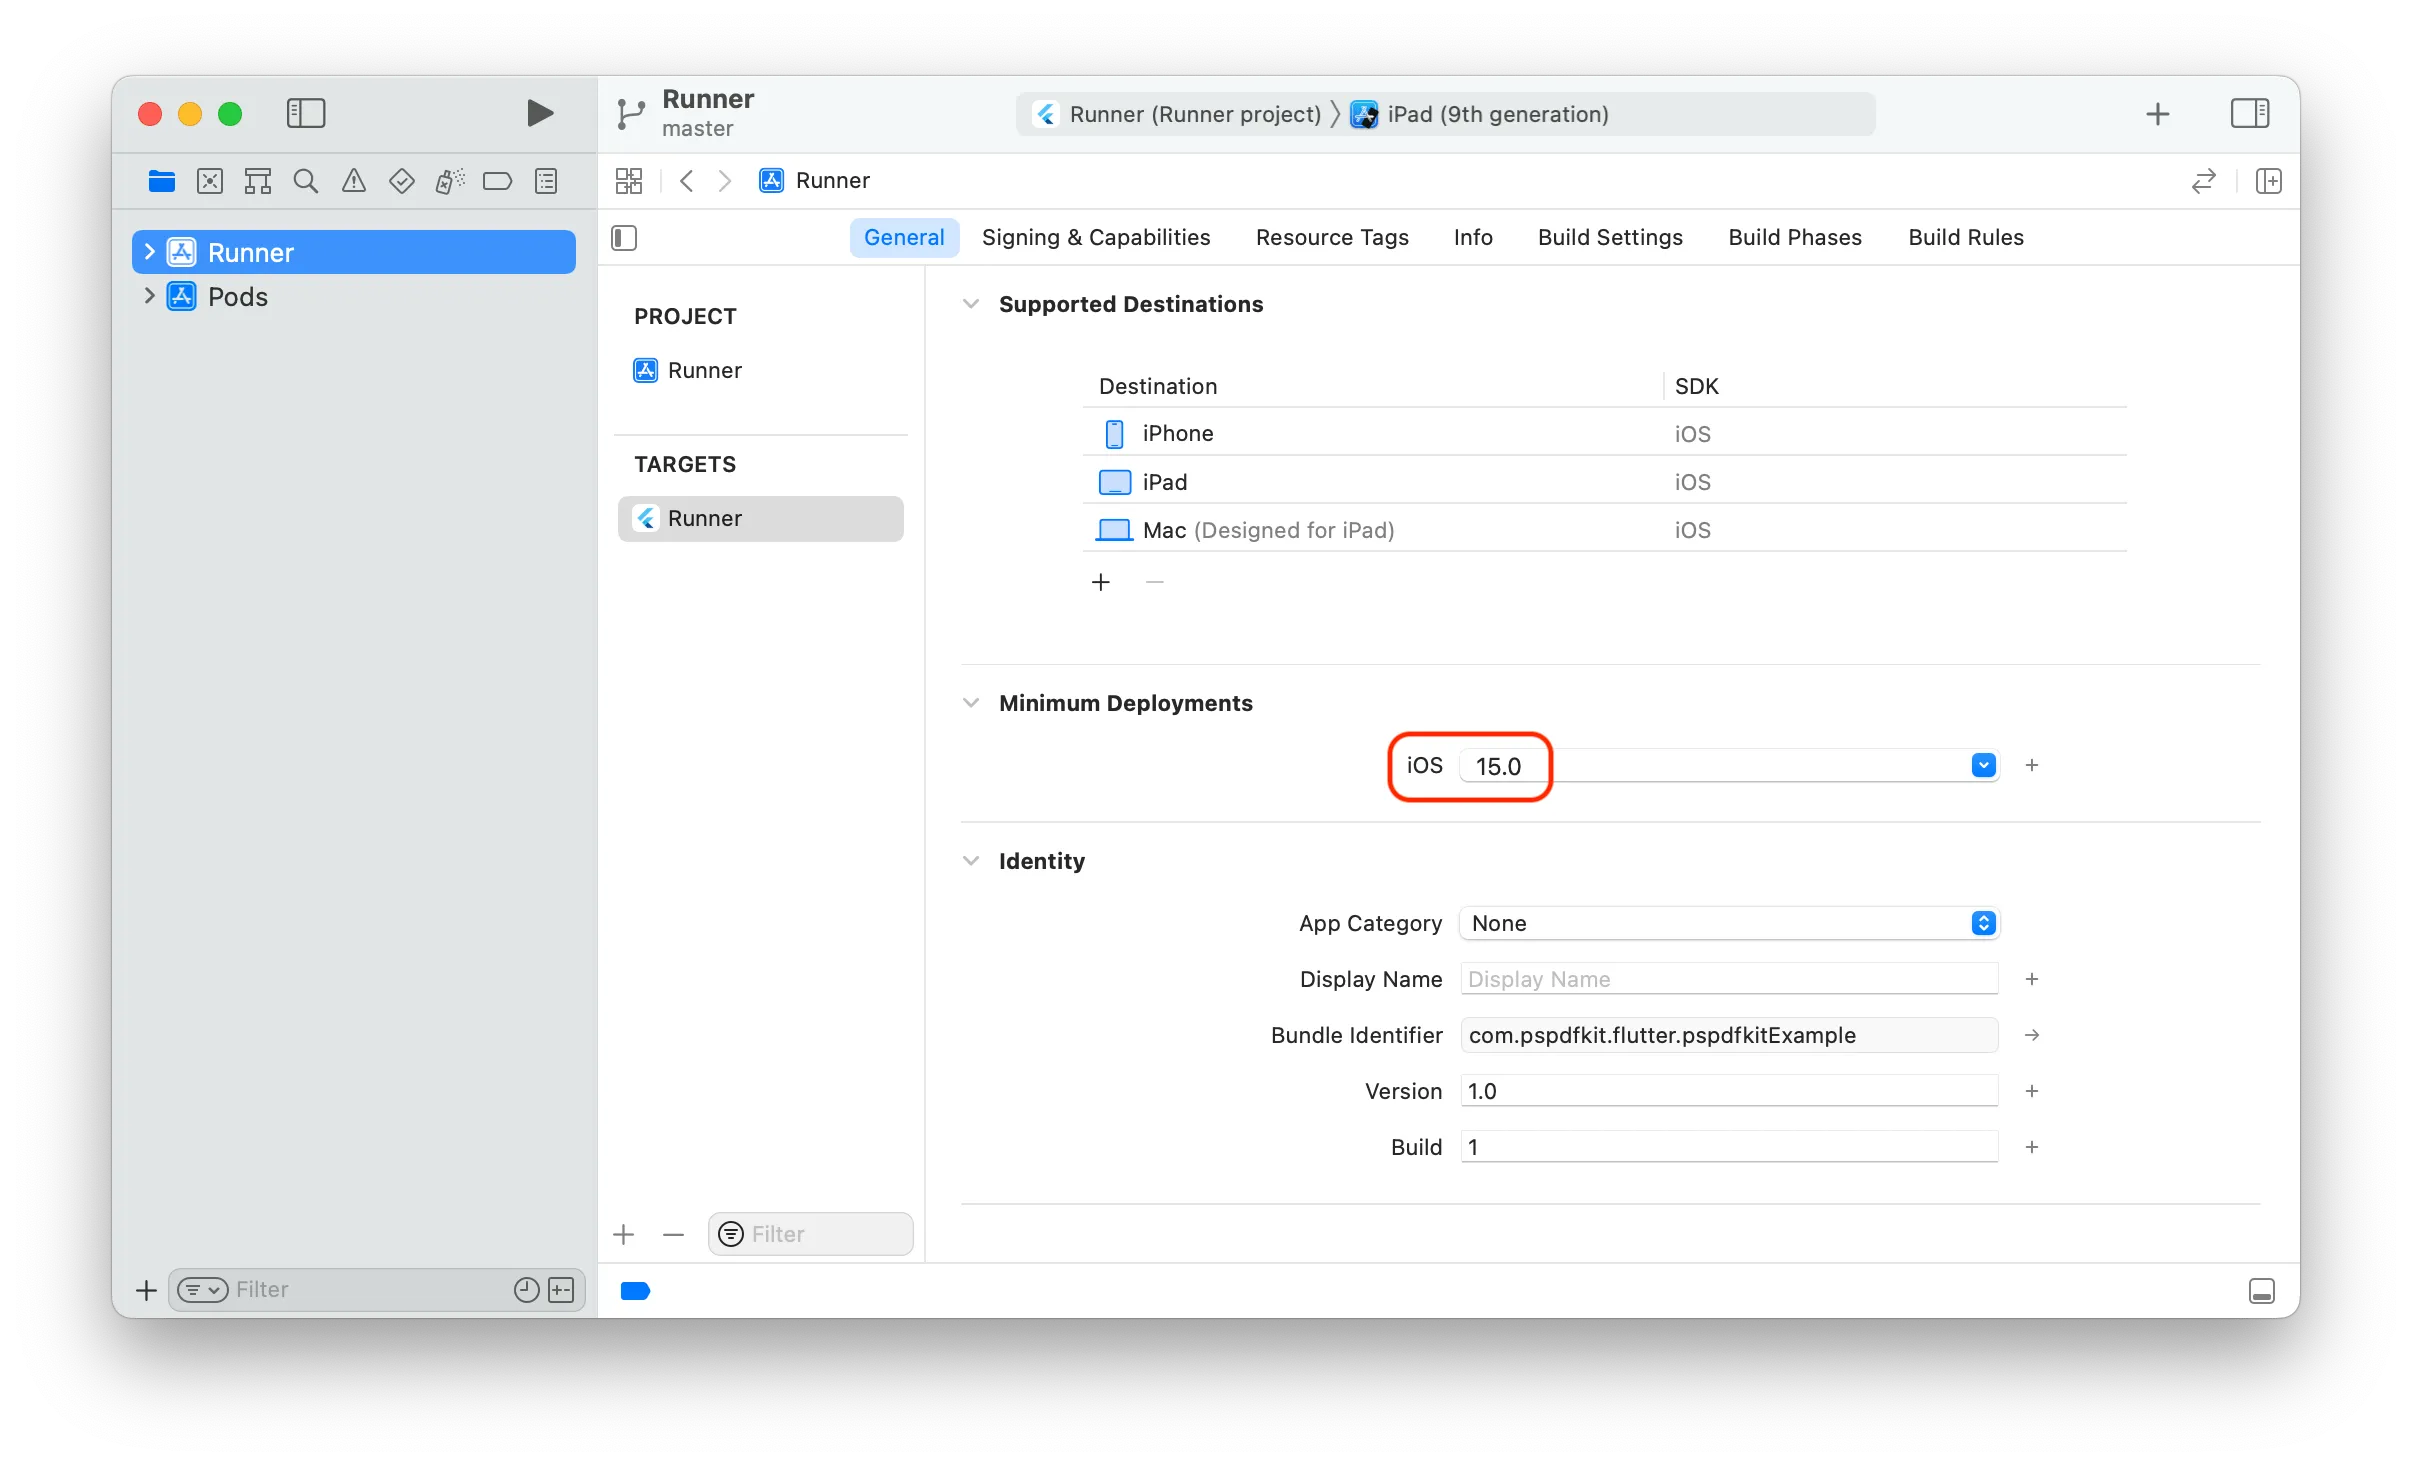
Runner.xcworkspacefrom theiosfolder in Xcode:Terminal window open ios/Runner.xcworkspaceEnsure the iOS deployment target is set to 16.0 or higher.
Open your project’s Podfile in a text editor:
Terminal window open ios/PodfileUpdate the platform to iOS 16, which is the minimum required version for Nutrient iOS SDK:
# platform :ios, '9.0'platform :ios, '16.0'
Web setup
The most direct and recommended way to get started is using our CDN to load Nutrient Web SDK:
Add the following script to the
<head>section of yourindex.htmlfile:<!DOCTYPE html><html><head><!-- ... other head elements ... --><script src="https://cdn.cloud.pspdfkit.com/pspdfkit-web@1.10.0/nutrient-viewer.js"></script></head><body><!-- ... body content ... --></body></html>Make sure to replace
<version>with the version you want to use. You can find the latest version in the Nutrient Web SDK changelog.Using the CDN option is recommended for both development and production, as it ensures you’re always using a specific, consistent version of the SDK.
Nutrient Web SDK files are distributed as an archive that can be extracted manually.
Download the framework(opens in a new tab). The download will start immediately and will save a
.tar.gzarchive likePSPDFKit-Web-binary-<%= latest_version(:web) %>.tar.gzto your computer.Once the download is complete, extract the archive and copy the entire contents of its
distfolder to your project’sweb/assetsfolder, or any other folder of your choice inside the web subfolder.Make sure your
assetsfolder contains thenutrient-viewer.jsfile and anutrient-viewer-libdirectory with the library assets.Make sure your server has the
Content-Type: application/wasmMIME typeset. Read more about this in the troubleshooting guide.Include the Nutrient library in your
index.htmlfile:<script src="assets/nutrient-viewer.js"></script>
Displaying a PDF
Integrating into an existing project consists of initializing the SDK and presenting it with a document.
Import the Nutrient package:
import 'package:nutrient_flutter/nutrient_flutter.dart';Show the PDF document inside your Flutter app as demonstrated below:
Scaffold(body: NutrientView(documentPath: 'file:///path/to/Document.pdf',),);
If you’re having trouble with integration, go through the new project tab to see if there’s anything missing in your setup.
Open the
lib/main.dartfile:Terminal window open lib/main.dartReplace the contents of
lib/main.dartwith the following code snippet that loads a document from theassetspath:import 'dart:io';import 'package:flutter/foundation.dart';import 'package:flutter/material.dart';import 'package:nutrient_flutter/nutrient_flutter.dart';const String documentPath = 'PDFs/Document.pdf';void main() {WidgetsFlutterBinding.ensureInitialized();// Initialize Nutrient with the license key. Pass `null` to use the trial version.Nutrient.initialize(androidLicenseKey: null, iosLicenseKey: null);runApp(const MaterialApp(home: MyApp(),));}class MyApp extends StatelessWidget {const MyApp({super.key});Future<String> extractAsset(BuildContext context, String assetPath) async {if (kIsWeb) {return assetPath;}final bytes = await DefaultAssetBundle.of(context).load(assetPath);final list = bytes.buffer.asUint8List();final tempDir = await Nutrient.getTemporaryDirectory();final tempDocumentPath = '${tempDir.path}/$assetPath';final file = File(tempDocumentPath);await file.create(recursive: true);file.writeAsBytesSync(list);return file.path;}@overrideWidget build(BuildContext context) {return Scaffold(body: FutureBuilder<String>(future: extractAsset(context, documentPath),builder: (context, snapshot) {if (snapshot.hasData) {/// NutrientView is a widget that displays a PDF document.return NutrientView(documentPath: snapshot.data!,);} else if (snapshot.hasError) {return Center(child: Text('${snapshot.error}'),);} else {return const Center(child: CircularProgressIndicator(),);}}),);}}Since Nutrient Flutter SDK version 3.9.0, it’s now required to initialize the SDK before it can be used by setting a license key. If you don’t have one yet, you can set it to
null. This will show a watermark on the document. You can get a trial license(opens in a new tab) to remove the watermark:void main(){Nutrient.initialize();runApp(const MyApp());}On Android, you’ll run into a class cast exception for AppCompatActivity. To fix this, you’ll need to follow this troubleshooting guide.
With your project now configured, proceed with the steps below to add a PDF document and run your application:
Add the PDF document you want to display in your project’s
assetsdirectory. You can use this Quickstart Guide PDF as an example.Create a
PDFsdirectory:Terminal window mkdir PDFsCopy the sample document into the newly created
PDFsdirectory:Terminal window cp ~/Downloads/Document.pdf PDFs/Document.pdfSpecify the
assetsdirectory inpubspec.yaml:# The following section is specific to Flutter.flutter:assets:- PDFs/...Depending on your platform, Start your Android emulator(opens in a new tab) or iOS simulator(opens in a new tab), or connect a device. If Chrome is installed on your computer, it’ll be launched automatically.
Run the app with:
Terminal window flutter run
Next steps
To learn more about Flutter, make sure to check out the following blog posts:
- How I got started with Flutter
- Getting started with Nutrient Flutter
- Opening a PDF in Flutter
- Download and display a PDF in Flutter
- How to customize our Flutter PDF SDK
- Advances in hybrid technologies
- How we maintain our public Flutter project using a private monorepo
- How to build a Flutter PDF viewer