Add PDF functionality with Delphi and C++ Builder
This guide explains how to integrate Nutrient .NET SDK (formerly known as GdPicture.NET SDK) into your application.
About Nutrient .NET SDK
Nutrient .NET SDK is a cross-platform developer solution for building intelligent PDF and document processing applications. This toolkit enables you to compose, display, capture, edit, and print documents. You can build applications using Nutrient .NET SDK with numerous development environments and deploy these applications to different platforms.
Prerequisites
Before proceeding with this guide, ensure your development environment meets the following requirements.
.NET 8.0 or higher (cross-platform)
- .NET SDK 8.0 or higher — Install the latest stable version from the Microsoft website(opens in a new tab).
- Supported operating systems — Windows, macOS, and Linux.
- Development tools — Visual Studio 2022 (17.6+) or Visual Studio Code with C# extension.
- Command-line tools — Ensure the .NET CLI is available and configured in your system path.
.NET Framework 4.6.2 or higher (Windows)
- .NET Framework 4.6.2+ — Preinstalled on Windows or available from the official Microsoft Download Center.
- Supported operating systems — Windows 10 or later.
- Development tools — Visual Studio 2019 (or newer) with the .NET framework development workload installed.
For more information on the supported frameworks and operating systems, refer to our system compatibility guide.
Installing Nutrient .NET SDK
The best way to install Nutrient .NET SDK is through NuGet repositories. To view a list of available packages, refer to the download Nutrient .NET guide.
Alternatively, use our ready-made bootstrap project for new setups.
Download example projectActivating the trial license
To activate a trial license, follow the steps below:
- In Visual Studio, create a
LicenseManagerobject in the code file where the application loads before using any of the methods of Nutrient .NET SDK. - Pass the license key to the
RegisterKEYmethod of theLicenseManagerobject.
Set the license using the
LicenseManageronce before making any calls to the SDK. This activates the license for the entire assembly. Make sure your application initializes and sets the license only once.
LicenseManager licenseManager = new LicenseManager();licenseManager.RegisterKEY("");Dim licenseManager As New LicenseManagerlicenseManager.RegisterKEY("")CLicenseManager licenseManager;licenseManager.CreateDispatch(L"GdPicture14.LicenseManager");licenseManager.RegisterKEY(L"");BSTR bstrLicense = ::SysAllocString(L"");if (bstrLicense != NULL){ _LicenseManagerPtr licenseManager(__uuidof(LicenseManager)); VARIANT_BOOL result = licenseManager->RegisterKEY(bstrLicense); ::SysFreeString(bstrLicense);}BSTR bstrLicense = ::SysAllocString(L"");if (bstrLicense != NULL){ _LicenseManagerPtr licenseManager; licenseManager = (_LicenseManagerPtr)CreateComObject(CLSID_LicenseManager); licenseManager->RegisterKEY(bstrLicense); ::SysFreeString(bstrLicense); bstrLicense = NULL;}var LicenseManager1: Variant;begin LicenseManager1 := CreateOleObject('GdPicture14.LicenseManager'); LicenseManager1.RegisterKey('');var licenseManager;licenseManager = new ActiveXObject("GdPicture14.LicenseManager");licenseManager.RegisterKey("");long ll_resultOLEObject licenseManagerlicenseManager = CREATE OLEObjectll_result = licenseManager.ConnectToNewObject("GdPicture14.LicenseManager")licenseManager.RegisterKey("")Dim licenseManager As New LicenseManagerCall licenseManager.RegisterKEY("")Dim licenseManager As New GdPicture_NET_14.LicenseManagerlicenseManager.RegisterKey ("")Leaving the license key as an empty string activates the SDK in trial mode. After purchasing a commercial license, replace the empty string with your license key.
Starting from version 14.2.94, a trial key is no longer required. As shown in the examples above, setting the key to an empty string ("") enables trial mode.
Delphi and C++Builder
This section provides you with a step-by-step guide to getting started using Nutrient .NET SDK with Delphi and C++Builder.
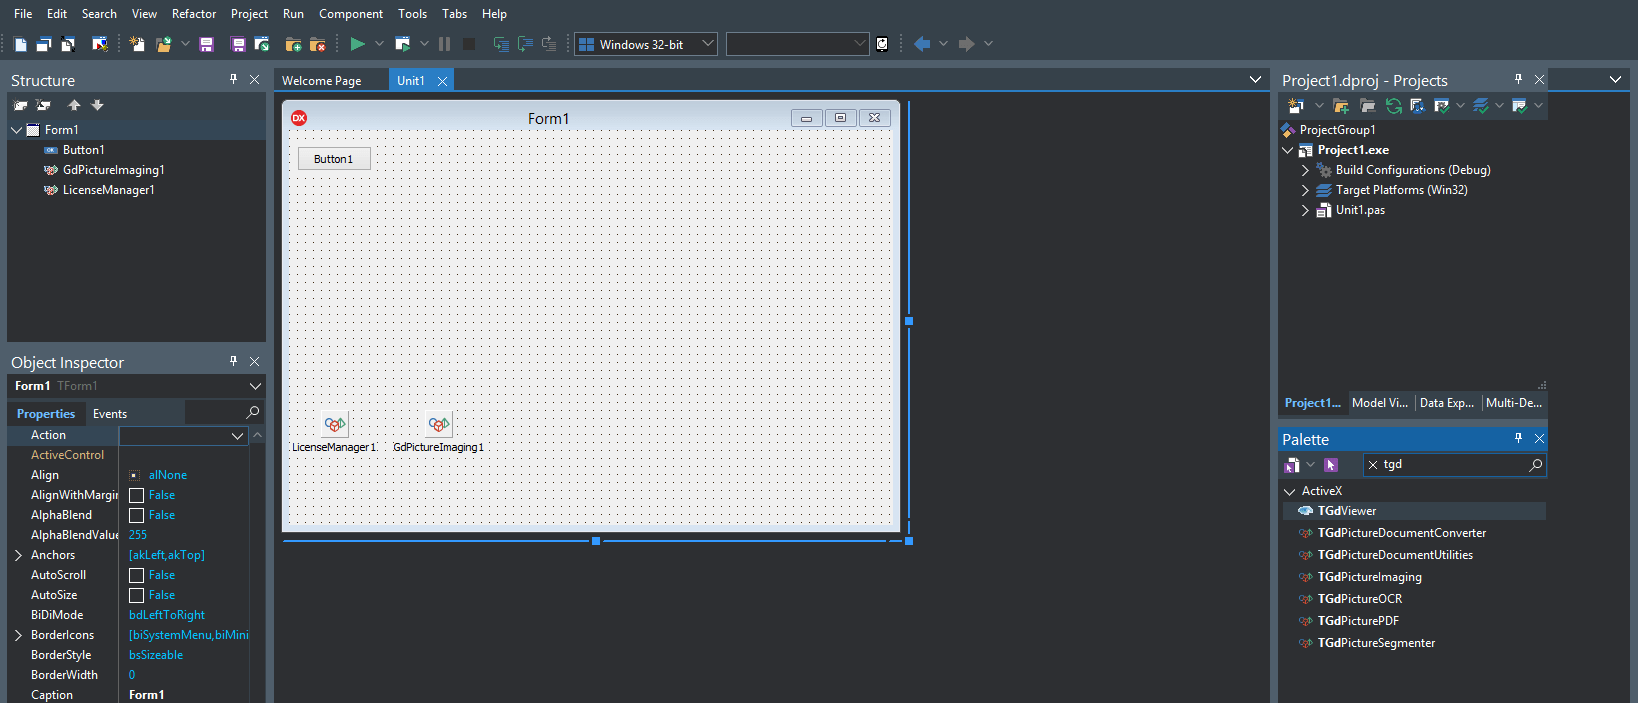
You can find two sample projects that demonstrate the use of Nutrient .NET SDK features. These are located in the [INSTALLATION FOLDER]\Samples\WinForm\delphi folder and use COM Interop.
IntelliSense is fully supported in Delphi and C++Builder.
Integration
You have two integration options, outlined below.
Importing as ActiveX controls
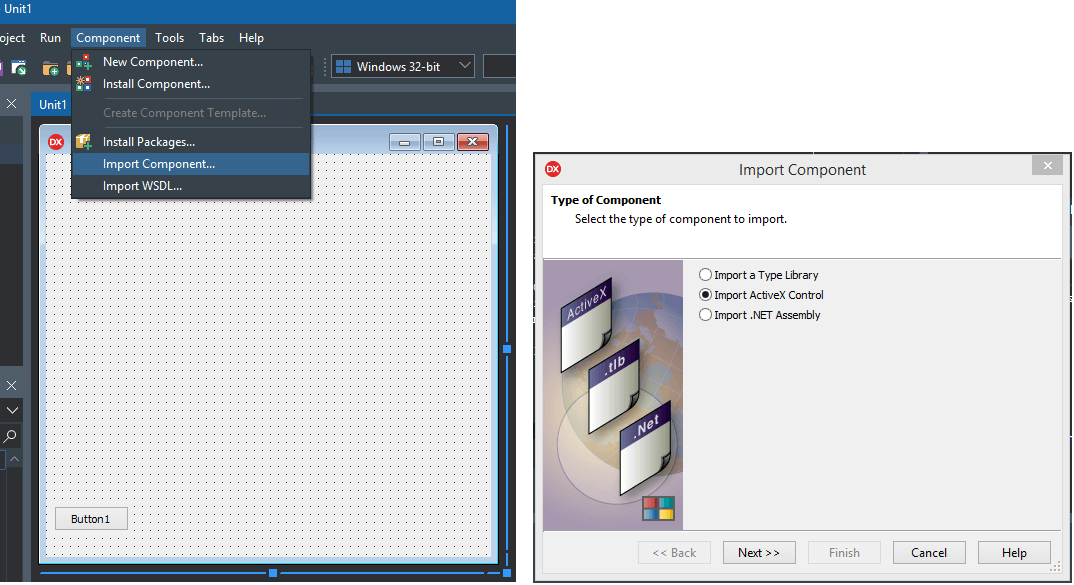
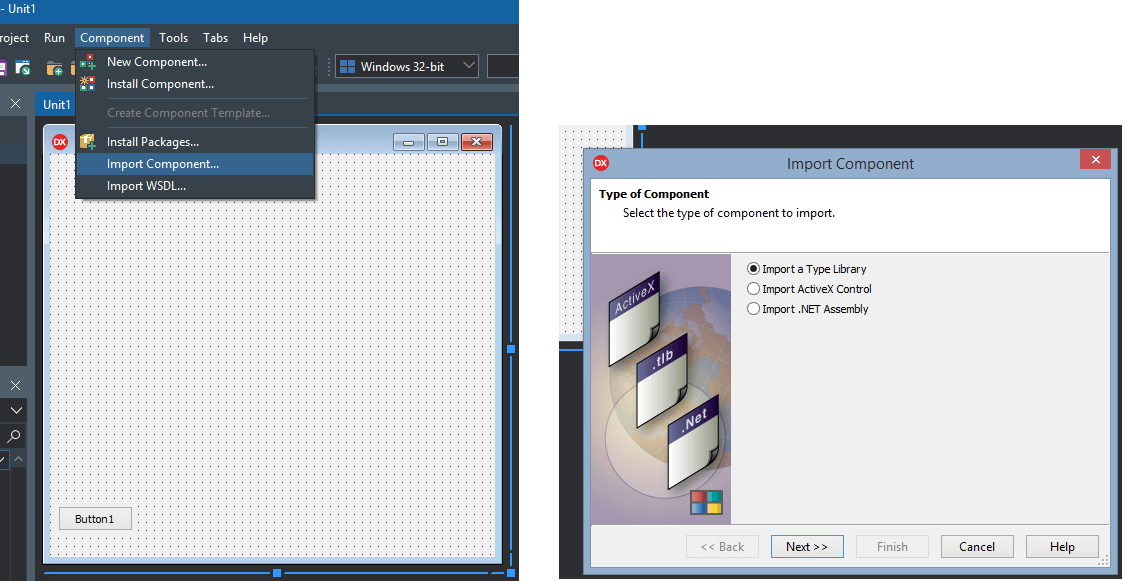
Start a new project in your Delphi environment and select Component > Import Component > Import ActiveX Control > Next.
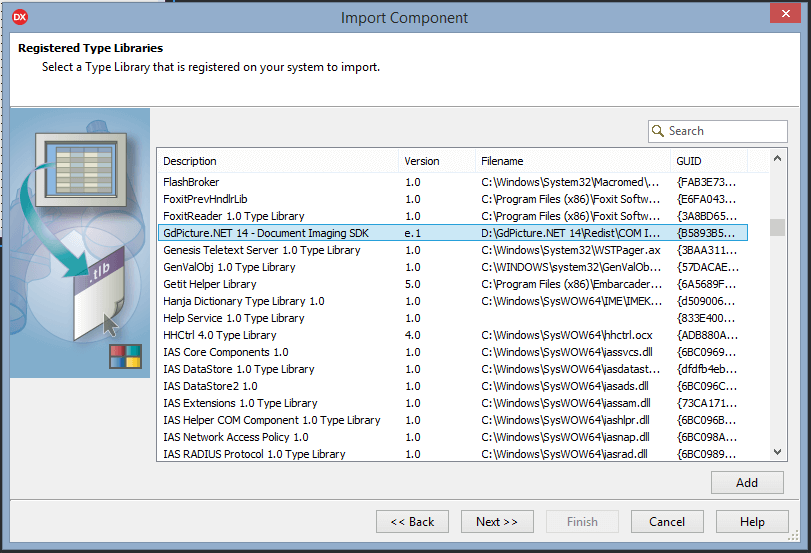
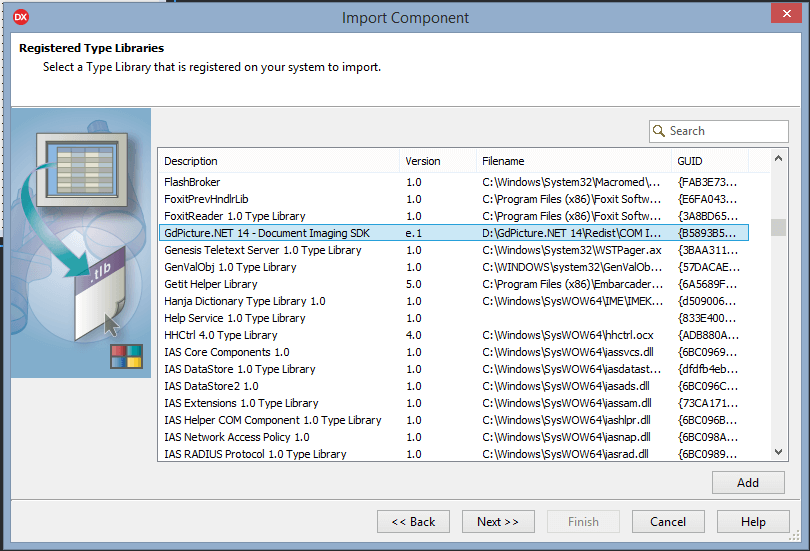
Scroll through the list until you find GdPicture.NET 14 - Document Imaging SDK. Select it and click Next.
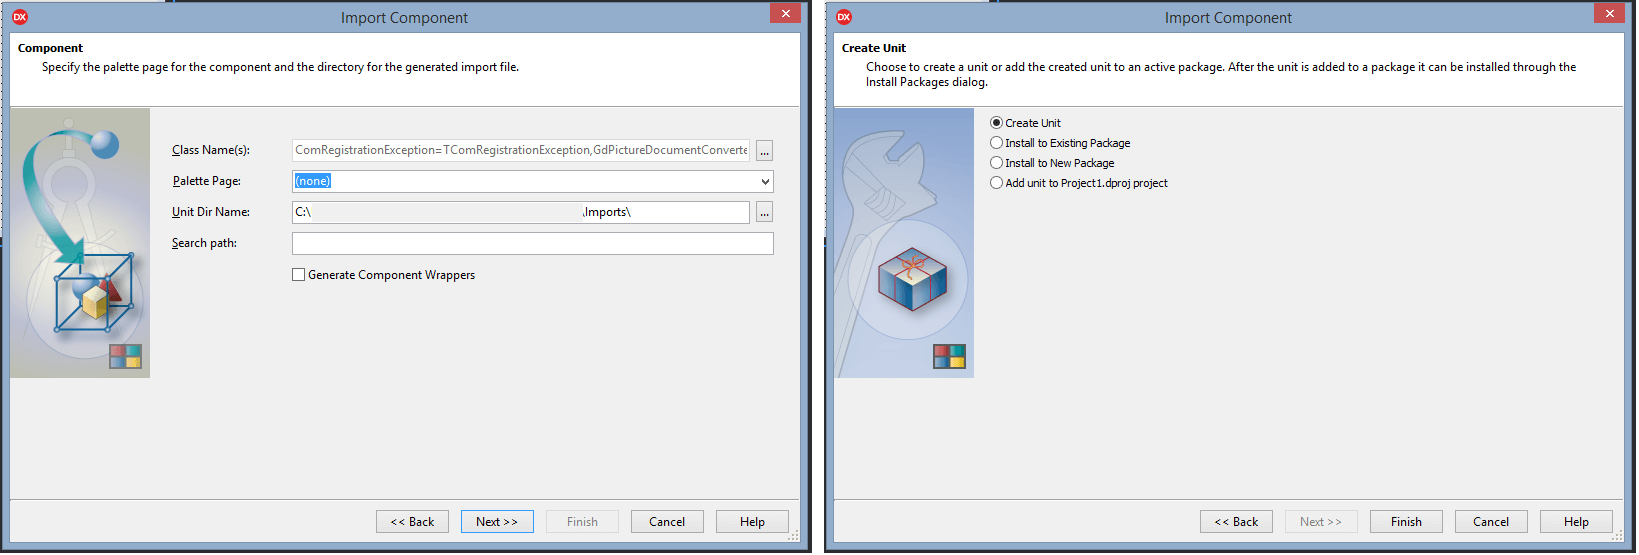
In the Class Name(s) field, you’ll see all the classes available for import. Ensure Palette Page is set to ActiveX, and check that Unit Dir Name is how you want it. Select the Generate Component Wrappers checkbox and click Next. Then, select the Install to New Package option and click Next again.
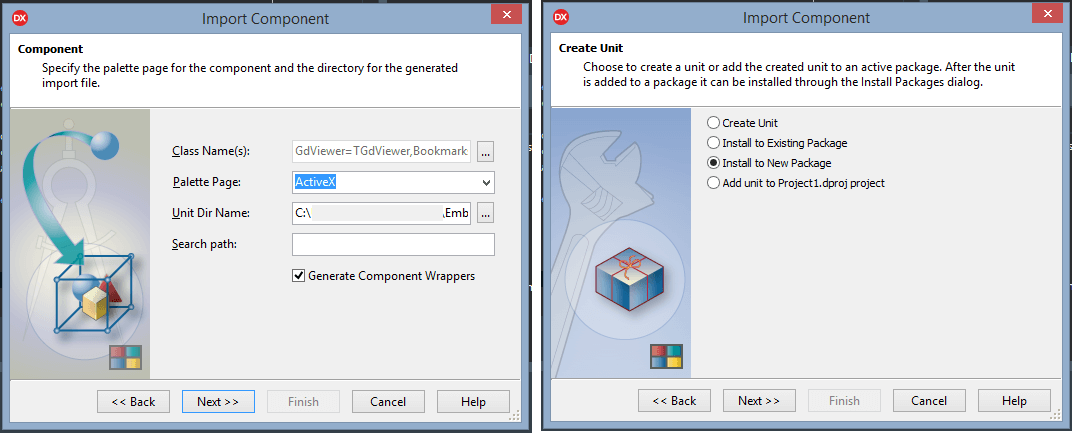
Browse for the proper path and add it as the Package name. Then click Finish. Finally, add and confirm the framework by clicking Yes.

Build the package. Change all instances of
UIntPtrtoCardinalin theGdPicture_NET_14_TLB.pasfile. After you’ve successfully built the package, you need to install it.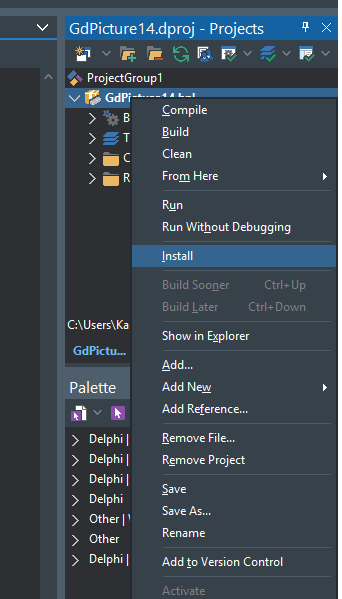
Finally, create your project, select your favorite components from the ActiveX palette, and use them in your application.
- Turn off floating-point exceptions.
- In a Delphi 32-bit app, use
Set8087CW($133f);. - In a Delphi 64-bit app, use
SetExceptionMask(exAllArithmeticExceptions);. To use this, you first need to import the math runtime library. - In C++Builder, add
Set8087CW(0x133f);to theWTypes.hfile.
Example use
The following code snippet demonstrates how to load a TIFF file and save it as a BMP:
procedure Test;var TiffImageID, Status : Integer;begin LicenseManager1.RegisterKEY('XXX'); // Replace XXX by a valid demo or commercial KEY TiffImageID := GdPictureImaging1.CreateGdPictureImageFromFile('d:\test.tif'); Status := GdPictureImaging1.SaveAsBMP(TiffImageID, 'd:\output.bmp'); if Status <> 0 then MessageBox(0,Pchar('Error saving file. Status: ' + inttostr(Status)),'', 0) else MessageBox(0,Pchar('Done'),'', 0);end;Importing a type library
Start a new project in your Delphi environment and select Component > Import Component… > Import a Type Library > Next.
Scroll through the list until you find GdPicture.NET 14 - Document Imaging SDK. Select this and click Next.
In the Class Name(s) field, you’ll see all the classes available for import. Check that Unit Dir Name is how you want it. Leave the Generate Component Wrappers checkbox empty, and then click Next. Then, select the Create Unit option and click Finish.
Include the generated unit in your files using the standard
usescommand, and build the application.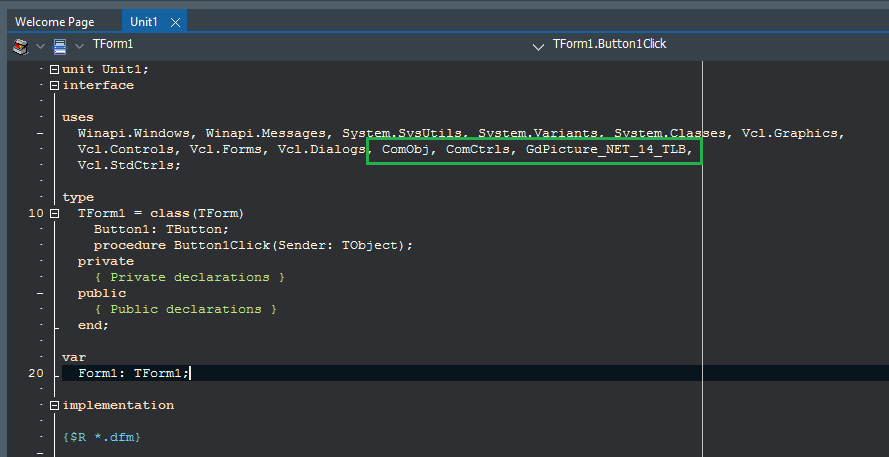
Example use
The following code snippet demonstrates how to load a TIFF file and save it as a BMP:
procedure Test;var LicenseManager1: Variant; GdPictureImaging1: _GdPictureImaging; TiffImageID : Integer; Status: Integer;begin LicenseManager1 := CreateOleObject('GdPicture14.LicenseManager'); LicenseManager1.RegisterKey('XXX'); // Replace XXX by a valid demo or commercial KEY GdPictureImaging1 := CreateComObject(CLASS_GdPictureImaging) as _GdPictureImaging; TiffImageID := GdPictureImaging1.CreateGdPictureImageFromFile('d:\test.tif'); Status := GdPictureImaging1.SaveAsBMP(TiffImageID, 'd:\output.bmp'); if Status <> 0 then MessageBox(0,Pchar('Error saving file. Status: ' + inttostr(Status)),'', 0) else MessageBox(0,Pchar('Done'),'', 0);end;