


How to convert HTML to an image using wkhtmltoimage and Laravel

Table of contents

- Install wkhtmltoimage and integrate it with Laravel
- Create a custom Artisan command for HTML-to-image conversion
- Convert any HTML file to PNG format via command line
Converting HTML to images lets developers generate screenshots, thumbnails, and visual previews of webpages. wkhtmltoimage(opens in a new tab) is a command-line tool that uses the WebKit rendering engine. It’s lightweight, fast, and runs headless (no GUI required). It’s available for macOS, Linux, and Windows.
In this tutorial, you’ll learn how to use wkhtmltoimage with Laravel to convert HTML to an image.
wkhtmltoimage was archived on 2 January 2023(opens in a new tab) and is now read-only. The library still works, but it receives no security patches, browser-engine updates, or bug fixes. For new projects, consider maintained alternatives — [Browsershot][] (PHP wrapper around Puppeteer, MIT), [Puppeteer][] or [Playwright][] for direct Node.js use, or Nutrient’s HTML-to-image API for a managed cloud option (covered later in this guide).
Development considerations
wkhtmltoimage is an open source tool created in 2008 by Jakob Truelsen. It was archived on 2 January 2023(opens in a new tab) — the project is read-only and no longer receives bug fixes, security patches, or browser-engine updates. For production use, consider Nutrient’s HTML-to-image API.
For a commercial solution, Nutrient offers an HTML-to-image API. Our hosted solution gives you 50 free conversions per month with additional packages for a per-image fee. Our solutions are regularly maintained, with releases occurring multiple times throughout the year. We also offer one-on-one support.
Requirements
- PHP — You’ll need to have PHP installed on your system. You can download the latest version from the official PHP website(opens in a new tab).
To check if you have PHP installed on your system, you can open a terminal and run the command php -v.
- Laravel framework — You can download the latest version from the Laravel website(opens in a new tab).
You can check if you have Laravel installed by running the command laravel -v in the terminal. If you don’t have Laravel installed, you can install it by running the following command:
composer global require laravel/installer- Next, add Composer(opens in a new tab), a dependency manager, to your path directory:
export PATH="$HOME/.composer/vendor/bin:$PATH"Setting up the project
Create a new Laravel project by running the following:
laravel new html-to-imageThis will create a new directory called html-to-image with the basic Laravel structure.
Navigate to the project directory by running the following command:
cd html-to-imageInstalling wkhtmltoimage
Install wkhtmltoimage on your system. You can download the appropriate version for your operating system from the official website(opens in a new tab).
Check if wkhtmltoimage is installed by running the following command:
wkhtmltoimage -VIt’ll display the version number of the library like this:
wkhtmltoimage 0.12.6 (with patched qt)Make sure you have wkhtmltoimage installed on your system and that the binary is in the system’s PATH. You can check this by running the following command:
which wkhtmltoimage 
If it’s not in the PATH, you can add the location to the PATH variable.
Integrating wkhtmltoimage with Laravel
Once you have wkhtmltoimage installed, you can integrate it with Laravel by creating a new command that utilizes the library. To do this, use the following command to generate a new command class:
Terminal window php artisan make:command ConvertHtmlToImageThis will create a new file in the
app/Console/Commandsdirectory.Open the
app/Console/Commands/ConvertHtmlToImage.phpfile and update thehandlemethod to use thewkhtmltoimagelibrary to convert HTML to an image:public function handle(): int{$html = $this->argument('html');$output = $this->argument('output');// Escape shell arguments to prevent command injection.$escapedHtml = escapeshellarg($html);$escapedOutput = escapeshellarg($output);$outputLines = [];$resultCode = null;exec("wkhtmltoimage --format png {$escapedHtml} {$escapedOutput} 2>&1", $outputLines, $resultCode);if ($resultCode !== 0) {$this->error("Failed to convert HTML to image");if (!empty($outputLines)) {$this->error(implode("\n", $outputLines));}return Command::FAILURE;}$this->info("HTML converted to image and saved to {$output}");return Command::SUCCESS;}This method takes the
htmlandoutputarguments and passes them to the wkhtmltoimage command. The--formatoption specifies the output format (PNG in this case).The
escapeshellarg()function sanitizes the input arguments to prevent command injection attacks. Theexec()function executes the wkhtmltoimage command, capturing both output and the result code for error handling.In the
signatureproperty of the class, define the arguments and options that this command accepts:protected $signature = 'convert:html-to-image {html=public/index.html} {output=public/image.png}';The
htmlargument is the path to the HTML file that will be converted to an image, and theoutputargument is the path to the output image file. The=syntax sets default values for these arguments.Here’s the full code for the command:
app/Console/Commands/ConvertHtmlToImage.php <?phpnamespace App\Console\Commands;use Illuminate\Console\Command;class ConvertHtmlToImage extends Command{/*** The name and signature of the console command.** @var string*/protected $signature = 'convert:html-to-image {html=public/index.html} {output=public/image.png}';/*** The console command description.** @var string*/protected $description = 'Convert HTML to image using wkhtmltoimage';/*** Execute the console command.** @return int*/public function handle(): int{$html = $this->argument('html');$output = $this->argument('output');// Escape shell arguments to prevent command injection.$escapedHtml = escapeshellarg($html);$escapedOutput = escapeshellarg($output);$outputLines = [];$resultCode = null;exec("wkhtmltoimage --format png {$escapedHtml} {$escapedOutput} 2>&1", $outputLines, $resultCode);if ($resultCode !== 0) {$this->error("Failed to convert HTML to image");if (!empty($outputLines)) {$this->error(implode("\n", $outputLines));}return Command::FAILURE;}$this->info("HTML converted to image and saved to {$output}");return Command::SUCCESS;}}
Creating the HTML file
Currently, there isn’t an HTML file inside the public directory. So, create a file called index.html and paste the following code into it:
193 collapsed lines
<!DOCTYPE html><html> <head> <meta charset="utf-8" /> <title> A simple, clean, and responsive HTML invoice template </title>
<style> .invoice-box { max-width: 800px; margin: auto; padding: 30px; border: 1px solid #eee; box-shadow: 0 0 10px rgba(0, 0, 0, 0.15); font-size: 16px; line-height: 24px; font-family: 'Helvetica Neue', 'Helvetica', Helvetica, Arial, sans-serif; color: #555; }
.invoice-box table { width: 100%; line-height: inherit; text-align: left; }
.invoice-box table td { padding: 5px; vertical-align: top; }
.invoice-box table tr td:nth-child(2) { text-align: right; }
.invoice-box table tr.top table td { padding-bottom: 20px; }
.invoice-box table tr.top table td.title { font-size: 45px; line-height: 45px; color: #333; }
.invoice-box table tr.information table td { padding-bottom: 40px; }
.invoice-box table tr.heading td { background: #eee; border-bottom: 1px solid #ddd; font-weight: bold; }
.invoice-box table tr.details td { padding-bottom: 20px; }
.invoice-box table tr.item td { border-bottom: 1px solid #eee; }
.invoice-box table tr.item.last td { border-bottom: none; }
.invoice-box table tr.total td:nth-child(2) { border-top: 2px solid #eee; font-weight: bold; }
@media only screen and (max-width: 600px) { .invoice-box table tr.top table td { width: 100%; display: block; text-align: center; }
.invoice-box table tr.information table td { width: 100%; display: block; text-align: center; } }
/** RTL **/ .invoice-box.rtl { direction: rtl; font-family: Tahoma, 'Helvetica Neue', 'Helvetica', Helvetica, Arial, sans-serif; }
.invoice-box.rtl table { text-align: right; }
.invoice-box.rtl table tr td:nth-child(2) { text-align: left; } </style> </head>
<body> <div class="invoice-box"> <table cellpadding="0" cellspacing="0"> <tr class="top"> <td colspan="2"> <table> <tr> <td> Invoice #: 123
Created: January 23, 2023
Due: January 31, 2023 </td> </tr> </table> </td> </tr>
<tr class="information"> <td colspan="2"> <table> <tr> <td> Acme, Inc.
12345 Sunny Road
Sunnyville, TX 12345 </td>
<td> Acme Corp.
John Doe
john@example.com </td> </tr> </table> </td> </tr>
<tr class="heading"> <td>Payment Method</td>
<td>Check #</td> </tr>
<tr class="details"> <td>Check</td>
<td>1000</td> </tr>
<tr class="heading"> <td>Item</td>
<td>Price</td> </tr>
<tr class="item"> <td>Website design</td>
<td>$300.00</td> </tr>
<tr class="item"> <td>Hosting (3 months)</td>
<td>$75.00</td> </tr>
<tr class="item last"> <td>Domain name (1 year)</td>
<td>$10.00</td> </tr>
<tr class="total"> <td></td>
<td>Total: $385.00</td> </tr> </table> </div> </body></html>Converting HTML to PNG
Navigate to the project directory and run the following command:
php artisan convert:html-to-image public/index.html public/image.pngThis runs the ConvertHtmlToImage command, which is defined in the app/Console/Commands/ConvertHtmlToImage.php file.
It takes two arguments:
- The first argument is the path to the input HTML file (
public/index.html). - The second argument is the path to the output image file (
public/image.png).
This command will convert the HTML file to an image and save it to the public/image.png file.
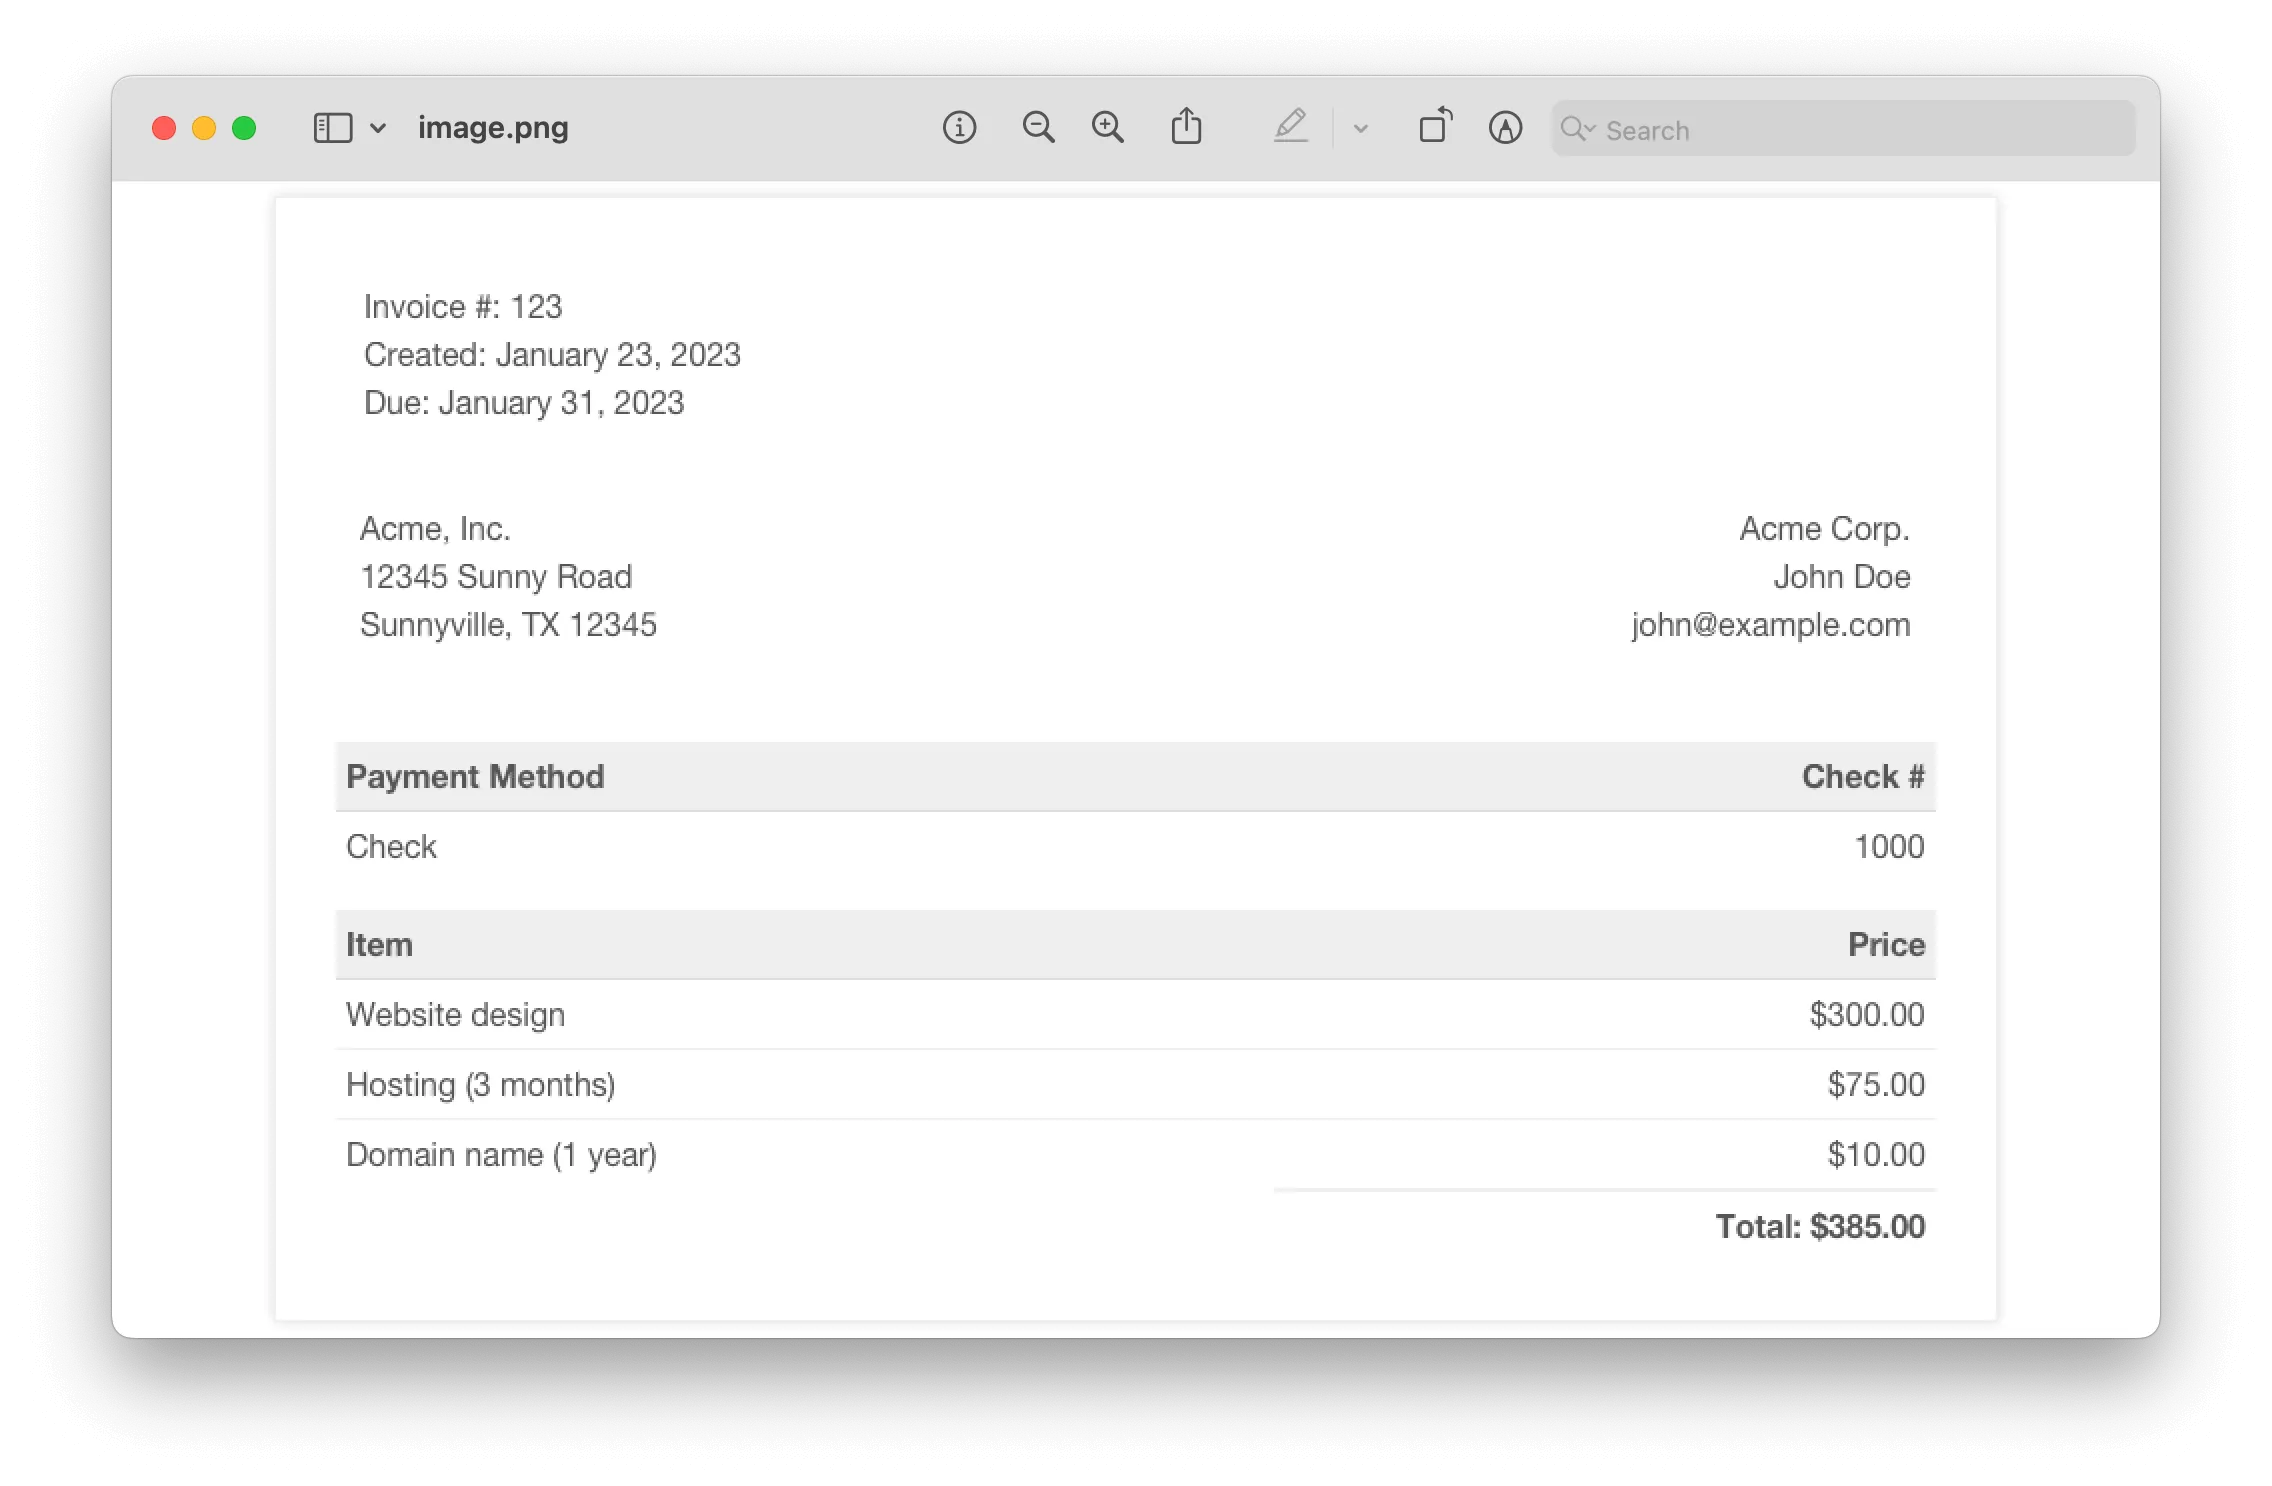
You can check the source code of the demo project on GitHub(opens in a new tab).
Conclusion
This tutorial covered setting up a Laravel project and integrating wkhtmltoimage to convert HTML to images. The combination works well for generating visual snapshots of webpages within PHP applications.
An alternative approach is Spatie/Browsershot(opens in a new tab), which uses headless Chrome to convert HTML to an image. This requires Chrome and Puppeteer installed on your system.
For production workloads, Nutrient offers a commercial option with 50 free conversions per month. Our HTML-to-image API integrates into your workflow or application. Create an account to unlock 50 free conversions per month.
FAQ
You can convert HTML to an image using the wkhtmltoimage command-line tool in a Laravel application. This involves generating the HTML content and using the tool to convert it to an image format like PNG or JPEG.
Install wkhtmltoimage on your server, create a Laravel controller to generate the HTML content, and use the exec function in PHP to call the wkhtmltoimage command and convert the HTML to an image.
Yes, you can customize the output image by passing various options to the wkhtmltoimage command, such as specifying the image format, setting the width and height, and adjusting the quality and compression.