Create fillable PDF form
PDF Generation supports the conversion of HTML forms into interactive PDF forms.
Conversion is handled completely internally, so there’s no need to pass any extra information to the generation payload.
Because not all HTML form fields map directly to PDF forms, a subset of form fields is supported. The following table shows how the HTML input element types map to PDF form types.
input type | PDF form field |
|---|---|
text | Text box |
password | Text box where all characters are replaced with * |
radio | Radio button |
checkbox | Checkbox |
select | Combo box |
All other input types aren’t supported and won’t be converted to PDF form fields.
Form values
All form values and radio buttons/checkboxes that are checked in HTML will be carried over to the form field values in the generated PDF.
Form field names
The name of the form field in the generated PDF is determined based on the id and name attributes of the HTML form field. They’re both concatenated with an _ in between. What follows are some concrete examples.
Only ID set
Given this HTML:
<input type="text" id="textInput" />The form field name would be:
textInput_Both ID and name set
Given this HTML:
<input type="text" id="textInput" name="cool" />The form field name would be:
textInput_coolOnly name set
Given this HTML:
<input type="text" name="cool" />The form field name would be:
id_<random_id>_coolHow to generate a fillable PDF form
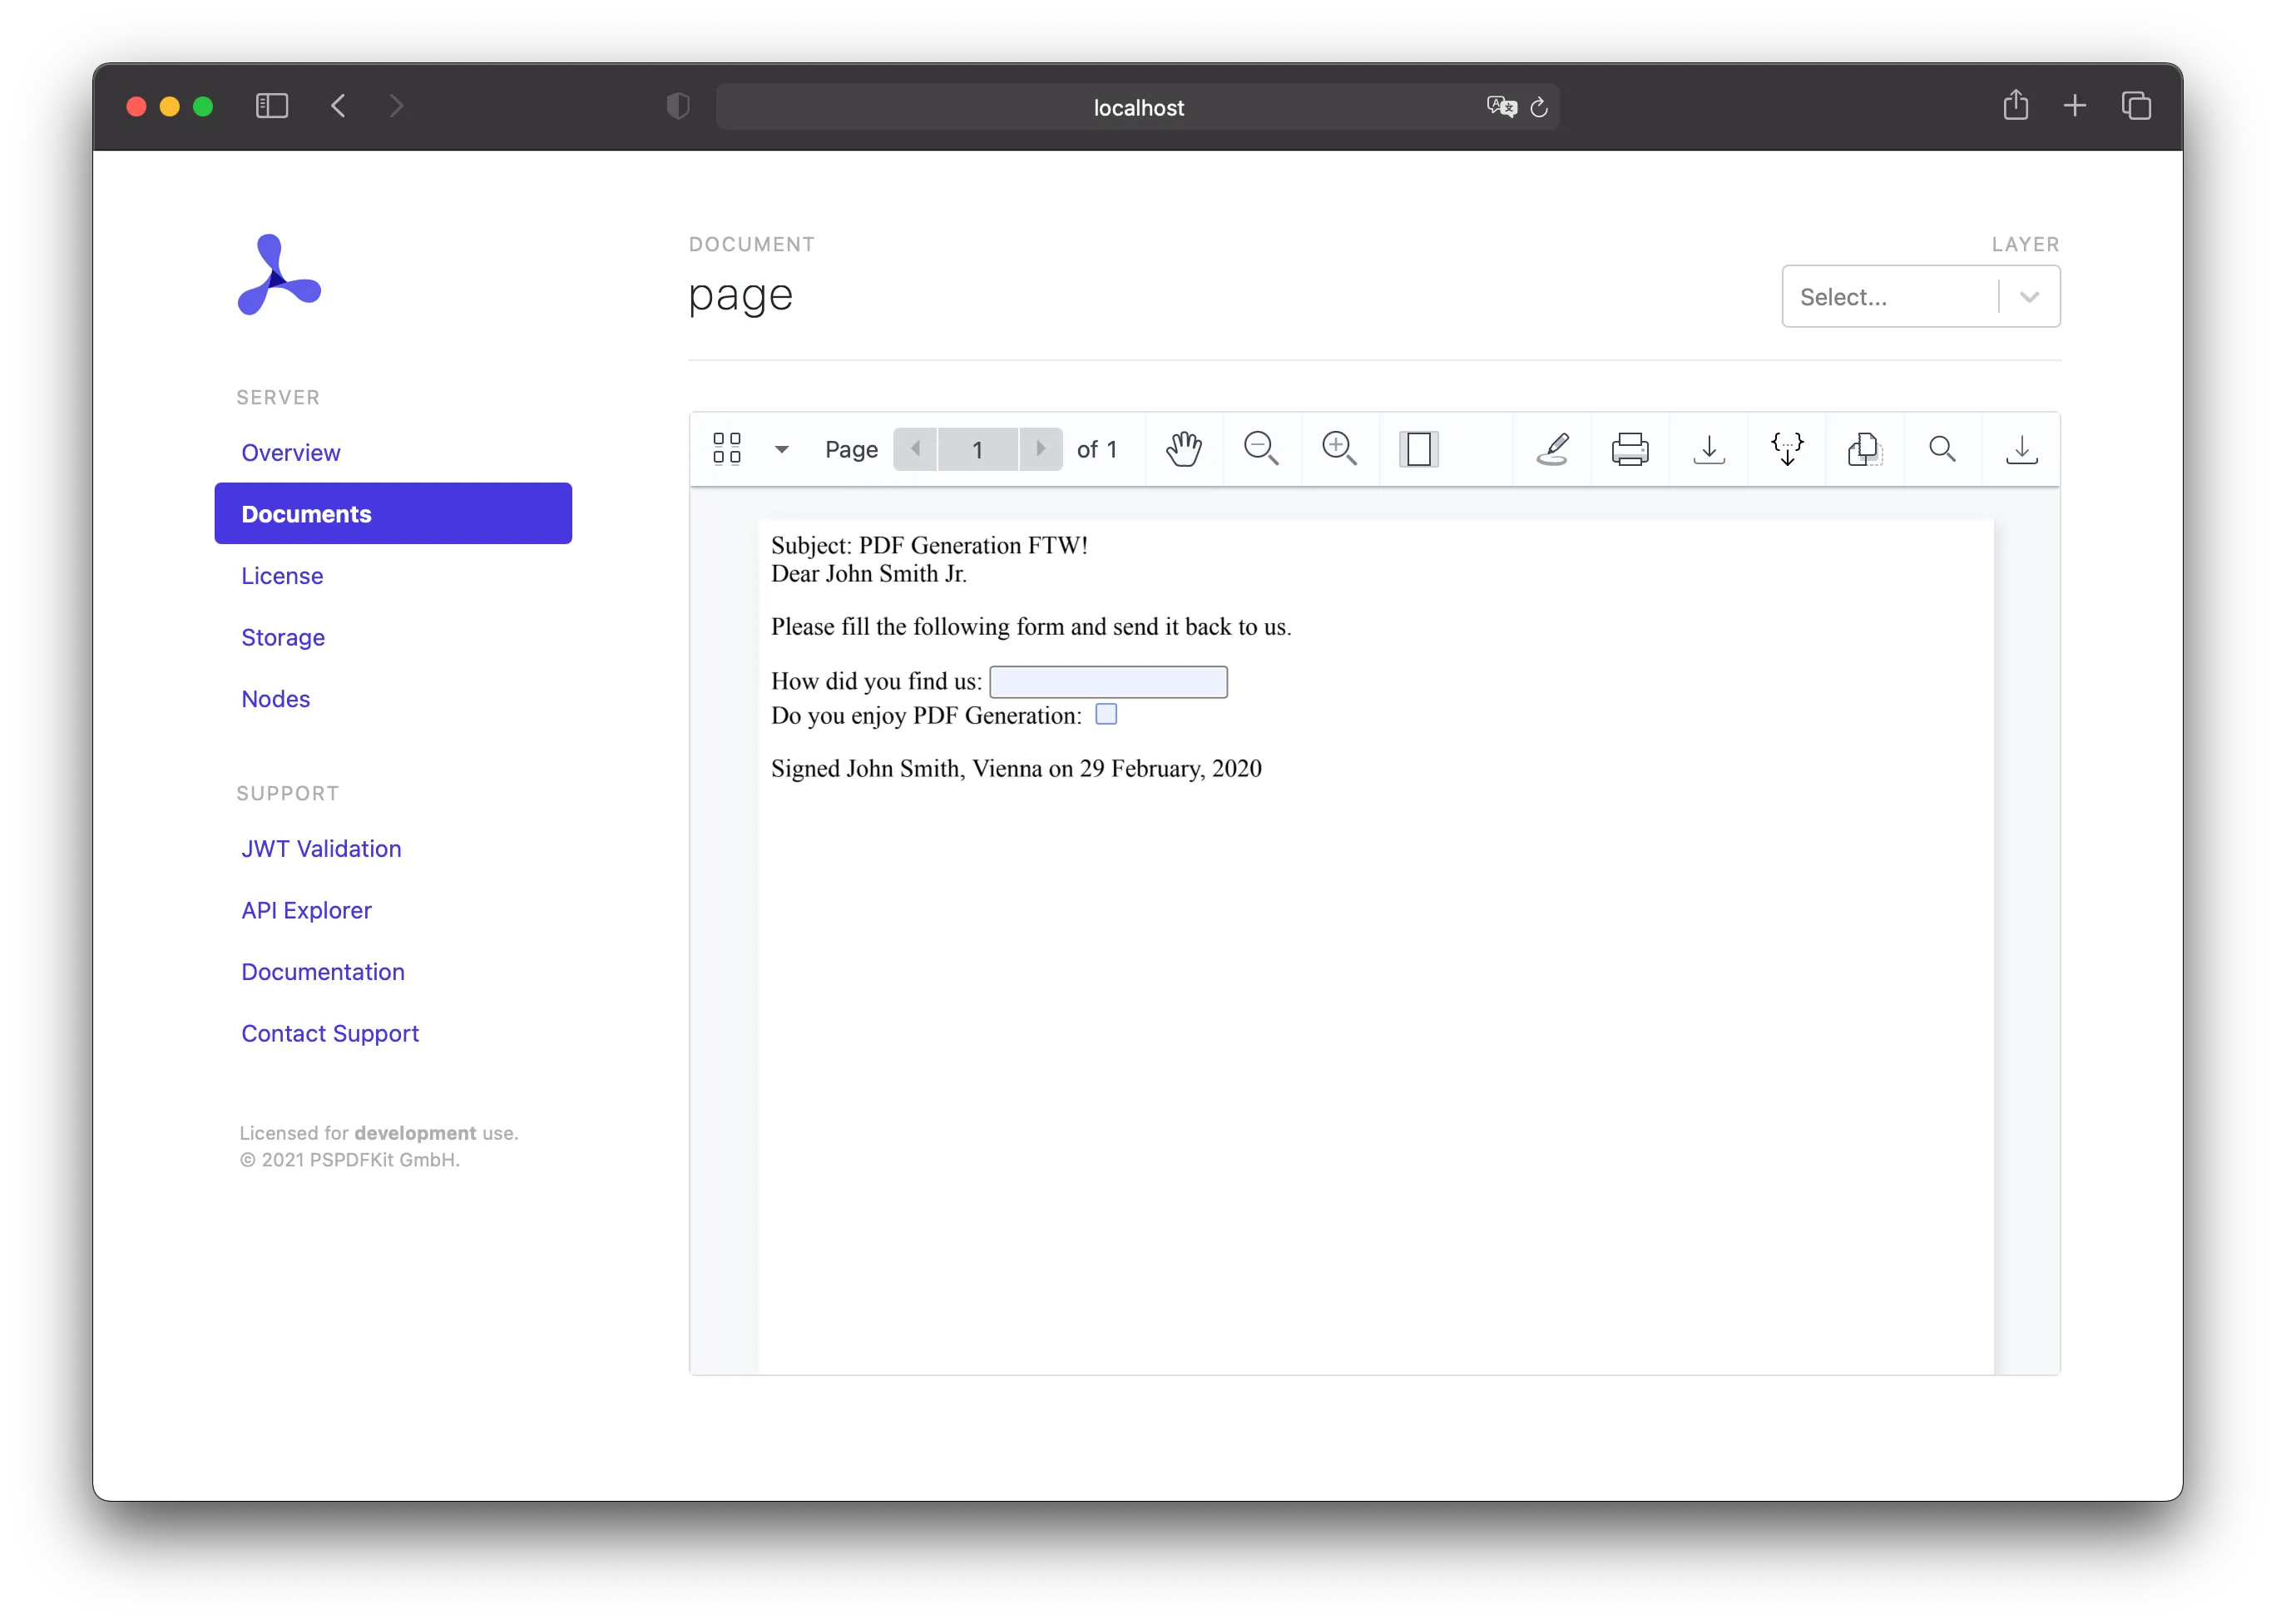
PDF Generation allows you to create fillable PDF forms from HTML. In this guide, you’ll create a simple personalized form in JavaScript. You can use the templating language Mustache(opens in a new tab), which allows you to inject data into a previously prepared HTML file. This is how your form will look:
<!DOCTYPE html><html> <body> <div class="subject">Subject: PDF Generation FTW!</div> <div>Dear {{name}}<br/></div> <div> <p> Please fill the following form and send it back to us. </p> <p> <label for="where">How did you find us:</label> <input type="text" id="where" name="where" /> </br> <label for="enjoy">Do you enjoy PDF Generation:</label> <input type="checkbox" id="enjoy" name="enjoy" /> </p> </div> <div>Signed John Smith, Vienna on {{date}}</div> </body></html>First, the data for {{name}} and {{date}} needs to be defined. In practice, this data may come from an external source or database, but for this example, you’ll define the data in a JSON file:
{ "name": "John Smith Jr.", "date": "29 February, 2020"}Now, run the mustache command to produce a final HTML document with the template arguments replaced:
const mustache = require("mustache");const fs = require("fs");
const page = fs.readFileSync("page.mustache").toString();const data = JSON.parse(fs.readFileSync("data.json").toString());
const outputHTML = mustache.render(page, data);
Run the JavaScript with Node.js:
node mustache-example.jsOnce you’ve created your HTML in JavaScript, send a request to the /api/documents endpoint, sending the PDF Generation schema with the HTML file you just created:
curl -X POST http://localhost:5000/api/documents \ -H "Authorization: Token token=<API token>" \ -F page.html=@/path/to/page.html \ -F generation='{ "html": "page.html"}'POST /api/documents HTTP/1.1Content-Type: multipart/form-data; boundary=customboundaryAuthorization: Token token=<API token>
--customboundaryContent-Disposition: form-data; name="page.html"; filename="page.html"Content-Type: text/html
<HTML data>--customboundaryContent-Disposition: form-data; name="generation"Content-Type: application/json
{ "html": "page.html"}--customboundary--The final PDF will look like this:
Adding watermarks
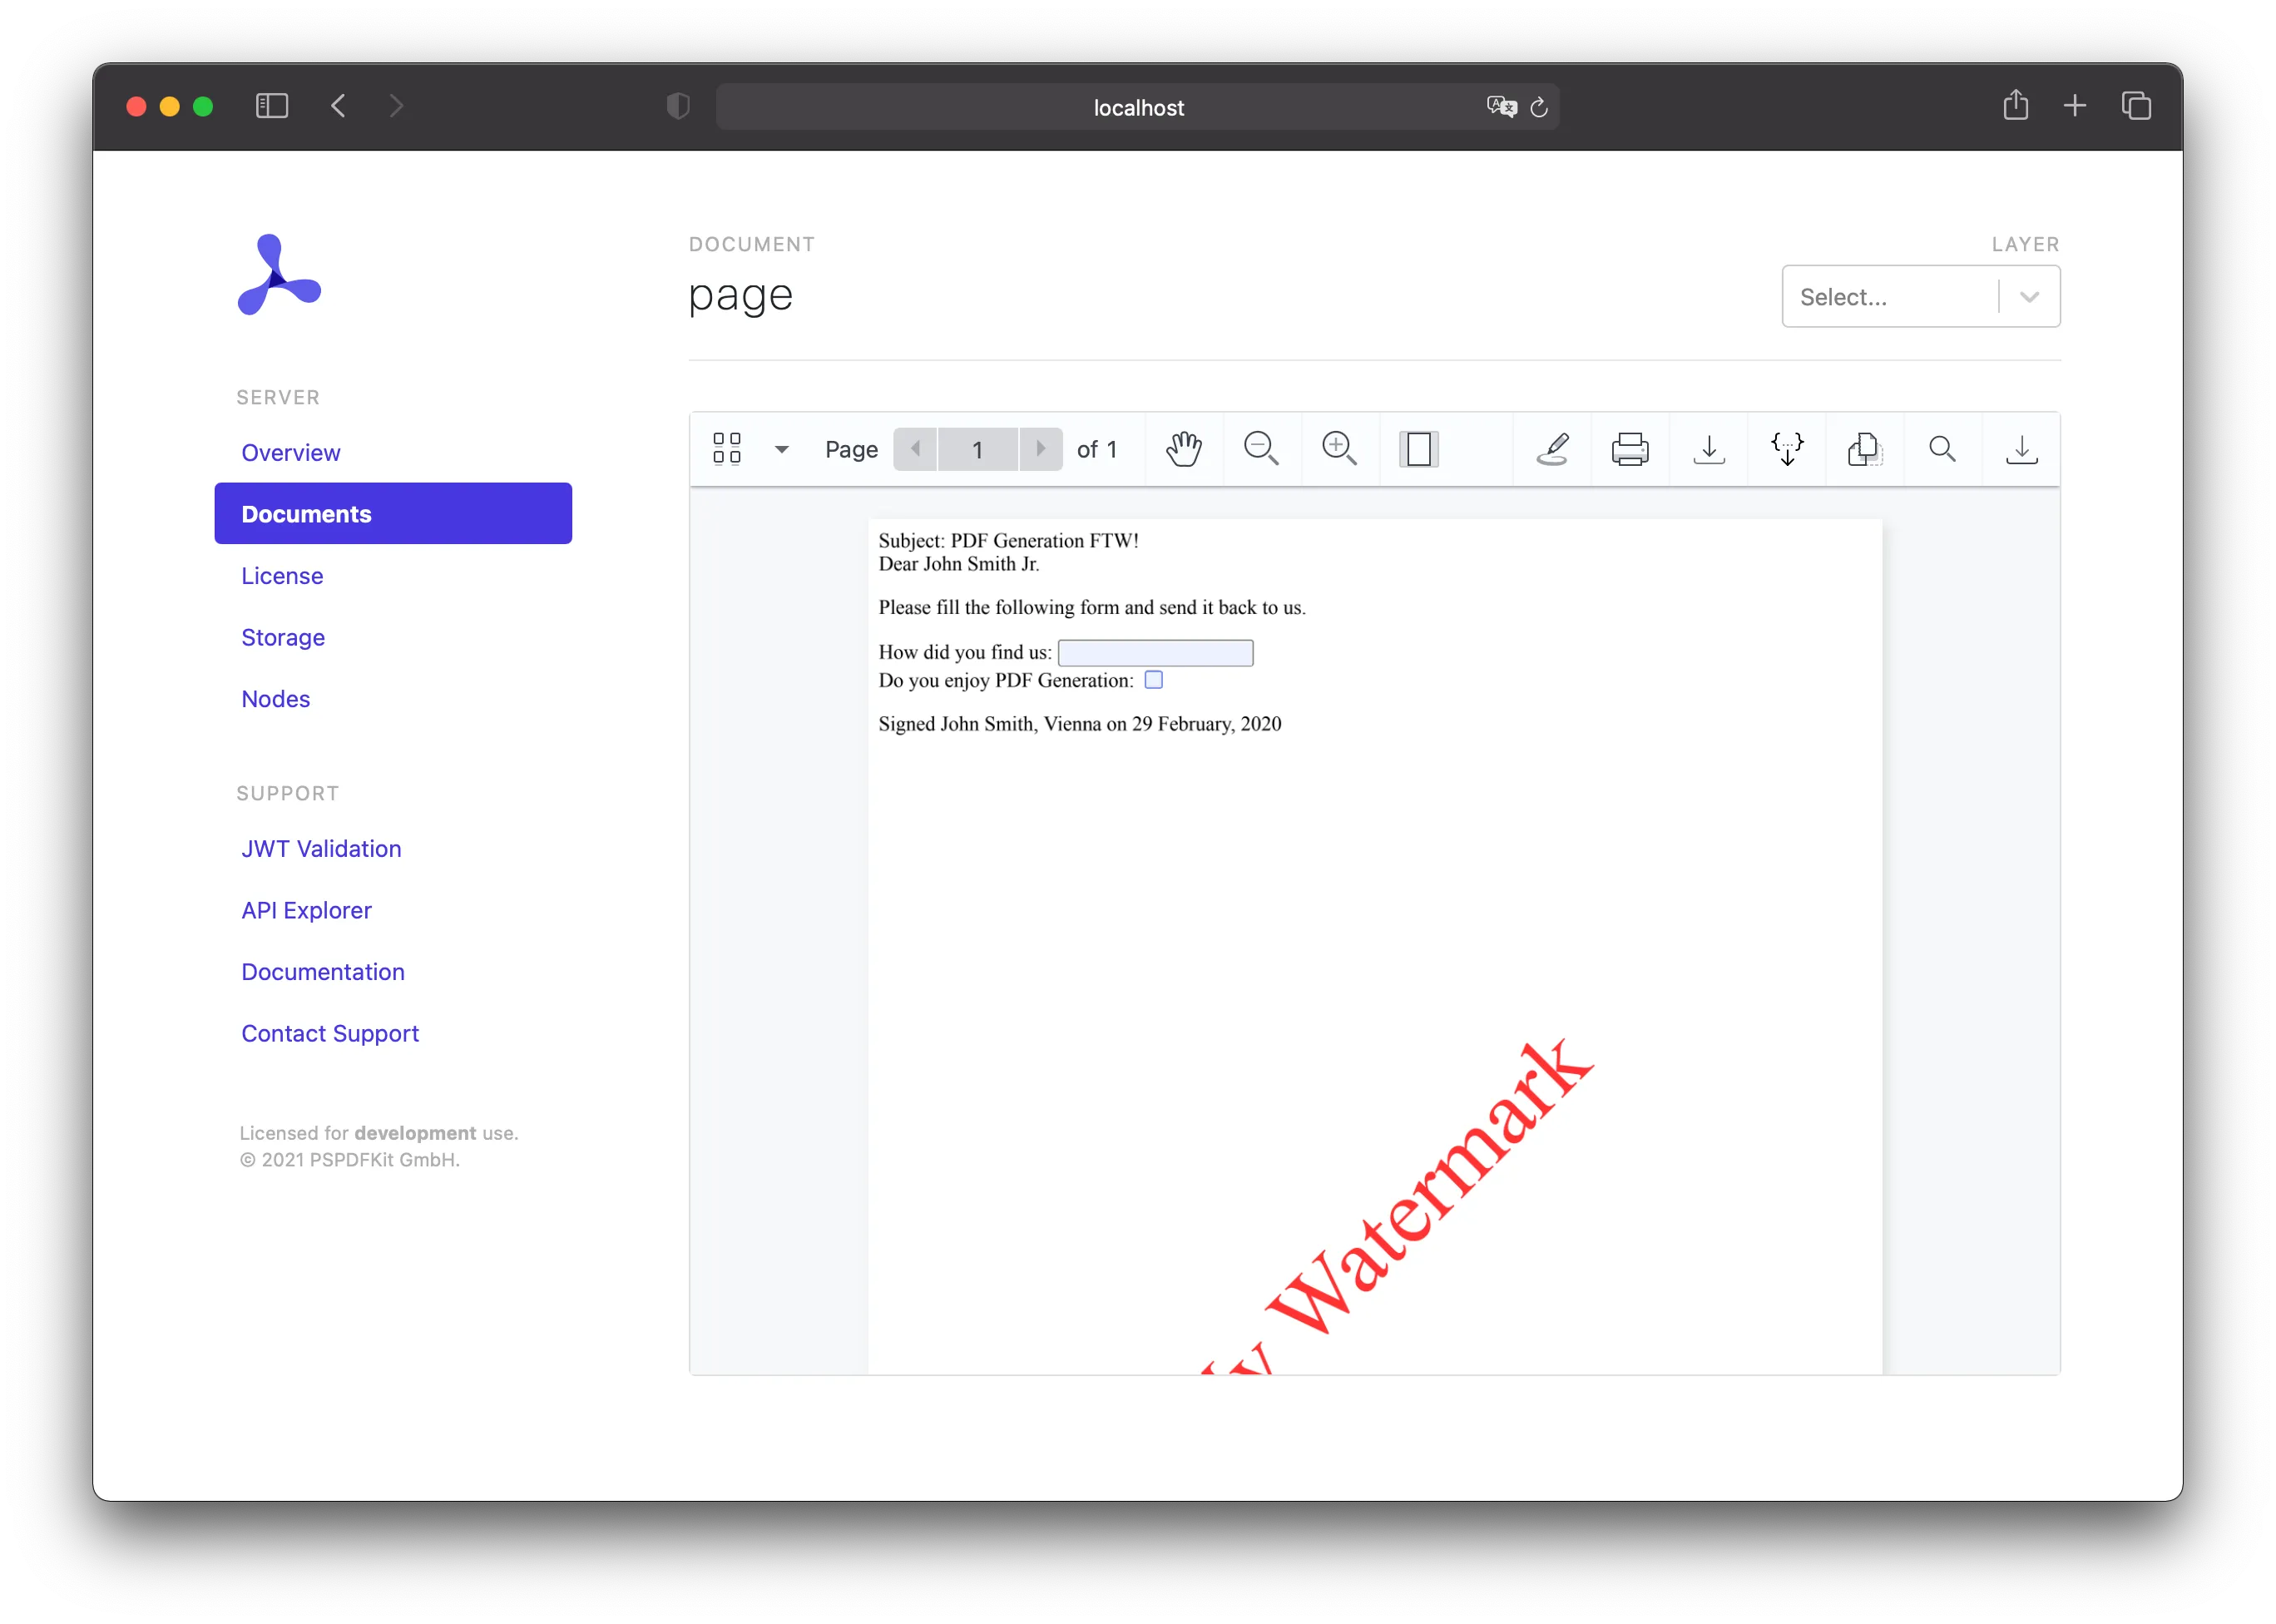
Once you have the basics of PDF generation down, you might want to watermark your PDF. You can do this by including some additional HTML:
<!DOCTYPE html><html> <body> <div style="position: fixed; top: 50%; left: 50%; font-size: 72px; color: red; opacity: 80%; transform: rotate(-45deg); width: 500px; height: 500px; margin-top: -250px; margin-left: -250px; text-align: center; vertical-align: middle; line-height: 500px;"> My Watermark </div> <div class="subject">Subject: PDF Generation FTW!</div> <div>Dear {{name}}<br/></div> <div> <p> Please fill the following form and send it back to us. </p> <p> <label for="where">How did you find us:</label> <input type="text" id="where" name="where" /> </br> <label for="enjoy">Do you enjoy PDF Generation:</label> <input type="checkbox" id="enjoy" name="enjoy" /> </p> </div> <div>Signed John Smith, Vienna on {{date}}</div> </body></html>This element will be rendered on all pages on top of all other content. The HTML above uses some text, but you could also use an image. The watermark can also be positioned any way you want.
Adding a cover page
There are two ways to add a cover page to a PDF you generated: You can generate the cover page as part of the HTML, or you can use a PDF you already have.
Using HTML
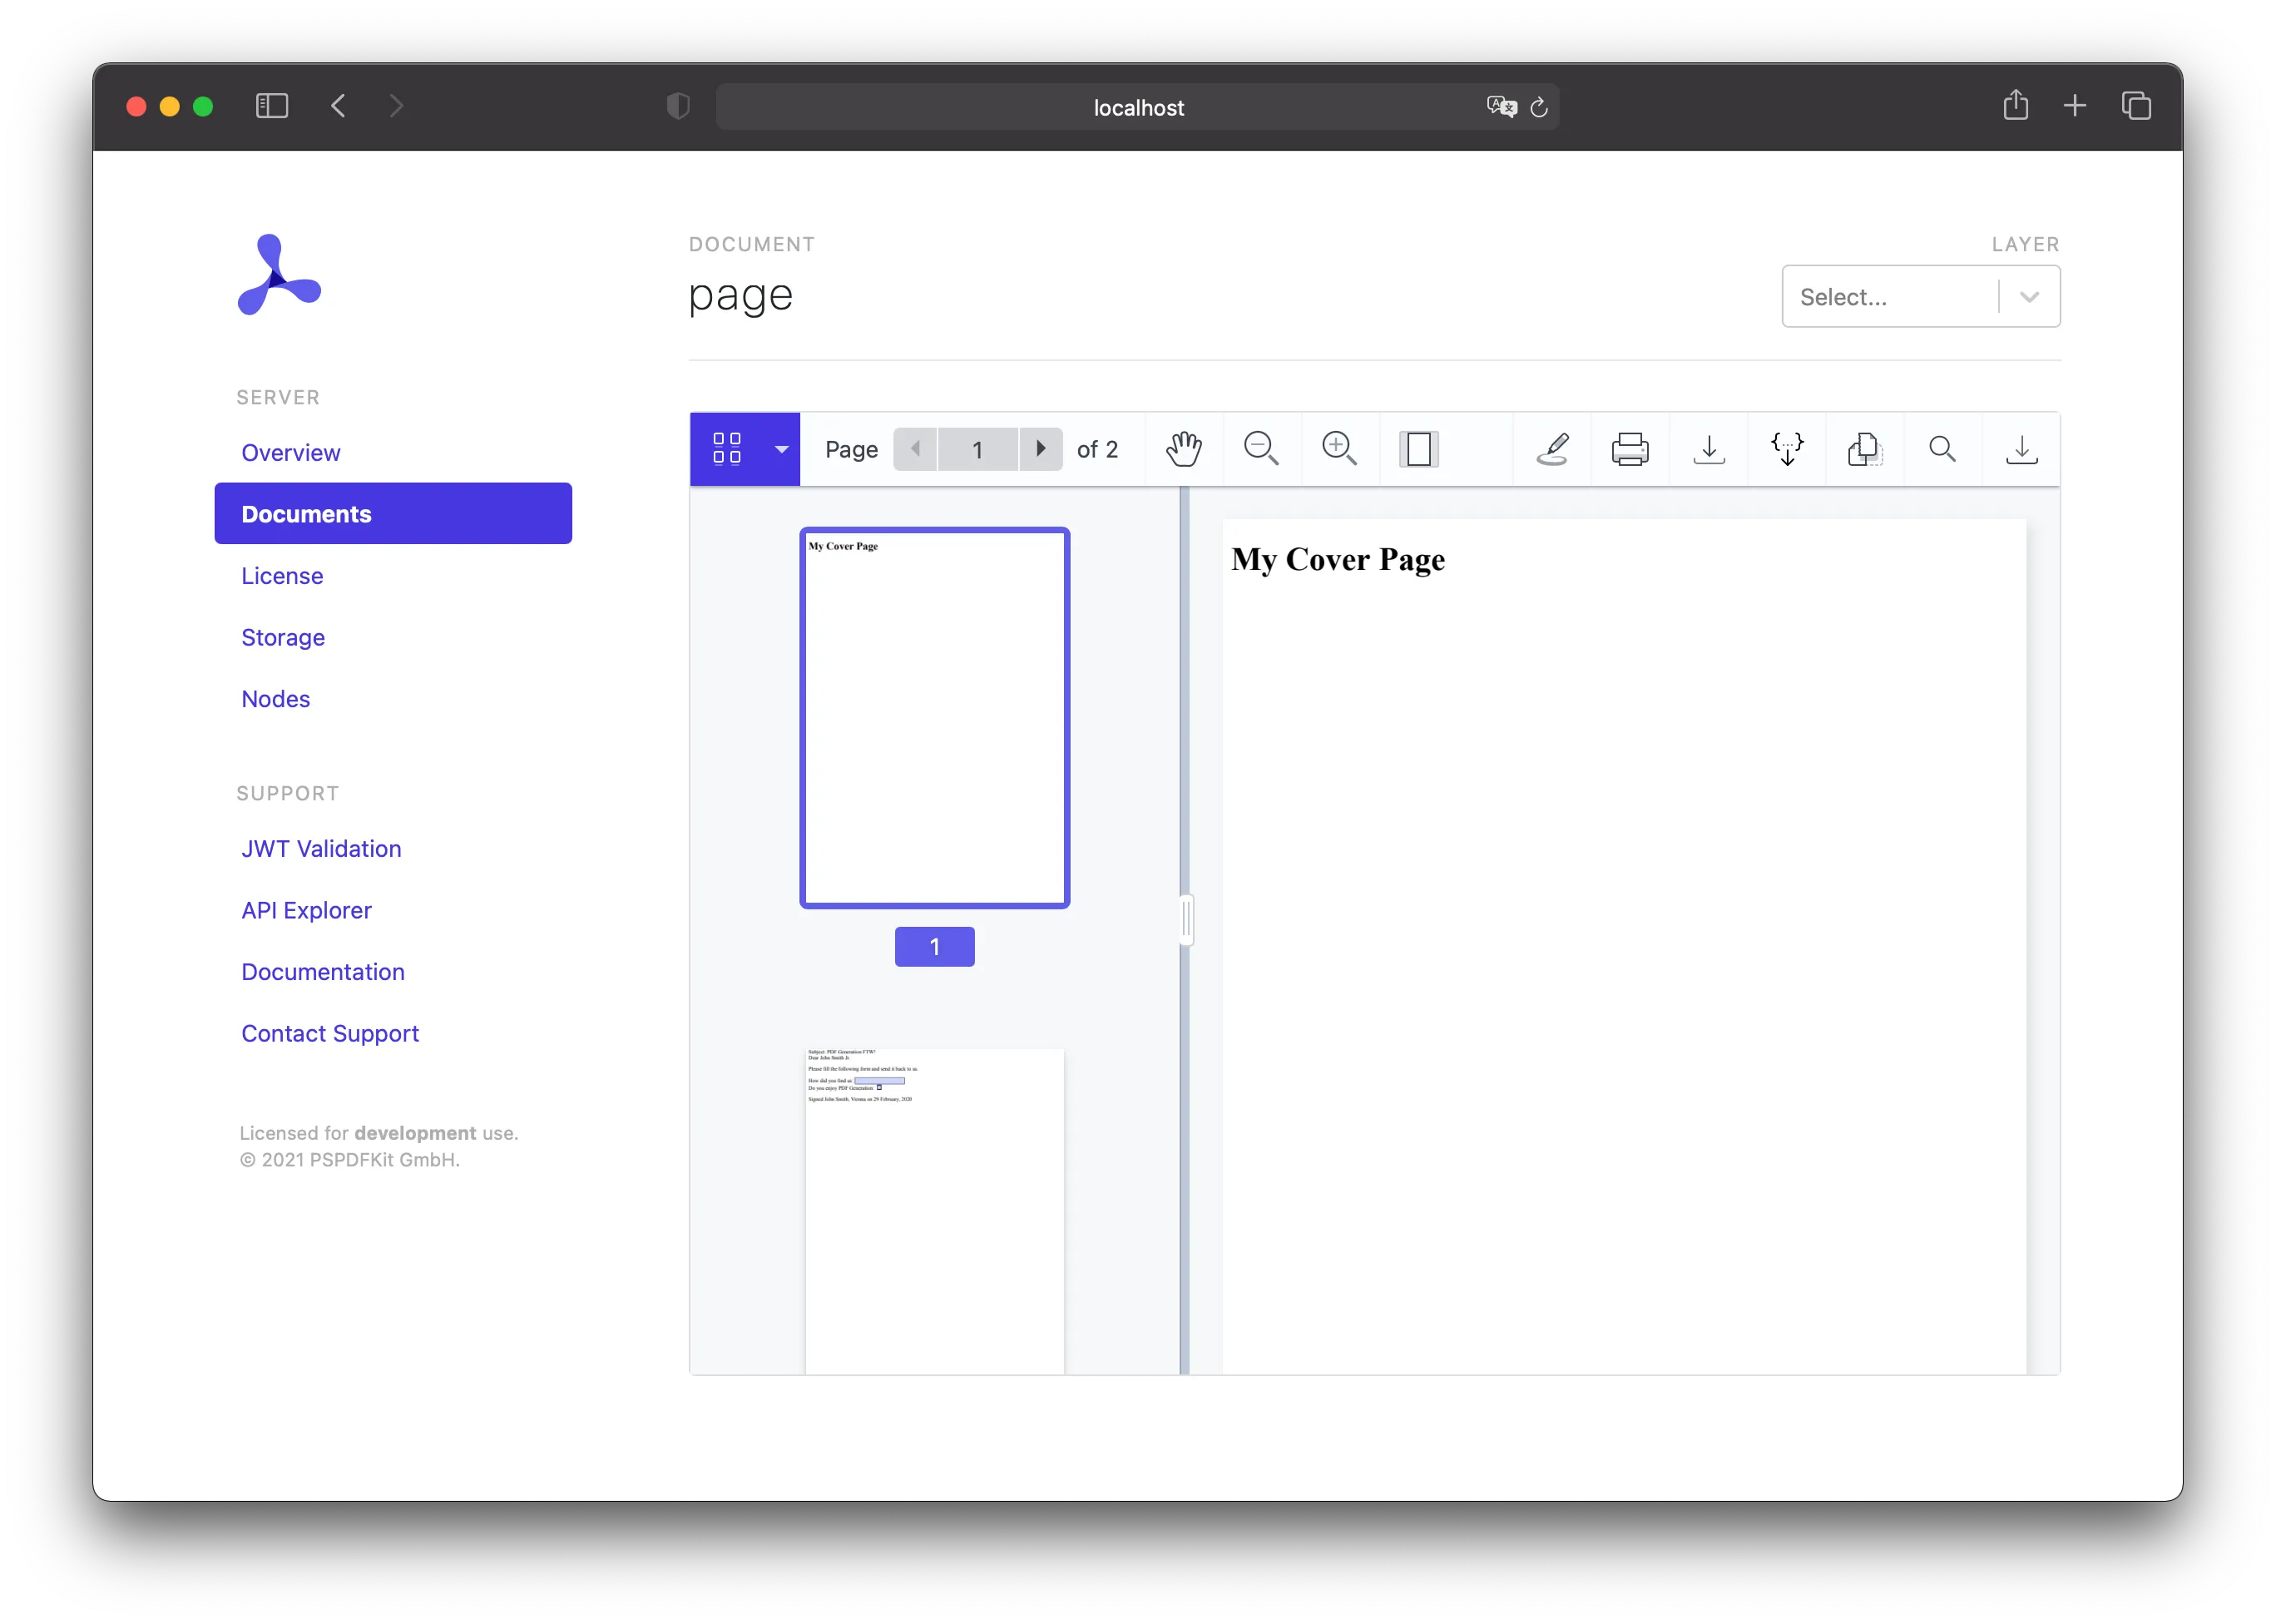
If you want to add a cover page to your generated PDF, you can do so by adding additional HTML:
<!DOCTYPE html><html> <body> <div style="display: block; width: 100%; height: 100%; page-break-after: always;"> <h1>My Cover Page</h1> </div> <div class="subject">Subject: PDF Generation FTW!</div> <div>Dear {{name}}<br/></div> <div> <p> Please fill the following form and send it back to us. </p> <p> <label for="where">How did you find us:</label> <input type="text" id="where" name="where" /> </br> <label for="enjoy">Do you enjoy PDF Generation:</label> <input type="checkbox" id="enjoy" name="enjoy" /> </p> </div> <div>Signed John Smith, Vienna on {{date}}</div> </body></html>This will add another page before the rest of the content, and you can use the new page as your cover page.
Using a PDF
Instead of adding some HTML as a cover page, you can add a PDF. This can be done by applying an importDocument operation on upload:
curl -X POST http://localhost:5000/api/documents \ -H "Authorization: Token token=<API token>" \ -F page.html=@/path/to/page.html \ -F cover.pdf=@/path/to/cover.pdf \ -F generation='{ "html": "page.html"}' \ -F operations='{ "operations": [ { "type": "importDocument", "beforePageIndex": 0, "document": "cover.pdf" } ]}'POST /api/documents HTTP/1.1Content-Type: multipart/form-data; boundary=customboundaryAuthorization: Token token=<API token>
--customboundaryContent-Disposition: form-data; name="page.html"; filename="page.html"Content-Type: text/html
<HTML data>--customboundaryContent-Disposition: form-data; name="cover.pdf"; filename="cover.pdf"Content-Type: application/pdf
<PDF data>--customboundaryContent-Disposition: form-data; name="generation"Content-Type: application/json
{ "html": "page.html"}--customboundaryContent-Disposition: form-data; name="operations"Content-Type: application/json
{ "operations": [ { "type": "importDocument", "beforePageIndex": 0, "document": "cover.pdf" } ]}--customboundary--The provided PDF will be appended before the first page of the HTML, and it’ll serve as your cover page.
PDF Generation allows you to create fillable PDF forms from HTML. In this guide, you’ll create a simple personalized form in Python. You can use the templating language Mustache(opens in a new tab), which allows you to inject data into a previously prepared HTML file. This is how your form will look:
<!DOCTYPE html><html> <body> <div class="subject">Subject: PDF Generation FTW!</div> <div>Dear {{name}}<br/></div> <div> <p> Please fill the following form and send it back to us. </p> <p> <label for="where">How did you find us:</label> <input type="text" id="where" name="where" /> </br> <label for="enjoy">Do you enjoy PDF Generation:</label> <input type="checkbox" id="enjoy" name="enjoy" /> </p> </div> <div>Signed John Smith, Vienna on {{date}}</div> </body></html>First, you need to replace your template data with something real. Define the data to replace the template arguments in code, though in practice, this data may come from an external source or database.
To perform the replacement, you’ll use the Chevron(opens in a new tab) package, which is an implementation of the Mustache(opens in a new tab) templating system.
The following will stream the page.mustache file (the HTML seen above) into Chevron to perform the replacement of {{name}} and {{date}}:
with open('page.mustache', 'r') as f: final_html = chevron.render(f, {'name': 'John Smith Jr.', "date": "29 February, 2020"})Once you’ve created your HTML in Python, send a request to the /api/documents endpoint, sending the PDF Generation schema with the HTML file you just created:
curl -X POST http://localhost:5000/api/documents \ -H "Authorization: Token token=<API token>" \ -F page.html=@/path/to/page.html \ -F generation='{ "html": "page.html"}'POST /api/documents HTTP/1.1Content-Type: multipart/form-data; boundary=customboundaryAuthorization: Token token=<API token>
--customboundaryContent-Disposition: form-data; name="page.html"; filename="page.html"Content-Type: text/html
<HTML data>--customboundaryContent-Disposition: form-data; name="generation"Content-Type: application/json
{ "html": "page.html"}--customboundary--The final PDF will look like this:
Adding watermarks
Once you have the basics of PDF generation down, you might want to watermark your PDF. You can do this by including some additional HTML:
<!DOCTYPE html><html> <body> <div style="position: fixed; top: 50%; left: 50%; font-size: 72px; color: red; opacity: 80%; transform: rotate(-45deg); width: 500px; height: 500px; margin-top: -250px; margin-left: -250px; text-align: center; vertical-align: middle; line-height: 500px;"> My Watermark </div> <div class="subject">Subject: PDF Generation FTW!</div> <div>Dear {{name}}<br/></div> <div> <p> Please fill the following form and send it back to us. </p> <p> <label for="where">How did you find us:</label> <input type="text" id="where" name="where" /> </br> <label for="enjoy">Do you enjoy PDF Generation:</label> <input type="checkbox" id="enjoy" name="enjoy" /> </p> </div> <div>Signed John Smith, Vienna on {{date}}</div> </body></html>This element will be rendered on all pages on top of all other content. The HTML above uses some text, but you could also use an image. The watermark can also be positioned any way you want.
Adding a cover page
There are two ways to add a cover page to a PDF you generated: You can generate the cover page as part of the HTML, or you can use a PDF you already have.
Using HTML
If you want to add a cover page to your generated PDF, you can do so by adding additional HTML:
<!DOCTYPE html><html> <body> <div style="display: block; width: 100%; height: 100%; page-break-after: always;"> <h1>My Cover Page</h1> </div> <div class="subject">Subject: PDF Generation FTW!</div> <div>Dear {{name}}<br/></div> <div> <p> Please fill the following form and send it back to us. </p> <p> <label for="where">How did you find us:</label> <input type="text" id="where" name="where" /> </br> <label for="enjoy">Do you enjoy PDF Generation:</label> <input type="checkbox" id="enjoy" name="enjoy" /> </p> </div> <div>Signed John Smith, Vienna on {{date}}</div> </body></html>This will add another page before the rest of the content, and you can use the new page as your cover page.
Using a PDF
Instead of adding some HTML as a cover page, you can add a PDF. This can be done by applying an importDocument operation on upload:
curl -X POST http://localhost:5000/api/documents \ -H "Authorization: Token token=<API token>" \ -F page.html=@/path/to/page.html \ -F cover.pdf=@/path/to/cover.pdf \ -F generation='{ "html": "page.html"}' \ -F operations='{ "operations": [ { "type": "importDocument", "beforePageIndex": 0, "document": "cover.pdf" } ]}'POST /api/documents HTTP/1.1Content-Type: multipart/form-data; boundary=customboundaryAuthorization: Token token=<API token>
--customboundaryContent-Disposition: form-data; name="page.html"; filename="page.html"Content-Type: text/html
<HTML data>--customboundaryContent-Disposition: form-data; name="cover.pdf"; filename="cover.pdf"Content-Type: application/pdf
<PDF data>--customboundaryContent-Disposition: form-data; name="generation"Content-Type: application/json
{ "html": "page.html"}--customboundaryContent-Disposition: form-data; name="operations"Content-Type: application/json
{ "operations": [ { "type": "importDocument", "beforePageIndex": 0, "document": "cover.pdf" } ]}--customboundary--The provided PDF will be appended before the first page of the HTML, and it’ll serve as your cover page.
PDF Generation allows you to create fillable PDF forms from HTML. In this guide, you’ll create a simple personalized form in Java. You can use the templating language Mustache(opens in a new tab), which allows you to inject data into a previously prepared HTML file. This is how your form will look:
<!DOCTYPE html><html> <body> <div class="subject">Subject: PDF Generation FTW!</div> <div>Dear {{name}}<br/></div> <div> <p> Please fill the following form and send it back to us. </p> <p> <label for="where">How did you find us:</label> <input type="text" id="where" name="where" /> </br> <label for="enjoy">Do you enjoy PDF Generation:</label> <input type="checkbox" id="enjoy" name="enjoy" /> </p> </div> <div>Signed John Smith, Vienna on {{date}}</div> </body></html>First, you need to replace your template data with something real. Define the data to replace the template arguments in code, though in practice, this data may come from an external source or database.
To perform the replacement, you’ll use the Mustache.java(opens in a new tab) package, which is an implementation of the Mustache(opens in a new tab) templating system.
The following will stream the page.mustache file from the resources (the HTML seen above) into Mustache to replace {{name}} and {{date}}, and the result will be written to stringWriter:
HashMap<String, Object> scopes = new HashMap<>();scopes.put("name", "John Smith Jr.");scopes.put("date", "29 February, 2020");
InputStream is = Main.class.getClassLoader().getResourceAsStream("assets/page.mustache");InputStreamReader mustacheFile = new InputStreamReader(is);
StringWriter stringWriter = new StringWriter();MustacheFactory mf = new DefaultMustacheFactory();Mustache mustache = mf.compile(mustacheFile, "example");mustache.execute(stringWriter, scopes);
Once you’ve created your HTML in Java, send a request to the /api/documents endpoint, sending the PDF Generation schema with the HTML file you just created:
curl -X POST http://localhost:5000/api/documents \ -H "Authorization: Token token=<API token>" \ -F page.html=@/path/to/page.html \ -F generation='{ "html": "page.html"}'POST /api/documents HTTP/1.1Content-Type: multipart/form-data; boundary=customboundaryAuthorization: Token token=<API token>
--customboundaryContent-Disposition: form-data; name="page.html"; filename="page.html"Content-Type: text/html
<HTML data>--customboundaryContent-Disposition: form-data; name="generation"Content-Type: application/json
{ "html": "page.html"}--customboundary--The final PDF will look like this:
Adding watermarks
Once you have the basics of PDF generation down, you might want to watermark your PDF. You can do this by including some additional HTML:
<!DOCTYPE html><html> <body> <div style="position: fixed; top: 50%; left: 50%; font-size: 72px; color: red; opacity: 80%; transform: rotate(-45deg); width: 500px; height: 500px; margin-top: -250px; margin-left: -250px; text-align: center; vertical-align: middle; line-height: 500px;"> My Watermark </div> <div class="subject">Subject: PDF Generation FTW!</div> <div>Dear {{name}}<br/></div> <div> <p> Please fill the following form and send it back to us. </p> <p> <label for="where">How did you find us:</label> <input type="text" id="where" name="where" /> </br> <label for="enjoy">Do you enjoy PDF Generation:</label> <input type="checkbox" id="enjoy" name="enjoy" /> </p> </div> <div>Signed John Smith, Vienna on {{date}}</div> </body></html>This element will be rendered on all pages on top of all other content. The HTML above uses some text, but you could also use an image. The watermark can also be positioned any way you want.
Adding a cover page
There are two ways to add a cover page to a PDF you generated: You can generate the cover page as part of the HTML, or you can use a PDF you already have.
Using HTML
If you want to add a cover page to your generated PDF, you can do so by adding additional HTML:
<!DOCTYPE html><html> <body> <div style="display: block; width: 100%; height: 100%; page-break-after: always;"> <h1>My Cover Page</h1> </div> <div class="subject">Subject: PDF Generation FTW!</div> <div>Dear {{name}}<br/></div> <div> <p> Please fill the following form and send it back to us. </p> <p> <label for="where">How did you find us:</label> <input type="text" id="where" name="where" /> </br> <label for="enjoy">Do you enjoy PDF Generation:</label> <input type="checkbox" id="enjoy" name="enjoy" /> </p> </div> <div>Signed John Smith, Vienna on {{date}}</div> </body></html>This will add another page before the rest of the content, and you can use the new page as your cover page.
Using a PDF
Instead of adding some HTML as a cover page, you can add a PDF. This can be done by applying an importDocument operation on upload:
curl -X POST http://localhost:5000/api/documents \ -H "Authorization: Token token=<API token>" \ -F page.html=@/path/to/page.html \ -F cover.pdf=@/path/to/cover.pdf \ -F generation='{ "html": "page.html"}' \ -F operations='{ "operations": [ { "type": "importDocument", "beforePageIndex": 0, "document": "cover.pdf" } ]}'POST /api/documents HTTP/1.1Content-Type: multipart/form-data; boundary=customboundaryAuthorization: Token token=<API token>
--customboundaryContent-Disposition: form-data; name="page.html"; filename="page.html"Content-Type: text/html
<HTML data>--customboundaryContent-Disposition: form-data; name="cover.pdf"; filename="cover.pdf"Content-Type: application/pdf
<PDF data>--customboundaryContent-Disposition: form-data; name="generation"Content-Type: application/json
{ "html": "page.html"}--customboundaryContent-Disposition: form-data; name="operations"Content-Type: application/json
{ "operations": [ { "type": "importDocument", "beforePageIndex": 0, "document": "cover.pdf" } ]}--customboundary--The provided PDF will be appended before the first page of the HTML, and it’ll serve as your cover page.
PDF Generation allows you to create fillable PDF forms from HTML. In this guide, you’ll create a simple personalized form in C#/.NET. You can use the templating language Mustache(opens in a new tab), which allows you to inject data into a previously prepared HTML file. This is how your form will look:
<!DOCTYPE html><html> <body> <div class="subject">Subject: PDF Generation FTW!</div> <div>Dear {{name}}<br/></div> <div> <p> Please fill the following form and send it back to us. </p> <p> <label for="where">How did you find us:</label> <input type="text" id="where" name="where" /> </br> <label for="enjoy">Do you enjoy PDF Generation:</label> <input type="checkbox" id="enjoy" name="enjoy" /> </p> </div> <div>Signed John Smith, Vienna on {{date}}</div> </body></html>First, you need to replace your template data with something real. Define the data to replace the template arguments in code, though in practice, this data may come from an external source or database.
To perform the replacement, you’ll use the Stubble(opens in a new tab) package, which is an implementation of the Mustache(opens in a new tab) templating system.
The following will stream the page.mustache file (the HTML seen above) into Stubble to replace {{name}} and {{date}} with replacementData:
var stubble = new StubbleBuilder().Build();
var replacementData = new Dictionary<string, object>{    {        "name", "John Smith"    },    {        "date", "29 February, 2020"    }};
using var streamReader = new StreamReader("page.mustache");var finalHtml = await stubble.RenderAsync(await streamReader.ReadToEndAsync(), replacementData);
Once you’ve created your HTML in C#/.NET, send a request to the /api/documents endpoint, sending the PDF Generation schema with the HTML file you just created:
curl -X POST http://localhost:5000/api/documents \ -H "Authorization: Token token=<API token>" \ -F page.html=@/path/to/page.html \ -F generation='{ "html": "page.html"}'POST /api/documents HTTP/1.1Content-Type: multipart/form-data; boundary=customboundaryAuthorization: Token token=<API token>
--customboundaryContent-Disposition: form-data; name="page.html"; filename="page.html"Content-Type: text/html
<HTML data>--customboundaryContent-Disposition: form-data; name="generation"Content-Type: application/json
{ "html": "page.html"}--customboundary--The final PDF will look like this:
Adding watermarks
Once you have the basics of PDF generation down, you might want to watermark your PDF. You can do this by including some additional HTML:
<!DOCTYPE html><html> <body> <div style="position: fixed; top: 50%; left: 50%; font-size: 72px; color: red; opacity: 80%; transform: rotate(-45deg); width: 500px; height: 500px; margin-top: -250px; margin-left: -250px; text-align: center; vertical-align: middle; line-height: 500px;"> My Watermark </div> <div class="subject">Subject: PDF Generation FTW!</div> <div>Dear {{name}}<br/></div> <div> <p> Please fill the following form and send it back to us. </p> <p> <label for="where">How did you find us:</label> <input type="text" id="where" name="where" /> </br> <label for="enjoy">Do you enjoy PDF Generation:</label> <input type="checkbox" id="enjoy" name="enjoy" /> </p> </div> <div>Signed John Smith, Vienna on {{date}}</div> </body></html>This element will be rendered on all pages on top of all other content. The HTML above uses some text, but you could also use an image. The watermark can also be positioned any way you want.
Adding a cover page
There are two ways to add a cover page to a PDF you generated: You can generate the cover page as part of the HTML, or you can use a PDF you already have.
Using HTML
If you want to add a cover page to your generated PDF, you can do so by adding additional HTML:
<!DOCTYPE html><html> <body> <div style="display: block; width: 100%; height: 100%; page-break-after: always;"> <h1>My Cover Page</h1> </div> <div class="subject">Subject: PDF Generation FTW!</div> <div>Dear {{name}}<br/></div> <div> <p> Please fill the following form and send it back to us. </p> <p> <label for="where">How did you find us:</label> <input type="text" id="where" name="where" /> </br> <label for="enjoy">Do you enjoy PDF Generation:</label> <input type="checkbox" id="enjoy" name="enjoy" /> </p> </div> <div>Signed John Smith, Vienna on {{date}}</div> </body></html>This will add another page before the rest of the content, and you can use the new page as your cover page.
Using a PDF
Instead of adding some HTML as a cover page, you can add a PDF. This can be done by applying an importDocument operation on upload:
curl -X POST http://localhost:5000/api/documents \ -H "Authorization: Token token=<API token>" \ -F page.html=@/path/to/page.html \ -F cover.pdf=@/path/to/cover.pdf \ -F generation='{ "html": "page.html"}' \ -F operations='{ "operations": [ { "type": "importDocument", "beforePageIndex": 0, "document": "cover.pdf" } ]}'POST /api/documents HTTP/1.1Content-Type: multipart/form-data; boundary=customboundaryAuthorization: Token token=<API token>
--customboundaryContent-Disposition: form-data; name="page.html"; filename="page.html"Content-Type: text/html
<HTML data>--customboundaryContent-Disposition: form-data; name="cover.pdf"; filename="cover.pdf"Content-Type: application/pdf
<PDF data>--customboundaryContent-Disposition: form-data; name="generation"Content-Type: application/json
{ "html": "page.html"}--customboundaryContent-Disposition: form-data; name="operations"Content-Type: application/json
{ "operations": [ { "type": "importDocument", "beforePageIndex": 0, "document": "cover.pdf" } ]}--customboundary--The provided PDF will be appended before the first page of the HTML, and it’ll serve as your cover page.
PDF Generation allows you to create fillable PDF forms from HTML. In this guide, you’ll create a simple personalized form in PHP. You can use the templating language Mustache(opens in a new tab), which allows you to inject data into a previously prepared HTML file. This is how your form will look:
<!DOCTYPE html><html> <body> <div class="subject">Subject: PDF Generation FTW!</div> <div>Dear {{name}}<br/></div> <div> <p> Please fill the following form and send it back to us. </p> <p> <label for="where">How did you find us:</label> <input type="text" id="where" name="where" /> </br> <label for="enjoy">Do you enjoy PDF Generation:</label> <input type="checkbox" id="enjoy" name="enjoy" /> </p> </div> <div>Signed John Smith, Vienna on {{date}}</div> </body></html>First, you need to replace your template data with something real. Define the data to replace the template arguments in code, though in practice, this data may come from an external source or database.
To perform the replacement, you’ll use the Mustache.php(opens in a new tab) package, which is an implementation of the Mustache(opens in a new tab) templating system.
The following will open the page.mustache file (the HTML seen above) from the views directory as a template and then call render to perform the replacement of {{name}} and {{date}}, which is echoed to the command line:
$mustache = new Mustache_Engine(array( 'entity_flags' => ENT_QUOTES, 'loader' => new Mustache_Loader_FilesystemLoader(dirname(__FILE__).'/views')));$tpl = $mustache->loadTemplate('page');echo $tpl->render(array('name' => 'John Smith', 'date' => '29 February, 2020'));Once you’ve created your HTML in PHP, send a request to the /api/documents endpoint, sending the PDF Generation schema with the HTML file you just created:
curl -X POST http://localhost:5000/api/documents \ -H "Authorization: Token token=<API token>" \ -F page.html=@/path/to/page.html \ -F generation='{ "html": "page.html"}'POST /api/documents HTTP/1.1Content-Type: multipart/form-data; boundary=customboundaryAuthorization: Token token=<API token>
--customboundaryContent-Disposition: form-data; name="page.html"; filename="page.html"Content-Type: text/html
<HTML data>--customboundaryContent-Disposition: form-data; name="generation"Content-Type: application/json
{ "html": "page.html"}--customboundary--The final PDF will look like this:
Adding watermarks
Once you have the basics of PDF generation down, you might want to watermark your PDF. You can do this by including some additional HTML:
<!DOCTYPE html><html> <body> <div style="position: fixed; top: 50%; left: 50%; font-size: 72px; color: red; opacity: 80%; transform: rotate(-45deg); width: 500px; height: 500px; margin-top: -250px; margin-left: -250px; text-align: center; vertical-align: middle; line-height: 500px;"> My Watermark </div> <div class="subject">Subject: PDF Generation FTW!</div> <div>Dear {{name}}<br/></div> <div> <p> Please fill the following form and send it back to us. </p> <p> <label for="where">How did you find us:</label> <input type="text" id="where" name="where" /> </br> <label for="enjoy">Do you enjoy PDF Generation:</label> <input type="checkbox" id="enjoy" name="enjoy" /> </p> </div> <div>Signed John Smith, Vienna on {{date}}</div> </body></html>This element will be rendered on all pages on top of all other content. The HTML above uses some text, but you could also use an image. The watermark can also be positioned any way you want.
Adding a cover page
There are two ways to add a cover page to a PDF you generated: You can generate the cover page as part of the HTML, or you can use a PDF you already have.
Using HTML
If you want to add a cover page to your generated PDF, you can do so by adding additional HTML:
<!DOCTYPE html><html> <body> <div style="display: block; width: 100%; height: 100%; page-break-after: always;"> <h1>My Cover Page</h1> </div> <div class="subject">Subject: PDF Generation FTW!</div> <div>Dear {{name}}<br/></div> <div> <p> Please fill the following form and send it back to us. </p> <p> <label for="where">How did you find us:</label> <input type="text" id="where" name="where" /> </br> <label for="enjoy">Do you enjoy PDF Generation:</label> <input type="checkbox" id="enjoy" name="enjoy" /> </p> </div> <div>Signed John Smith, Vienna on {{date}}</div> </body></html>This will add another page before the rest of the content, and you can use the new page as your cover page.
Using a PDF
Instead of adding some HTML as a cover page, you can add a PDF. This can be done by applying an importDocument operation on upload:
curl -X POST http://localhost:5000/api/documents \ -H "Authorization: Token token=<API token>" \ -F page.html=@/path/to/page.html \ -F cover.pdf=@/path/to/cover.pdf \ -F generation='{ "html": "page.html"}' \ -F operations='{ "operations": [ { "type": "importDocument", "beforePageIndex": 0, "document": "cover.pdf" } ]}'POST /api/documents HTTP/1.1Content-Type: multipart/form-data; boundary=customboundaryAuthorization: Token token=<API token>
--customboundaryContent-Disposition: form-data; name="page.html"; filename="page.html"Content-Type: text/html
<HTML data>--customboundaryContent-Disposition: form-data; name="cover.pdf"; filename="cover.pdf"Content-Type: application/pdf
<PDF data>--customboundaryContent-Disposition: form-data; name="generation"Content-Type: application/json
{ "html": "page.html"}--customboundaryContent-Disposition: form-data; name="operations"Content-Type: application/json
{ "operations": [ { "type": "importDocument", "beforePageIndex": 0, "document": "cover.pdf" } ]}--customboundary--The provided PDF will be appended before the first page of the HTML, and it’ll serve as your cover page.