


Adding annotations in Swift with PDFKit vs. Nutrient
Table of contents

This guide compares Apple’s PDFKit and Nutrient for adding annotations in Swift. It provides detailed code examples for creating free text, ink, and form field annotations, while also highlighting how Nutrient offers a richer user interface (UI) and more complete documentation than PDFKit’s basic annotation support.
Apple’s PDFKit supports a variety of basic annotation types out of the box, but it doesn’t support other ones, like image annotations, which were covered in a previous blog post. However, this blog post will talk about the annotation types PDFKit does support and how they compare to the ones at Nutrient.
Getting started
For the upcoming examples, you first need a PDF document. You can either use an already existing one, or you can create a new one with PDFKit. Creating a new PDF with PDFKit is explained in our Creating a PDF in Swift blog post. The sample project for this can be downloaded here.
Creating a free text annotation
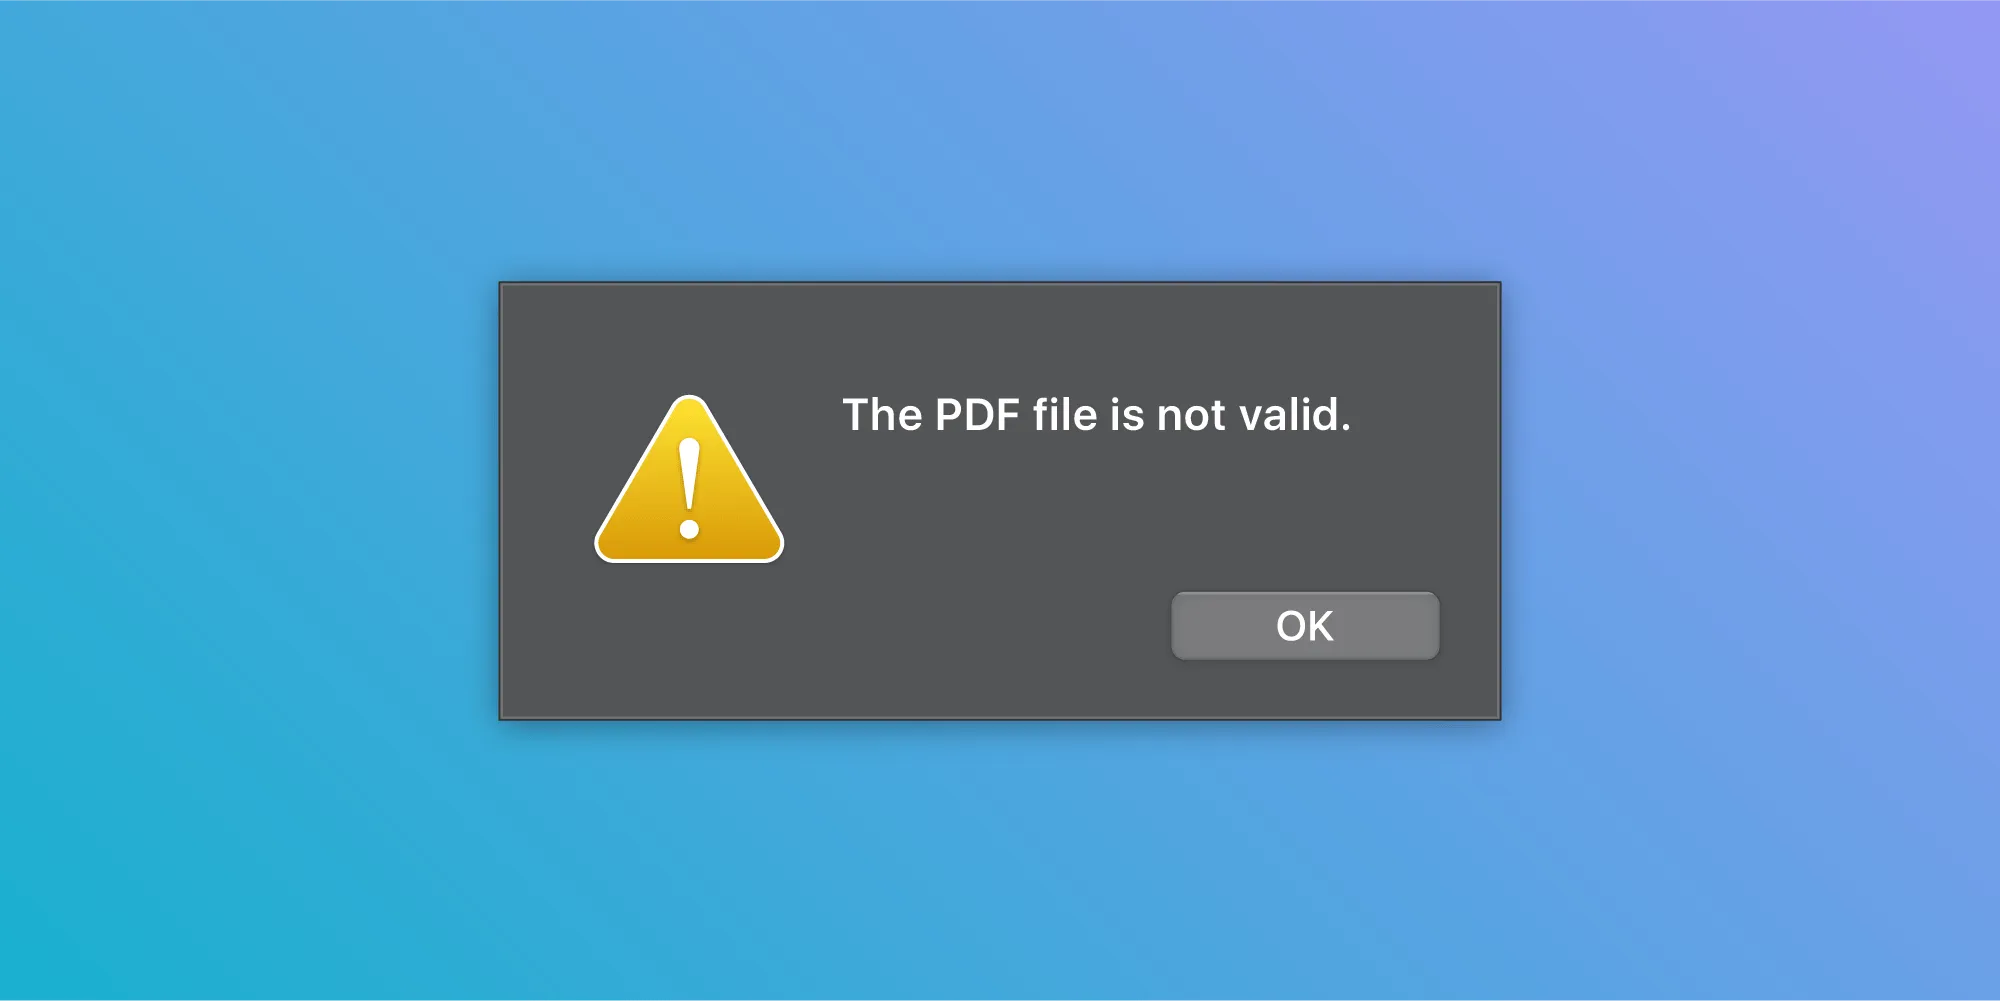
Start with something simple: a basic free text annotation. It’s mainly used for taking notes on a PDF or adding additional information on a page.
Adding some text to a PDF can’t be that hard, right? Here’s an example:
let freeTextAnnotation = PDFAnnotation(bounds: CGRect(x: 200, y: 400, width: 200, height: 50), forType: .freeText, withProperties: nil)
freeTextAnnotation.fontColor = .red// We need to set this to clear, otherwise the background will be yellow by default.freeTextAnnotation.color = .clearfreeTextAnnotation.contents = "Free Text"freeTextAnnotation.font = .systemFont(ofSize: 40)
pdfView?.currentPage?.addAnnotation(freeTextAnnotation)
In the code above, you created a PDFAnnotation(opens in a new tab) for the freeText(opens in a new tab) type, and then you customized its appearance a bit and set the contents of the annotation, which is the text displayed in the free text annotation.
One thing that’s a bit weird is that the background color of the free text annotation is yellow by default, which is fine when wanting to highlight the annotation. However, in most cases, this is probably not the desired effect, so setting it to .clear will give you a nice and neutral result.
This is how it’s done in Nutrient:
  let freeTextAnnotation = FreeTextAnnotation(contents: "Free Text")
  freeTextAnnotation.textBoundingBox = CGRect(x: 200, y: 400, width: 200, height: 50)  freeTextAnnotation.color = .red  freeTextAnnotation.fontSize = 40  // Set the `pageIndex` for the annotation to specify on which page  // it should be added. This defaults to the first page of the document.  freeTextAnnotation.pageIndex = 0
  document.add(annotations: [freeTextAnnotation], options: nil)
At first glance, there isn’t much difference between the above and what PDFKit does, except that you can initialize your free text annotation with your contents, while PDFKit lets you initialize it with the bounding box. The background color for your free text annotation defaults to .clear, so there aren’t any changes to make there. To control on which page of the document the annotation is added, you can set the pageIndex property. This defaults to 0, which is the first page of the document. You also can’t edit the free text annotation in PDFKit, while there’s UI for that in Nutrient. All in all, the setup is similar, with only minor differences.
Here’s how they look on a device:
| PDFKit | Nutrient |
|---|---|
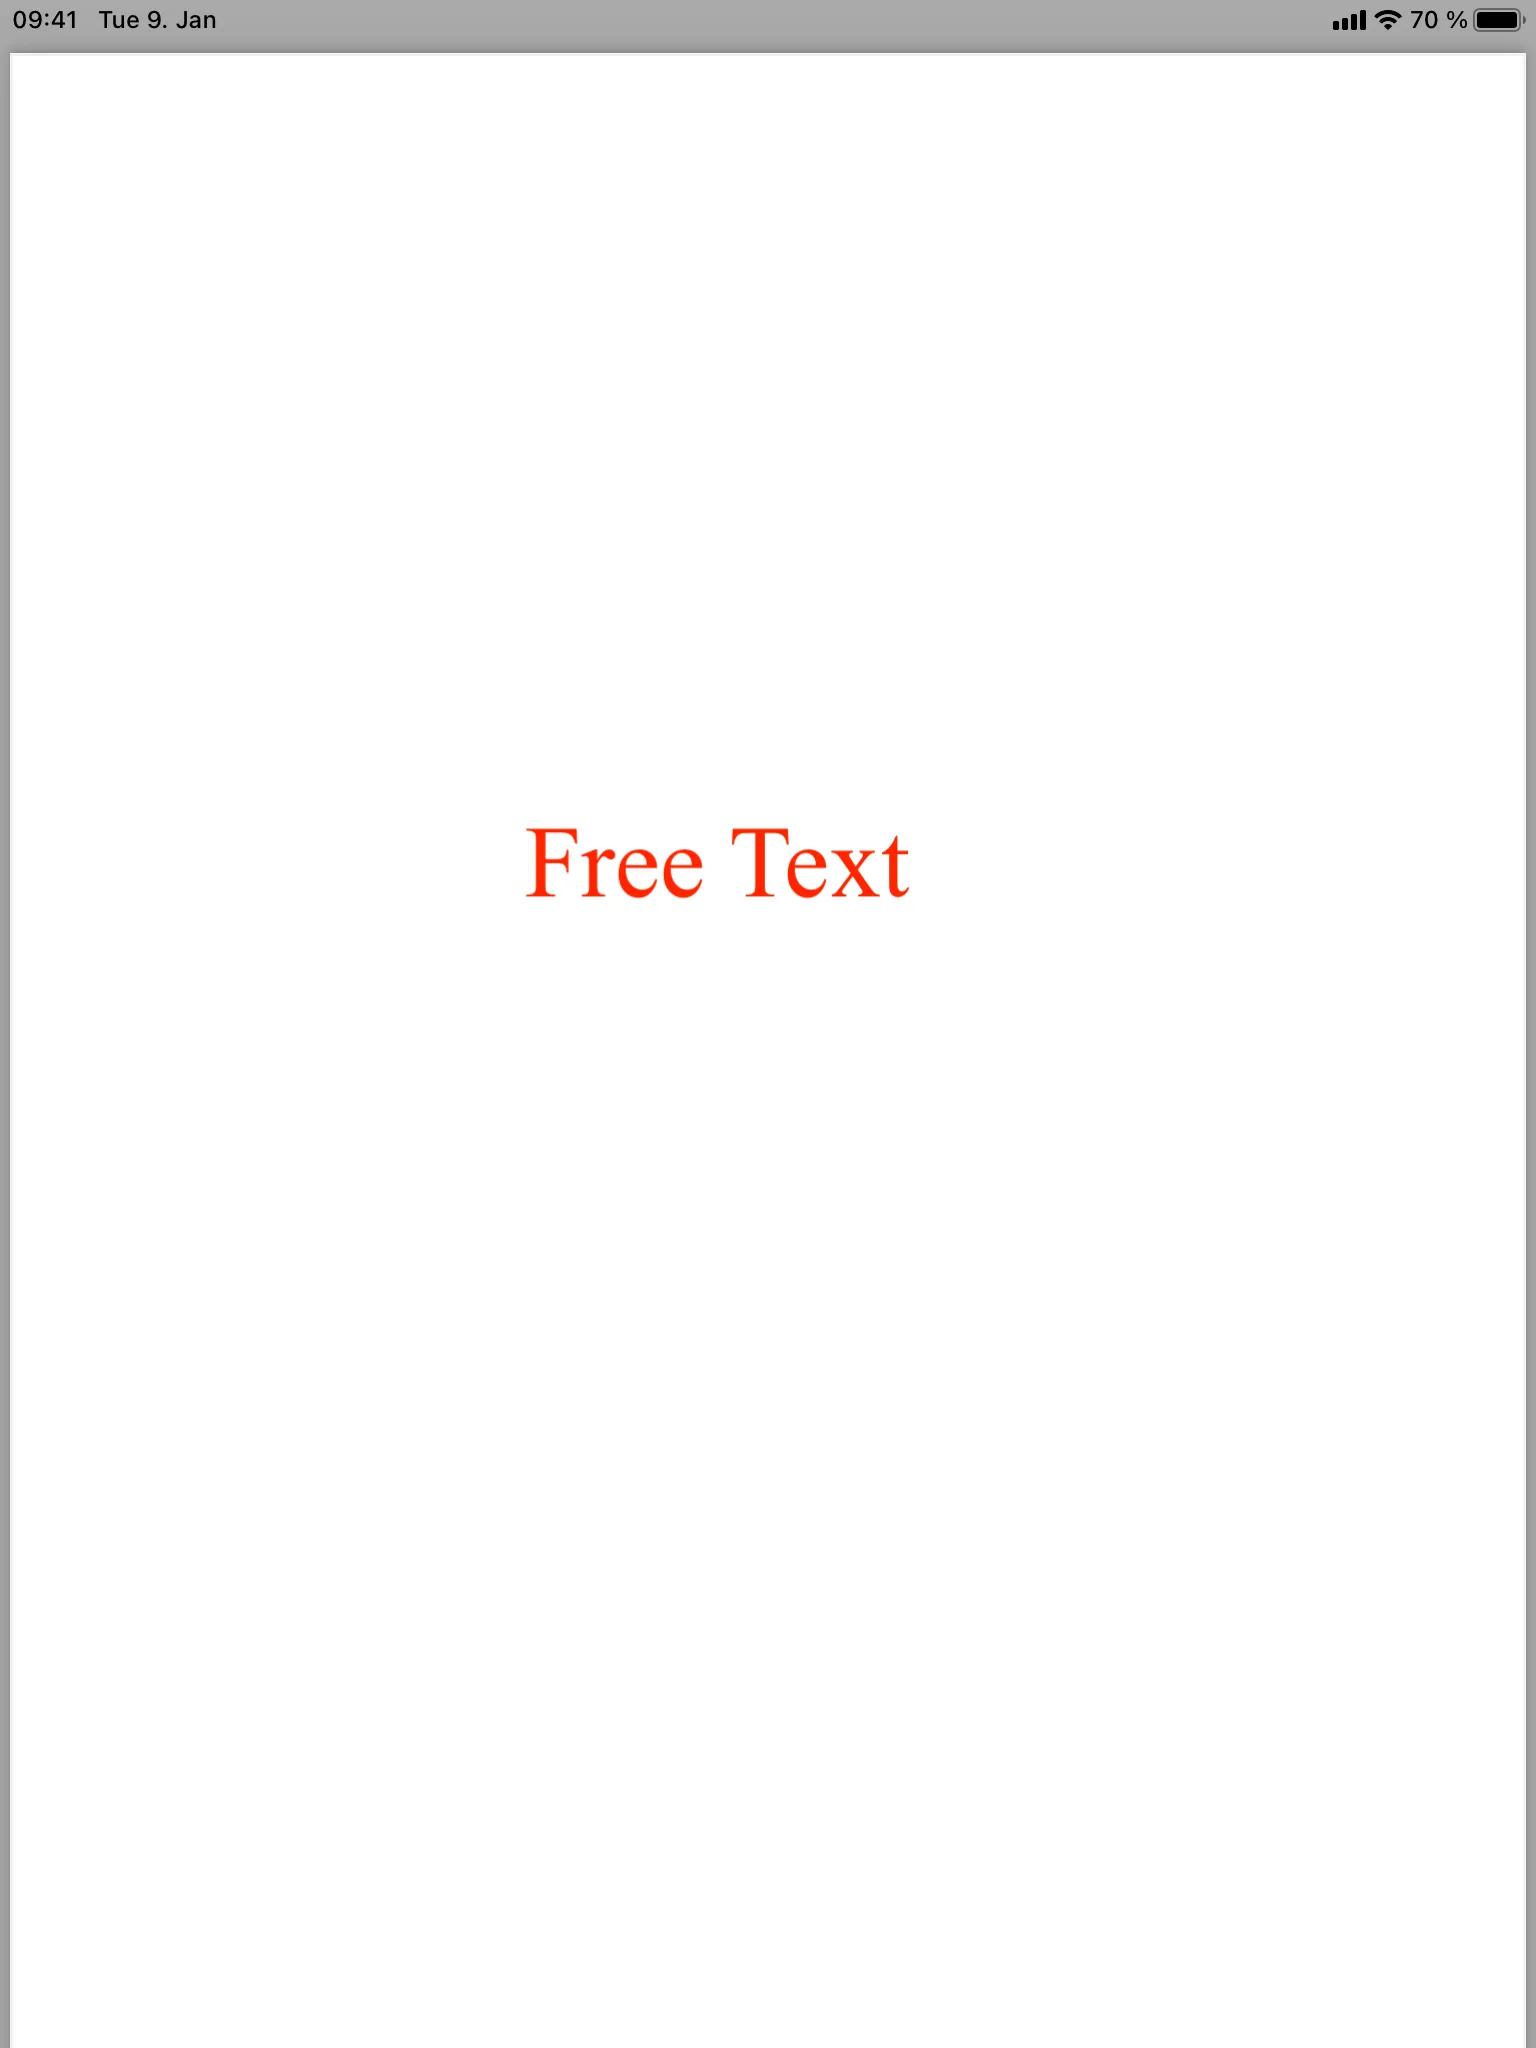 |  |
Creating an ink annotation
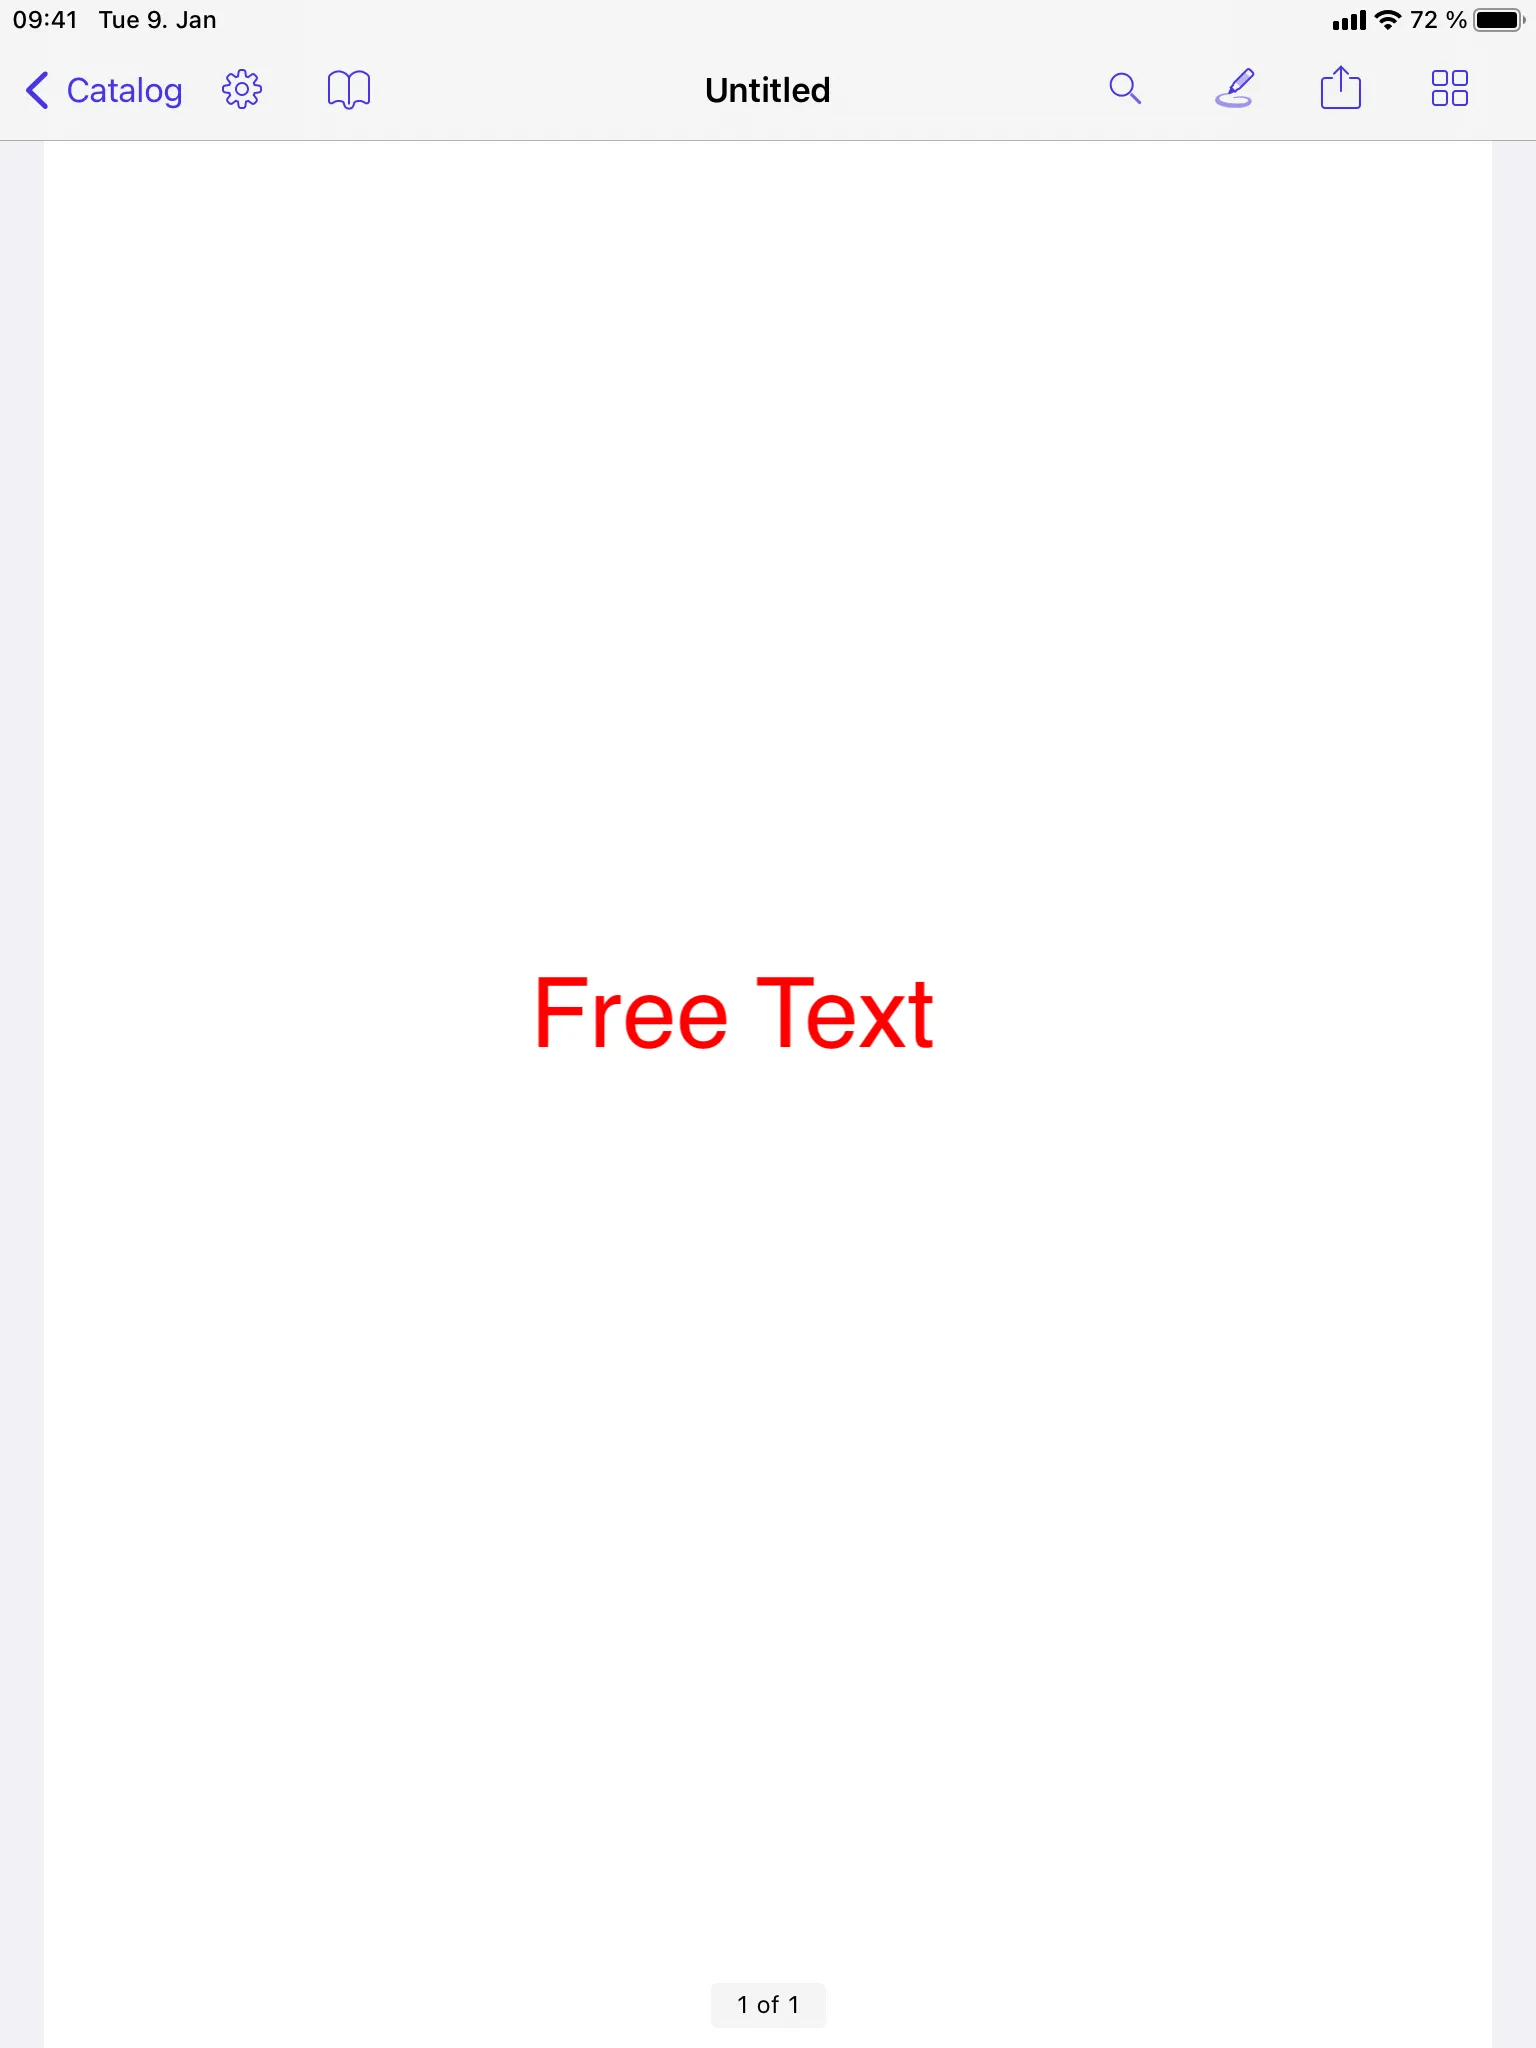
Continue by creating an ink annotation. It’s one of the most basic annotation types, and it’s also very common. In fact, it’s probably the single most flexible annotation type, as it can be used to take notes, circle specific parts of a page, and even highlight text.
To create an ink annotation in PDFKit, use the following code:
// Create a line for the ink annotation.let path = UIBezierPath()path.move(to: CGPoint(x: 300, y: 300))path.addLine(to: CGPoint(x: 300, y: 400))path.addLine(to: CGPoint(x: 350, y: 500))
// To change the line width/thickness of an ink annotation, we need to create a border for it// and set the `lineWidth` property there.let border = PDFBorder()border.lineWidth = 5.0
let inkAnnotation = PDFAnnotation(bounds: page.bounds(for: pdfView.displayBox), forType: .ink, withProperties: nil)
inkAnnotation.border = borderinkAnnotation.color = .blueinkAnnotation.add(path)
pdfView?.currentPage?.addAnnotation(inkAnnotation)
This process isn’t as straightforward as with the free text annotation. Here, you created a UIBezierPath, which will be the shape of your ink annotation. This code opts for a nice and simple line. Changing the thickness of an ink annotation is a bit weird, since you need to create a PDFBorder(opens in a new tab) first, set the lineWidth property of the border, and then assign this border to your ink annotation. You could also set the style property of your border to .dashed if you want to create a dashed ink annotation. Then you can change the color of the annotation again, and that’s it.
Here’s how this can be achieved in Nutrient:
// Create a line for the ink annotation.let lines = [    [DrawingPoint(cgPoint: CGPoint(x: 300, y: 300)), DrawingPoint(cgPoint: CGPoint(x: 300, y: 400)), DrawingPoint(cgPoint: CGPoint(x: 350, y: 500))]    // We can add more lines or other shapes of ink annotations here.]
let inkAnnotation = InkAnnotation(lines: lines)inkAnnotation.lineWidth = 5inkAnnotation.color = .blue
document.add(annotations: [inkAnnotation], options: nil)
It’s already apparent that not as much code is needed in Nutrient as in PDFKit. You create an array of arrays of DrawingPoints to shape your ink annotation. Then you create the InkAnnotation from those lines, and you set the lineWidth and color properties to customize the appearance of the annotation. Finally, you add the ink annotation on the document and you’re done!
But wait! If you look at the comparison now, you might notice a difference:
| PDFKit | Nutrient |
|---|---|
 | 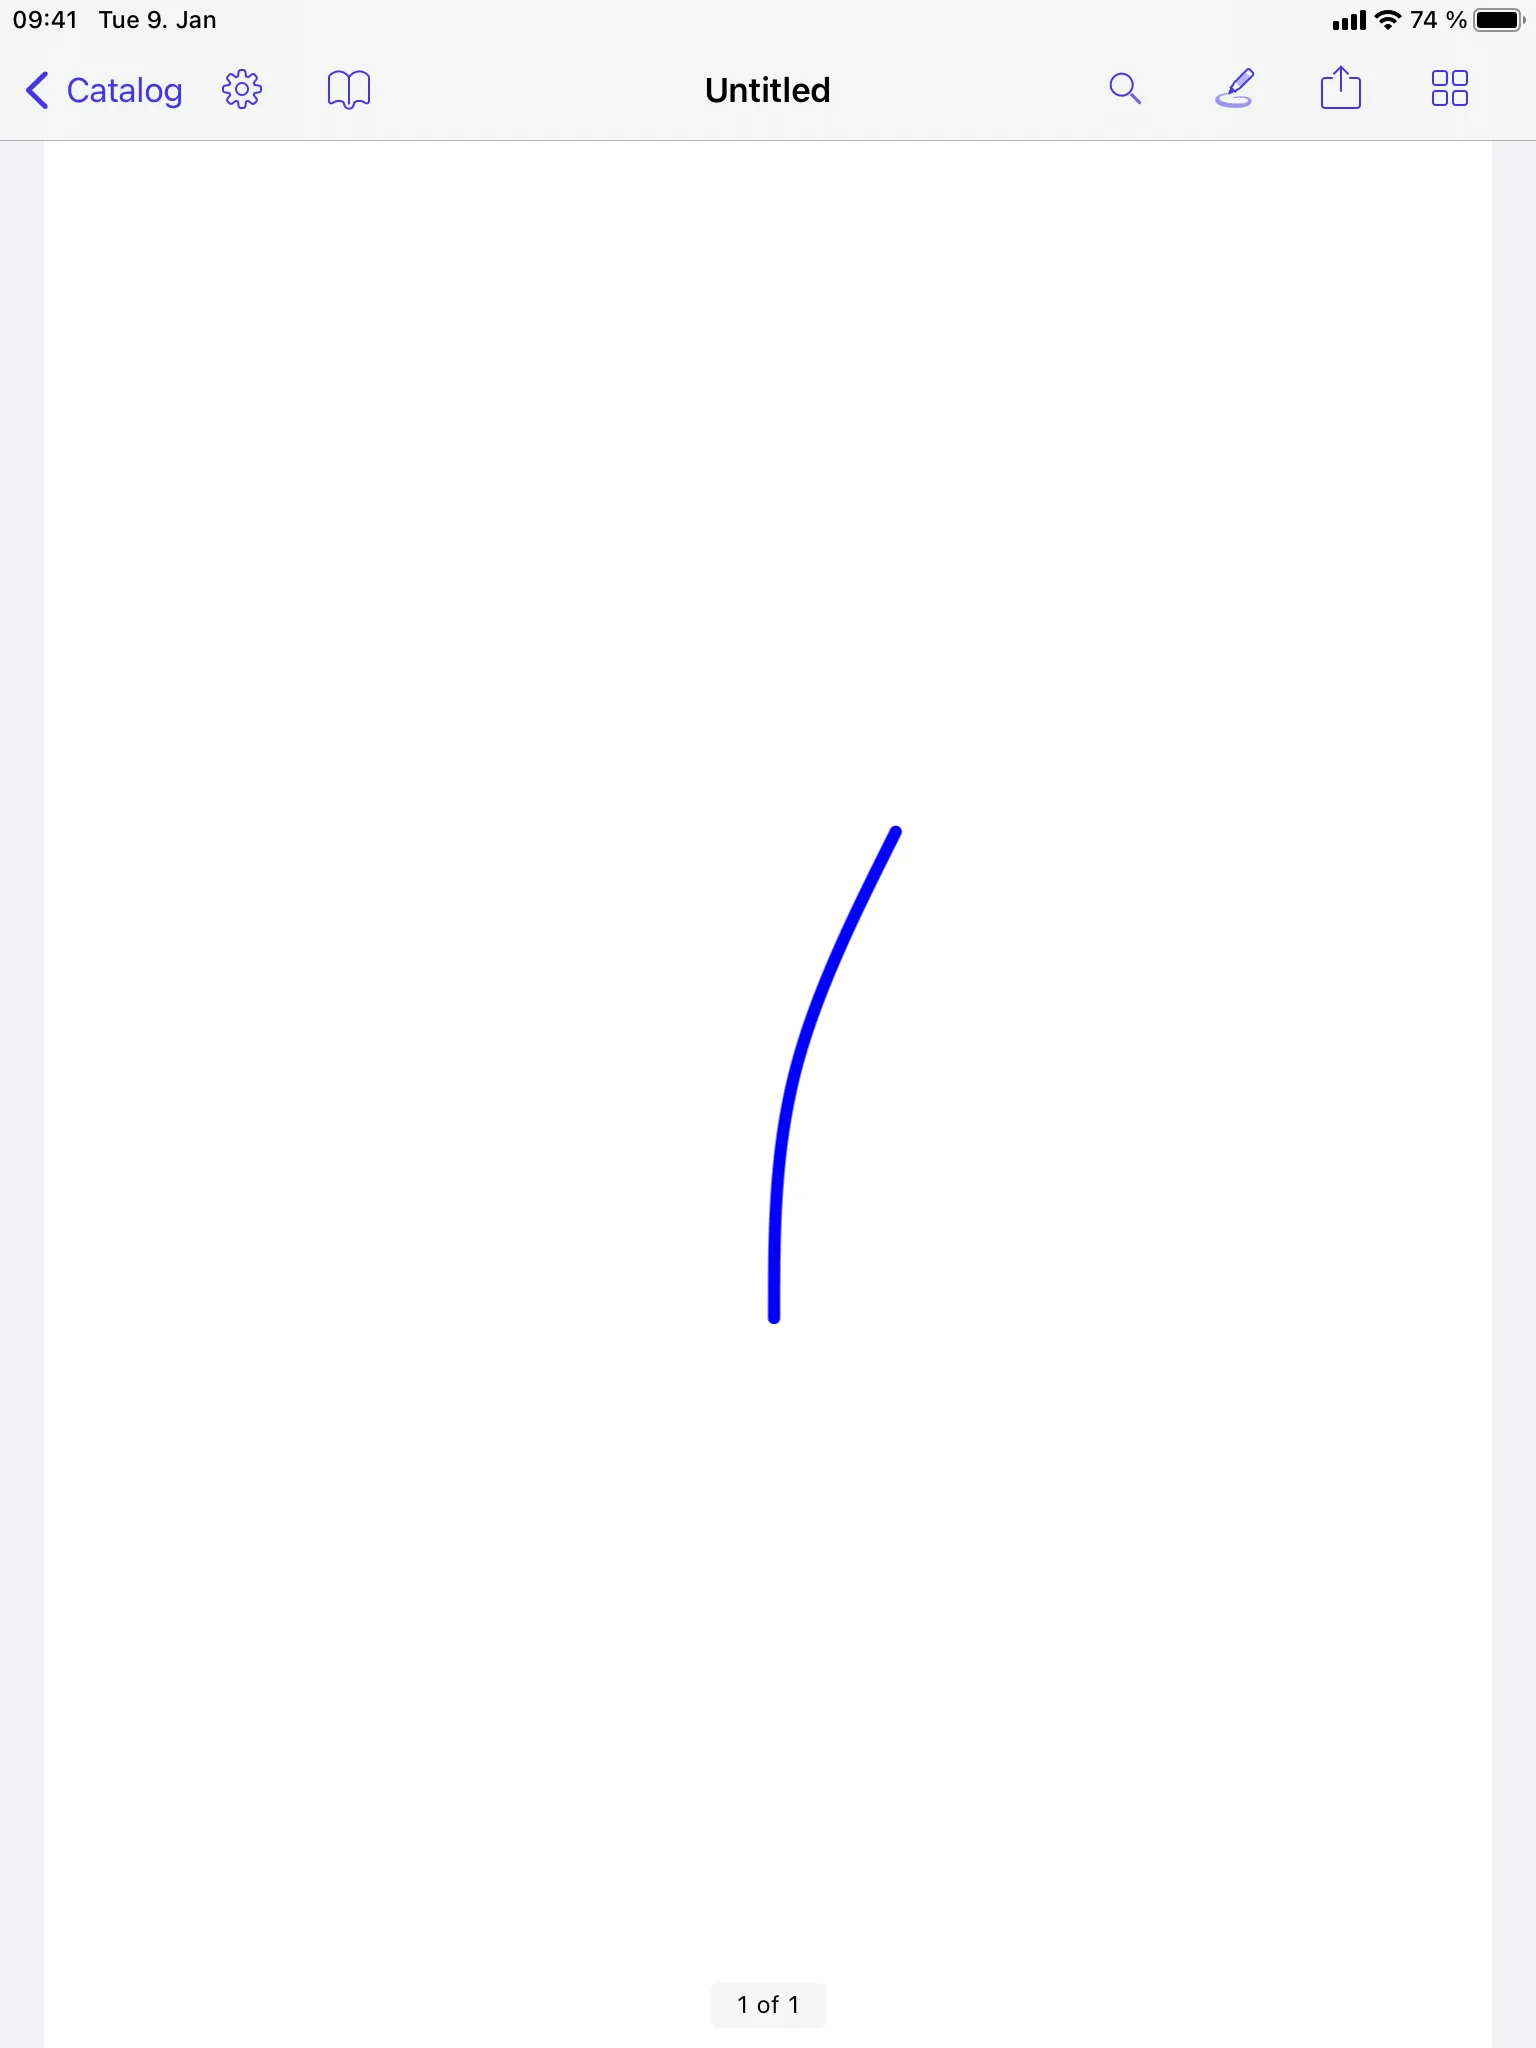 |
As can be seen in the images above, the PDFKit annotation is edgy, while the Nutrient annotation is rounded. This is because of a Bézier curve in DrawingPoint, which makes the latter seem more like a natural, hand-drawn ink annotation.
But what if you really want the annotation to have proper edges? No problem at all; that’s where the PolyLineAnnotation comes into play. It’s essentially an ink annotation with only straight lines connected to each other, which means it has proper edges. This can be done as follows:
let inkAnnotation = PolyLineAnnotation(points: [CGPoint(x: 300, y: 300), CGPoint(x: 300, y: 400), CGPoint(x: 350, y: 500)])inkAnnotation.lineWidth = 5inkAnnotation.color = .blue
document.add(annotations: [inkAnnotation], options: nil)
Again, this is an easy way to create an annotation. Here, you create a PolyLineAnnotation from CGPoints and then customize the appearance before adding it to the document.
<image src=“/assets/images/blog/2021/adding-annotations-in-swift-with-pdfkit-vs-pspdfkit/pspdfkit-poly.png” width=“50%” alt=“Nutrient edgy ink annotation example”>
Creating a text form field
Last but not least, why not create something a little more advanced, like a text form field? Its main purpose is to let users enter information on a PDF page. Unlike the free text annotation, a text form field can be edited any time, even in PDFKit. So how do you create one?
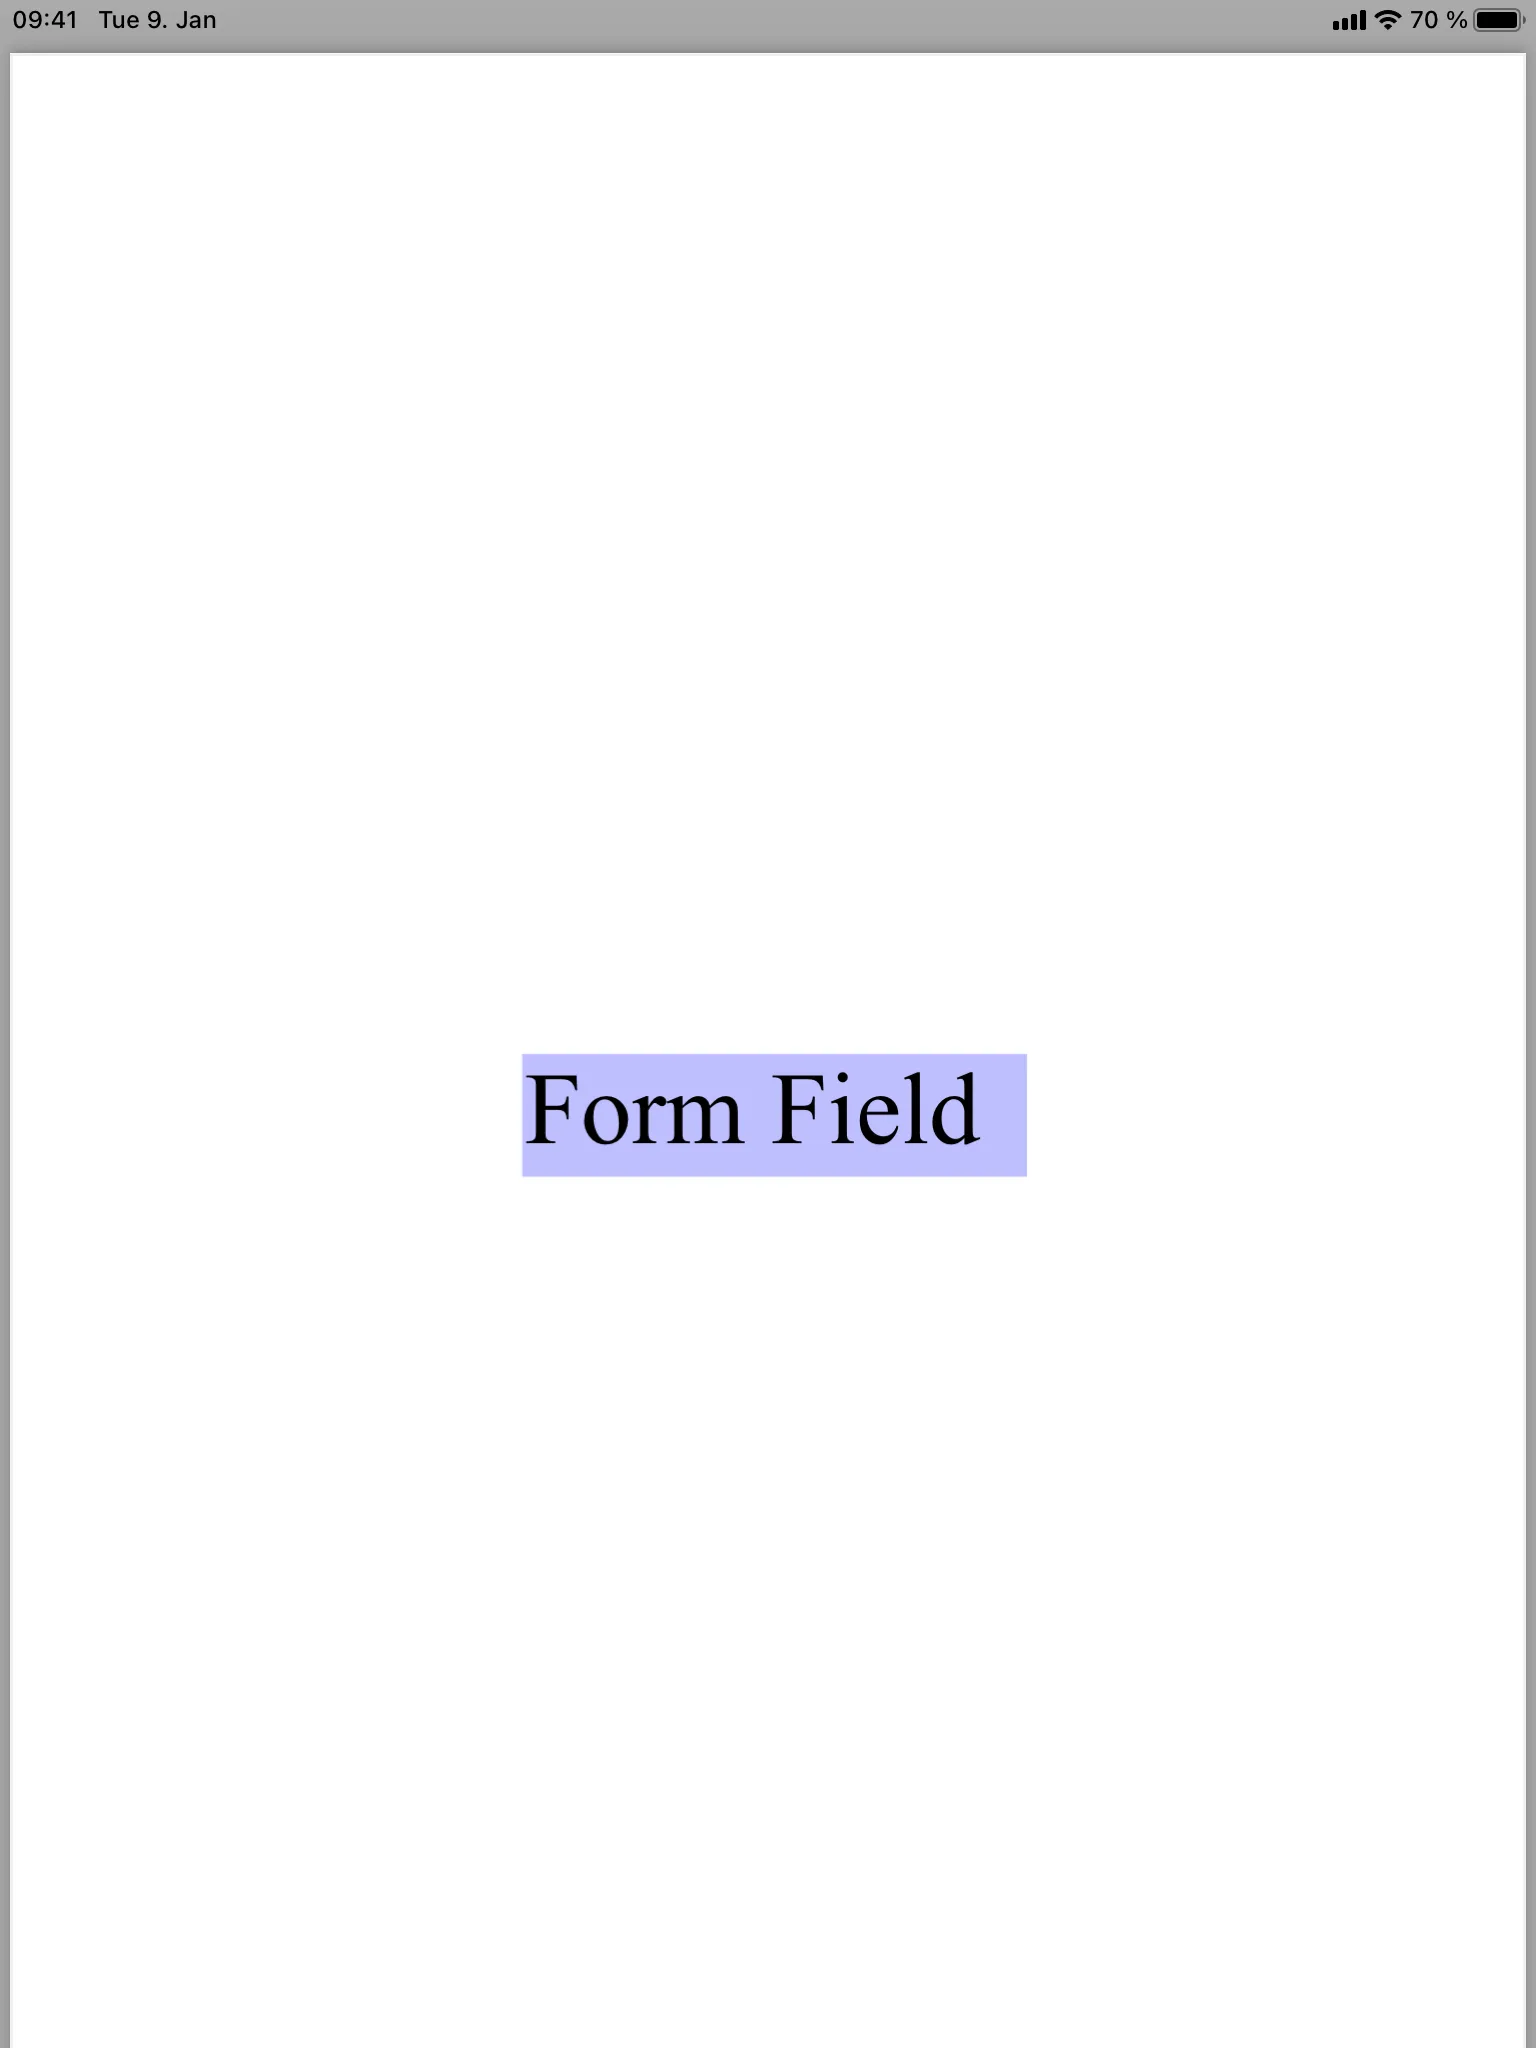
let textFormField = PDFAnnotation(bounds: CGRect(x: 200, y: 400, width: 200, height: 50), forType: .widget, withProperties: nil)textFormField.widgetFieldType = .text// Here we can set a placeholder string for the form field.textFormField.widgetStringValue = "Form Field"textFormField.font = .systemFont(ofSize: 40)// Since a border for the form field would only be visible when it's selected,// let's add some background color so it's a bit more noticeable.textFormField.backgroundColor = UIColor.blue.withAlphaComponent(0.25)
pdfView?.currentPage?.addAnnotation(textFormField)
This one is surprisingly easy in PDFKit. You just need to create a PDFAnnotation with a .widget(opens in a new tab) subtype. Then you need to specify it even further, and you have to set widgetFieldType to .text(opens in a new tab) to clarify that you want to create a text form field. Afterward, you can also customize some things, like setting a placeholder, changing the font and font size, and changing the background color for better visibility.
How does Nutrient do this?
let textFieldFormElement = TextFieldFormElement()textFieldFormElement.boundingBox = CGRect(x: 200, y: 400, width: 200, height: 50)textFieldFormElement.fontSize = 40
// Insert a form field for the form element. It’ll automatically be added to the document.try! TextFormField.insertedTextField(withFullyQualifiedName: "FieldName", documentProvider: document.documentProviders.first!, formElement: textFieldFormElement)
// We set a placeholder text for the form field here.// This needs to be done after we've inserted a form field for the form element.textFieldFormElement.contents = "Form Field"
In Nutrient, form fields are split into two parts: a field object and an annotation object. While the field object handles the state of the form field and offers methods for modifying it, the annotation object’s main purpose is to provide a graphical element on the PDF.
Here, you first create the annotation object, the TextFieldFormElement. You can set a font size, but you don’t need to add a background color, since it already has one by default. Then you need to insert a form field for the form element with insertedTextFieldWithFullyQualifiedName:documentProvider:formElement:error:. This will also automatically add the form field to the document. You can then set a placeholder text if you want to.
Here’s how the created text form fields look:
| PDFKit | Nutrient |
|---|---|
 | 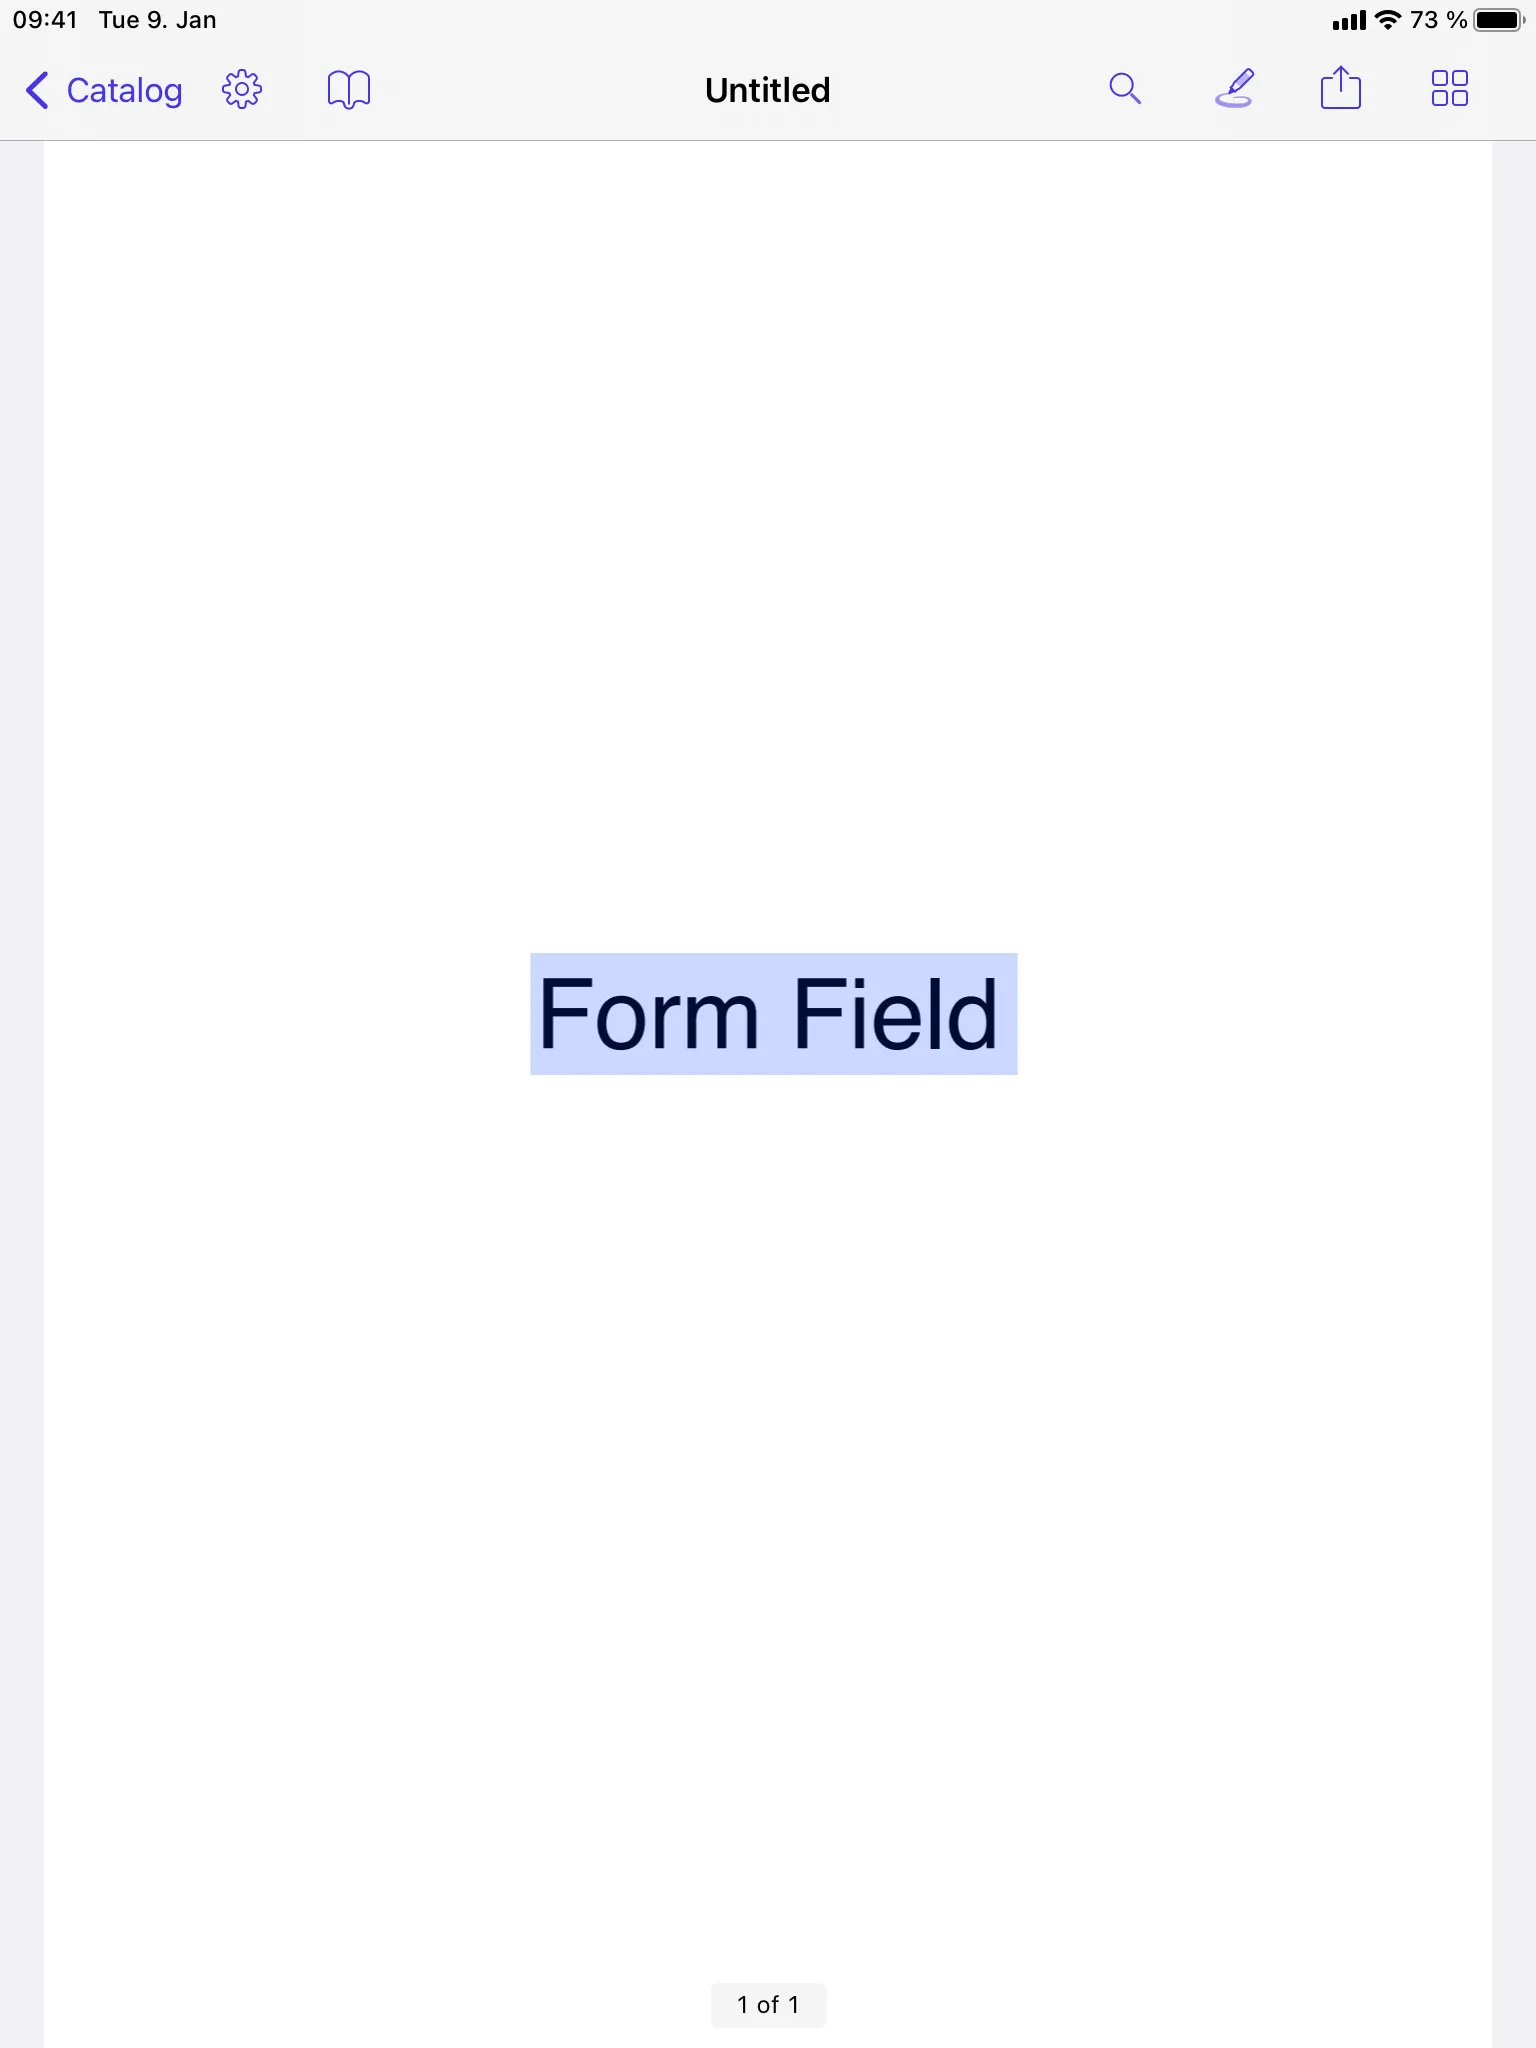 |
Conclusion
While Nutrient is easily the cleaner and more fleshed out solution, it’s still surprising to see some of the straightforward solutions PDFKit provided for the use cases shown in this blog post. I expected it to be frustrating and time-consuming, but most of the time, I found the correct API fairly quickly.
However, a disadvantage of PDFKit when compared to Nutrient is its lack of documentation — both the API documentation and the lack of proper guides or examples — especially when doing more complicated stuff. I searched for some official ones myself, but I was disappointed to only find posts from other users searching for the same things I was.
Another major disadvantage of PDFKit — maybe even more so than the lack of documentation — is its lack of UI. Meanwhile, our highly configurable UI is a key feature of the Nutrient SDK and the mark of a great user experience. With Nutrient, it’s possible to add, change, and delete all kinds of annotations on the fly and with ease, which makes working with, and more importantly, annotating PDFs simpler and smoother.
Related iOS guides
Cross-platform development
Advanced annotation features
FAQ
PDFKit offers basic annotation support, while Nutrient provides more advanced features, including UI and better customization options.
Yes. Both libraries allow the creation of ink annotations, but Nutrient makes the process simpler and offers smoother, more natural-looking strokes.
No. PDFKit doesn’t support image annotations, while Nutrient does.
Some annotations, like free text, cannot be edited in PDFKit, but Nutrient allows full editing of all annotation types.
Nutrient provides better documentation, a more feature-rich UI, and support for more annotation types, making it a more complete solution for PDF annotation. It also offers advanced capabilities like PDF text comparison for document review workflows.