


Document Engine with Docker
You can integrate Document Engine with Nutrient Web SDK. This integration enables you to offload document processing, rendering, and management to the server, enabling features such as real-time collaboration, annotation synchronization, and improved performance for large or complex documents.
This guide shows how to build a complete document viewing application using Document Engine deployed with Docker, integrated with Nutrient Web SDK in a React frontend and Node.js backend. We’ll set up secure authentication, handle document uploads, and create a modern web interface for viewing and annotating documents.
We've demonstrated the implementation using React + Vite for the frontend and Node.js for the backend, but the same concepts can be adapted to other supported web framework or technology stack.
Prerequisites
Document Engine is distributed as a Docker container. To run it, install(opens in a new tab) a container runtime distribution for your operating system (Docker, OrbStack, or others).
Setting up Document Engine
Copy the code snippet below and save it in a file named docker-compose.yml:
services:  document_engine:    image: pspdfkit/document-engine:1.12.2    environment:      PGUSER: de-user      PGPASSWORD: password      PGDATABASE: document-engine      PGHOST: db      PGPORT: 5432      API_AUTH_TOKEN: secret      SECRET_KEY_BASE: secret-key-base      JWT_PUBLIC_KEY: |        -----BEGIN PUBLIC KEY-----        MIIBIjANBgkqhkiG9w0BAQEFAAOCAQ8AMIIBCgKCAQEA2gzhmJ9TDanEzWdP1WG+        0Ecwbe7f3bv6e5UUpvcT5q68IQJKP47AQdBAnSlFVi4X9SaurbWoXdS6jpmPpk24        QvitzLNFphHdwjFBelTAOa6taZrSusoFvrtK9x5xsW4zzt/bkpUraNx82Z8MwLwr        t6HlY7dgO9+xBAabj4t1d2t+0HS8O/ed3CB6T2lj6S8AbLDSEFc9ScO6Uc1XJlSo        rgyJJSPCpNhSq3AubEZ1wMS1iEtgAzTPRDsQv50qWIbn634HLWxTP/UH6YNJBwzt        3O6q29kTtjXlMGXCvin37PyX4Jy1IiPFwJm45aWJGKSfVGMDojTJbuUtM+8P9Rrn        AwIDAQAB        -----END PUBLIC KEY-----      JWT_ALGORITHM: RS256      DASHBOARD_USERNAME: dashboard      DASHBOARD_PASSWORD: dashboard-password    ports:      - 5001:5000    depends_on:      - db  db:    image: postgres:16    environment:      POSTGRES_USER: de-user      POSTGRES_PASSWORD: password      POSTGRES_DB: document-engine      POSTGRES_INITDB_ARGS: --data-checksums      PGDATA: /var/lib/postgresql/data/pgdata    volumes:      - pgdata:/var/lib/postgresql/data
volumes:  pgdata:
Starting Document Engine
Go to the directory where you saved the docker-compose.yml file and run the following command in your terminal:
docker compose upThis command might take a while to run, depending on your internet connection speed. Wait until you see the following message:
document_engine_1 | Access the web dashboard at http://localhost:5001/dashboardDocument Engine is now up and running!
Uploading a document to Document Engine
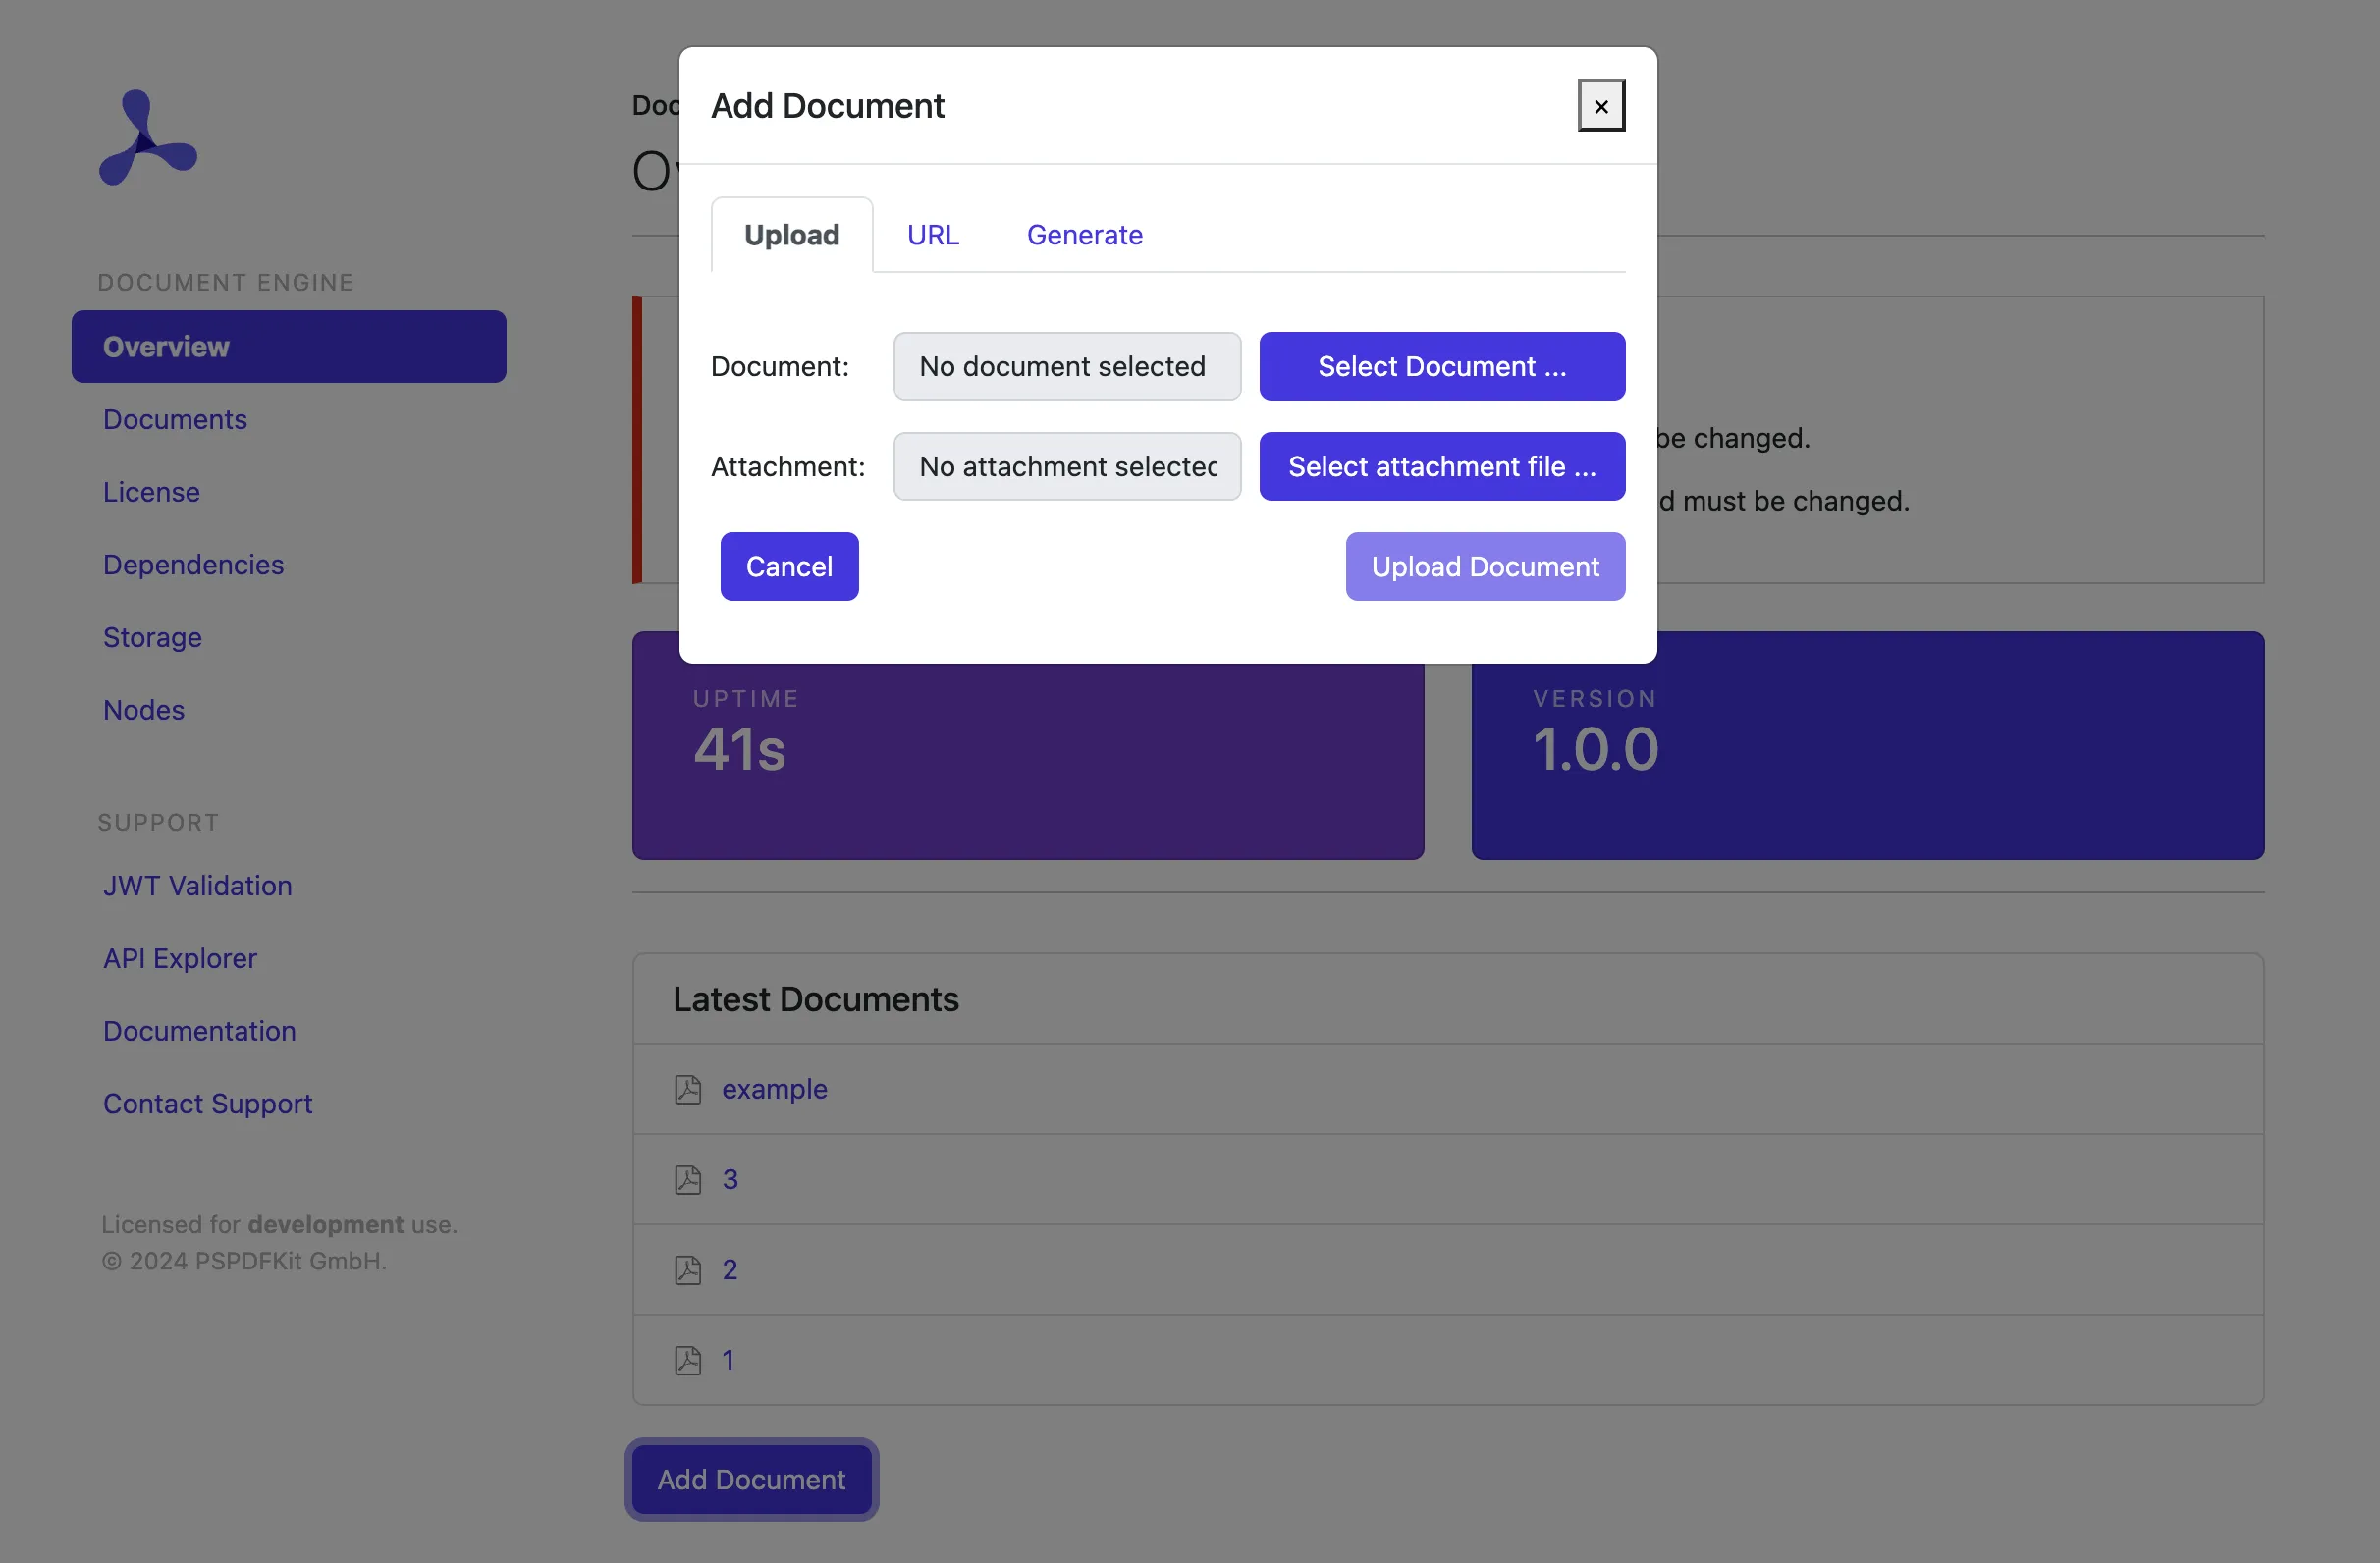
Visit http://localhost:5001/dashboard and authenticate using "dashboard" as the username and "dashboard-password" as the password. Choose Add Document and upload the document you want to work with.
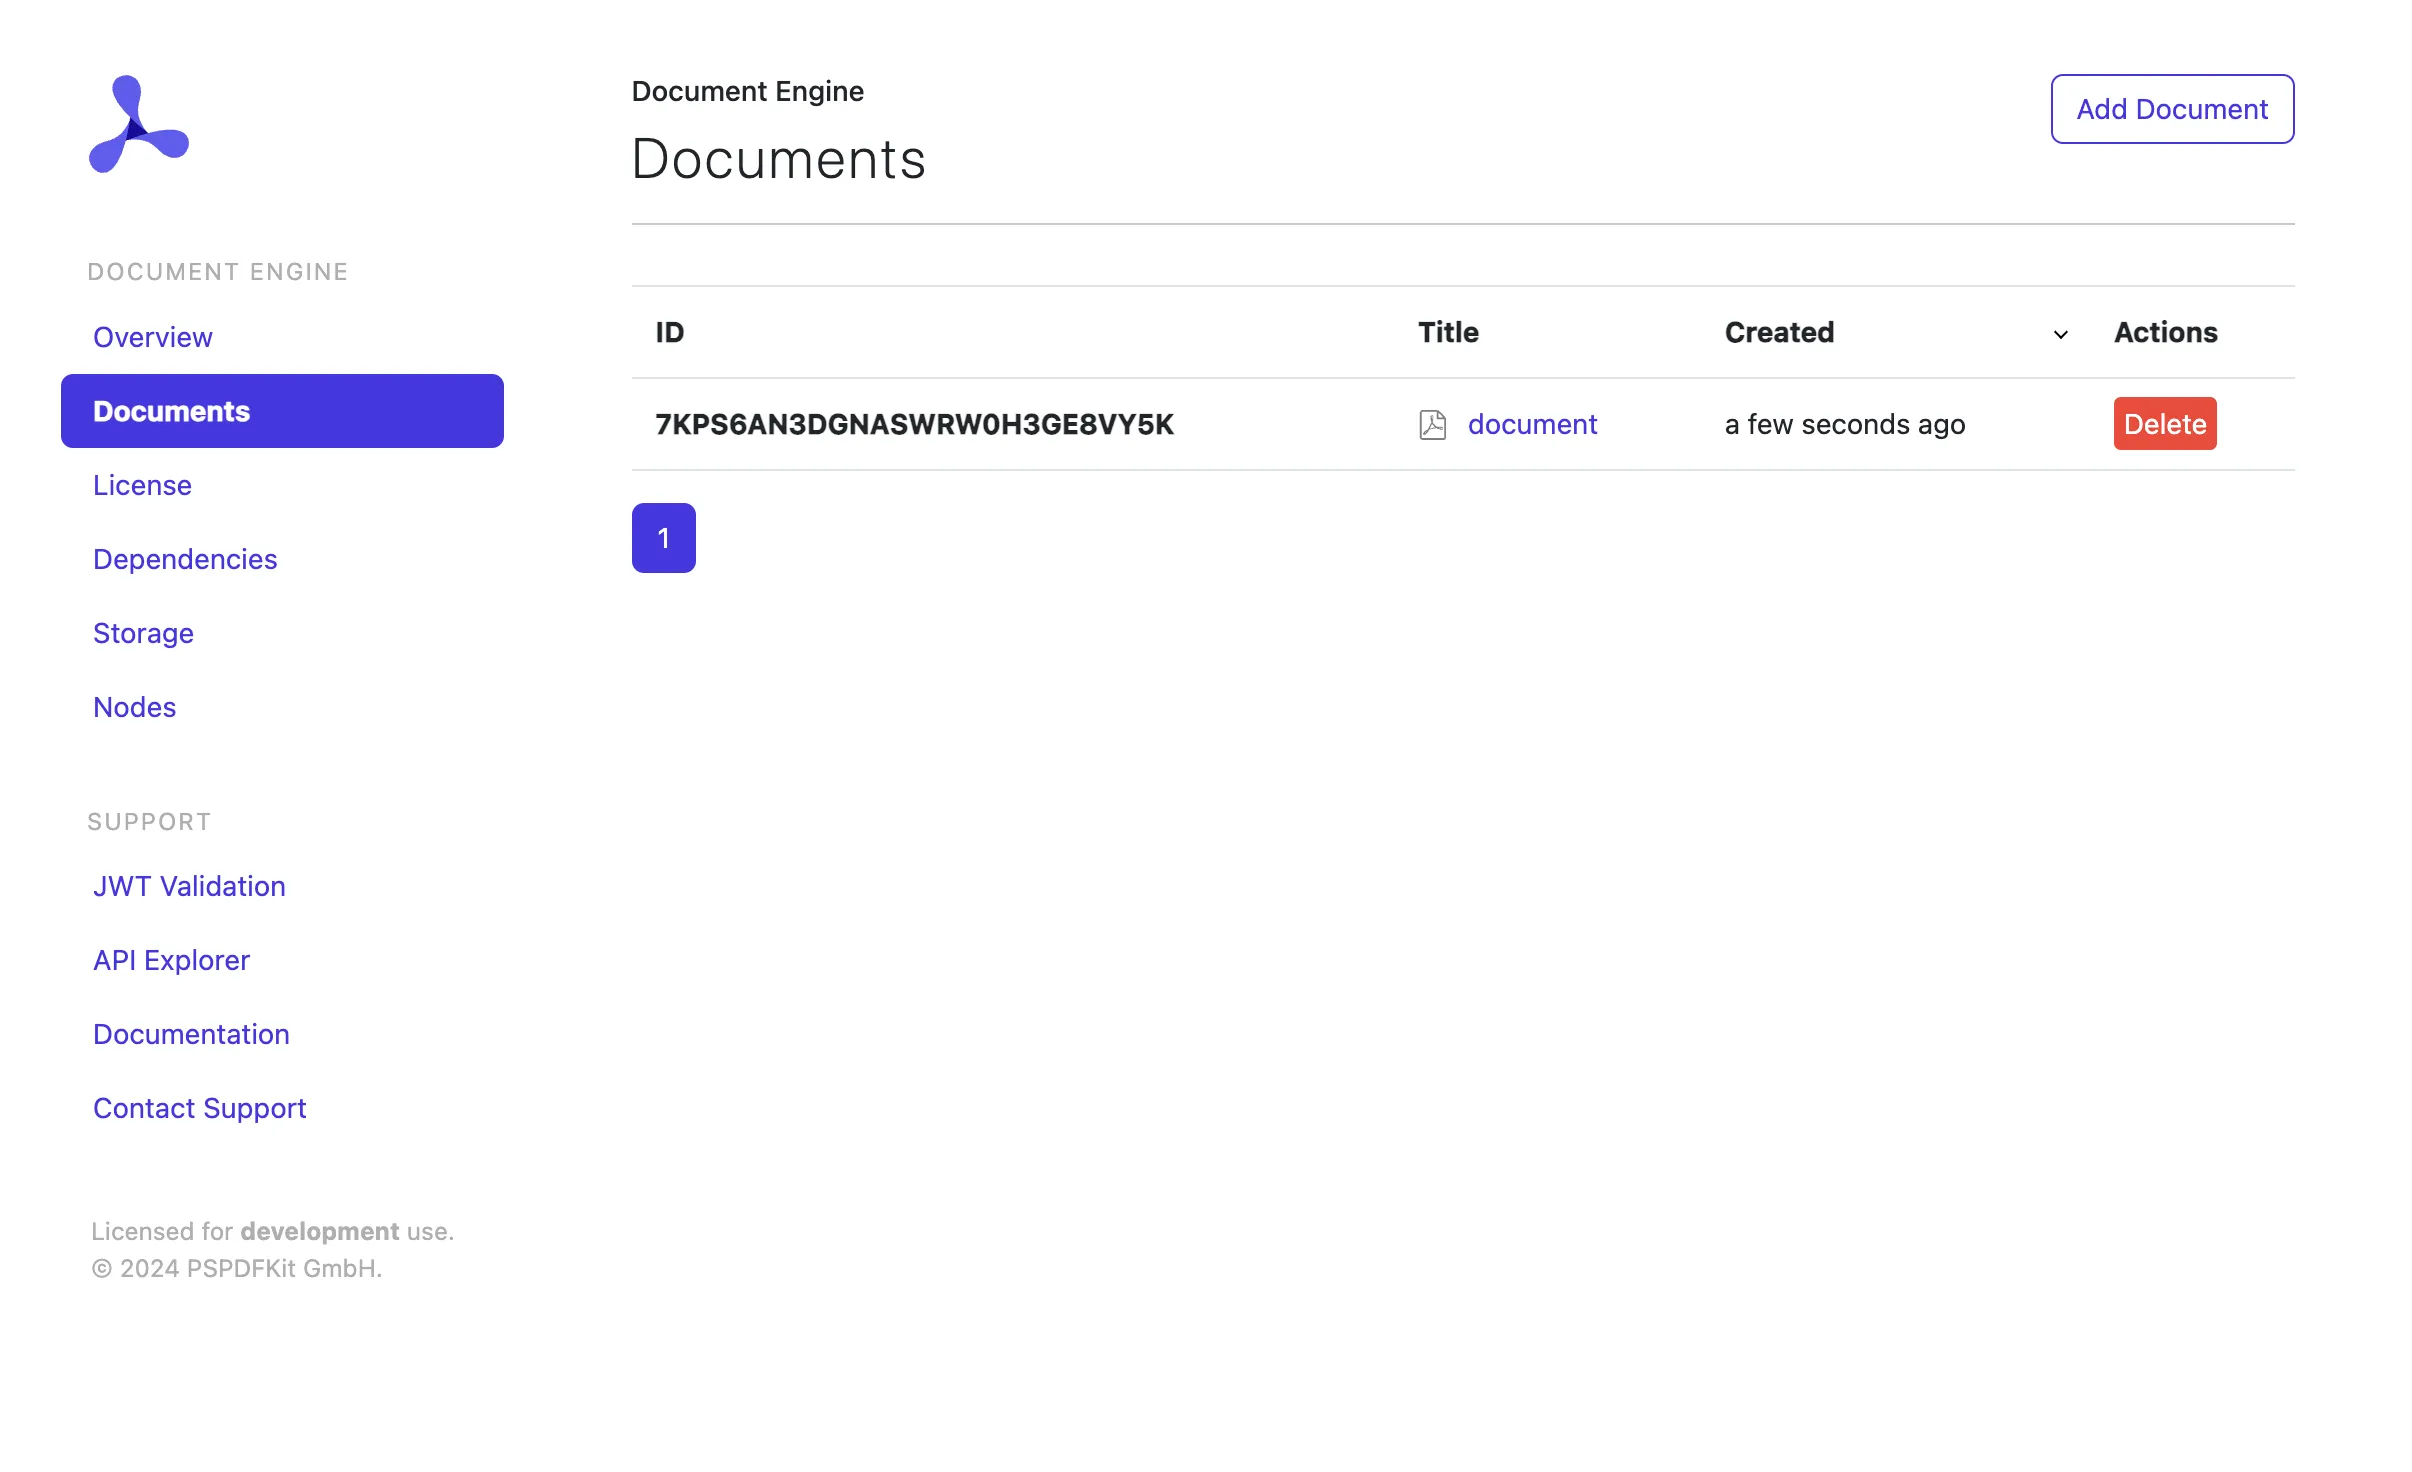
Once the document is uploaded, visit http://localhost:5001/dashboard/documents to see a list of available documents. Each document is identified by an ID. Copy this document ID - you’ll need to enter it in your React application to view the document. The ID looks similar to 7KPS8X13JRB2G841X4V7EQ3T2J.
Building the backend server
Create a Node.js server that generates JWTs for secure document access. This server acts as the bridge between your frontend application and Document Engine. For a comprehensive understanding of JWT-based authentication with Document Engine, refer to our client authentication guide.
Setting up the Node.js project
Create a new directory for your backend and initialize a Node.js project:
mkdir document-viewer-backendcd document-viewer-backendnpm init -ynpm install express jsonwebtoken corsCreating the server
Create a file called server.js with the following content:
const express = require('express');const jwt = require('jsonwebtoken');const cors = require('cors');
const app = express();const port = 3001;
// Enable CORS for all requestsapp.use(cors());app.use(express.json());
// The private key from your Docker Compose configurationconst PRIVATE_KEY = `-----BEGIN RSA PRIVATE KEY-----MIIEpQIBAAKCAQEA2gzhmJ9TDanEzWdP1WG+0Ecwbe7f3bv6e5UUpvcT5q68IQJKP47AQdBAnSlFVi4X9SaurbWoXdS6jpmPpk24QvitzLNFphHdwjFBelTAOa6taZrSusoFvrtK9x5xsW4zzt/bkpUraNx82Z8MwLwrt6HlY7dgO9+xBAabj4t1d2t+0HS8O/ed3CB6T2lj6S8AbLDSEFc9ScO6Uc1XJlSorgyJJSPCpNhSq3AubEZ1wMS1iEtgAzTPRDsQv50qWIbn634HLWxTP/UH6YNJBwzt3O6q29kTtjXlMGXCvin37PyX4Jy1IiPFwJm45aWJGKSfVGMDojTJbuUtM+8P9RrnAwIDAQABAoIBAQDSKxhGw0qKINhQIwQP5+bDWdqUG2orjsQf2dHOHNhRwJoUNuDZ4f3tcYzV7rGmH0d4Q5CaXj2qMyCd0eVjpgW0h3z9kM3RA+d7BX7XKlkdQABliZUT9SUUcfIPvohXPKEzBRHed2kf6WVtXKAuJTD+Dk3LjzRygWldOAE4mnLeZjU61kxPYriynyre+44Gpsgy37Tj25MAmVCYFlotr/1WZx6bg3HIyFRGxnoJ1zU1MkGxwS4IsrQwOpWEHBiD5nvo54hF5I00NHj/ccz+MwpgGdjyl02IGCy1fF+Q5SYyH86DG52Mgn8VI9dseGmanLGcgNvrdJFILoJRSZW7gQoBAoGBAP+D6ZmRF7EqPNMypEHQ5qHHDMvil3mhNQJyIC5rhhl/nn063wnmzhg96109hVh4zUAj3Rmjb9WqPiW7KBMJJdnEPjmZ/NOXKmgjs2BF+c8oiLQyTQmlxB7LnptvBDi8MnEd3uemfxNuZc+2siuSzgditshNru8xPG2Sn99JC271AoGBANp2xj5EfdlqNLd11paLOtJ7dfREgc+8FxQCiKSxbaOlVXNk0DW1w4+zLnFohj2m/wRrbBIzSL+eufoQ9y4BT/AA+ln4qxOpC0isOGK5SxwIjB6OHhCuP8L3anj1IFYM+NX0Xr1/qdZHKulgbS49cq+TDpB74WyKLLnsvQFyINMXAoGABR5+cp4ujFUdTNnp4out4zXasscCY+Rv7HGe5W8wC5i78yRXzZn7LQ8ohQCziDc7XXqadmYI2o4DmrvqLJ91S6yb1omYQCD6L4XvlREx1Q2p13pegr/4cul/bvvFaOGUXSHNEnUKfLgsgAHYBfl1+T3oDZFI3O/ulv9mBpIvEXUCgYEApeRnqcUM49o4ac/7wZm8czT5XyHeiUbFJ5a8+IMbRJc6CkRVr1N1S1u/OrMqrQpwwIRqLm/vIEOB6hiT+sVYVGIJueSQ1H8baHYO4zjdhk4fSNyWjAgltwF2Qp+xjGaRVrcYckHNUD/+n/VvMxvKSPUcrC7GAUvzpsPUypJFxsUCgYEA6GuP6M2zIhCYYeB2iLRD4ZHw92RfjikaYmB0++T0y2TVrStlzXHlc8H6tJWNchtHH30nfLCj9WIMb/cODpm/DrzlSigHffo3+5XUpD/2nSrcFKESw4Xsa4GXoAxqU44w4Mckg2E19b2MrcNkV9eWAyTACbEO4oFcZcSZOCKj8Fw=-----END RSA PRIVATE KEY-----`;
// Generate JWT for a given document IDapp.post('/generate-jwt', (req, res) => {  const { documentId } = req.body;
  if (!documentId) {    return res.status(400).json({ error: 'Document ID is required' });  }
  const payload = {    document_id: documentId,    permissions: ['read-document', 'write', 'download'],    exp: Math.floor(Date.now() / 1000) + (60 * 60) // Expires in 1 hour  };
  try {    const token = jwt.sign(payload, PRIVATE_KEY, { algorithm: 'RS256' });    res.json({ jwt: token });  } catch (error) {    res.status(500).json({ error: 'Failed to generate JWT' });  }});
app.listen(port, () => {  console.log(`Backend server running at http://localhost:${port}`);});
Starting the backend server
Start your backend server:
node server.jsYour backend server is now running on http://localhost:3001 and ready to generate JWTs for document access.
Building the React frontend
Create a React application that fetches JWTs from your backend and displays documents using Nutrient Web SDK.
Setting up the React project
Create a new React app with Vite:
npm create vite@latest document-viewer-frontend -- --template reactcd document-viewer-frontendnpm installInstalling Nutrient Web SDK
Add the Nutrient Web SDK script to public/index.html:
<script src="https://cdn.cloud.pspdfkit.com/pspdfkit-web@1.8.0/nutrient-viewer.js"></script>Creating the document viewer component
Replace the contents of src/App.jsx with the following:
import React, { useEffect, useRef, useState } from 'react';import './App.css';
function App() {  const viewerRef = useRef(null);  const [documentId, setDocumentId] = useState('');  const [isLoading, setIsLoading] = useState(false);  const [error, setError] = useState('');
  const loadDocument = async () => {    if (!documentId.trim()) {      setError('Please enter a document ID');      return;    }
    setIsLoading(true);    setError('');
    try {      // Fetch JWT from backend      const response = await fetch('http://localhost:3001/generate-jwt', {        method: 'POST',        headers: {          'Content-Type': 'application/json',        },        body: JSON.stringify({ documentId: documentId.trim() }),      });
      if (!response.ok) {        throw new Error('Failed to generate JWT');      }
      const { jwt } = await response.json();
      // Clear previous viewer instance if it exists      if (viewerRef.current) {        viewerRef.current.innerHTML = '';      }
      // Load document with Nutrient Web SDK      const { NutrientViewer } = window;      if (NutrientViewer) {        await NutrientViewer.load({          serverUrl: 'http://localhost:5001/',          container: viewerRef.current,          documentId: documentId.trim(),          authPayload: { jwt },          instant: true,        });      } else {        throw new Error('NutrientViewer not loaded from CDN');      }
      console.log('Document loaded successfully');    } catch (err) {      setError(err.message || 'Failed to load document');      console.error('Error loading document:', err);    } finally {      setIsLoading(false);    }  };
  return (    <div className="App">      <header className="App-header">        <h1>Document Viewer</h1>        <div className="document-controls">          <input            type="text"            placeholder="Enter Document ID (for example, 7KPS8X13JRB2G841X4V7EQ3T2J)"            value={documentId}            onChange={(e) => setDocumentId(e.target.value)}            disabled={isLoading}          />          <button onClick={loadDocument} disabled={isLoading || !documentId.trim()}>            {isLoading ? 'Loading...' : 'Load Document'}          </button>        </div>        {error && <div className="error">Error: {error}</div>}      </header>
      <div        ref={viewerRef}        className="viewer-container"        style={{ width: '100vw', height: '100vh' }}      />    </div>  );}
export default App;
Required CSS changes
Nutrient Web SDK requires that the mounting container has explicit width and height before calling NutrientViewer.load(). The container cannot be 0x0 pixels or the SDK will fail to initialize.
Remove conflicting CSS from your
src/index.cssfile. The default Vite React template includes CSS that interferes with container dimensions:/* src/index.css - Remove these conflicting styles */body {display: flex; /* Remove this line */place-items: center; /* Remove this line */}Ensure your viewer container has explicit dimensions. The React component above uses inline styles (
style={{ width: '100vw', height: '100vh' }}) which is our recommended approach for most projects.
Starting the React application
Start your React development server:
npm run devYour React application will be running at http://localhost:5173.
With all three services running (Document Engine, backend server, and React app), you can now open http://localhost:5173, enter the document ID, and click Load Document. You should see your document rendered. Any changes you make will be automatically saved and synchronized across sessions.