Add PDF functionality on iOS
This guide explains how to integrate Nutrient iOS SDK into a new or existing iOS project. By the end, you’ll be able to display a PDF document using the default Nutrient user interface (UI).
Requirements
- A Mac running macOS
- The latest stable version of Xcode(opens in a new tab)
Creating your project
Skip this step if you’re using an existing project. If you’re starting a new iOS app, follow the steps below.
- Open Xcode and select File > New > Project.
- Select the iOS tab and choose the App template.
- Enter your product name (for example,
Nutrient-Demo) and organization identifier (for example,com.example). You can choose either SwiftUI or Storyboard (UIKit) as the interface. - Click Next, choose a location to save the project, and click Create.
Adding Nutrient to your project
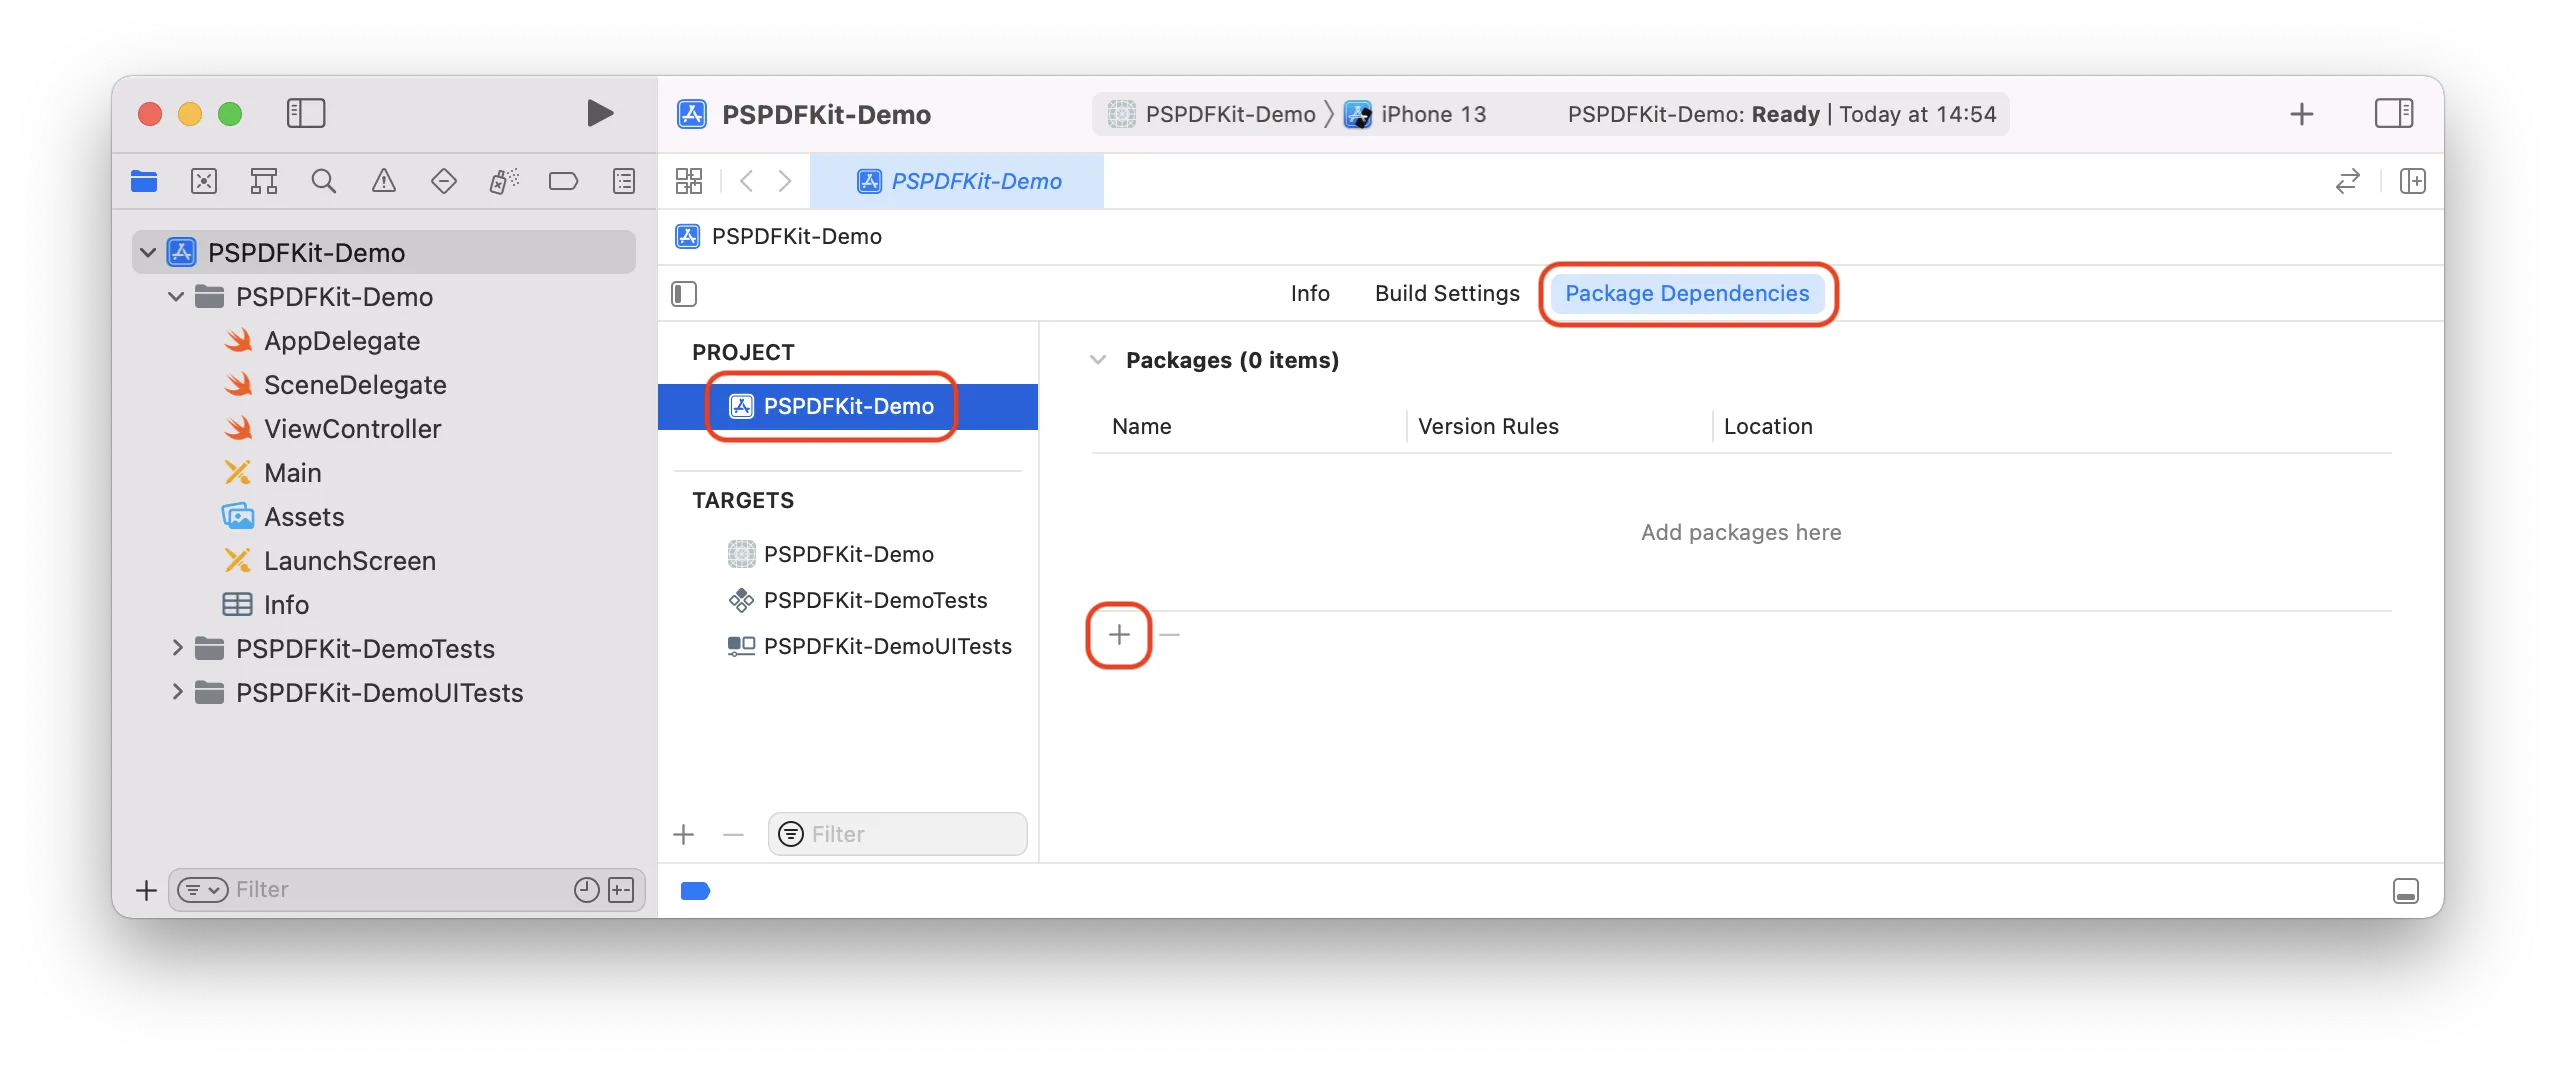
In Xcode, select your project.
Go to the Package Dependencies tab and click +.
Enter the Nutrient Swift Package URL into the search field:
https://github.com/PSPDFKit/PSPDFKit-SP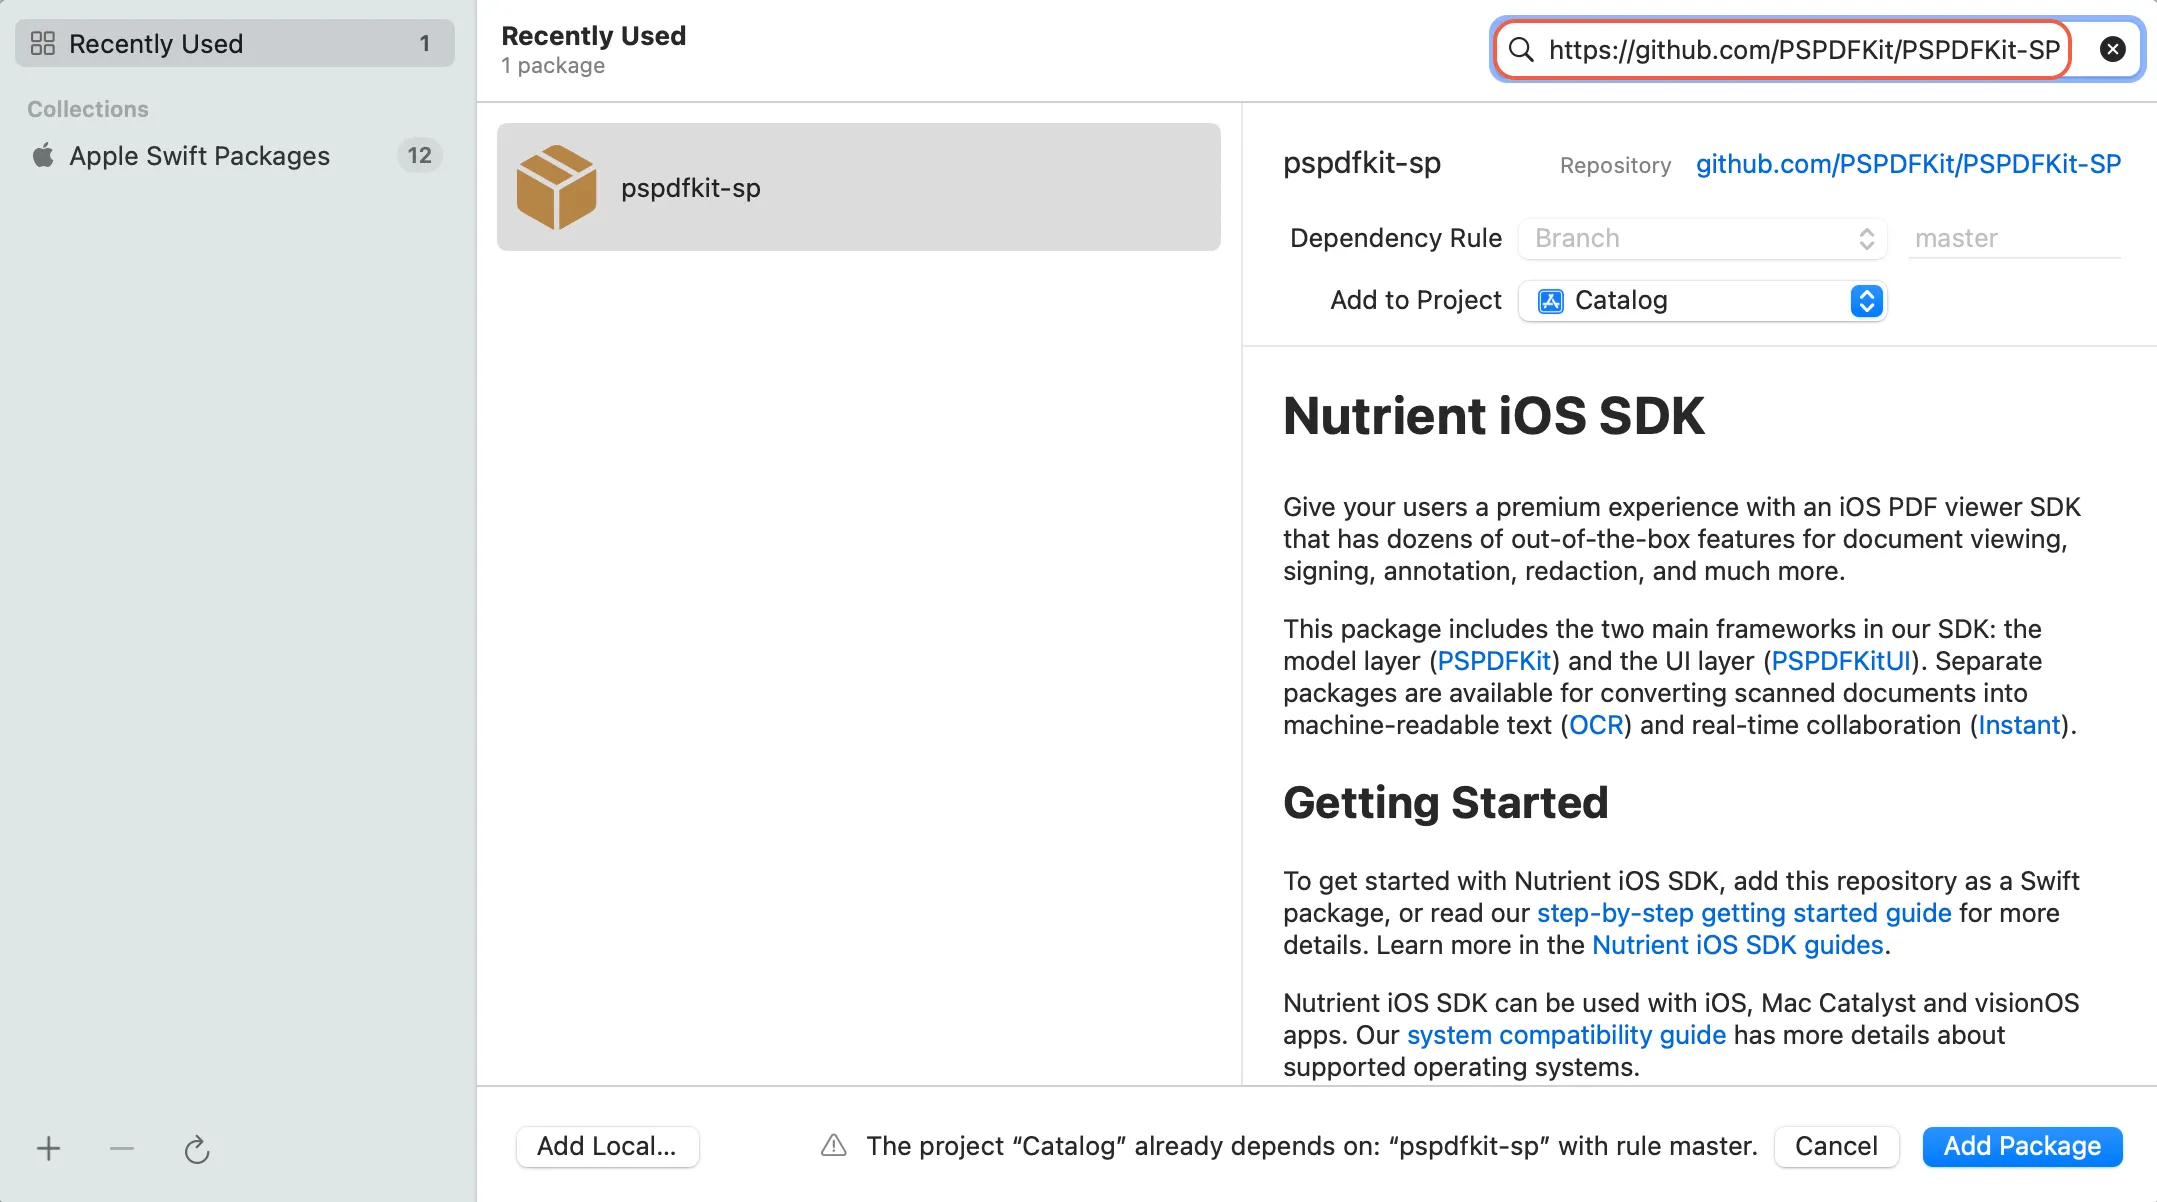
In the Dependency Rule fields, select:
- Branch >
master— to use the latest version - Version > Up to Next Minor — for controlled updates

- Branch >
Click Add Package. Confirm the addition.
In this confirmation step, ensure that the Add to Target column displays the correct target (usually the app target), and that the checkbox on the left is selected. For many projects — especially newly created ones — there will only be one target, so you can click the Add Package button again. However, for more complex projects with multiple targets, it’s important to double-check this setting.
Nutrient will now appear under Swift Package Dependencies.
Displaying a PDF
Add your PDF file to the project by dragging it into the Xcode project navigator. Click Finish when prompted.
In the file for your view (
ContentView.swiftfor a new project), import the Nutrient iOS SDK:import PSPDFKitimport PSPDFKitUIDisplay the PDF using the following code:
struct ContentView: View {// Update to use your document name.let document = Document(url: Bundle.main.url(forResource: "Document", withExtension: "pdf")!)@PDFView.Scope private var scopevar body: some View {NavigationStack {PDFView(document: document).toolbar {// Add Nutrient viewer's default toolbar items to include buttons for searching, annotating, and more.DefaultToolbarButtons()}// Set the scope for the view hierarchy so the default toolbar buttons and the `PDFView` can communicate..pdfViewScope(scope)}}}Build and run your application.
Add your PDF file to the project by dragging it into the Xcode project navigator. Click Finish when prompted.
In your
UIViewControllersubclass, import the Nutrient iOS SDK:import PSPDFKitimport PSPDFKitUIDisplay the PDF using the following code. You can place this inside
viewDidAppear(_:)(opens in a new tab), a button action handler, a table view cell selection delegate, or any other suitable place:// Update to use your document name.let fileURL = Bundle.main.url(forResource: "Document", withExtension: "pdf")!let document = Document(url: fileURL)// The configuration closure is optional and allows additional customization.let pdfController = PDFViewController(document: document) {$0.isPageLabelEnabled = false}// Present the PDF view controller within a `UINavigationController` to show built-in toolbar buttons.present(UINavigationController(rootViewController: pdfController), animated: true)Build and run your application.
You’ll now see your PDF document displayed using Nutrient iOS SDK’s built-in viewer.
Next steps
- Add your license key to disable watermarks. Nutrient is commercial software.
- Add AI capabilities to Nutrient’s document viewer.
- Customize the UI and other SDK functionality.
- Add document collaboration through Instant.
- Add OCR support to recognize text in scanned documents.
For getting started on Mac Catalyst or visionOS, first follow the same instructions above, and then refer to the Mac Catalyst and visionOS guide for specific instructions.
The getting started steps mentioned in this guide are for Swift Package Manager, which is our recommendation. Alternatively, you can add Nutrient to your project manually or using CocoaPods.