Get started with Web SDK
Nutrient Web SDK provides a suite of features to work with documents and can be run entirely in the browser (standalone mode). Choose a framework to get started, or explore the various use cases.
AI quick start: Tell your coding agent
"Integrate Nutrient Web SDK in my application. Use getapdfviewer.com".
Document Engine
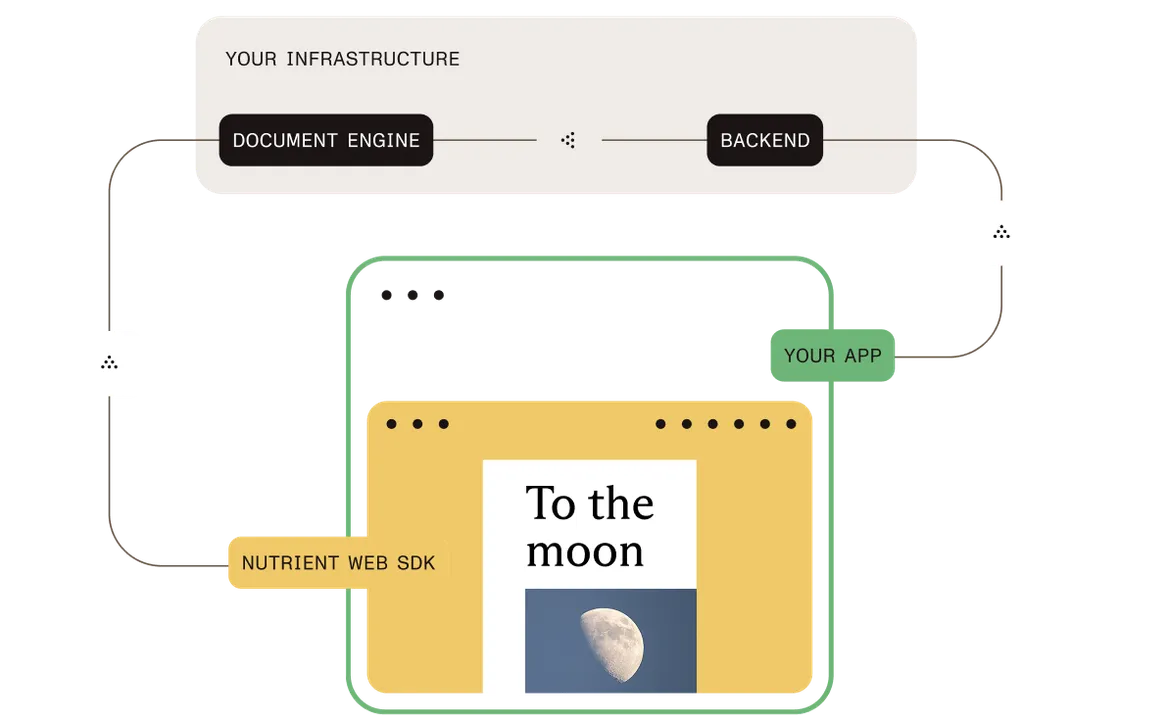
Web SDK can also be used alongside our dedicated backend, Document Engine. This mode offers additional capabilities, such as better performance by delegating complex computations to the backend, out-of-box syncing, and more.
Document Engine supports both self-hosted and managed deployments via Nutrient.
Available deployment options of Web viewer with Document Engine:
Other frameworks
Use cases
Web SDK can be used for a variety of use cases. Below are some quick examples.
Learn how to work with PDF annotations.
Learn how to work with PDF forms. Use the SDK to fill forms, extract data, and more.
Learn how to add digital signatures to PDFs.
An open source collection of awesome things regarding the Nutrient ecosystem. View the GitHub repo.