Workflow Automation API for automation tasks
The Nutrient Workflow Automation API has a large collection of functions that enable you to manage processes, requests, tasks, reports, and users within a Workflow Automation instance. There are also many new functions in the new API, including extended functions for the management of file attachments.
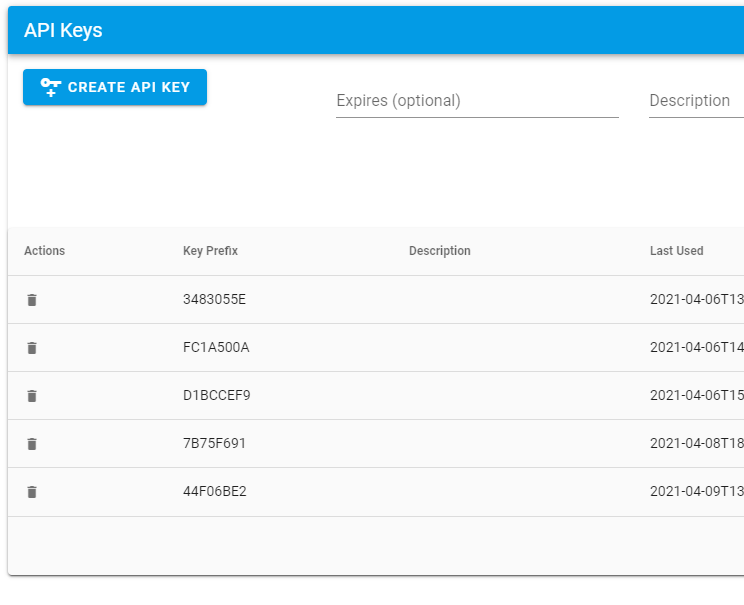
Generating an API key
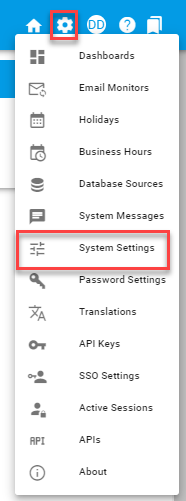
Choose the API Keys icon in the Settings menu (the gear icon in the upper-right corner).

To create a new key, add an expiration date and a description, both of which are optional, and then click Create API Key. A new value will appear in the Private Key field. Press Copy on the far right to store the key securely and safely.
If you don’t copy this value, it won’t be displayed again anywhere in the system, and you’ll need to generate a replacement key.
Legacy API information can be found at developer.integrify.com/rest/docs(opens in a new tab). New functions have been added to this version, all of which are documented within the application itself. Refer to the screenshot below for the link to the API documentation.
Using the Workflow Automation API
This section will walk you through how to use the Nutrient Workflow Automation API step by step, including how to:
- Identify your host and tenant name
- Access the API documentation
- Authenticate and get your access token
Identify the host and tenant
The host header value can be found on the main screen under Settings > System Settings in the upper right-hand corner of the screen.
On the System Settings page, copy and save the following items:
- ID — yourtenant
- HostHeader — baseurl.integrify.com

Access the API documentation
API documentation is now hosted under the System / APIs section and has sections as shown in the screenshot below. To access a particular topic, click the box with the arrow pointing up and to the right.
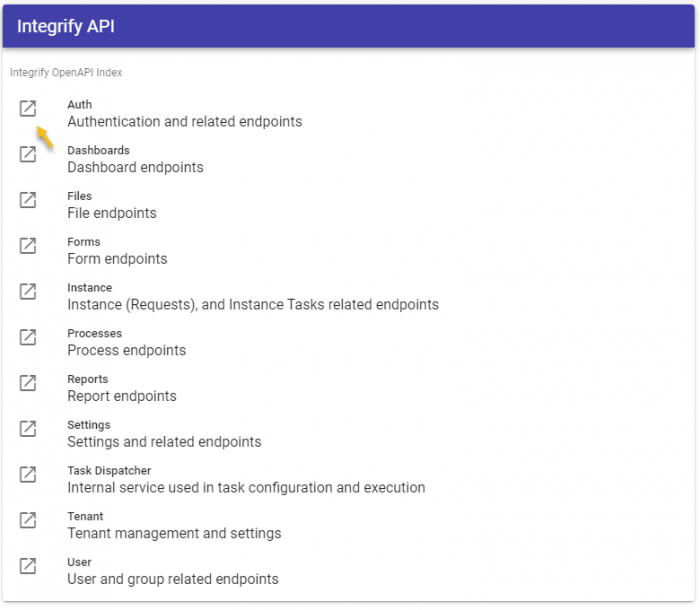
The section you access will look something like what’s shown below.
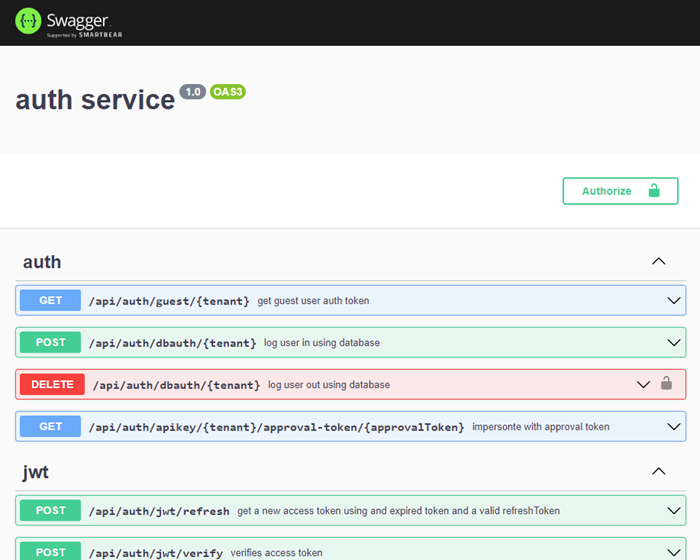
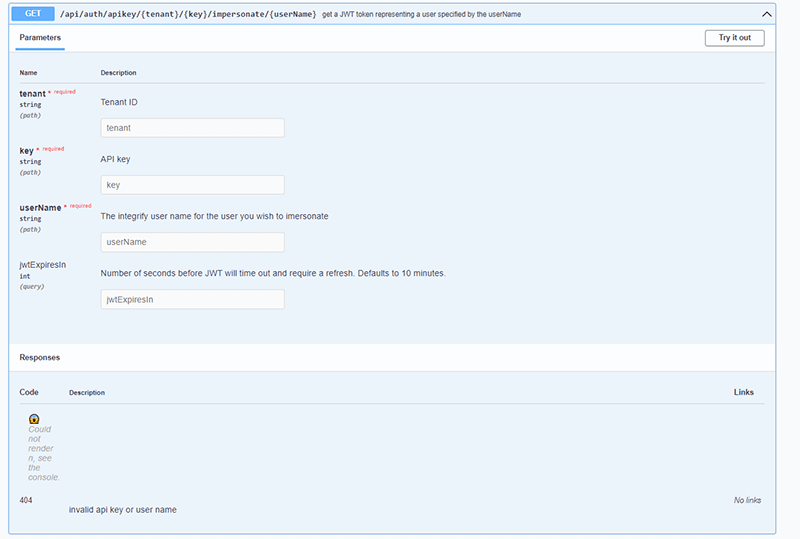
Each colored button represents a method you can access in the Workflow Automation API. In this example, the area is specific to authentication. You can expand each function by clicking on each function’s listing.
Click Try it out to test the function directly on the page. You may need to provide one or more parameter values to help the function complete successfully. When the function completes, you’ll receive a success or failure message and any appropriate return values.
Authenticate the system
To complete most tasks within the Workflow Automation API, you’ll need to pass a JSON Web Token (JWT) token value in the header of the method call you’re using.
IntegrifyEnv (“Env”) tokens are used by system functions only and cannot be used by external systems to authenticate to Workflow Automation.
You can retrieve a JWT token using an API key that you created in the system settings area.
Using the JWT token
The JWT token you retrieve should be placed in the header of each method call you make. The way to use this token is as a bearer authentication token, where the token is passed as proof of privileges to the Workflow Automation system.
User-based API key authentication
As of version 8.11.0, a new API endpoint enables the acquisition of access tokens using user-based API keys. This authentication method provides a secure way for integrated services to access the API with user-specific permissions.
How user-based API keys work
User-based API key authentication functions similarly to the impersonation endpoint, but with the identity fixed to the user associated with the API key:
- Each API key is tied to a specific user account.
- The access token granted reflects that user’s permissions and roles.
- API calls made with this token execute with the same privileges as the associated user.
This ensures proper authorization and audit trails for API operations.
Use cases for user-based API keys
This authentication method is particularly useful for:
- Service integrations — When external services need to perform actions on behalf of specific users.
- Automated workflows — For scheduled tasks that should execute with specific user permissions.
- Third-party applications — When integrating applications that require user-specific API access.
- Audit compliance — Maintaining clear attribution of API actions to specific user accounts.
Obtaining an access token with a user-based API key
To authenticate using a user-based API key:
- Generate a user-based API key through the API Keys settings (the process is the same as generating standard API keys).
- Use the dedicated user-based authentication endpoint to obtain an access token.
- Include the access token in subsequent API requests as a bearer authentication token.
The endpoint returns an access token that represents the user associated with the API key, enabling secure, user-specific API authentication for your integrated services.
User-based API keys grant access with the full permissions of the associated user account. Ensure API keys are stored securely and only used by authorized applications.
createInstanceWithTaskData response behavior
When using createInstanceWithTaskData, instance tasks in the response are returned in a consistent order. This enables more reliable integration logic when task sequencing matters.