Streamline email management with inbound monitors
Email monitors allow you to define an inbox for an email address you want to monitor for incoming email messages. This can be handy for managing emails sent to a group inbox, especially from external sources like customers, vendors, students, etc.
How does it work?
When a message arrives in a monitored mailbox, it’ll generate a new request in Workflow Automation. To manage the request, assign a mailbox and create a process.
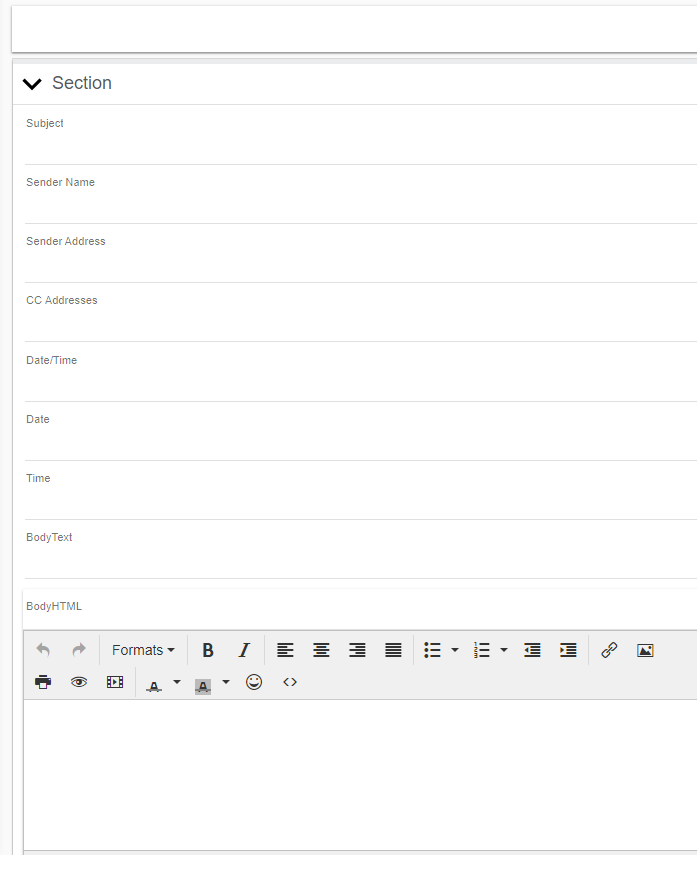
The data captured from the email will include the following:
- “Subject”
- “Sender Name”
- “Sender Address”
- “CC Addresses”
- “Date/Time”
- “Date”
- “Time”
- “BodyText”
- “BodyHTML”
- “Body”
- “Attachments”
These data points can then be used as prefilled data and within your business rules for routing during process execution.
Configuring an inbound email monitor
Select System Settings > Email Monitors from the left-side navigation menu.
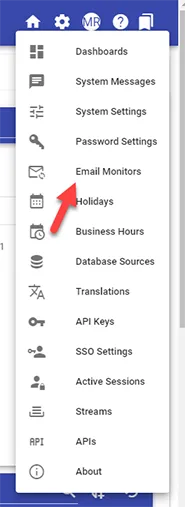
Then choose Add Email Monitor.

Once selected, you’ll be presented with the following options to configure an email monitor.
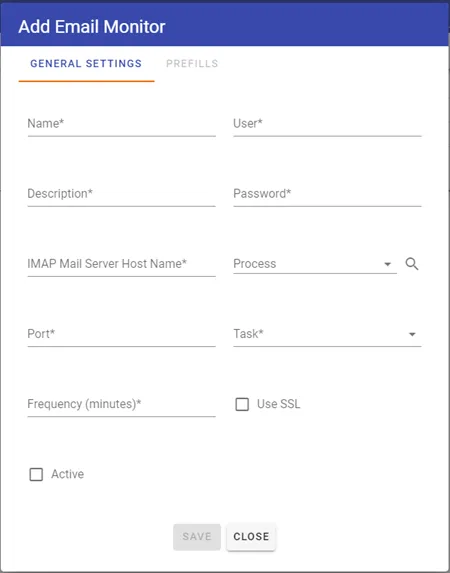
Email monitor attributes
Here are the attributes you can define:
| Attribute | Option | Required | Description |
|---|---|---|---|
| Name | None | Yes | The name of the email monitor. |
| Description | None | No | The description of the email monitor. |
| Internet Message Access Protocol (IMAP) Mail Server Host Name | None | No | The fully qualified domain name of the IMAP Server you want to use. |
| Port | None | No | The port for your connection. Standard IMAP ports are 143 for non-SSL and 993 for SSL connections. |
| Frequency (minutes) | None | Yes | The frequency at which the email monitor checks for unread emails, measured in minutes. |
| Active | Slide button | No | Select to make the email monitor active. |
| User | None | No | The username for your connection (if required). |
| Password | None | No | The password for your connection (if required). |
| Process | Select list | No | The process you wish to initiate from the inbound email. |
| Task | Select list | No | Dynamic based on the process selected. The task within the process you wish to complete with the inbound email. |
| Use SSL | Slide button | No | If using SSL for your connection. |
Using the email monitor with Gmail
To authenticate with a Gmail account set up with IMAP, a unique app password must be generated to provide Workflow Automation access to the inbox. Check out this article(opens in a new tab) for information on how to set this up and generate a one-time password for the email monitor.
Using the email monitor with Outlook 365
Nutrient Workflow Automation supports connecting to Outlook 365 mailboxes using modern authentication protocols. The email monitor is compatible with Microsoft’s latest security requirements:
- Transport Layer Security (TLS) protocol — The email monitor uses TLS 1.2/1.3 protocols for secure connections.
- Azure authentication — Modern Azure authentication setup is required for connecting to Outlook 365 mailboxes.
- IMAP configuration — Ensure IMAP is enabled for your Outlook 365 mailbox.
Configuration changes
Due to changes in Microsoft’s API endpoints and security requirements, older email monitor configurations may need to be updated to use the modernized Azure authentication setup. The system supports stable connectivity with Microsoft services through updated TLS protocols and authentication mechanisms.
Example email monitor configuration
Here’s an example of an email monitor configuration.
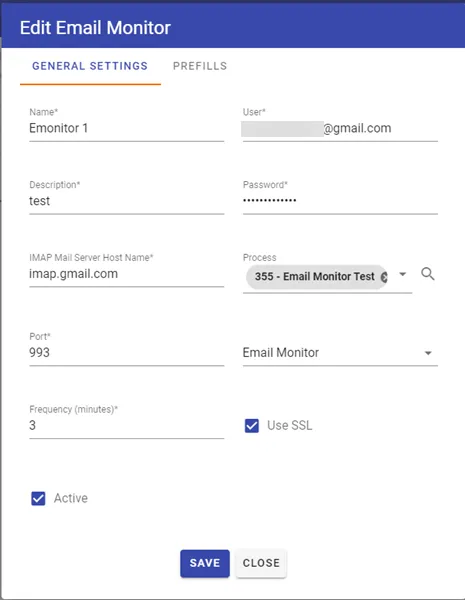
Once you’ve saved an email monitor, you can see that the process will start and the task will be completed with data from the inbound email.
Form task definition for the email monitor
When you define a process and its form task that will start based on an email being received in your configurations, you’ll need to ensure that the form used in your form task has questions with specifically titled questions. The form fields must be of the short text type, and the field labels must be spelled the same as they are in the list below (i.e. the field for BodyText input must have BodyText for a label).
The values passed in from the email are:
- “Subject”
- “Sender Name”
- “Sender Address”
- “CC Addresses”
- “Date/Time”
- “Date”
- “Time”
- “BodyText”
- “BodyHTML”
- “Body”
- “Attachments”
You must configure the Form task’s prefill settings as shown below with Parent Process Data or the email’s data won’t be transferred to your input form.

Your forms must have questions with labels of these names to receive the desired data.
Here’s an example of a form with the required question types.
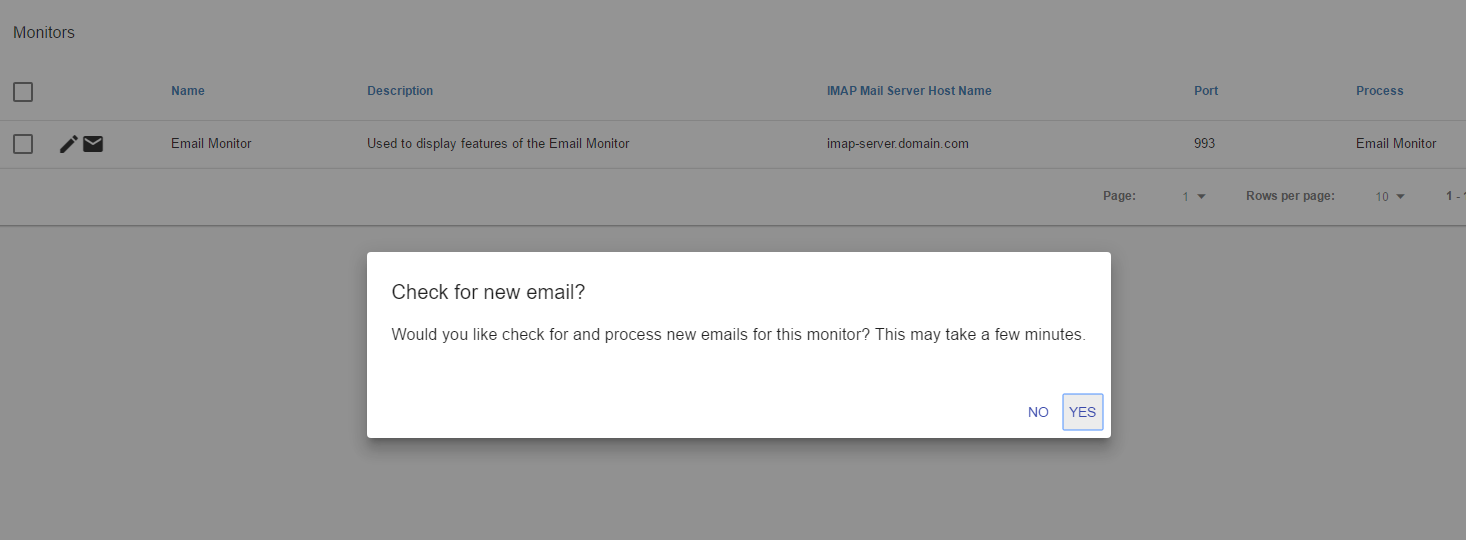
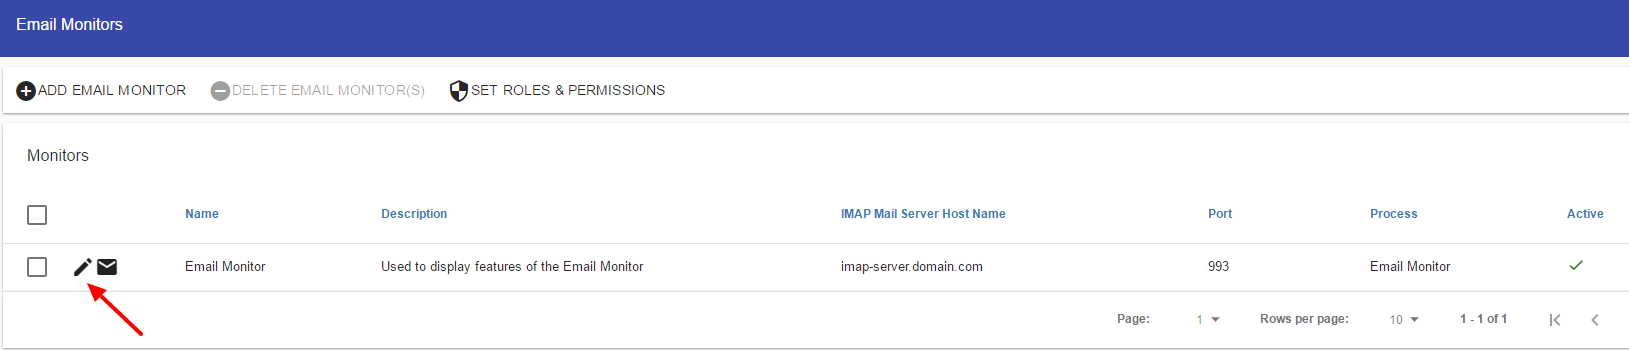
You can also edit your email monitors here.
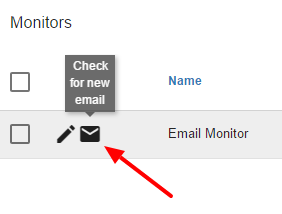
In addition, you can check for new email by selecting the Envelope icon.
Email monitor dialog improvements
As of version 8.11.0, the email monitor configuration dialog includes several usability enhancements:
Save confirmation and feedback
- Save confirmation message: You now receive immediate feedback when saving email monitor configurations, confirming that your changes have been applied successfully
- Disabled button state: The Save button is disabled during active save operations to prevent duplicate submissions and ensure data integrity
- Race condition fixes: Improvements to the save process eliminate issues that previously occurred when saving configurations
Navigation improvements
- Close button on all tabs: A Close button is now available on all configuration tabs, including the Prefills tab, allowing you to exit directly from any configuration sub-menu without having to navigate back through multiple screens
Searchable field mappings
- v-autocomplete controls: Field mapping selections now use searchable dropdown controls instead of standard selection menus
- Text filtering: You can filter field mappings by typing, making it easier to find specific fields in processes with many form questions
- Improved usability: This enhancement is particularly helpful when working with complex processes that have numerous fields to map
These improvements streamline the email monitor configuration experience and reduce the time needed to set up and maintain email monitoring workflows.
This will prompt you to select Yes or No.