Adding a My Tasks widget
This guide explains how to add and configure a My Tasks widget on a dashboard in Workflow Automation.
Adding a My Tasks widget to the admin dashboard provides a clear and immediate view of all open tasks assigned to users. This enables you to monitor, access, and manage your current responsibilities directly from the dashboard. The widget can be filtered (for example, to show only open tasks), helping you focus on what needs attention, and improving task management efficiency. Additionally, you can predefine filters for the widget, ensuring consistency in what’s displayed to different users or groups, which streamlines workflow oversight and task tracking across the organization.
Adding a My Tasks widget
To add a My Tasks widget, follow the steps below:
- Go to the Dashboards layout page for a dashboard.
- Click Add Widget in the upper-right corner of the page.
- On the pop-up that appears, select My Tasks and click Add Widget to proceed. Click Cancel to terminate the operation.
Newly added widgets appear at the bottom of the dashboard. Scroll down to find, move, or edit them.
Widget actions
- Use Search
 to find a task by its name, type, description, or request ID.
 - Click the Filter
 icon in the upper-right corner of the widget to apply filters and view only specific data subsets. Click Close in the lower-right corner to exit the filter pop-up, and Clear All to reset all the filters.
Users cannot change these predefined filters if the dashboard is assigned to them by an admin.
- Click the Refresh
 icon in the upper-right corner of the widget to update tasks with the latest data.
Changing the widget layout
You can resize the widget for improved readability and layout fit. As you resize, the number of rows adjusts dynamically based on the widget height, ensuring optimal visibility of the tasks content.
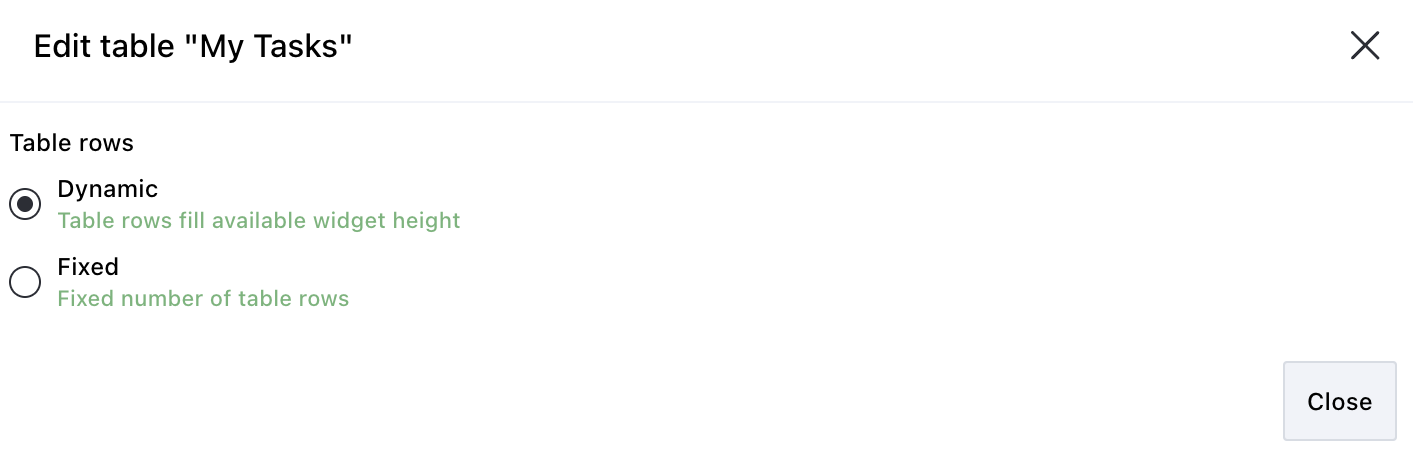
Editing the table
To configure whether to adjust row height of the widget dynamically or not:
- Click the three dots
 icon in the upper-right corner of the widget.
 - Select the Edit table option from the dropdown.
- On the pop-up that appears, toggle between dynamic or fixed row heights for the widget:
- Dynamic — Table rows fill available widget height.
- Fixed — Fixed number of table rows.
- Click Close to save changes and exit the pop-up.
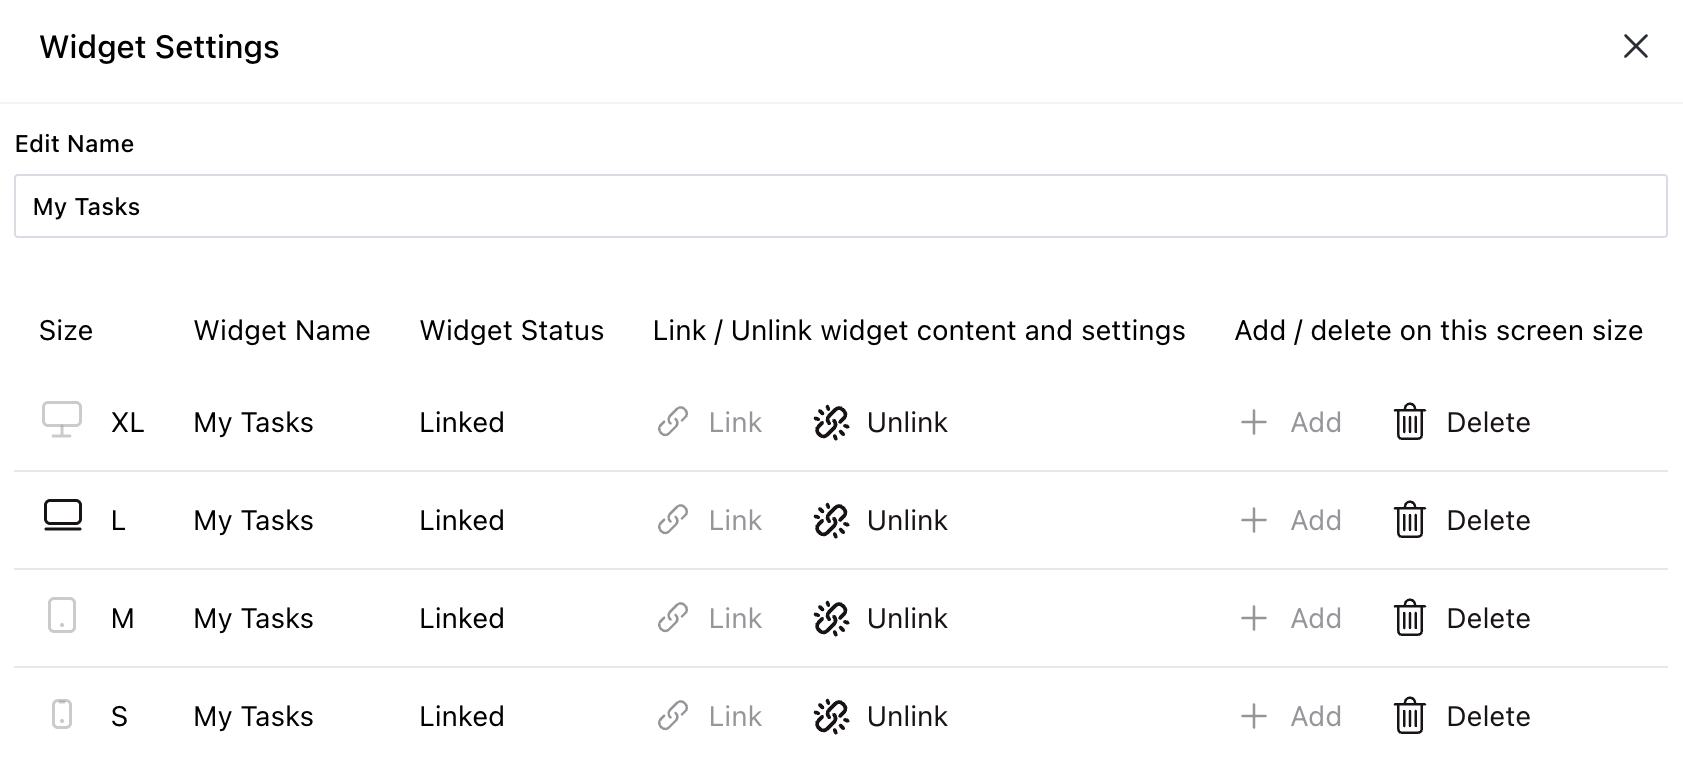
Editing widget settings
To edit widget settings:
- Click the three dots icon in the upper-right corner of the widget and select the Edit widget option from the dropdown.
- On the pop-up that appears, you can edit the following settings:
- Widget name — Modify the label that appears on the widget header.
- Link/unlink widget content and settings
- Linking keeps the widget content and configurations consistent across all screen sizes.
- Unlinking enables you to customize the widget layout or content independently for each screen size — useful for optimizing display for mobile vs. desktop.
- Relinking restores shared behavior, overriding any screen-specific edits made while unlinked.
- Add/delete widget on a screen
- Click the Add
 icon to include the widget on additional screen sizes.
 - Click the Delete
 icon to remove the widget from a particular screen size without affecting its presence on others.
- Click the Add
- Click the Close
 icon to save changes and exit the pop-up.
Deleting the widget
To delete the widget:
- Click the three dots icon in the upper-right corner of the widget.
- Select the Delete widget option from the dropdown.
Saving changes
Once you finish customizing the widget:
- Click Save dashboard in the upper-right corner to apply the changes.
- Click Discard to cancel any unsaved edits.
Next steps
Refer to the guides below to learn about the following widgets and their configuration: