Adding a Today’s Messages widget
This guide explains how to add and configure a Today’s Messages widget on a dashboard in Workflow Automation.
Adding a Today’s Messages widget to an admin dashboard enables you to display important announcements, news, help notes, or any other messages directly to users within their dashboards. Messages can be scheduled with specific start and end dates, and multiple messages can appear if their date ranges overlap. This ensures timely and relevant communication is visible to users as soon as they access their dashboard, improving awareness and engagement with critical updates or information relevant to their workflow activities
Adding a Today’s Messages widget
To add a Today’s Messages widget, follow the steps below:
- Go to the Dashboards layout page for a dashboard.
- Click Add Widget in the upper-right corner of the page.
- On the pop-up that appears, select Today’s Messages and click Add Widget to proceed. Click Cancel to terminate the operation.
Newly added widgets appear at the bottom of the dashboard. Scroll down to find, move, or edit them.
For information on how to schedule messages with specific start and end dates in a Today’s Messages widget, refer to the guide for managing system messages.
Changing the widget layout
You can resize and reposition the widget for improved readability and layout fit by dragging and dropping it for better usability.
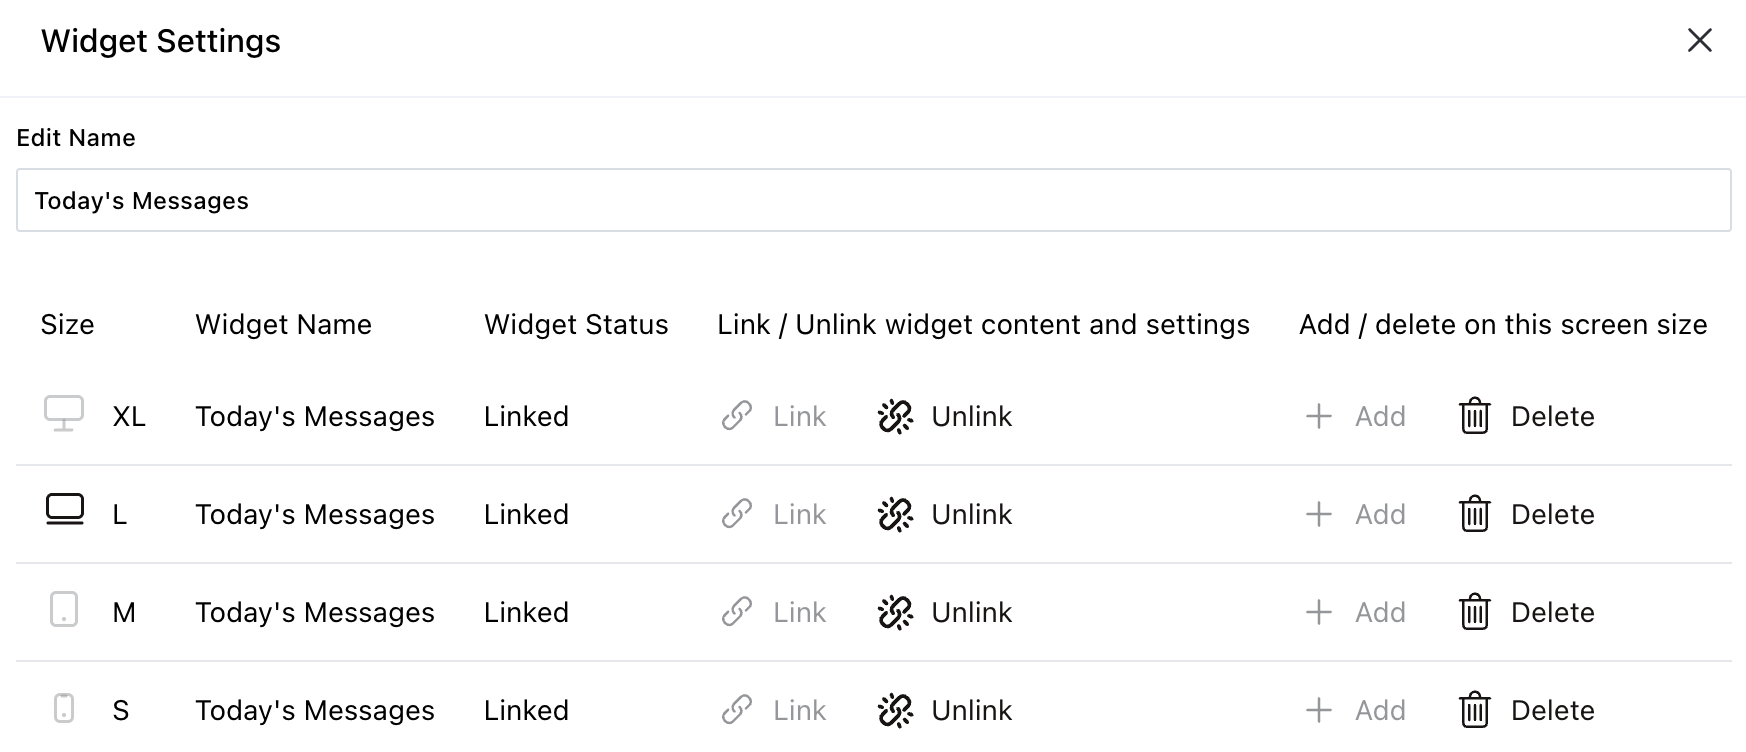
Editing widget settings
To edit widget settings:
- Click the three dots
 icon in the upper-right corner of the widget and select the Edit widget option from the dropdown.
 - On the pop-up that appears, you can edit the following settings:
- Widget name — Modify the label that appears on the widget header.
- Link/unlink widget content and settings
- Linking keeps the widget content and configurations consistent across all screen sizes.
- Unlinking enables you to customize the widget layout or content independently for each screen size — useful for optimizing display for mobile vs. desktop.
- Relinking restores shared behavior, overriding any screen-specific edits made while unlinked.
- Add/delete widget on a screen
- Click the Add
 icon to include the widget on additional screen sizes.
 - Click the Delete
 icon to remove the widget from a particular screen size without affecting its presence on others.
- Click the Add
Deleting the widget
To delete the widget:
- Click the three dots icon in the upper-right corner of the widget.
- Select the Delete widget option from the dropdown.
Saving changes
Once you finish customizing the widget:
- Click Save dashboard in the upper-right corner to apply the changes.
- Click Discard to cancel any unsaved edits.
Next steps
Refer to the guides below to learn about the following widgets and their configuration: