Managing roles and permissions for dashboards
This guide explains how to manage roles and permissions for dashboards.
To begin managing access to dashboards:
- Navigate to the Dashboard list page.
- Click Manage Roles & Permissions in the top bar.
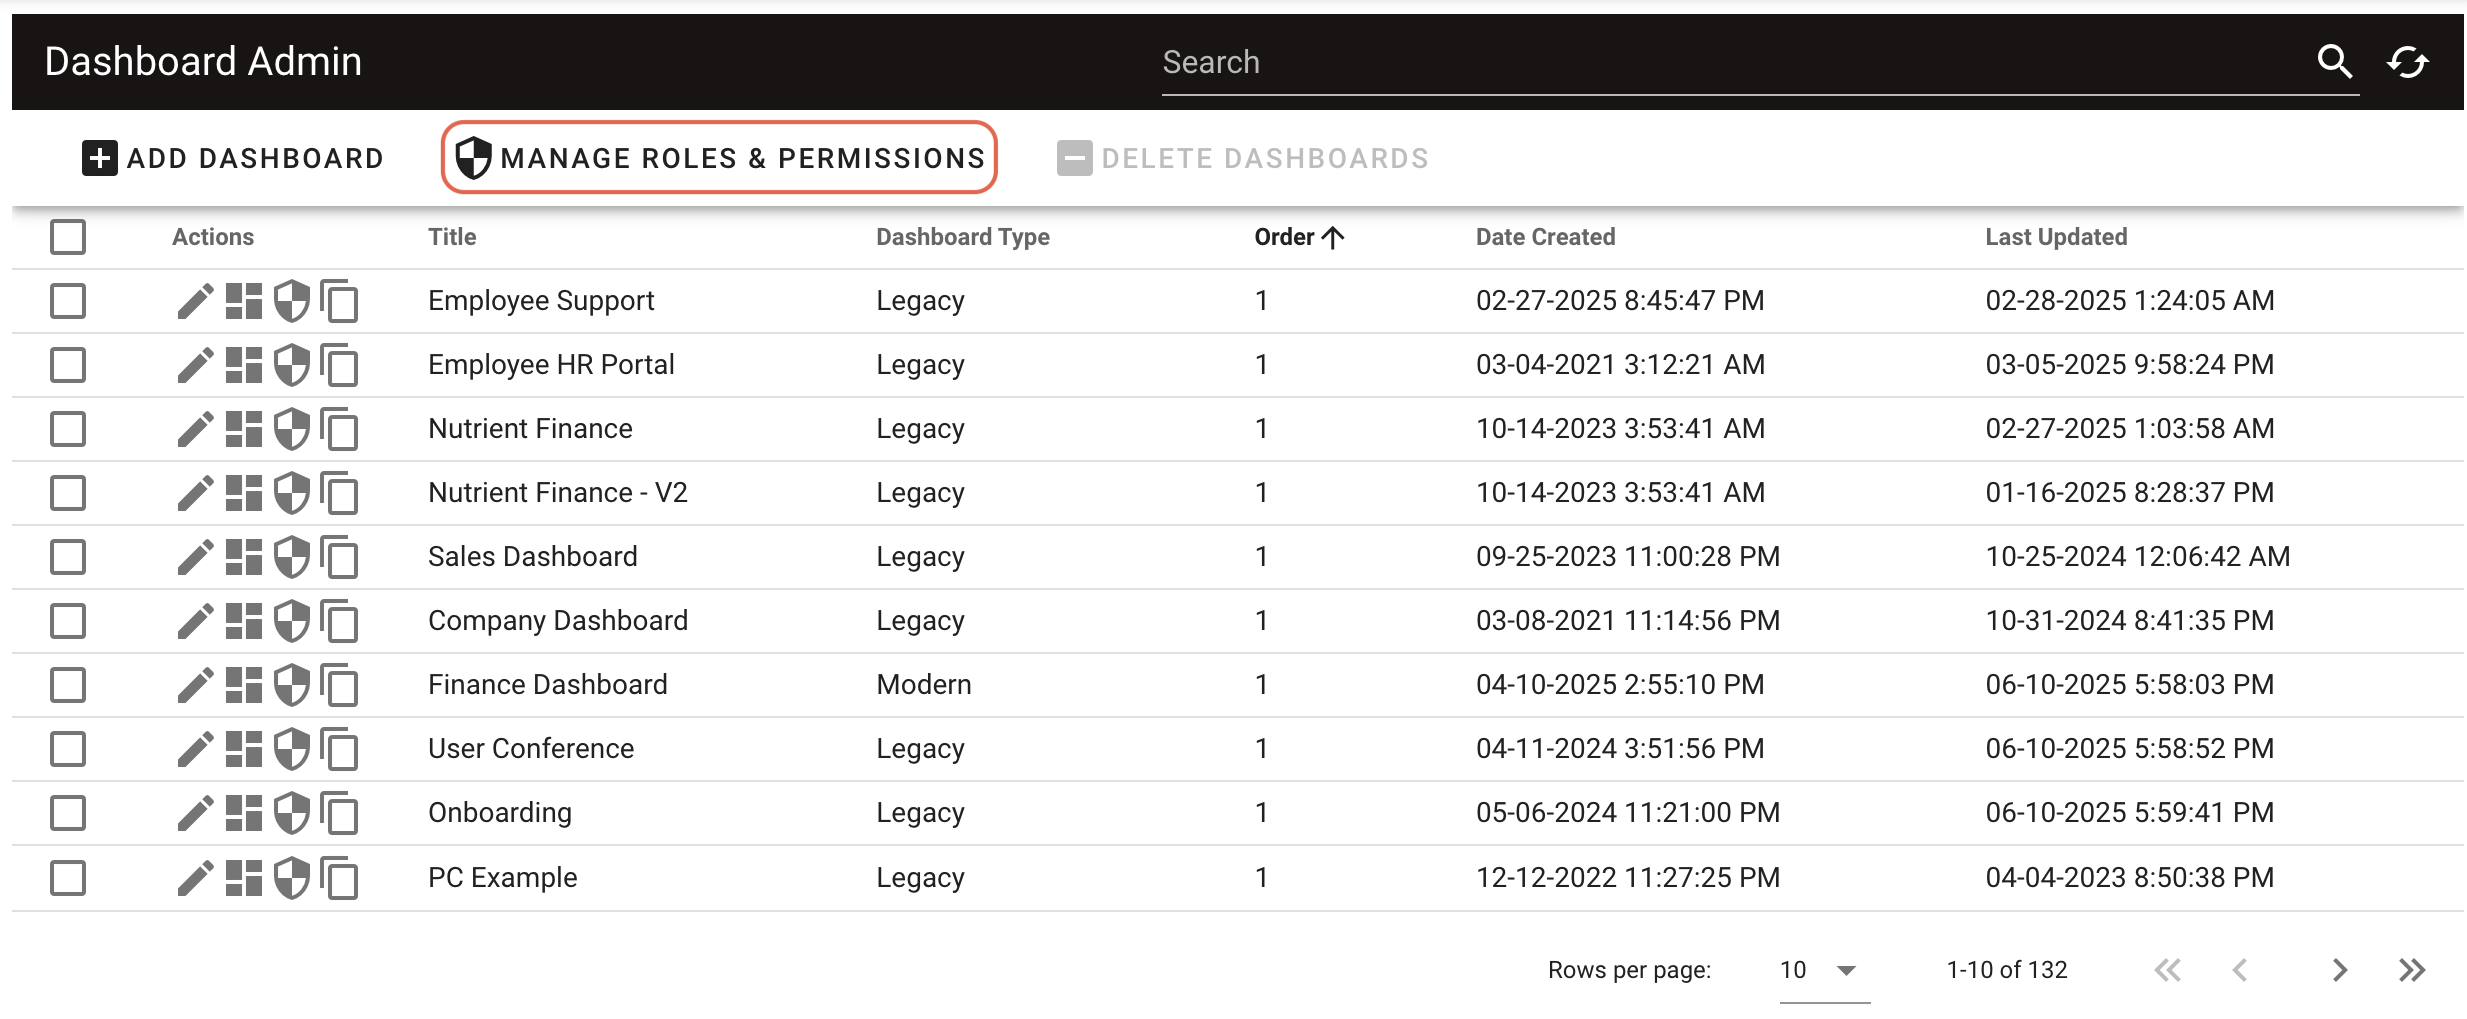
This opens the roles and permissions page, where you can view and manage all roles created at the dashboards level.
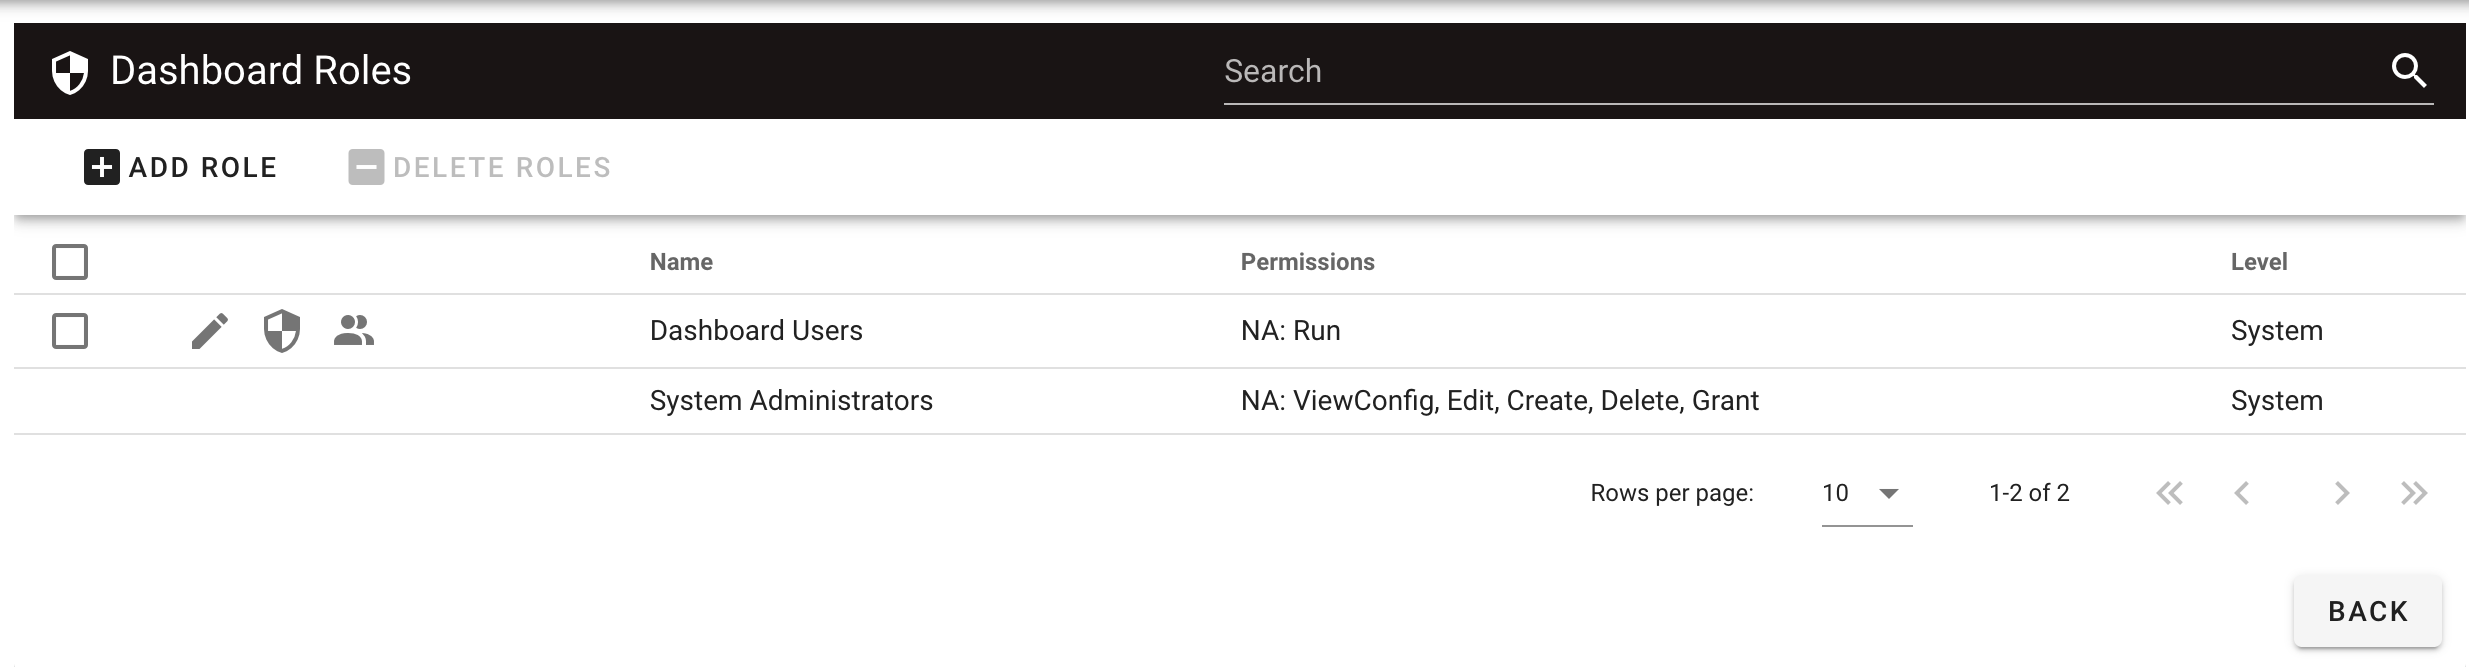
Viewing dashboard-level roles
On the roles and permissions page, you can:
- View all existing roles
- See the Name, Permissions, and access Level (for example, System) for each role
- Search for a specific role using the Search bar at the top
Creating a new role
To create a new role:
- Click Add Role in the upper-left corner of the roles and permissions page.
- Enter the following details for the role:
- Name
- Description
- Click Add Role to save, or Close to cancel.
Editing role permissions at the dashboards level
After creating a new role, set the permissions to run the dashboard by following the steps below:
- Click the Edit Permissions
 icon for the newly added role.
 - On the page that appears, select Run.
- Click Save to apply changes.

Create a general role with Run permissions at the dashboards level. This enables you to reuse it across all dashboards and assign users on a per-dashboard basis.
Managing roles: Additional actions
You can perform the following additional actions on a role:
 Edit details of the role (role ID, name, description)
 View members assigned to the role
Click Back in the lower-right corner to return to the Dashboard list page.
Setting role permissions for an individual dashboard
To set role permissions for an individual dashboard:
- Select the dashboard from the list of dashboards.
- Click the Set Permissions icon.
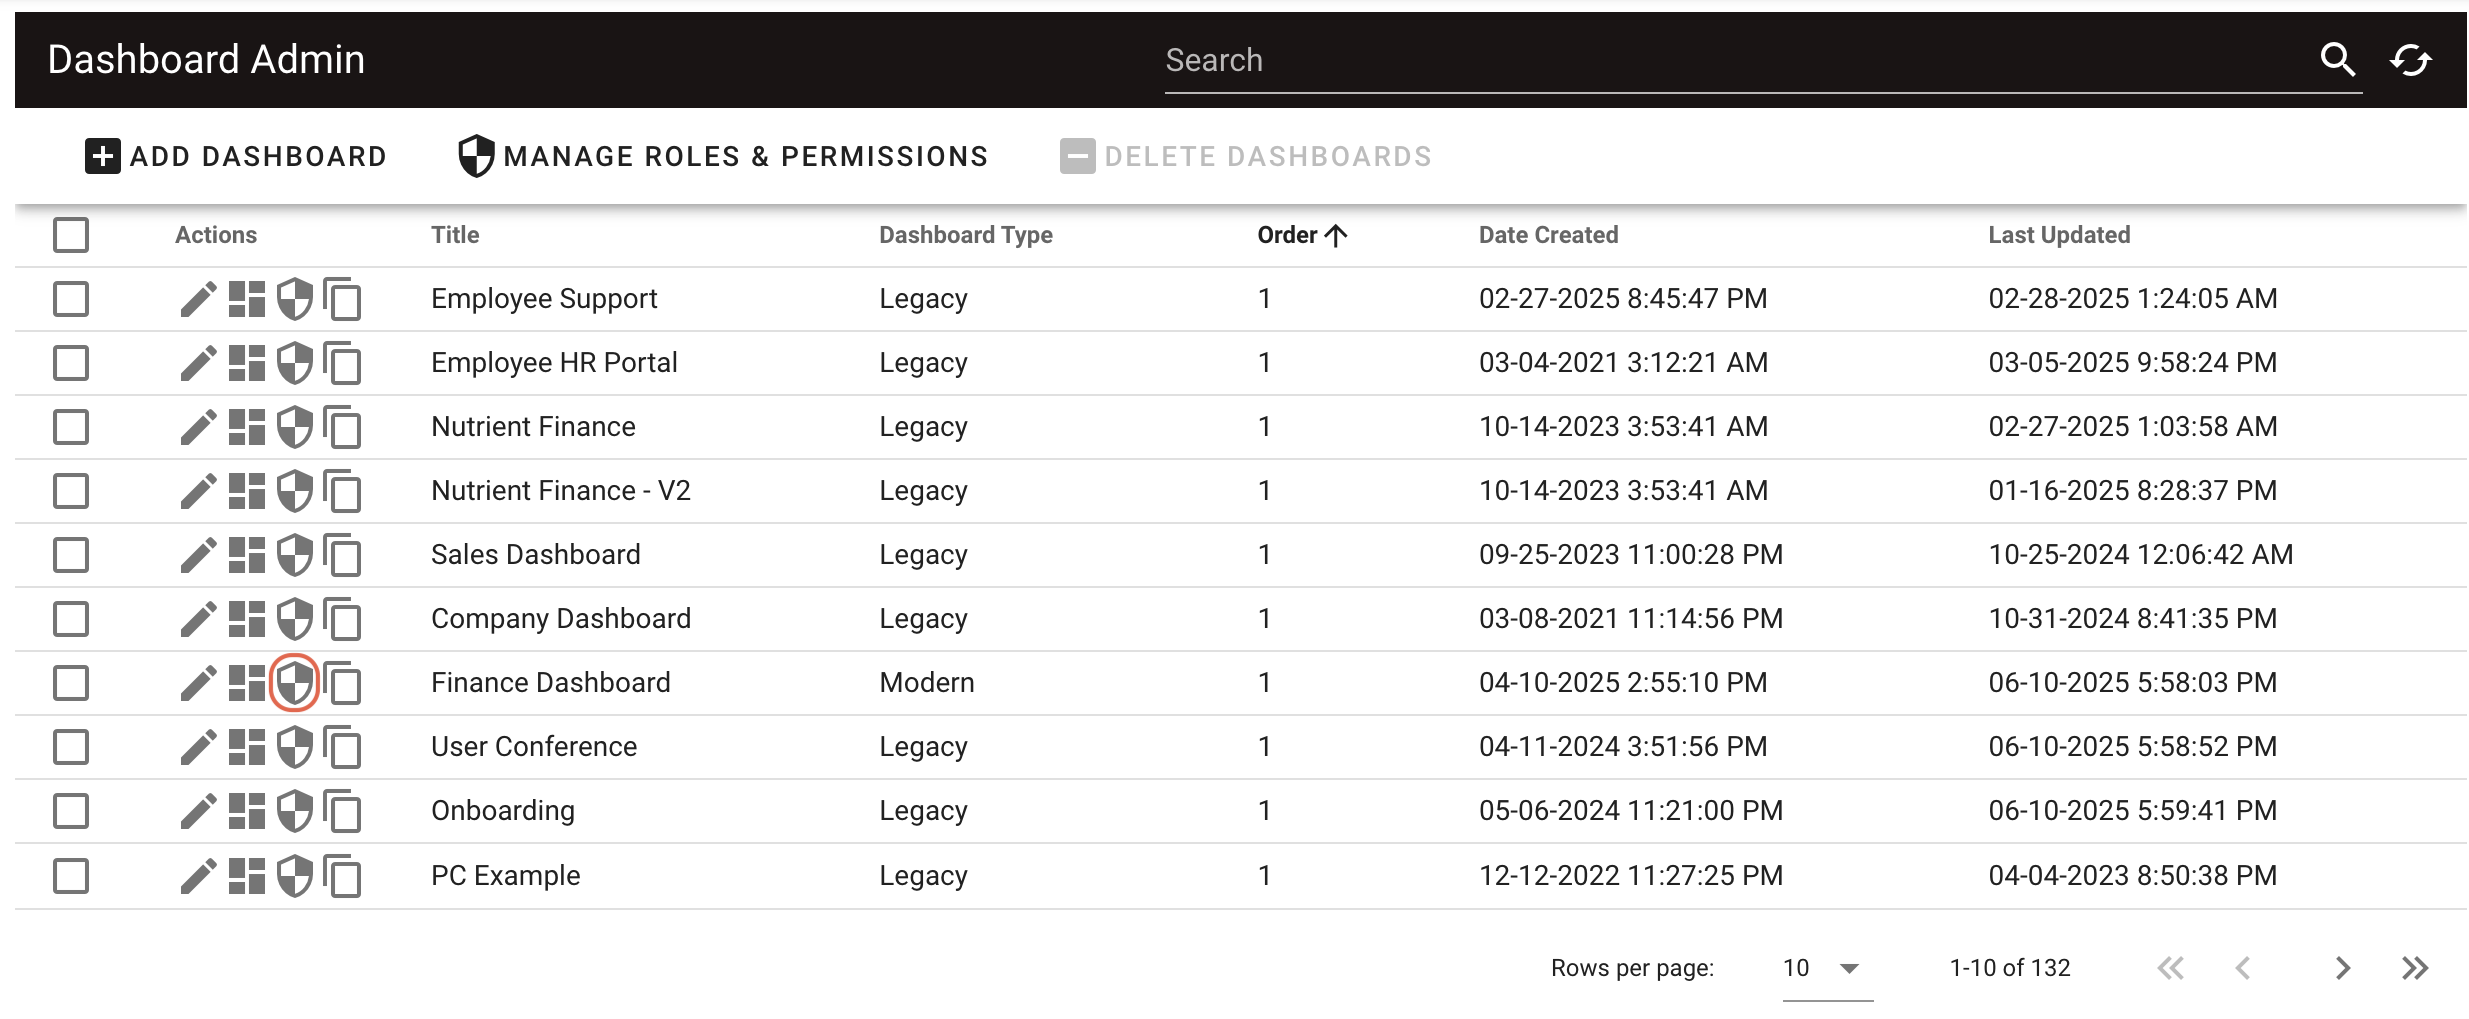
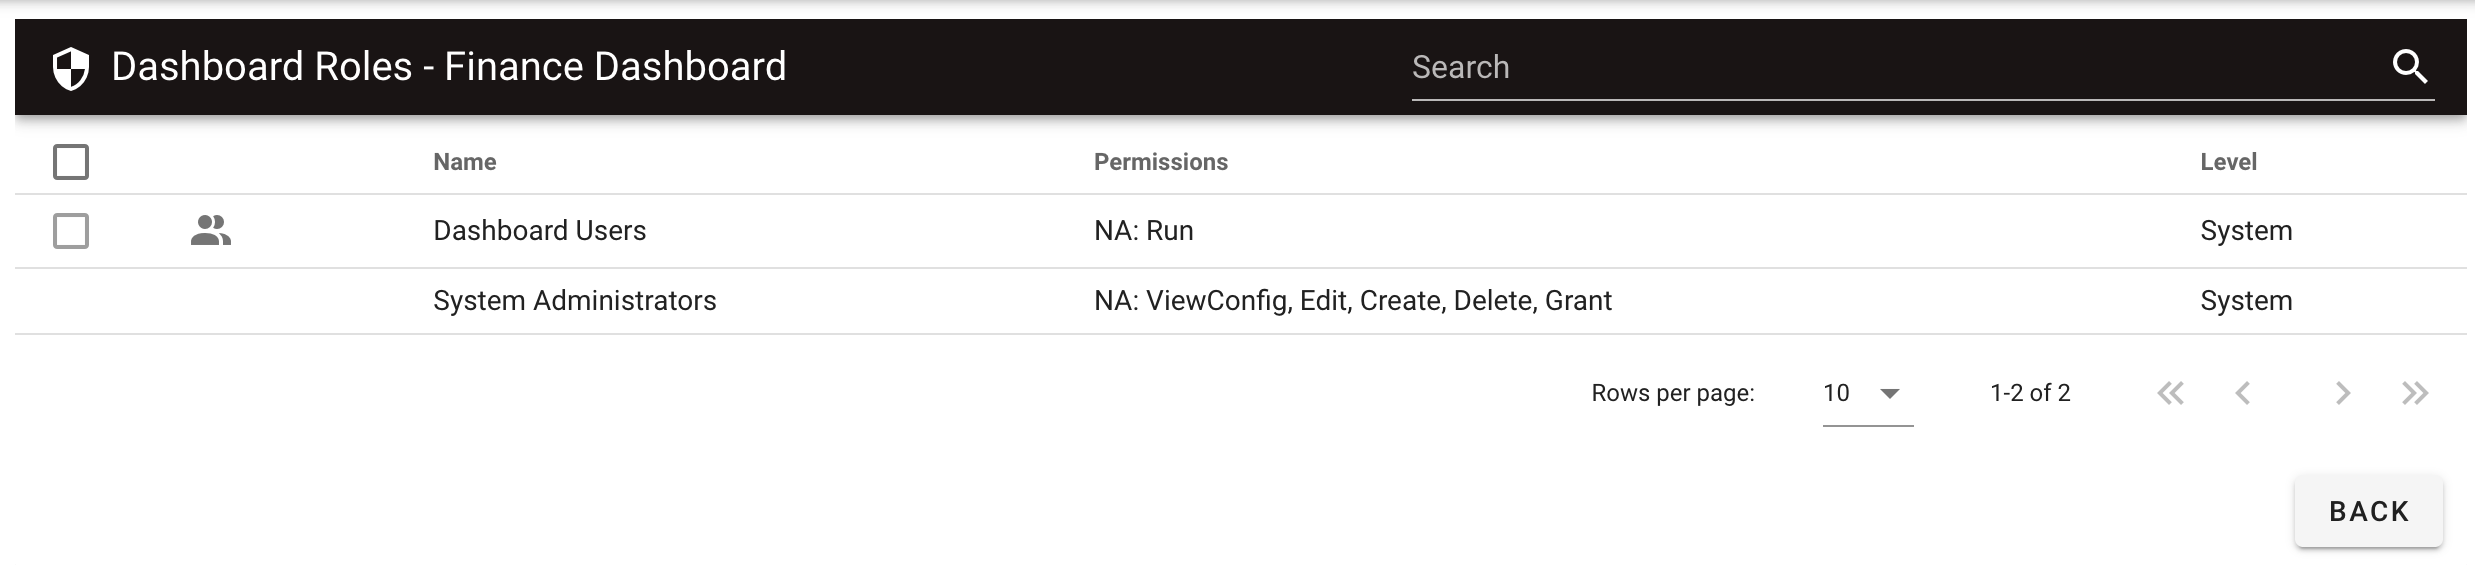
This opens the dashboard-specific permissions page, showing all roles and their current access.
For each role, you can view the following details:
- Name of the role
- Permissions associated with the role
- Access level of the role (for example, System)
Use the Search bar to find a role by name.
Adding members to a role
To add members to a role:
Click the Show Members
icon for the desired role.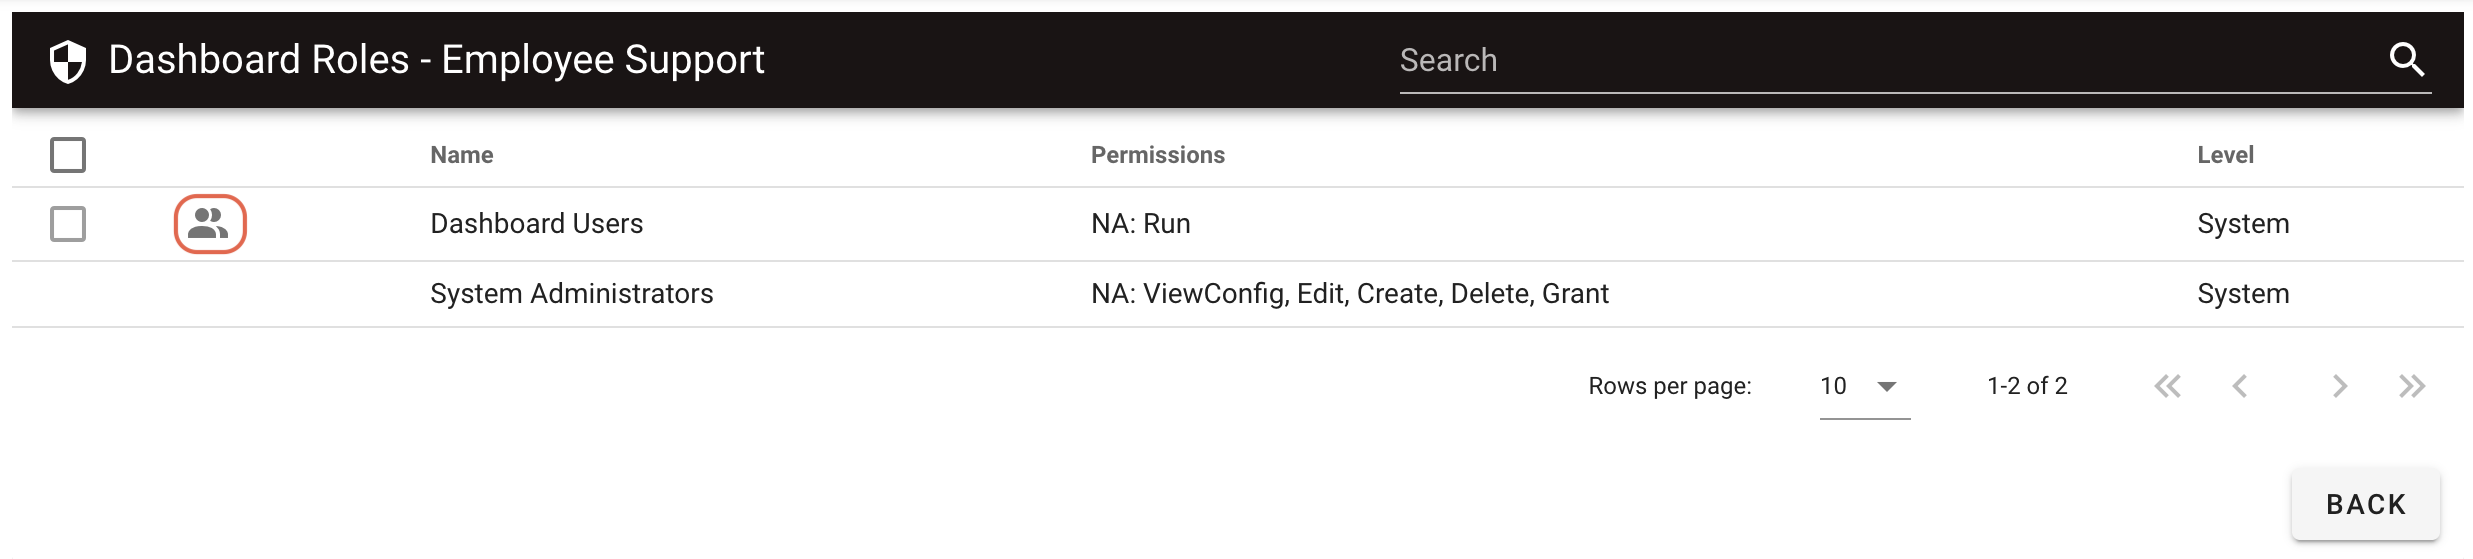
On the page that appears, click the
 icon to add Contacts or Groups to the current role members panel. Click the
  icon to remove an added member.
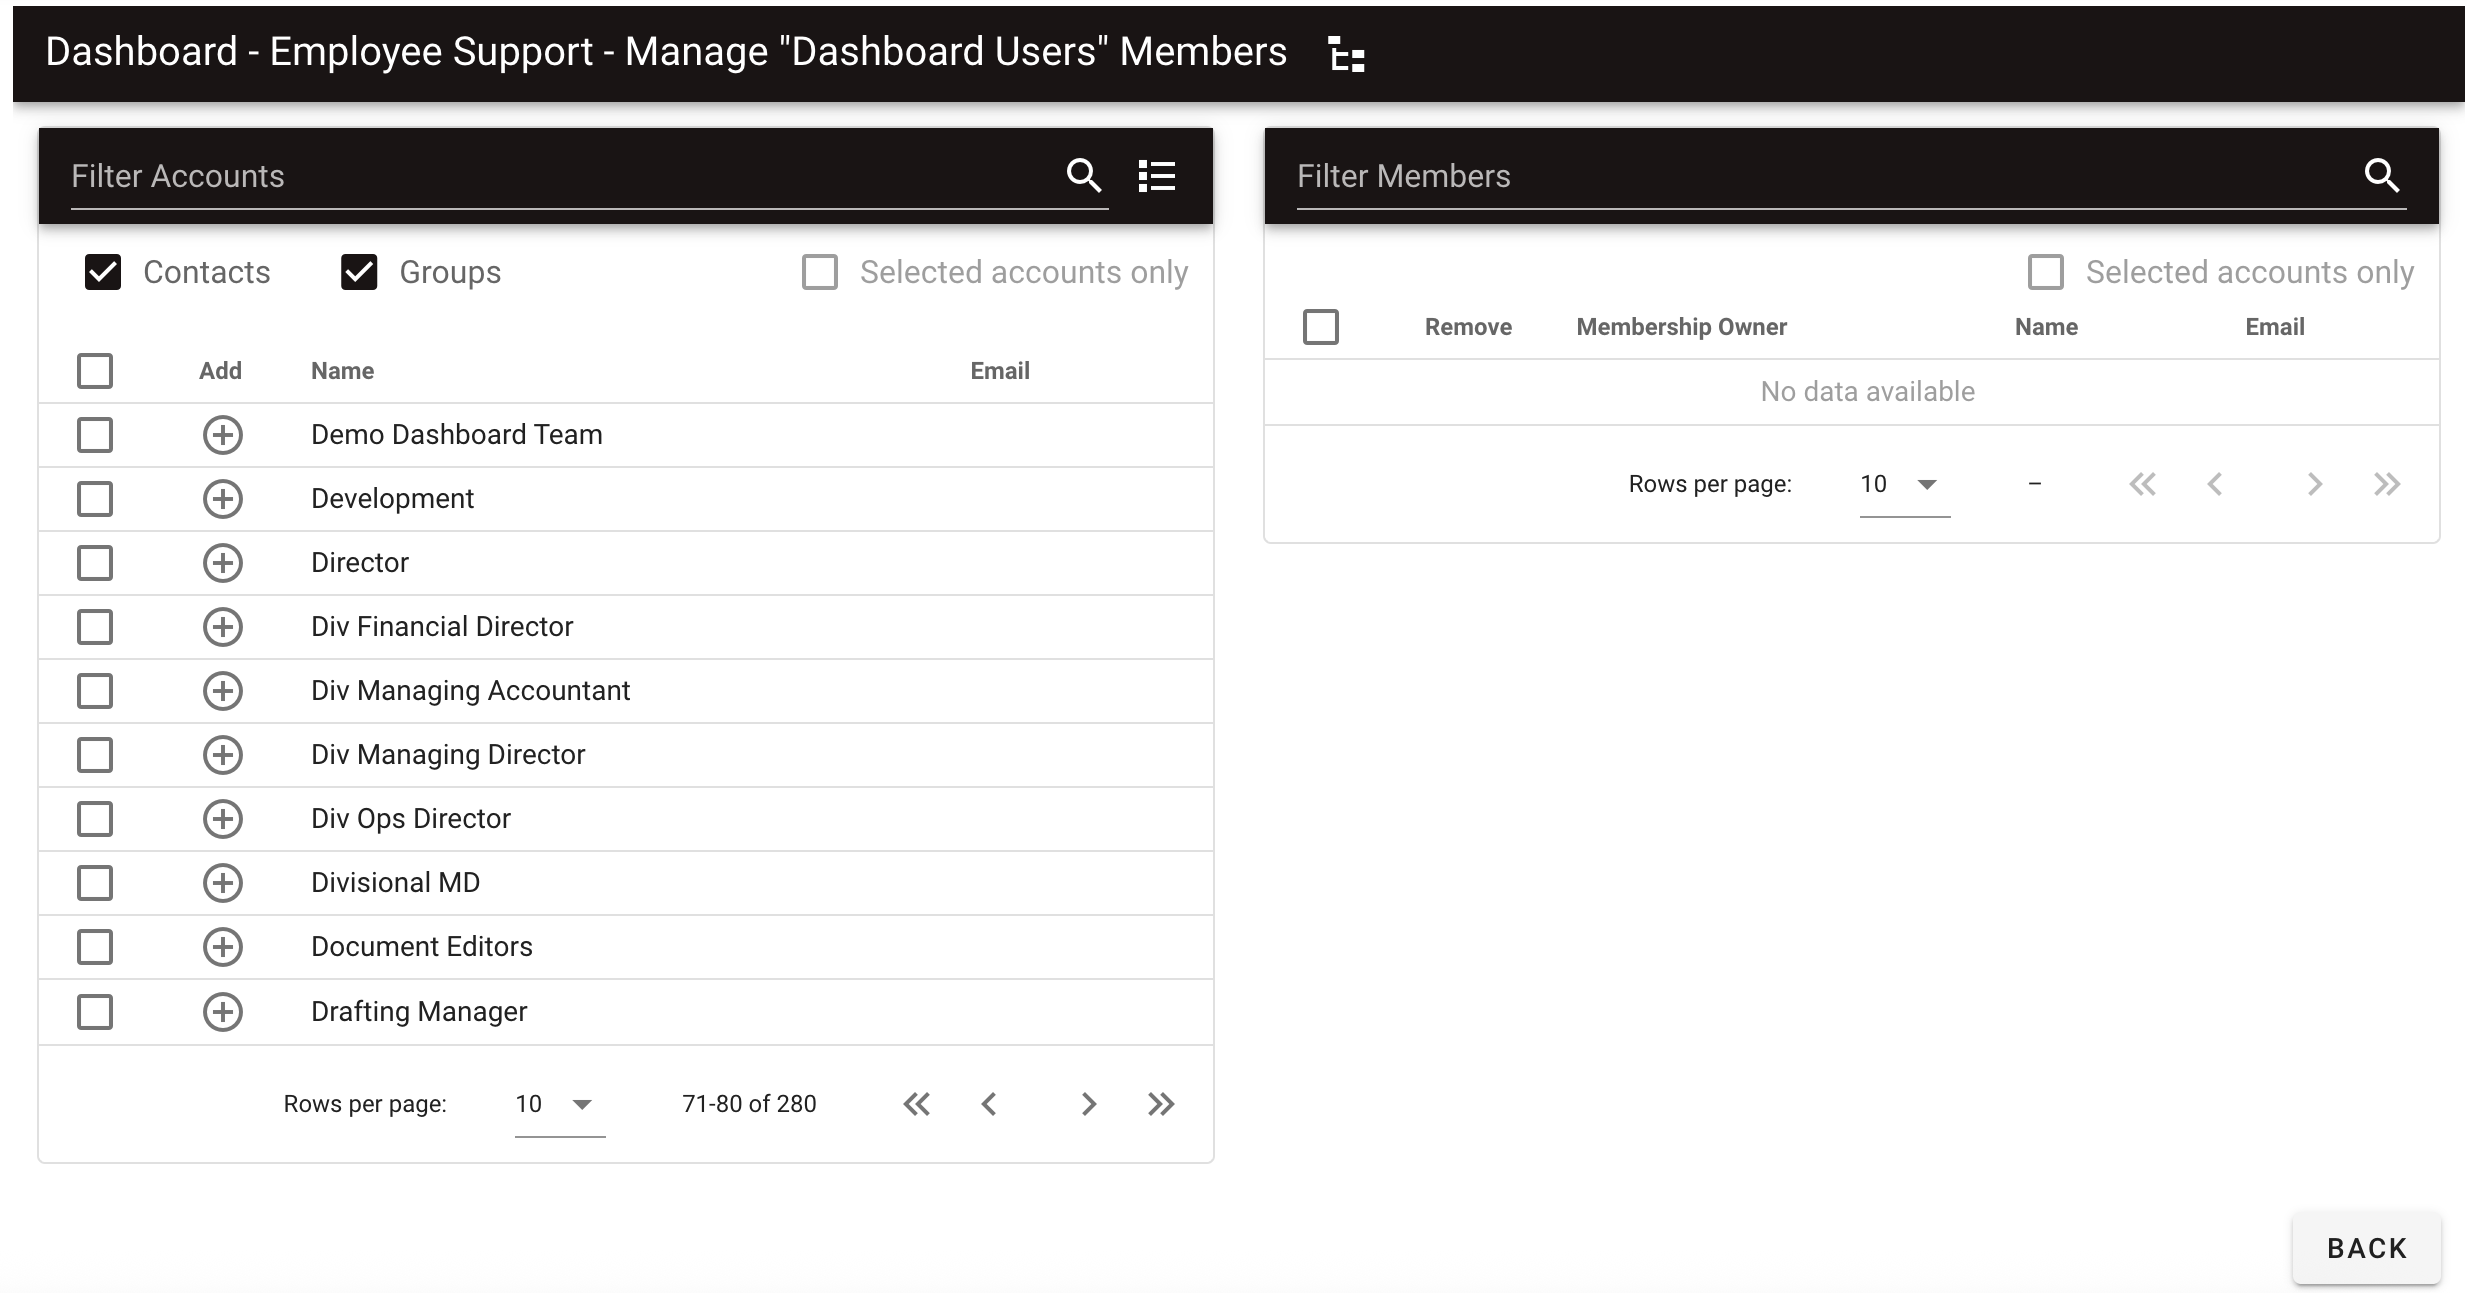
Click Back in the lower-right corner to return and automatically save changes.
Assign members to the role at specific dashboard level, not at the global level. This enables role reuse across dashboards.
Outcome
Once a user or group is added to a role with access to a dashboard, that dashboard will appear in their tabs the next time they log in to Workflow Automation.