Sign documents electronically
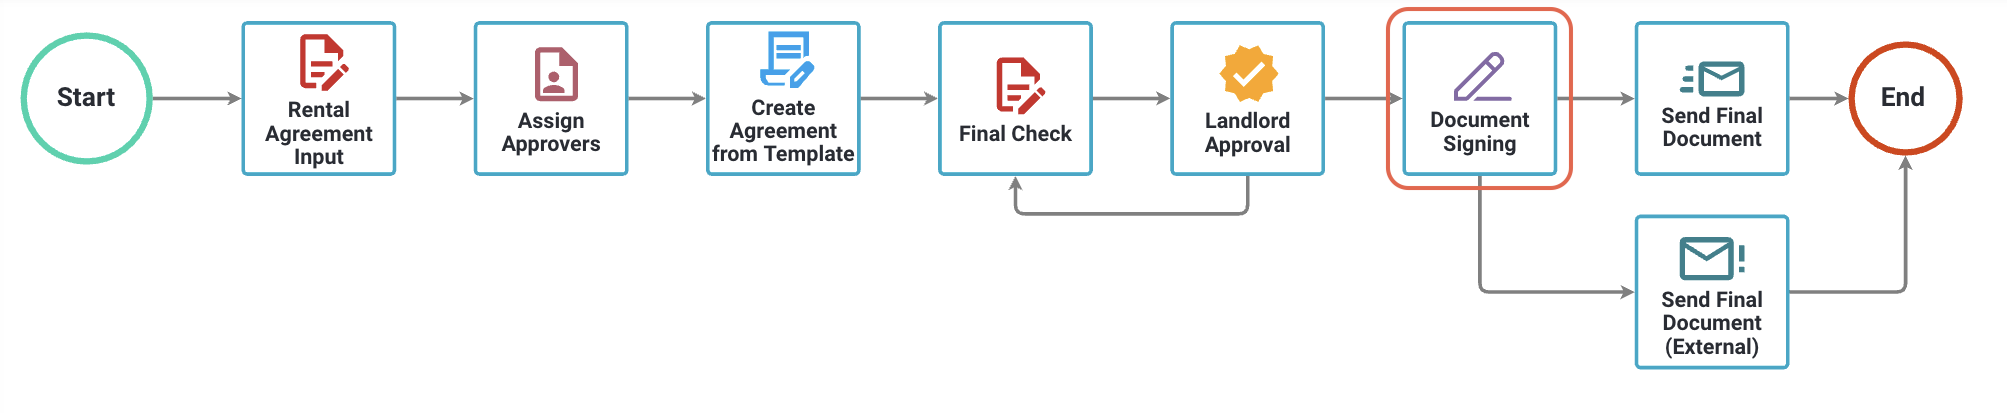
The Document Signing task in Nutrient Workflow Automation Platform enables electronic signing of documents within workflows. This reduces reliance on physical paperwork and manual tracking while supporting security and legal compliance.
Use this task to:
- Configure documents for internal or external signing
- Assign one or more recipients
- Manage notifications and reminders
- Enable sequential or parallel signing
This task supports collaboration by enabling multiple users to sign a document either in a specific order or at the same time.
Accessing the document as an external signer
External signers receive an email with a link to the document. To access the document:
- Click the link in the email.
- Enter the 6-digit verification code sent to the same email address.

Accessing the document as an internal signer
Internal users can access assigned signing tasks through standard task views, such as View My Tasks, or by clicking task links in notifications.
To sign the document:
- Open the task from your task list or notification.
- Review the document in the Document Signing task interface.
- Complete the signing process as prompted.
Reviewing and signing the document
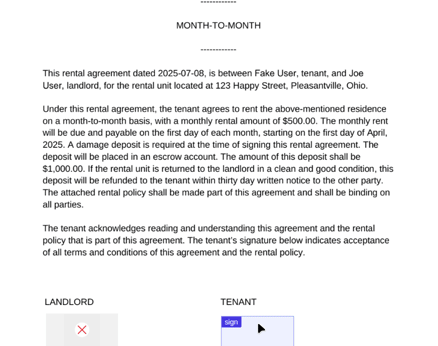
As a signer, you can only view the fields assigned to you by the document admin. Review the document carefully to ensure all required fields are complete. If you have questions about the content, contact the document admin or the task sender.
To sign the document:
Click the signature field assigned to you.
If you have a saved signature in your profile, you’ll see it as the default option. This also applies to external users after they’ve signed once in the document.
- Click the signature to use it.
- Or click Add Signature to open more options.
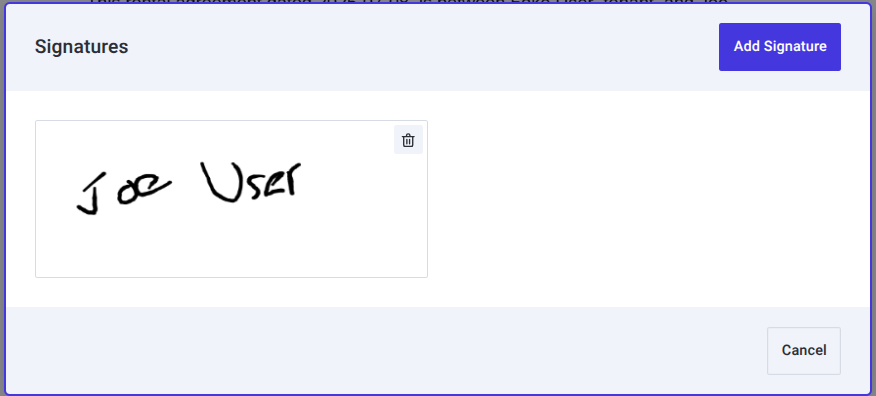
In the signature dialog:
- Draw your signature using a mouse or touchpad,
- Upload an image file, or
- Type your name to generate a signature.
The platform will use the name provided during document configuration.
Click Done to apply your signature.
Complete any other assigned fields such as initials or dates.
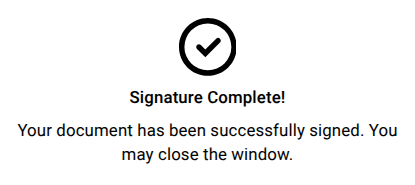
When finished, click Submit in the upper-right corner to complete the signing process.
Accessing the signed document
Once all signers have completed the signing process:
- Internal users (Nutrient Workflow Automation users) can view or download the signed document from the task history.
- External signers will receive the signed document by email.
Process designers should configure the workflow to send the completed document to external signers once all signatures are collected. This ensures all participants receive a copy of the finalized document.

Decline document signing
If you’re assigned to sign a document but can’t or don’t want to complete the signing process, you can decline signing. Declining cancels the signing and notifies the document administrator and other relevant parties.
When to decline
Decline signing when:
- You determine the document is not appropriate for your signature at that time
- You don’t have the authority to sign the document
- The document requires modifications before you can sign
- You need to escalate the request to another person
How to decline
To decline signing:
- Open the Document Signing task from your task list or notification.
- Review the document and any fields assigned to you.
- If you decide not to sign, select Decline in the upper-right corner of the task interface. A dialog appears asking you to confirm your decision.
- Select Confirm to decline signing.
Once you decline, the system cancels signing and the task finishes with a state of Declined. The document administrator and workflow participants receive a notification indicating that you declined to sign.
What happens after you decline
After declining:
- The system cancels the signing task for all signers.
- The task finishes in a Declined state.
- Other assigned signers receive a notification that the signing is canceled.
- Workflow rules can use the Declined state to route the request to additional steps, such as escalation, cancellation, or reassignment to another signer.