Enhance form management with request records
Basically, a “Request Record” is a type of Form Task where you will be able to present a form for users to complete and then anyone with access can continue to update the form without having to kick off a new Form Task each time. This “record” will then remain open and can be updated by anyone who has access to it.
You can think of Request Records as a form of light “case management.” One use case might be a security incident reporting process(opens in a new tab) where the Request Record is started by the person reporting the incident and then it is continually updated as different team members handle different aspects of investigating and managing the incident.
NOTE: The data for each “version” of a request record gets stored as another “form” record in the database. So it is stored in the same format as our existing Form task.
Why would you use a Request Record instead of a regular form?
- You want the form to be available for editing at any time during a process.
- You do not want to re-launch the tasks that run AFTER a form is completed.
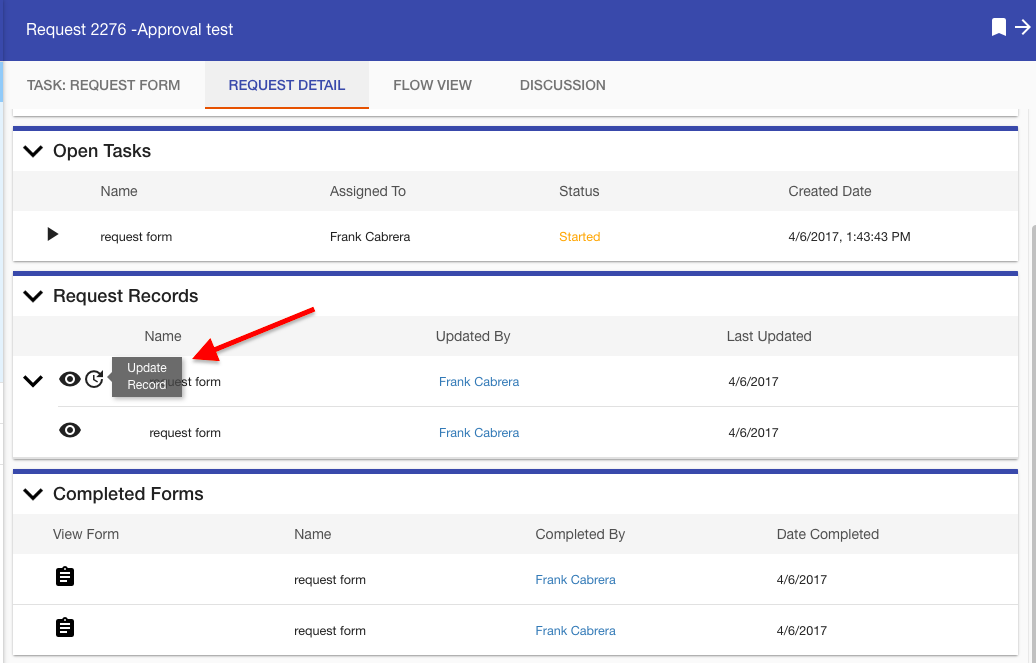
Once the request record is created, the Request Detail page will include a new section, called Request Records. All completed request records will appear in this list.
Viewing and editing request records
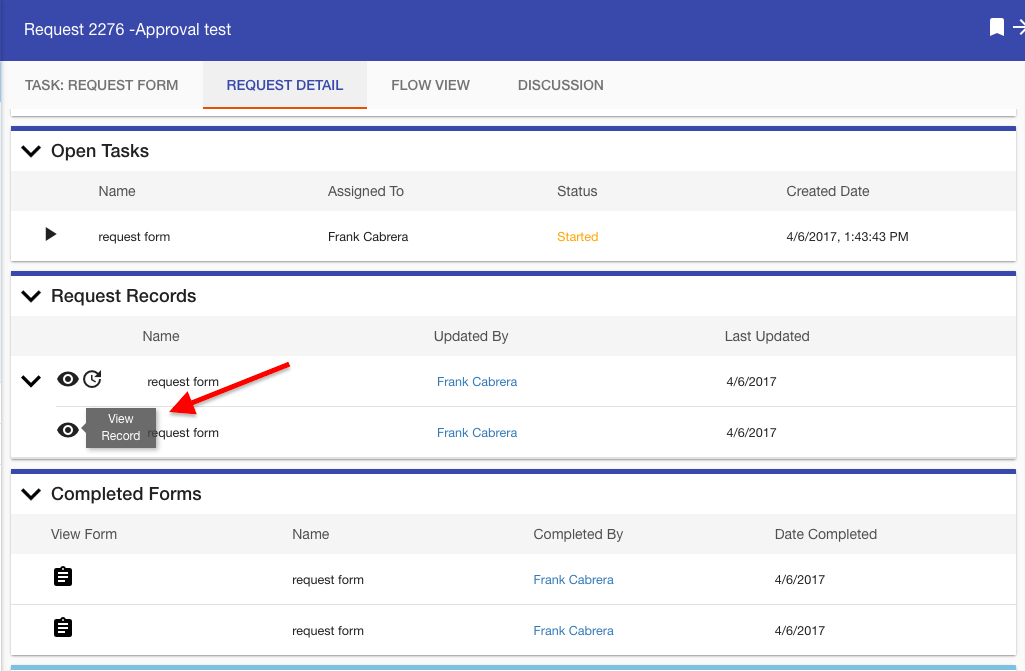
The Request Records section displays different icons based on your permissions:
- Edit icon — If you have the rights to edit the request records (i.e., you are a recipient of that task), you will see an Edit icon. Clicking this icon enables you to update the record with new information.
- View icon — If you do not have editing rights, you will see a View icon. Clicking this displays the current state of the record in read-only mode.
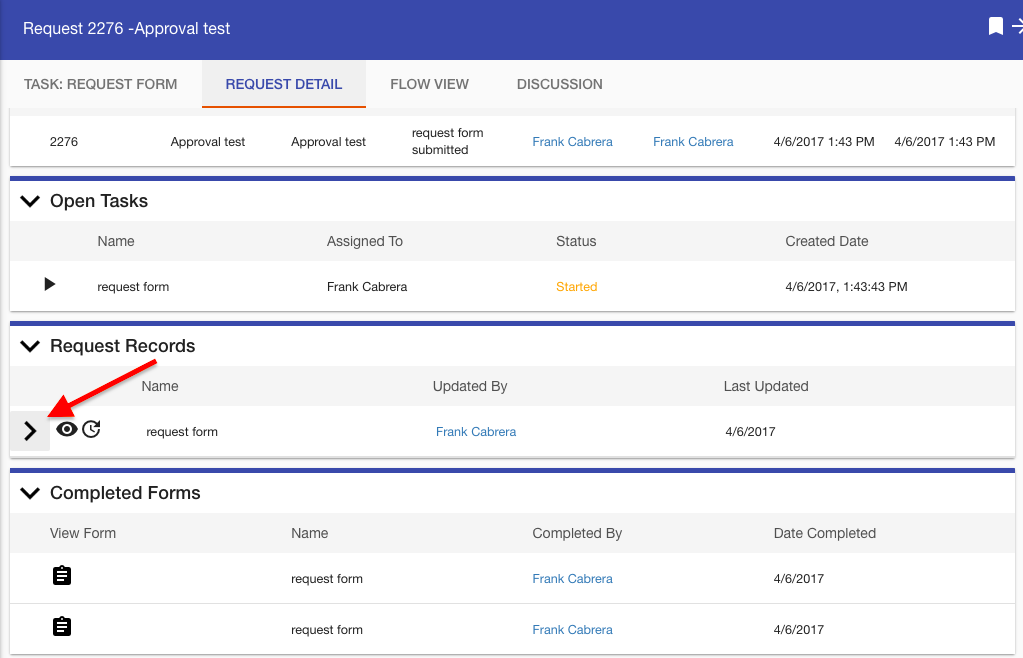
To see previous iterations of the Request Record, click the ”> ” next to the Request Record name to expand.
Creating a Request Record
- Create a new process.
- In a Process Flow, add a Form Task and select it.
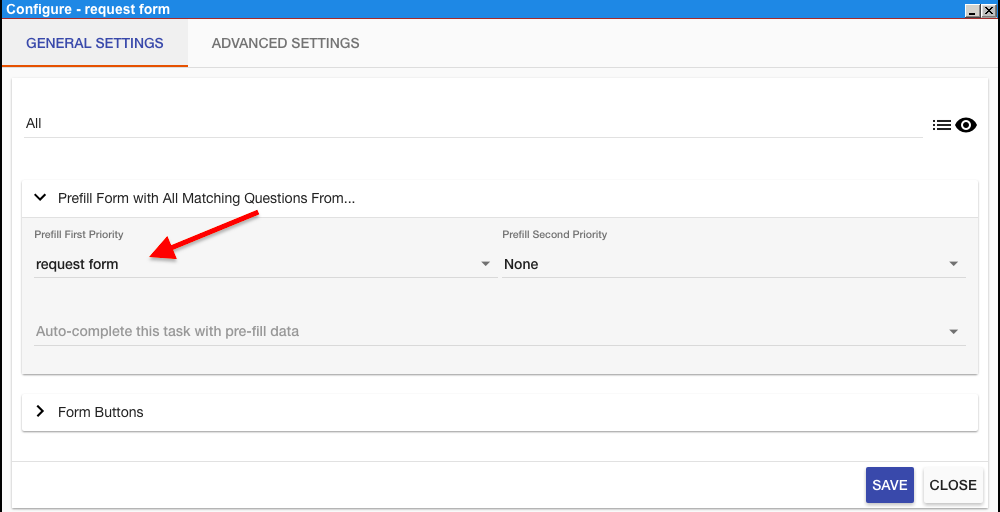
- Select “Configuration” and then “Configure Task.” On the first line, select the form (ex. All) that will be used as the Request Record. On the Prefill First Priority line, select the form that will retain the previously entered data i f the process routes back to that form task. Click Save.
Select the Form Task again. Select “Configuration” and then “Advanced Settings.” Check the box for “Make this Task a Request Record.”
You’ll also see an additional option: Also show initial iteration as a task. When enabled, this option makes the initial form submission visible as a task in addition to appearing in the Request Records section. This provides more flexible management of the initial form submission and ensures it’s tracked in both task lists and request records.
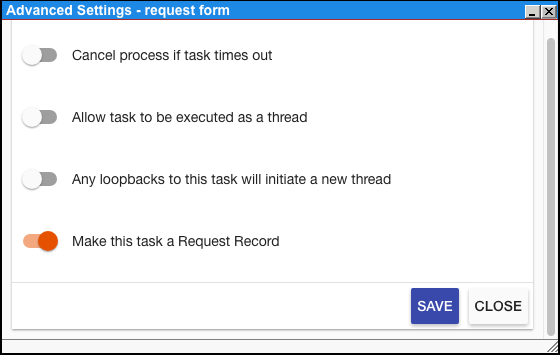
Note: When a Form Task becomes a Request Record, it will display a special icon on the upper right. 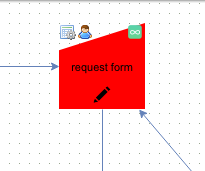
- Select the Form Task again. In Recipients, the “Process Rule” must be “One of the recipients” (this should be the default).
- When designing the process, ensure that the task will only be “kicked off” one time.
- To allow a user to edit a Request Record as part of the main workflow, make that user is a “Recipient” of the Request Record Form Task. (Any user with access to the request as it is executing will be able to update the Request Record form by opening it from the Request Detail screen).
- The request record will re-launch itself after it is completed, and display in the request detail (Forms On Top only) in its own section.
Note: Request Records will NOT appear in My Tasks.