Adding a DashForm widget
This guide explains how to add and configure a DashForm widget on a dashboard in Workflow Automation.
The DashForm widget enables you to embed form previews directly within your dashboard, providing visual access to forms without leaving the dashboard context. This widget displays previews of forms, making it ideal for:
- Accessing form previews alongside related dashboard data
- Providing reference to forms within dashboard workflows
- Offering convenient form preview access for administrative oversight
The widget includes intelligent form selection with both hierarchical browsing and search capabilities, and respects form permissions to ensure users only see forms they’re authorized to access.
Adding a DashForm widget
To add a DashForm widget, follow the steps below:
- Go to the Dashboards layout page for a dashboard.
- Click Add Widget in the upper-right corner of the page.
- On the pop-up that appears, select DashForm and click Add Widget to proceed. Click Cancel to terminate the operation.
New widgets appear at the bottom of the dashboard. Scroll down to find, move, or edit them.
Adding a form to the widget
To add a form to the DashForm widget:
- Click the Add Form button in the widget (displayed when no form is selected).
- Choose a form using the Select Form dialog that appears.
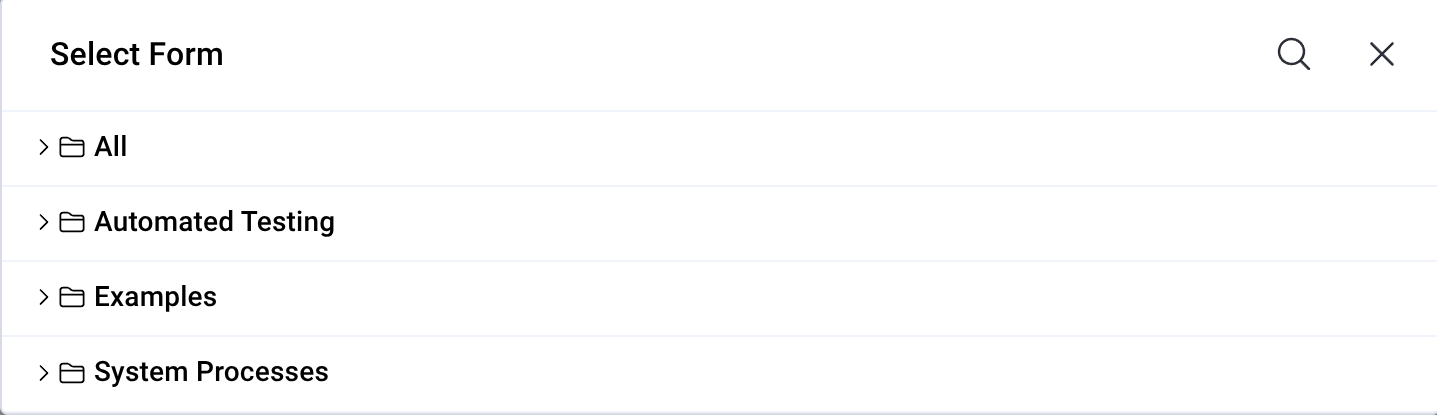
The form selection dialog only displays forms you’ve permission to view and access.
Using the form widget
After you add a form to the widget:
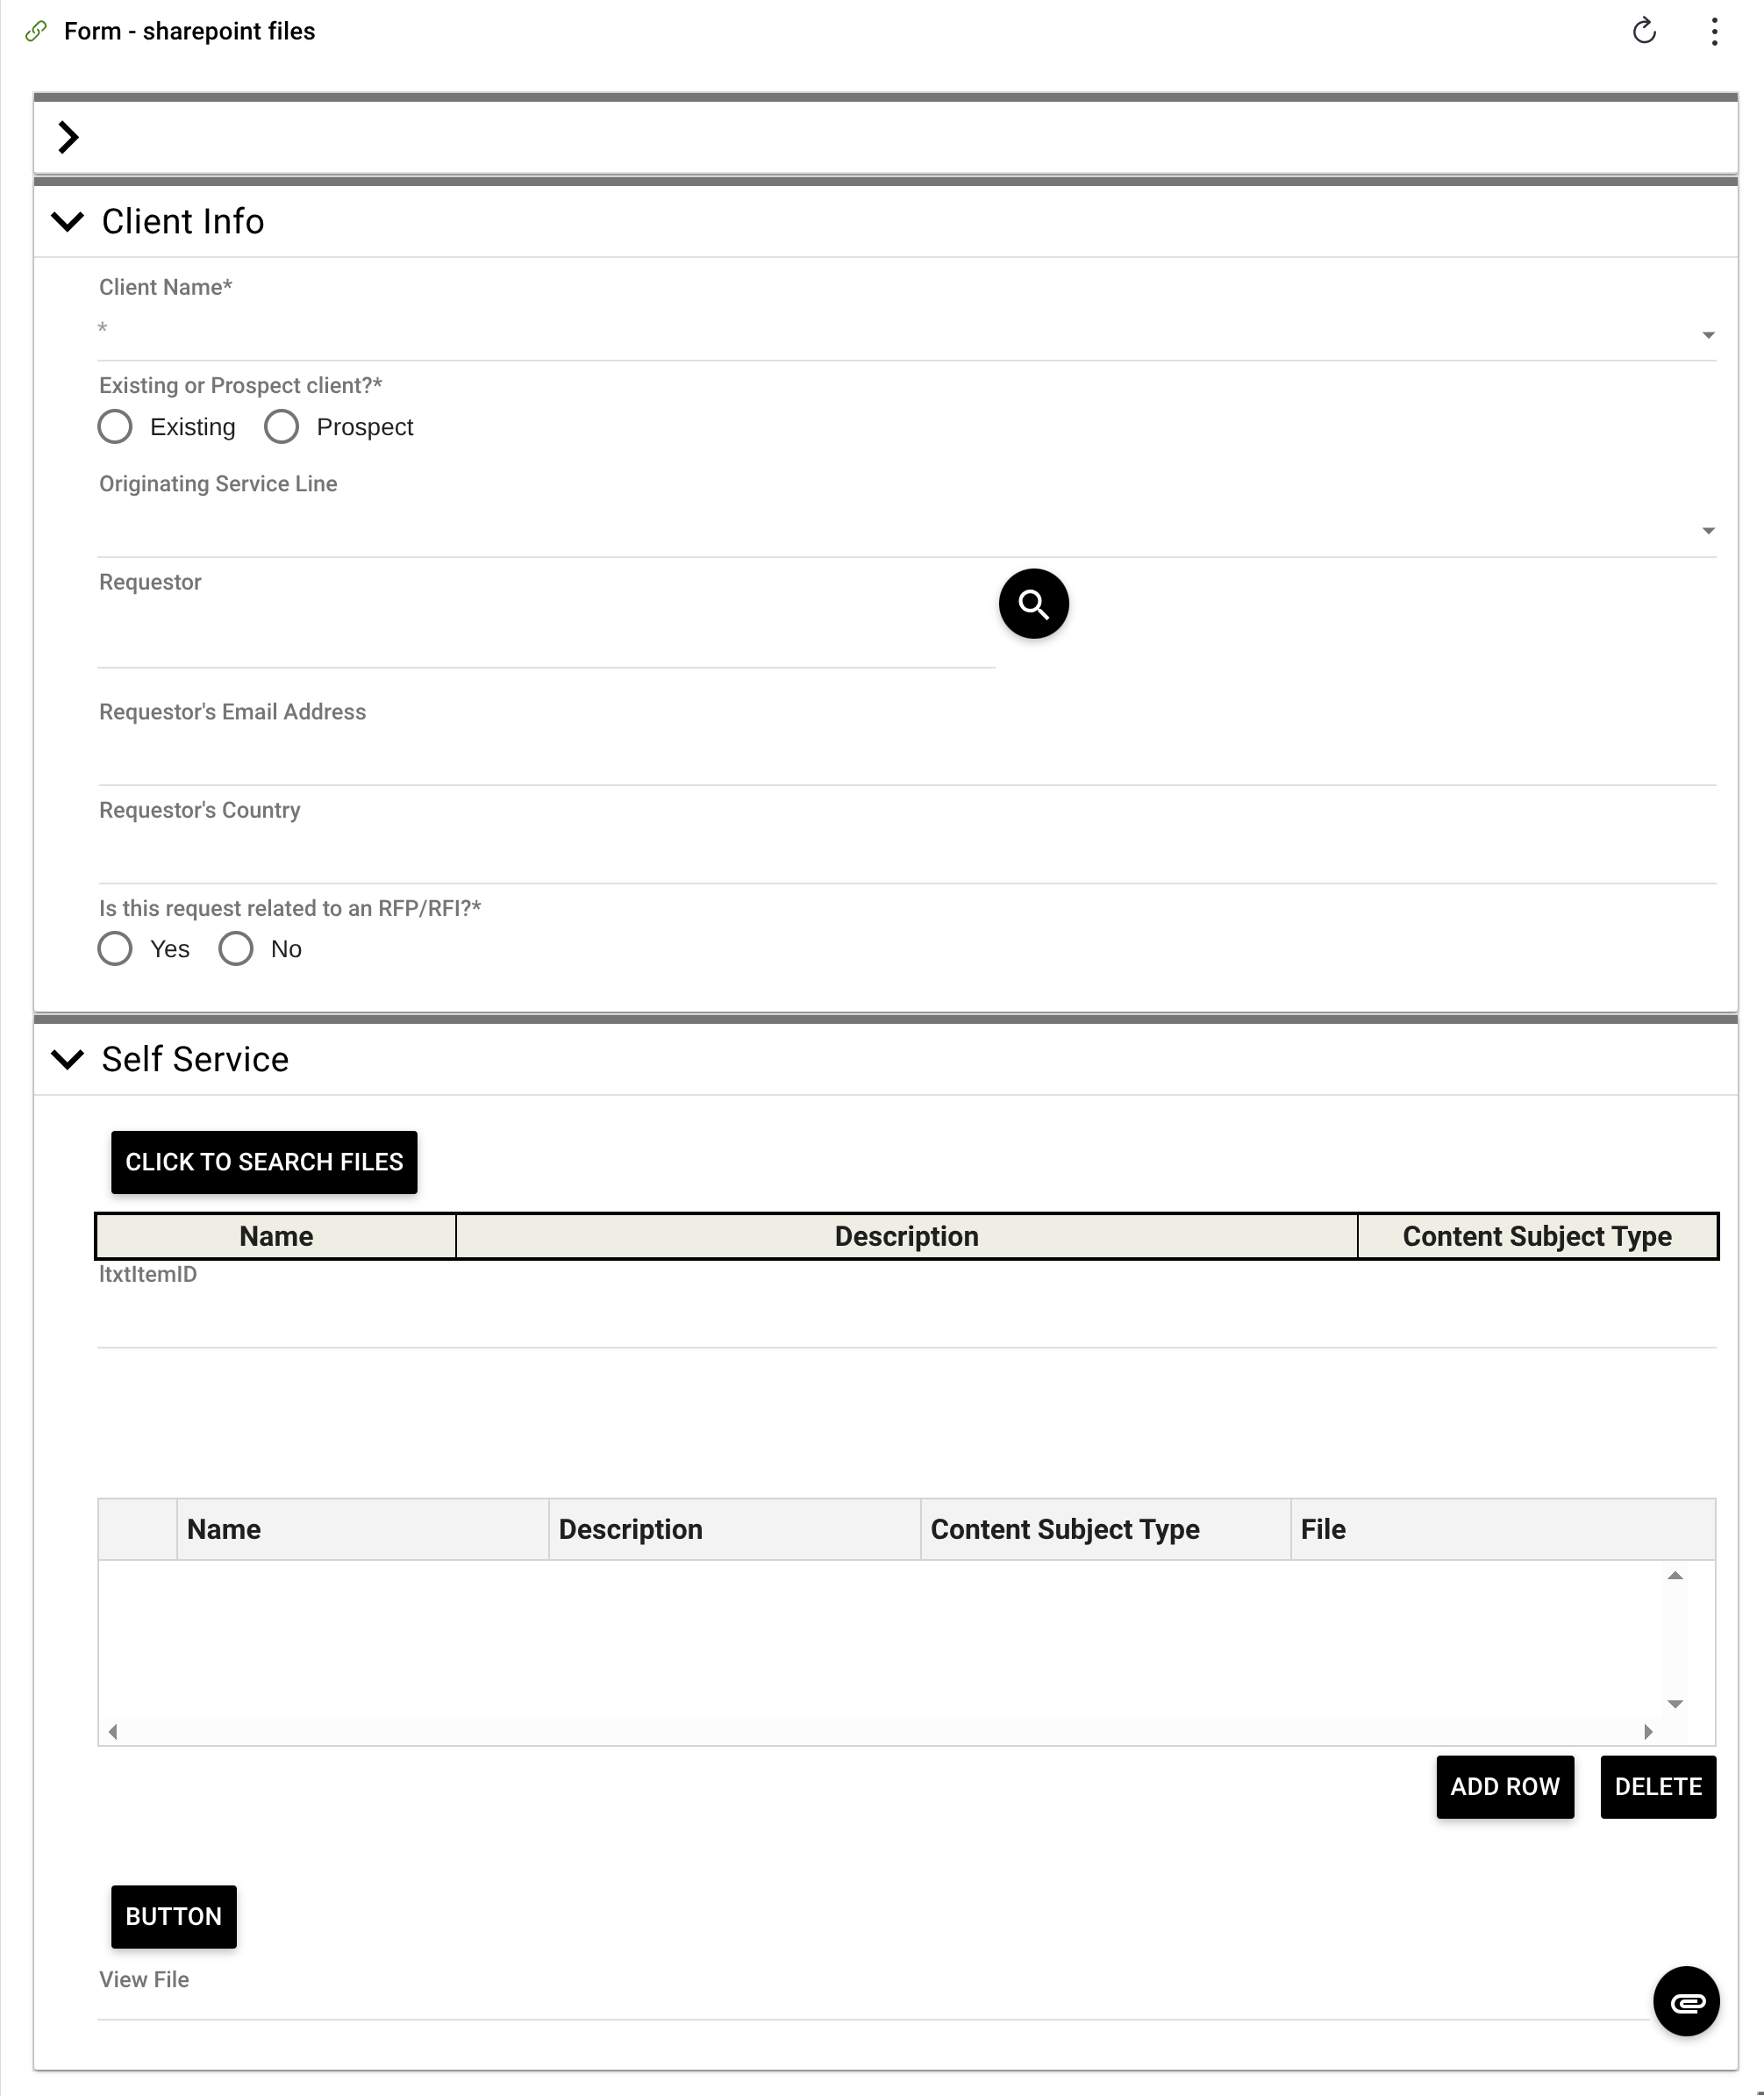
- The form displays as a preview within the widget
- The widget title shows “Form - {FormName}” and links to the form’s admin page for full access
- Users can view the form layout and structure but cannot submit data through the preview
Widget actions
Click the three dots ![]() icon in the upper-right corner of the widget to perform the following actions:
icon in the upper-right corner of the widget to perform the following actions:
- Change form — Select this option to replace the current form with a different one. This opens the same form selection dialog used when initially adding a form.
- Refresh — Select this option to reload the form content, useful if the form has been updated or if there are display issues.
Changing the widget layout
You can resize and reposition the DashForm widget for improved readability and layout fit by dragging and dropping it for better usability. The embedded form will automatically adjust to fit the widget dimensions.
Editing widget settings
To edit widget settings:
- Click the three dots
 icon in the upper-right corner of the widget and select the Edit widget option from the dropdown.
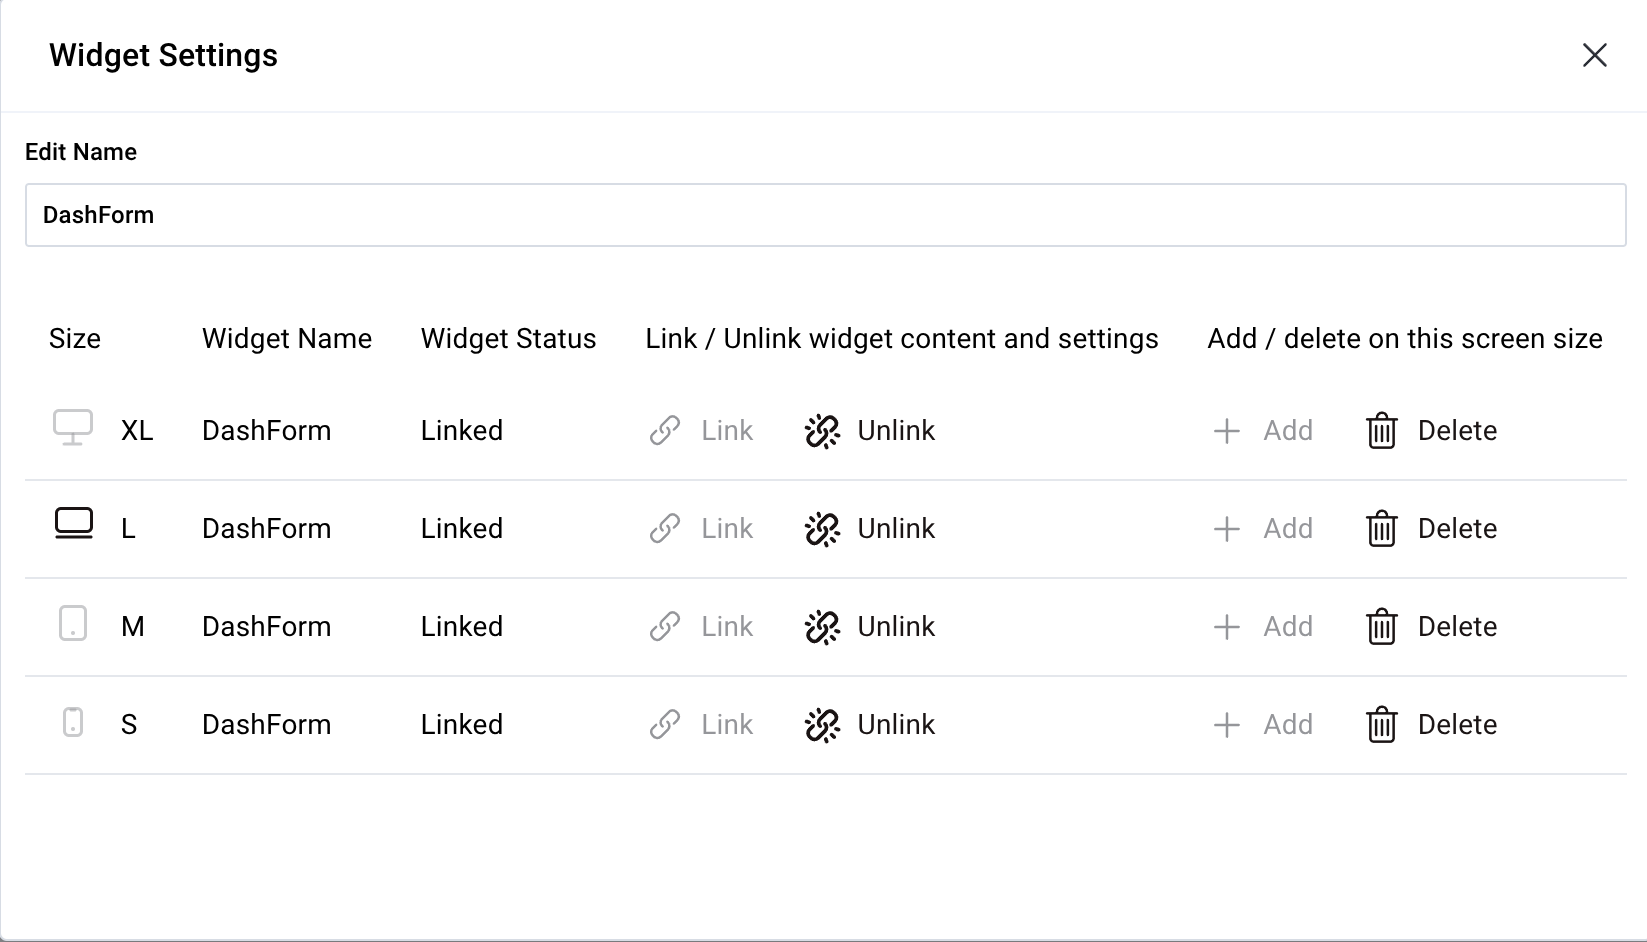
 - On the pop-up that appears, you can edit the following settings:
- Widget name — Modify the label that appears on the widget header. By default, this is set to “Form - {FormName}”.
- Link/unlink widget content and settings
- Linking keeps the widget content and configurations consistent across all screen sizes.
- Unlinking enables you to customize the widget layout or content independently for each screen size — useful for optimizing display for mobile vs. desktop.
- Relinking restores shared behavior, overriding any screen-specific edits made while unlinked.
- Add/delete widget on a screen
- Click the Add
 icon to include the widget on additional screen sizes.
 - Click the Delete
 icon to remove the widget from a particular screen size without affecting its presence on others.
- Click the Add
Deleting the widget
To delete the widget:
- Click the three dots icon in the upper-right corner of the widget.
- Select the Delete widget option from the dropdown.
Saving changes
Once you’ve finished customizing the widget:
- Click Save dashboard in the upper-right corner to apply the changes.
- Click Discard to cancel any unsaved edits.
Next steps
Refer to the guides below to learn about the following widgets and their configuration: