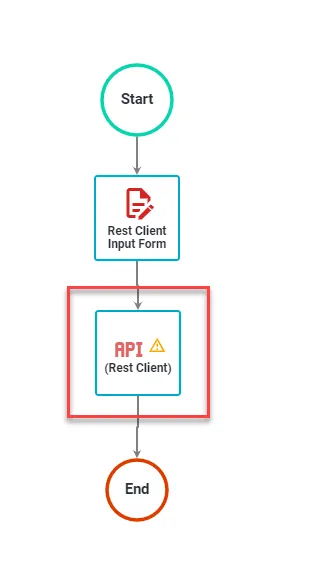
Configure REST client for web service integration
The REST Client task type enables you to configure processes to consume RESTful web services. Use this task to push or pull information from other systems that have a web service API.
Unlike the Web Service task, which posts data as SOAP messages or parameterized query strings, the REST Client task provides full control over HTTP requests with support for JSON payloads, custom headers, and authentication options.
Previously, this task type used the Request Module(opens in a new tab) for Node, but with the latest update, you can now switch to the Node fetch API from the Request Configuration tab. New tasks will default to Node fetch API, while existing tasks will continue using request unless manually updated. Some complex configurations may require adjustments when transitioning to Node fetch API.
There are three configuration tabs for defining your attributes and one for testing your configuration:
Request configuration
This tab accepts either a single URL/URI string or a JSON configuration object with the following options:
uriorurl- Fully qualifiedurior a parsedurlobject fromurl.parse()qs- Object containing query string values that append to theurimethod- HTTP method (default: “GET”); supports all HTTP verbs (for example, GET, POST, PUT, DELETE)headers- HTTP headers (default: {})body- Entity body for PATCH, POST and PUT requests; must be a stringform- When passed an object, this sets
bodyto a query string representation of the value and addsContent-Type: application/x-www-form-urlencoded; charset=utf-8header - When passed no options, a FormData instance is returned (and is piped to the request); this is the most common way to post a JSON object
- When passed an object, this sets
auth- A hash containing values:user,username,password,pass, andsendImmediately; this is not a hash in the cryptographic sensejson- Setsbodyto a JSON representation of the value and addsContent-type: application/jsonheader. Additionally, it parses the response body as JSON.followRedirect- Follow HTTP 3xx responses as redirects (default: true)followAllRedirects- Follow non - GET HTTP 3xx responses as redirects (default: false)maxRedirects- The maximum number of redirects to follow (default: 10)encoding- Encoding forsetEncodingof response data. If null, returns the body as a Buffer.timeout- Integer containing the number of milliseconds to wait for a request to respond before aborting the requestproxy- An HTTP proxy for requests; supports proxy authentication with Basic Authoauth- Options for OAuth HMAC-SHA1 signingstrictSSL- If true, requires SSL certificates to be validTo use your own Certificate Authority (CA), specify an agent that you created with that CA as an option.
jar- If true, remember cookies for future use (or define your custom cookie jar; see examples below)aws- Object containing AWS signing information; should have the propertieskey,secret, andbucket, unless it’s specified in the path, or the request doesn’t use abucket(i.e. GET Services)httpSignature- Options for the HTTP Signature Scheme(opens in a new tab) using Joyent’s library(opens in a new tab); thekeyIdandkeyproperties must be specified
If you’re transitioning to Node fetch API, ensure your request configuration aligns with its syntax. Unlike request, Node fetch API doesn’t support options such as qs, form, and jar. You may need to make adjustments when transitioning.
Example
{ "url": "https://myservice.myco.com", "method": "POST", "form": { "customer_name": "__cname", "customer_type": "__customertype", "active": true }}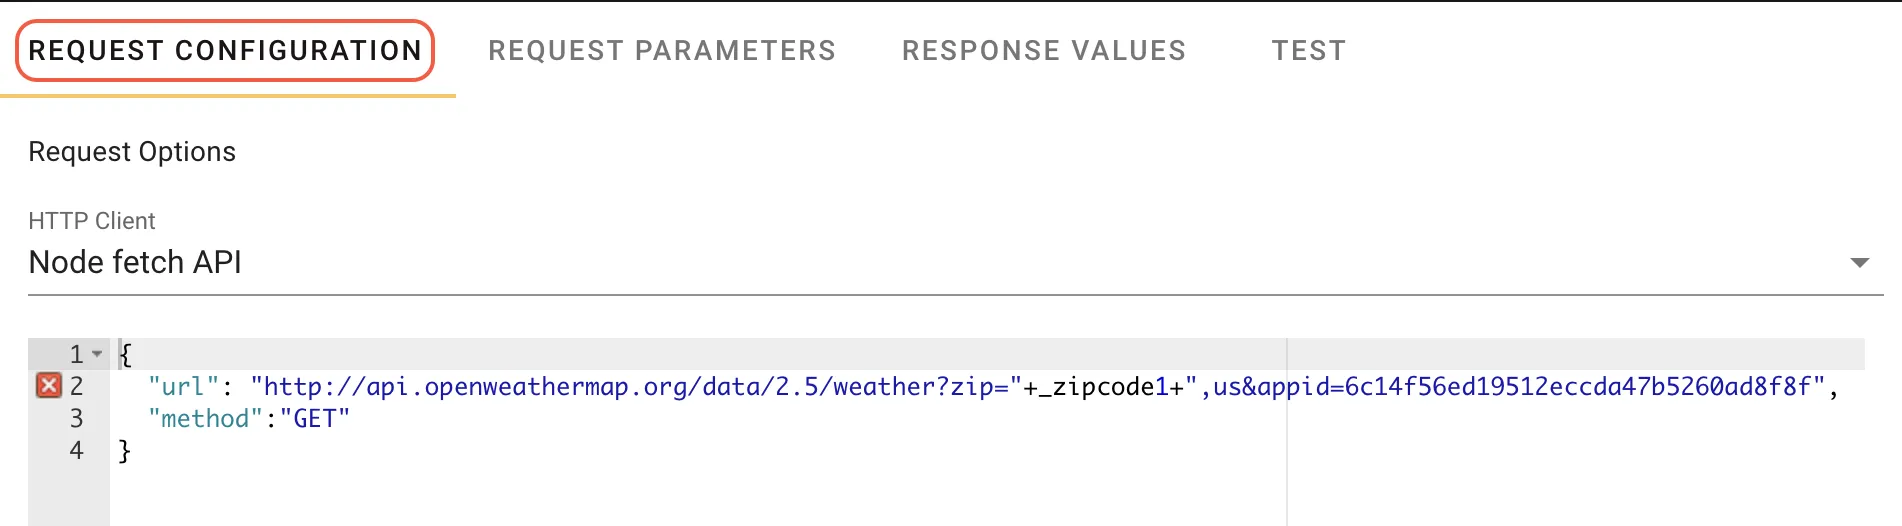
The following example uses the auth, and json options to make a request:
{ "uri": "http://somecompany.com/ws/simple/createProject", "method": "POST", "auth": { "user": "MyUserName", "pass": "123455", "sendImmediately": false }, "json": true, "body": { "customer_type": "__customerType", "customer_name": "__cname" }}Request parameters
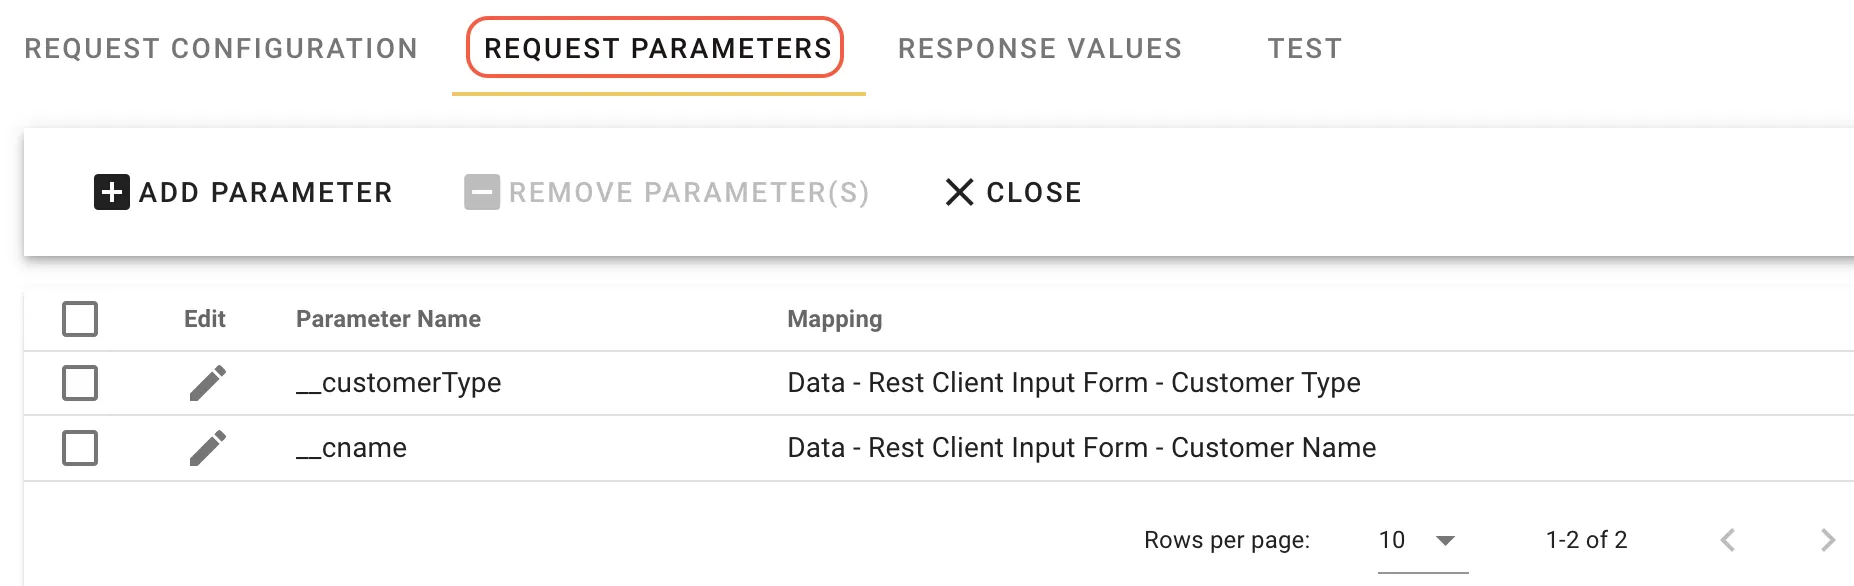
This tab enables you to configure request parameters to fill variables in your Request Configuration -> Request Options settings. For example, in the above request configuration, to replace the strings __customerType and __cname with variables captured in a form, use the below configuration:
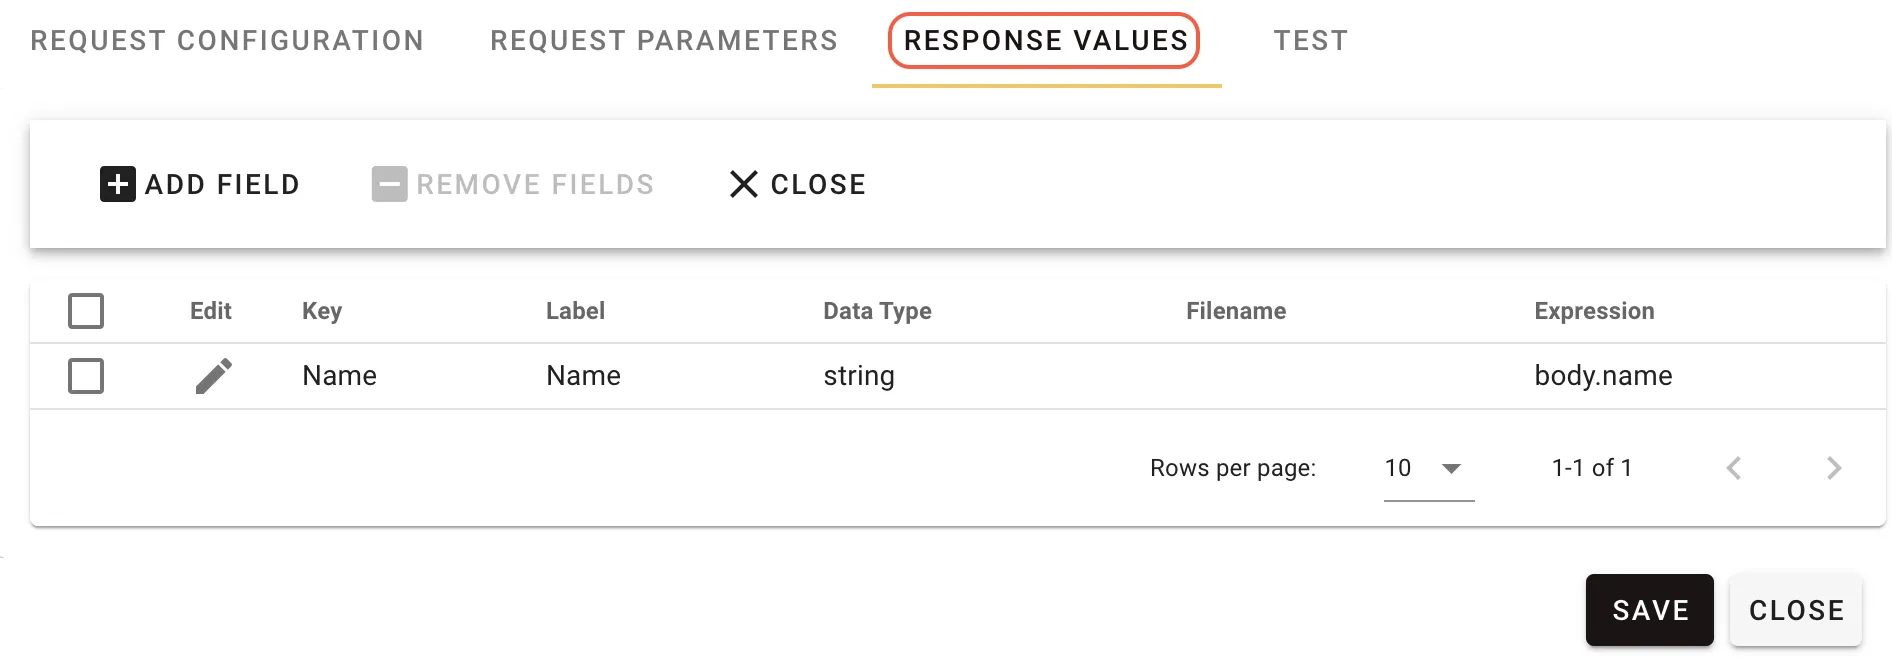
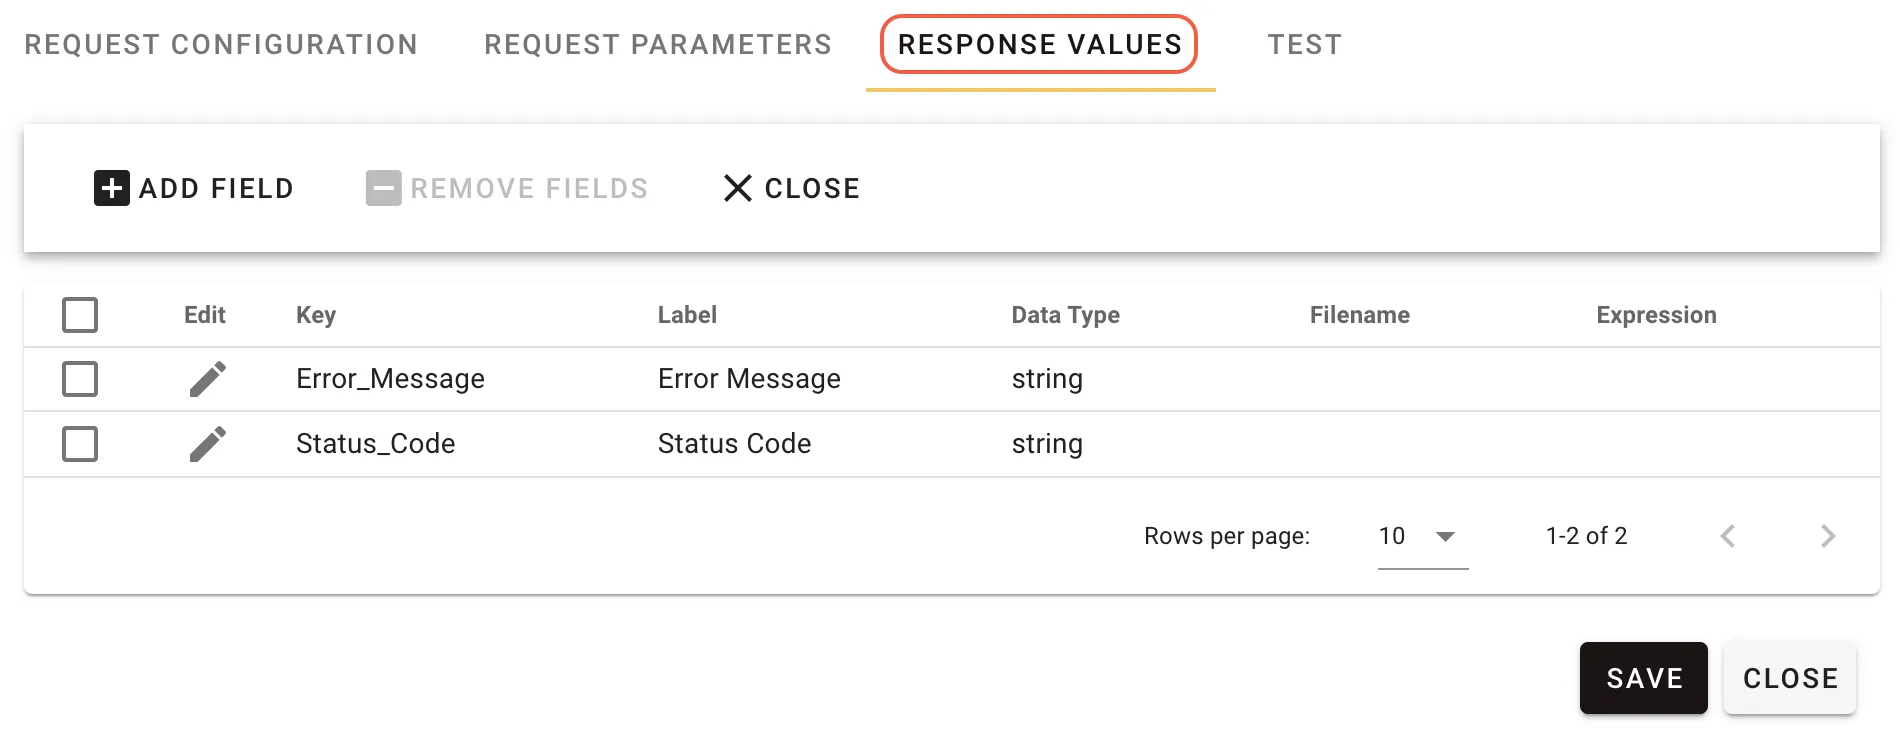
Response values
This tab enables you to map values returned from the request to task variables. Rules, prefill values, and reports can then access these variables. When the task executes, it saves the values to the database.
In the previous example, you can retrieve the _id value from the response of your POST request. If you want the entire body of the response, you can skip this tab. The task type enables you to create expressions based on the JSON-Query module for Node. The system sets the context to the response and parses response.body as JSON. In the previous example, the POST request would return the record for the customer that was saved:
{"__v":0,"active":true,"name":"test customer","_id":"52b353d88bd1a1954c01231b","licenses":[],"users":[],"supportContracts":[],"created":"2013-12-19T20:15:20.320Z","supportTier":"standard","customerType":"Prospect"}If you want to retrieve the _id value from the response of a POST request, configure an expression to extract body._id. The full configuration includes:
- Key - A string that uniquely identifies the value for this task instance.
- Label - The label that displays the variable in the Request Detail, Rules, Prefills, and Reports.
- Data Type - The data type to capture.
- Expression - The
JSON-Queryexpression that parses the raw response and retrieves the value for this variable.
Extracting headers, cookies, and status codes
In addition to extracting values from the response body, you can also extract HTTP headers, cookies, and the status code from the REST client response. This is useful for capturing authentication tokens, session identifiers, tracking server-side state, and handling HTTP status codes in your workflow logic.
Response data prefixes
When configuring expressions in the Response Values tab, you can use prefixes to specify which part of the HTTP response to extract data from:
header.- Extract HTTP response headerscookie.- Extract and parse Set-Cookie headersstatus- Extract the HTTP status codebody.- Extract from response body (optional prefix for backward compatibility)
Expressions without a prefix default to extracting from the response body, maintaining backward compatibility with existing REST client tasks.
Extracting response headers
Use the header. prefix to extract values from HTTP response headers. Header names are case-insensitive.
Example: Extracting an authentication token from response headers
If your API returns an authentication token in the response headers:
HTTP/1.1 200 OKX-Auth-Token: bearer_xyz123abc456Content-Type: application/jsonConfigure your response value expression:
- Key —
authToken - Label —
Auth Token - Data Type —
String - Expression —
header.x-auth-token
This extracts the value bearer_xyz123abc456 and stores it in the task variable authToken.
Alternative bracket notation
You can also use bracket notation for header extraction:
headers["x-auth-token"]Both formats work identically and support case-insensitive header matching.
Extracting cookies from response
Use the cookie. prefix to extract cookies from Set-Cookie headers. The system parses cookies according to RFC 6265 and returns them as objects containing the cookie value and metadata (domain, path, expires, secure, httpOnly, sameSite).
Example: Extracting a session ID from a cookie
If your API returns a session cookie:
HTTP/1.1 200 OKSet-Cookie: JSESSIONID=abc123xyz789; Path=/; Secure; HttpOnlyConfigure your response value expression:
- Key —
sessionId - Label —
Session ID - Data Type —
String - Expression —
cookie.JSESSIONID.value
This extracts the value abc123xyz789 and stores it in the task variable sessionId.
Cookie object structure
The system parses each cookie into an object with the following properties:
{ "name": "JSESSIONID", "value": "abc123xyz789", "domain": ".example.com", "path": "/", "expires": "2024-12-31T23:59:59Z", "maxAge": 3600, "secure": true, "httpOnly": true, "sameSite": "Strict"}Extracting cookie properties
- Get just the cookie value (most common) —
cookie.JSESSIONID.value - Get the full cookie object —
cookie.JSESSIONID - Get specific cookie properties —
cookie.JSESSIONID.domain,cookie.JSESSIONID.expires,cookie.JSESSIONID.secure
Alternative bracket notation
You can also use bracket notation for cookie extraction:
cookies["JSESSIONID"].valueBoth formats work identically.
Unlike headers (which are simple strings), cookies are objects with multiple properties. Use .value to extract just the cookie value, or access other properties like .domain, .expires, or .secure as needed.
Extracting HTTP status code
Use the status expression (without a prefix) to extract the HTTP status code from the response.
Example: Capturing the status code for conditional logic
Configure your response value expression:
- Key —
statusCode - Label —
Status Code - Data Type —
Number - Expression —
status
This extracts the HTTP status code (e.g., 200, 201, 404, 500) and stores it in the task variable statusCode. You can then use this variable in workflow rules to handle different response scenarios.
Backward compatibility
Existing REST client tasks continue to work without modification. Expressions without a prefix default to extracting from the response body, maintaining full backward compatibility with existing workflows.
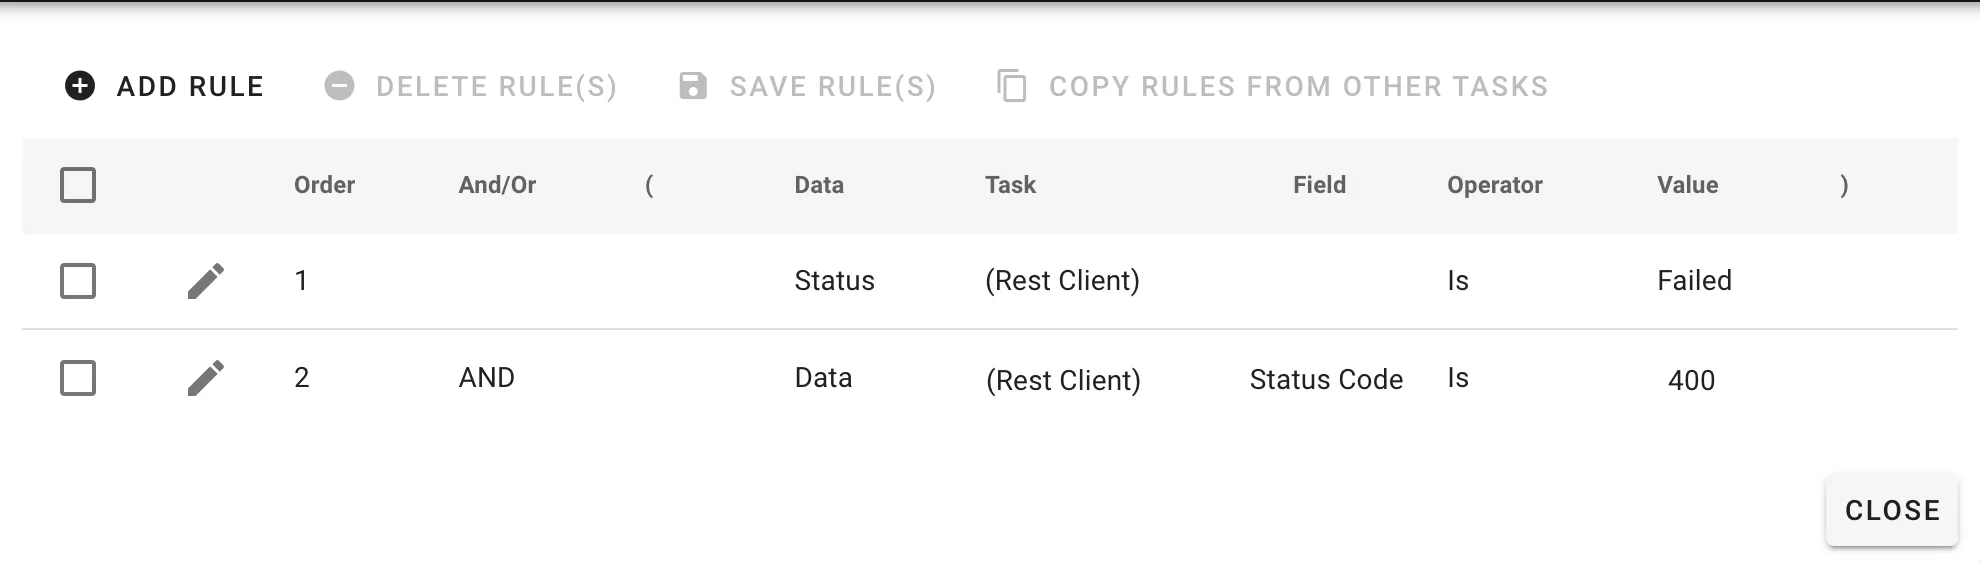
REST error handling
If the REST client fails, use the failure response codes provided to build appropriate handling rules. Below is a simplified example:
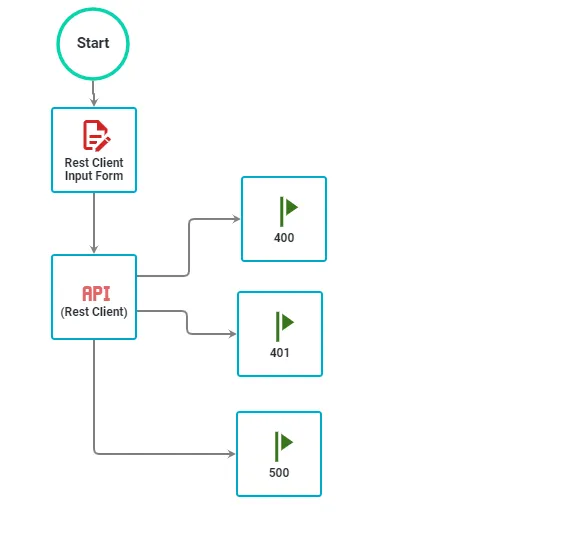
Configure the REST task as follows:

Configure subsequent milestones to receive the error codes. The following example shows the 400 error milestone configuration. Configure the other error codes in a similar manner.
Test
This tab enables you to validate and test your configuration based on the settings you have saved. Be sure to click the Save button in the lower-right corner on each tab prior to running your test. Below is a screenshot of a test:
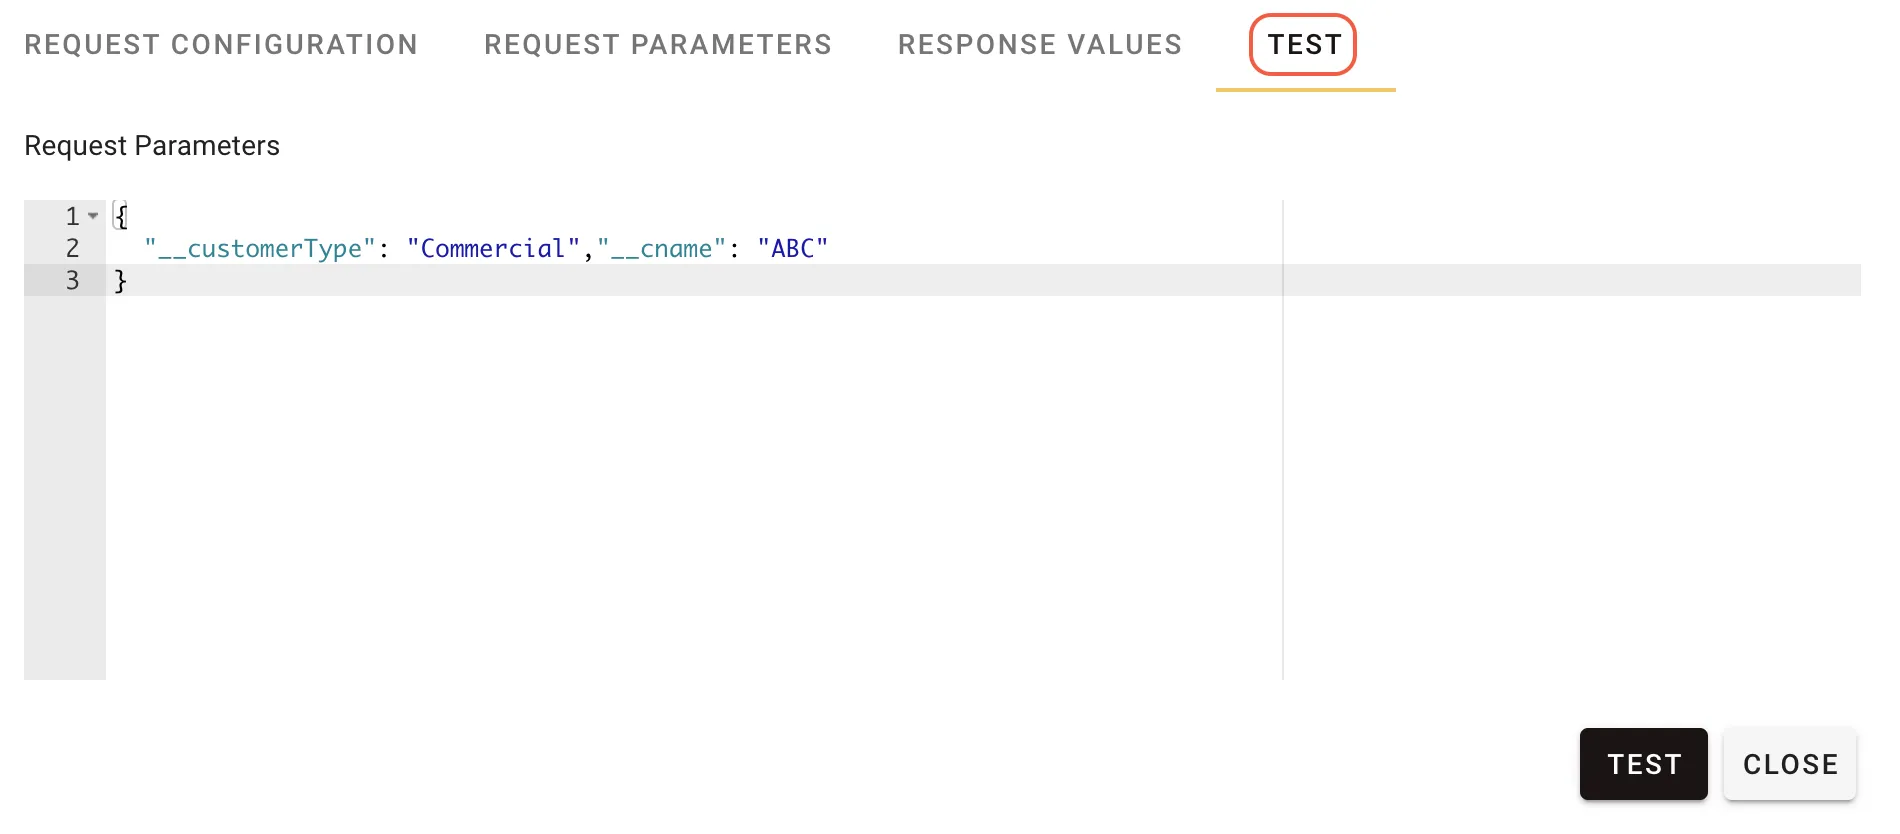
This tab automatically generates the configuration for the Request Parameters. You will need to enter values for each parameter before testing.
Clicking the Test button sends the request and processes the response based on the Response Values configuration. In this example, the configuration defines one Response value with the expression body._id. The raw response body appears as shown below:
{"__v":0,"active":true,"name":"ACME Anvils Incorporated2","_id":"52b4a1b922102e315700000e","licenses":[],"users":[],"supportContracts":[],"created":"2013-12-20T19:59:53.259Z","supportTier":"standard","customerType":"Prospect"}The expression body._id extracts only the _id value from the response. The test returns results in an array of JSON objects, including the key, label, type, and the value that the JSON-Query expression retrieves.