Permissions overview
The permissions overview shows effective permissions across Nutrient Workflow Automation. Use it to audit who has access to processes, forms, reports, dashboards, and other items, as well as how they gained that access.
What the permissions overview shows
The permissions overview displays effective permissions for a selected item type. Permissions are grouped by item (for example, by individual process). Expand an item to see every user, role, and group that has access.
The following item types are supported:
- Process
- Category
- Form
- Report
- Group
- Contact
- Dashboard
- Business hours
- Holiday
- Database connection
- Email monitor
- AI connection
This guide uses process permissions as the primary example. The same workflow applies to all other item types.
Navigating to the permissions overview
To open the permissions overview:
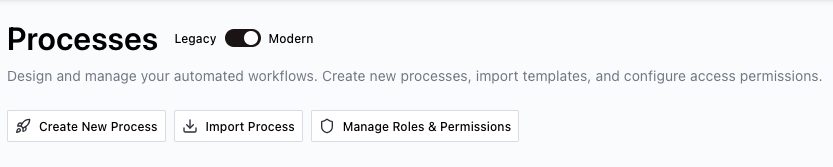
Navigate to the Admin area.
Open the Processes list view.
Click the Manage Roles & Permissions button.
In the Process Roles dialog that opens, click the Permissions List button in the top-right corner.

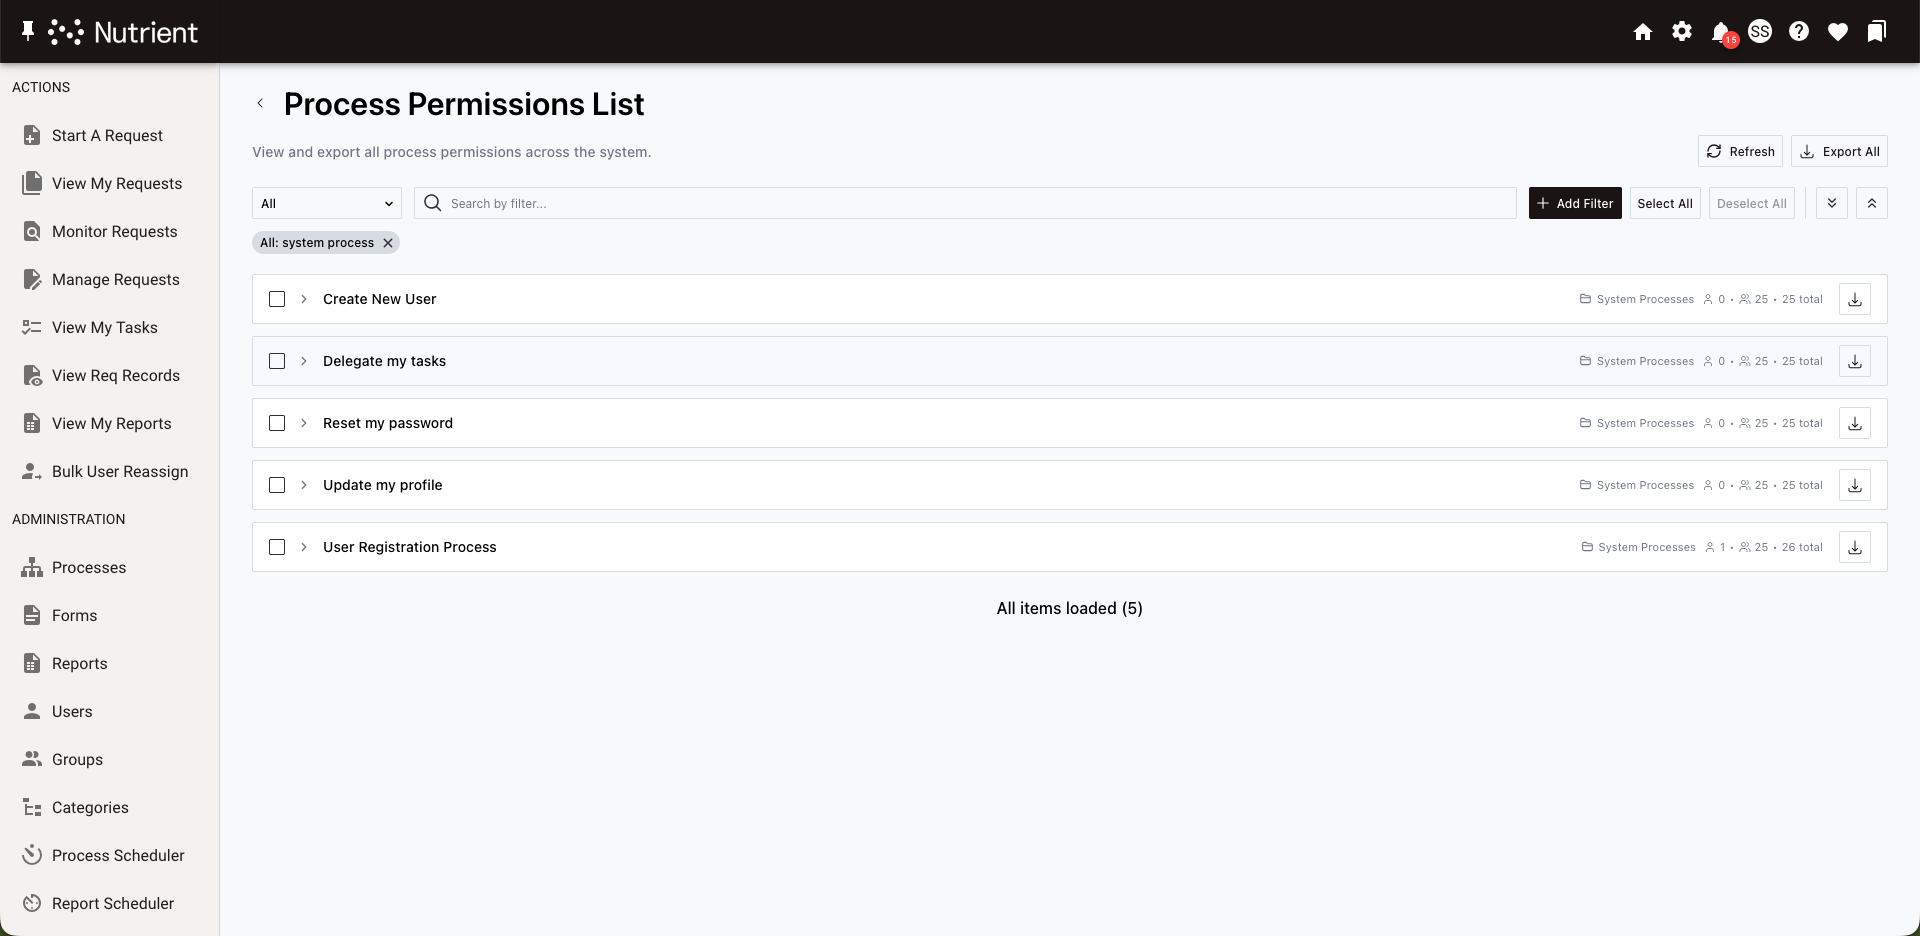
The permissions overview opens, showing all processes and their permission details.
To view permissions for other item types — for example, forms, reports, or dashboards — follow the same steps from that item type’s admin page. The report opens for whichever item type you launched it from.
Understanding the permissions list
The permissions list groups items by name. Each row shows the item name and a count of users and groups with access.
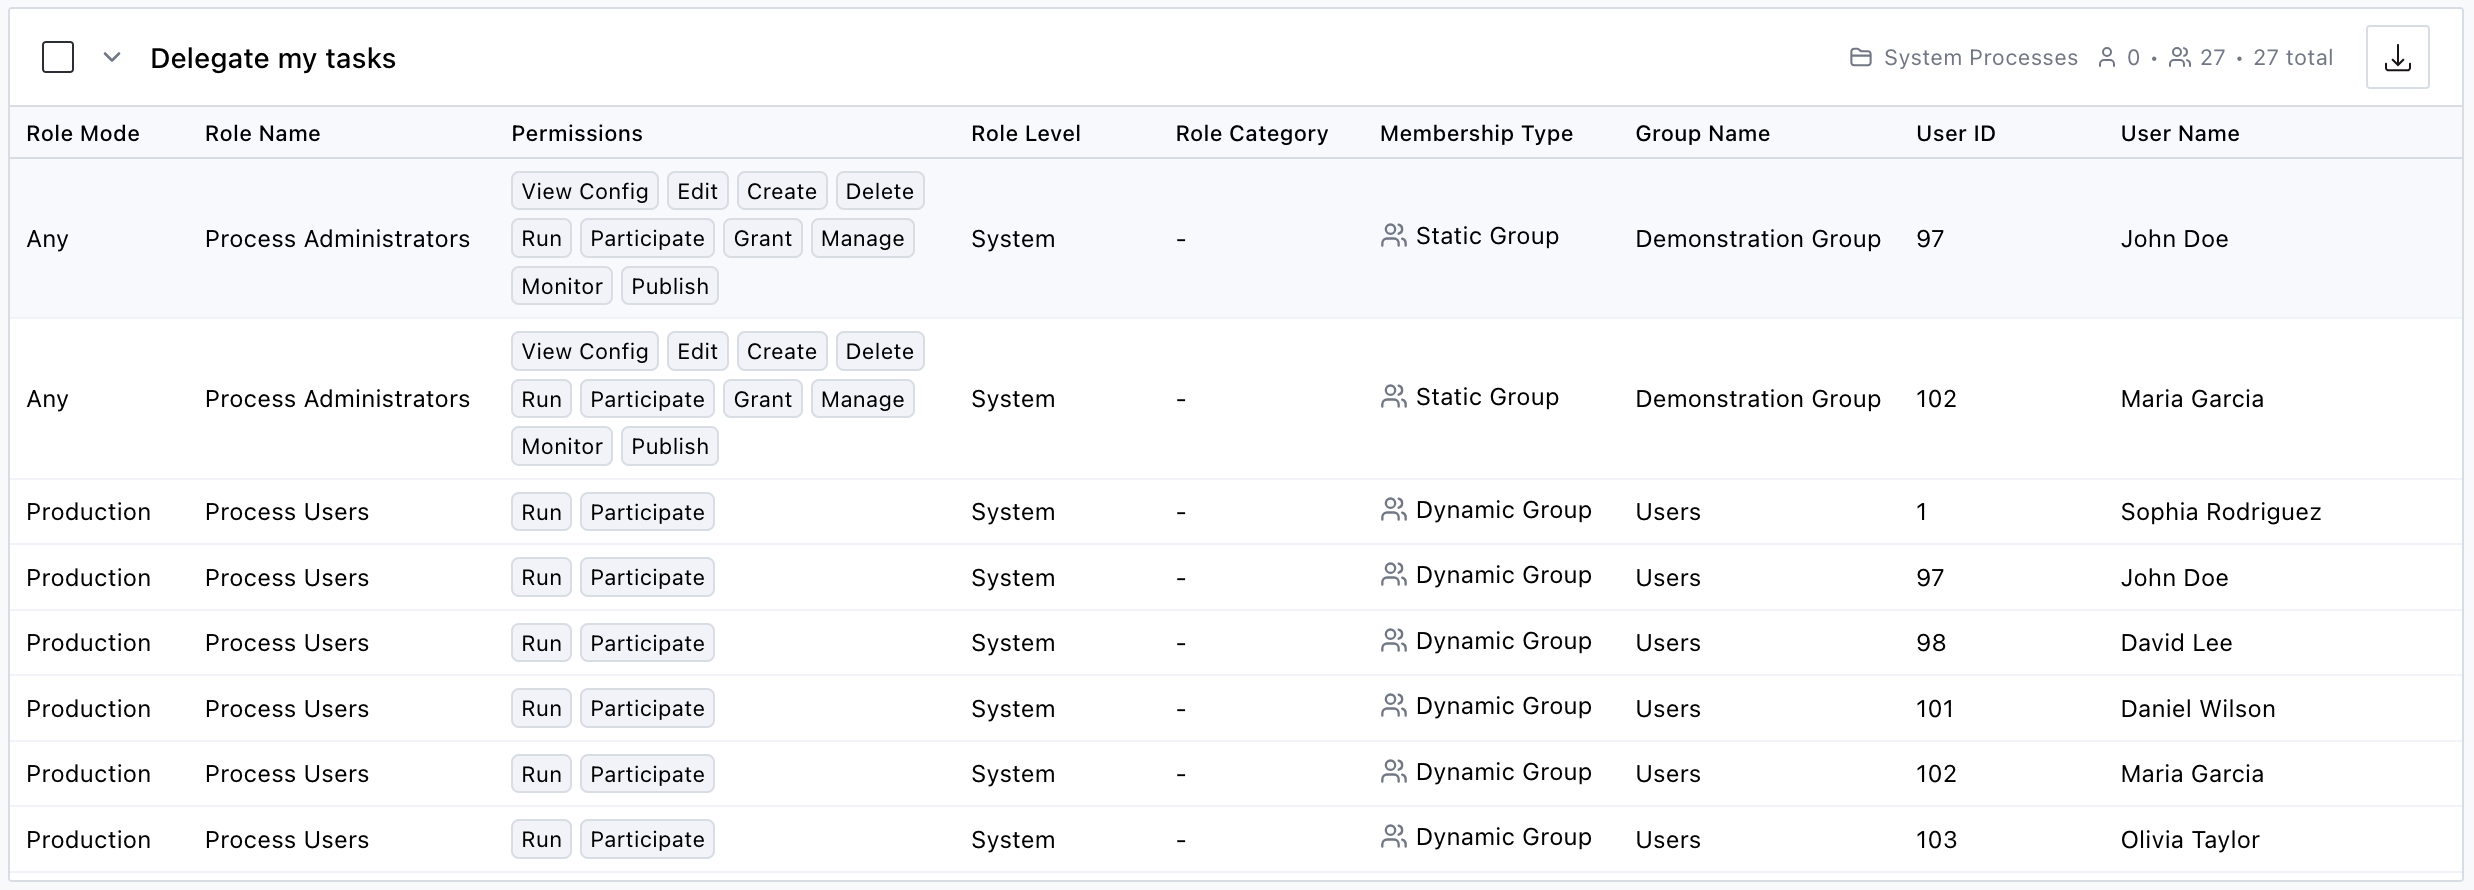
Click a row to expand it. Each permission entry includes the following fields:
| Field | Description |
|---|---|
| Role Mode | For processes, this is the publish status the role applies to (Production, Testing, Development, Inactive, or Any). For non-process items, this field is hidden. |
| Role Name | The role through which the permission is granted |
| Permissions | The specific permission types granted (for example, View Config, Edit, Run) |
| Role Level | The scope at which the role is defined: System, Category, or the specific object type (for example, Process or Form) |
| Role Category | The category path of the role |
| Membership Type | How the user gained access: User (direct), Static Group, or Dynamic Group |
| Group Name | The group through which the user is a member of the role (blank for direct role membership) |
| User ID | The numeric identifier of the user. Use this to distinguish between users who share the same name. |
| User Name | The name of the user who has this permission |
For a full list of permission types and their definitions, refer to the guide for managing roles and permissions.
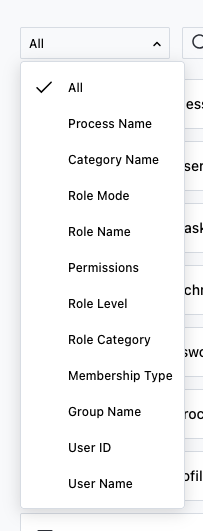
Filtering permissions

Use filters to narrow the permissions list to specific users, roles, groups, or permission types.
To add a filter:
- Select a filter field from the dropdown on the left side of the action bar — for example, Permissions, User Name, or Membership Type. Select All to search across all fields.
- Type a search term in the search input.
- Click Add Filter.
The filter appears as a pill below the action bar. Add multiple filters to combine criteria — all filters apply simultaneously (AND logic).
To remove a filter, click the × button on the filter pill.
Filters are saved automatically and restored when you return to the permissions overview. Each item type maintains its own set of filters, so switching between process and form permissions preserves the filters for each.
Selecting and expanding items
This section covers how permissions are displayed for different item types and how to expand, collapse, and select items.
System-scoped vs. object-scoped item types
Item types that only have system-level permissions — Category, Contact, Business Hours, Holiday, Database Connection, Email Monitor, and AI Connection — display a flat permissions table with no accordion grouping.
Item types with per-object permissions — Process, Report, Form, Dashboard, and Group — display items in expandable accordion rows, one per object.
Expanding and collapsing
For object-scoped item types:
- Click an item row to expand or collapse its permission details.
- Click the Expand All button to expand every item in the current view.
- Click the Collapse All button to collapse all expanded items.
Selecting items
- Click the checkbox on an item row to select it for bulk operations (for example, exporting).
- Click Select All to select every item in the filtered view.
- Click Deselect All to clear the selection.
Exporting permissions to CSV
Export permissions data to a CSV file for offline analysis, compliance reporting, or record keeping.
Three export options are available:
- Export All — Export every item in the current view. Active filters are respected, so only matching results are included. This button is in the header.
- Export Selected — Export only the items you selected via checkboxes. This button appears in the header after selecting one or more items.
- Export single item — Click the download icon on any item row to export just that item’s permissions.
The CSV includes the same fields as the permissions list, with one difference: Instead of a single Permissions column, the CSV has a separate column for each permission type (View Config, Edit, Create, Delete, Run, Participate, Grant, Manage, Monitor, Publish, Reassign).
For exports exceeding 100,000 rows, a confirmation dialog appears before the download starts. Large exports take longer to process.
Refreshing permissions data
After modifying roles, group memberships, or permission assignments, refresh the data to see the latest state.
To refresh, click the Refresh button in the header.
This clears the permissions report cache and the dynamic group membership cache. The next load recomputes all data from scratch.
Next steps
- To create roles and assign permissions, refer to the managing roles and permissions guide.
- For process-level role assignments, refer to the setting roles and permissions guide.