Accessing dashboards and navigating the interface
This guide explains how to access dashboards in Workflow Automation and how to use the dashboard management interface effectively.
Accessing dashboards
To view and manage dashboards:
- Sign in to your Workflow Automation site.
- Hover over the Settings
 icon in the upper-right corner of the page.
 - Select Dashboards from the dropdown menu.
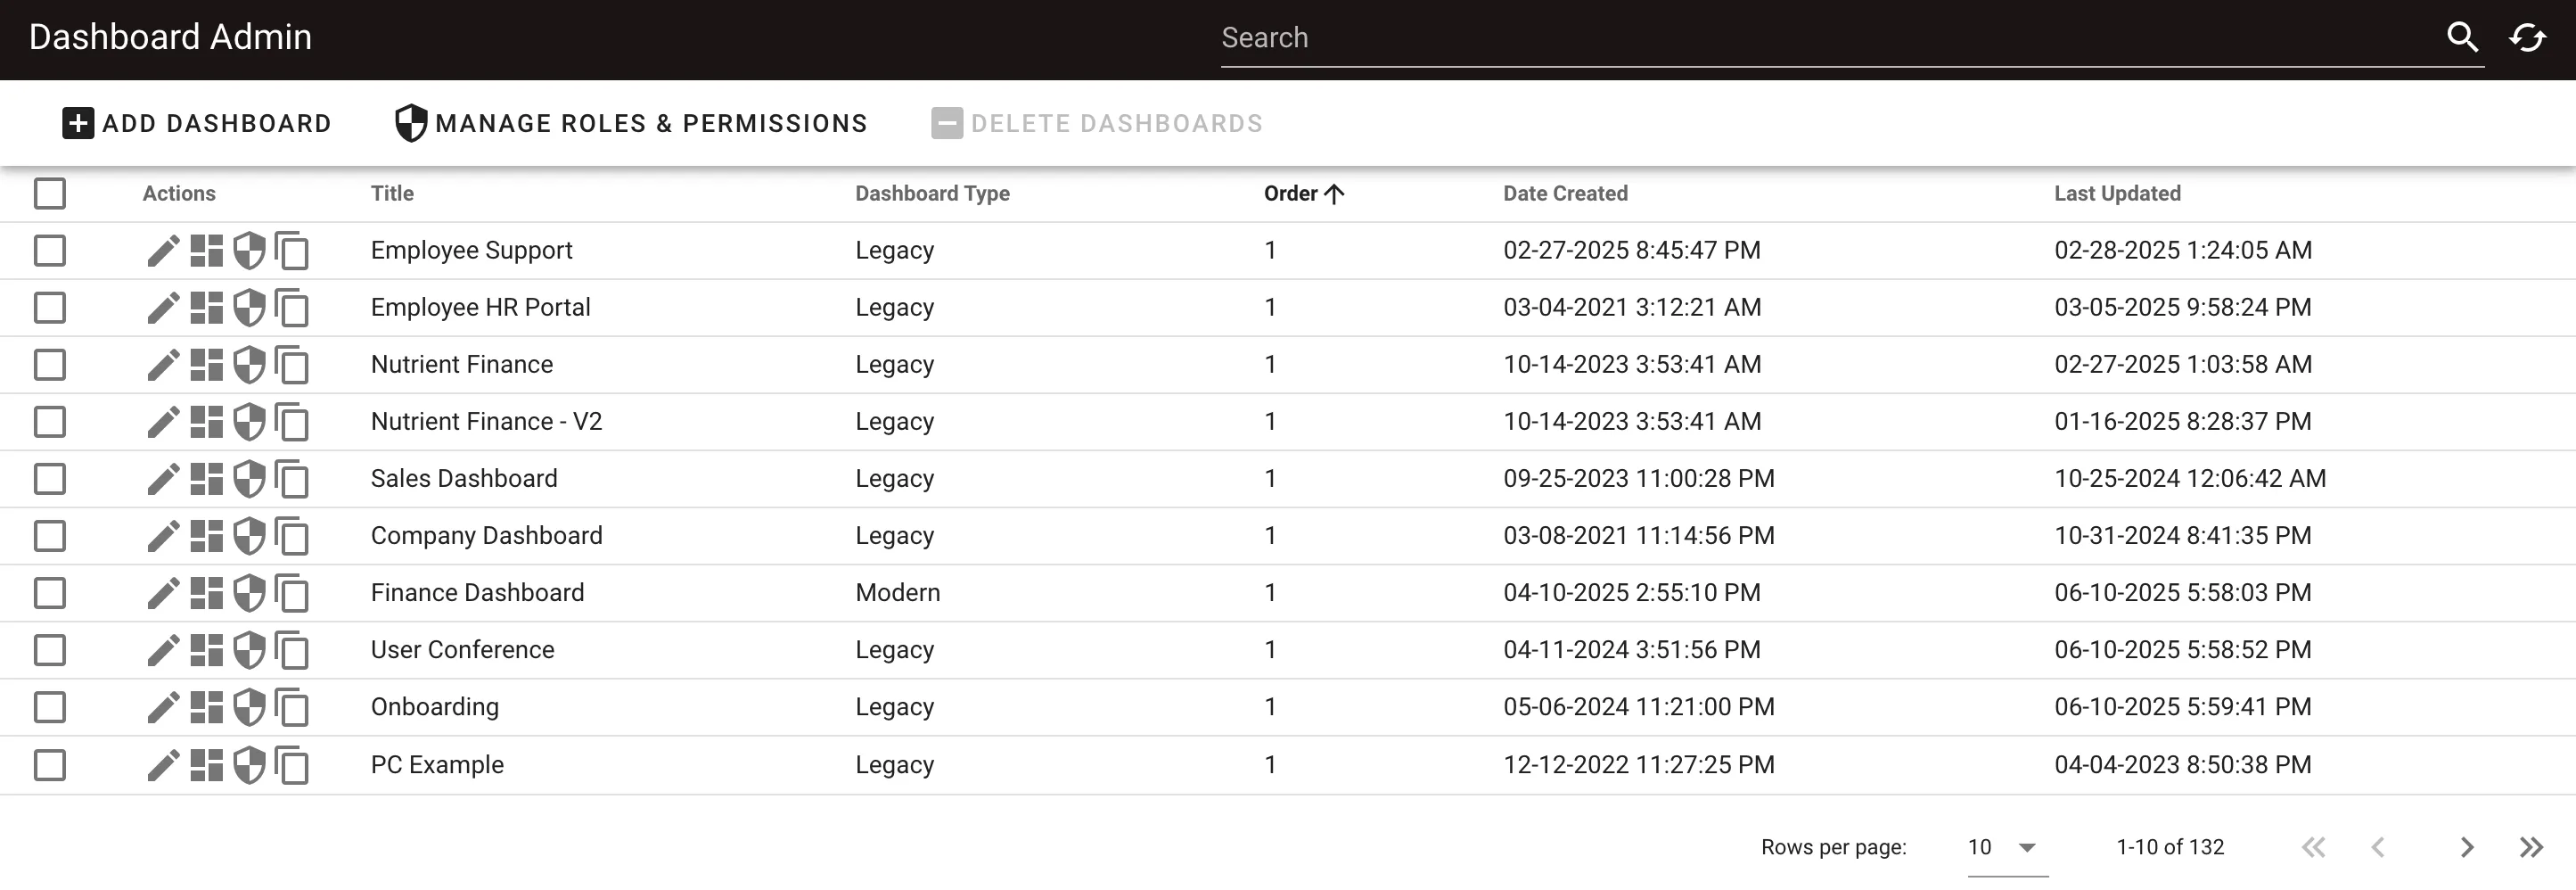
This opens the Dashboard list page, where all the dashboards are listed.
Dashboard list overview
Each dashboard entry in the list displays the following information:
- Title — The name of the dashboard as it appears to users.
- Dashboard Type — Indicates whether the dashboard uses the modern or legacy layout.
- Order — The position of the dashboard in the list of dashboards, both in the admin view and as tabs in the end user view (lower numbers appear first).
- Date Created — The date the dashboard was first created.
- Last Updated — The most recent date the dashboard was modified.
- Actions — Enables you to manage individual dashboards using the following icons.
| Icon | Action |
|---|---|
| Edit dashboard name | |
| View or edit dashboard layout | |
| Set dashboard permissions | |
| Create a copy of the dashboard | |
| Select dashboard for bulk actions (for example, deletion or managing roles and permissions) |

To delete dashboards, select one or more dashboards using the checkbox in the left-most column of the dashboard list and click Delete Dashboards in the top bar.
Searching and refreshing the dashboard list
- Search — Use the Search bar in the upper-right corner of the page to find dashboards by:
- Title
- Dashboard Type
- Order number
- Refresh — Click the Refresh
 icon to update the dashboard list. This is useful after creating, editing, or deleting dashboards to reflect the latest state.