Permissions overview
Use the permissions overview to audit effective permissions across Nutrient Workflow Automation. It shows who has access to processes, forms, reports, dashboards, and other items, and it shows how they got that access.
What the permissions overview shows
The permissions overview shows effective permissions for the item type you select. It groups permissions by item (for example, by individual process). Expand an item to view every user, role, and group with access.
It supports the following item types:
- Process
- Category
- Form
- Report
- Group
- Contact
- Dashboard
- Business Hours
- Holiday
- Database Connection
- Email Monitor
- AI Connection
This guide uses process permissions as the main example. You can use the same workflow for all other item types.
Navigate to the permissions overview
To open the permissions overview:
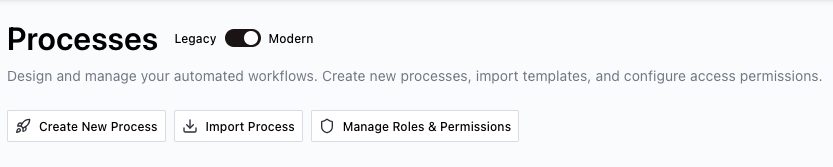
Navigate to the Administration in the left navigation panel.
Click Processes.
Click Manage Roles & Permissions.
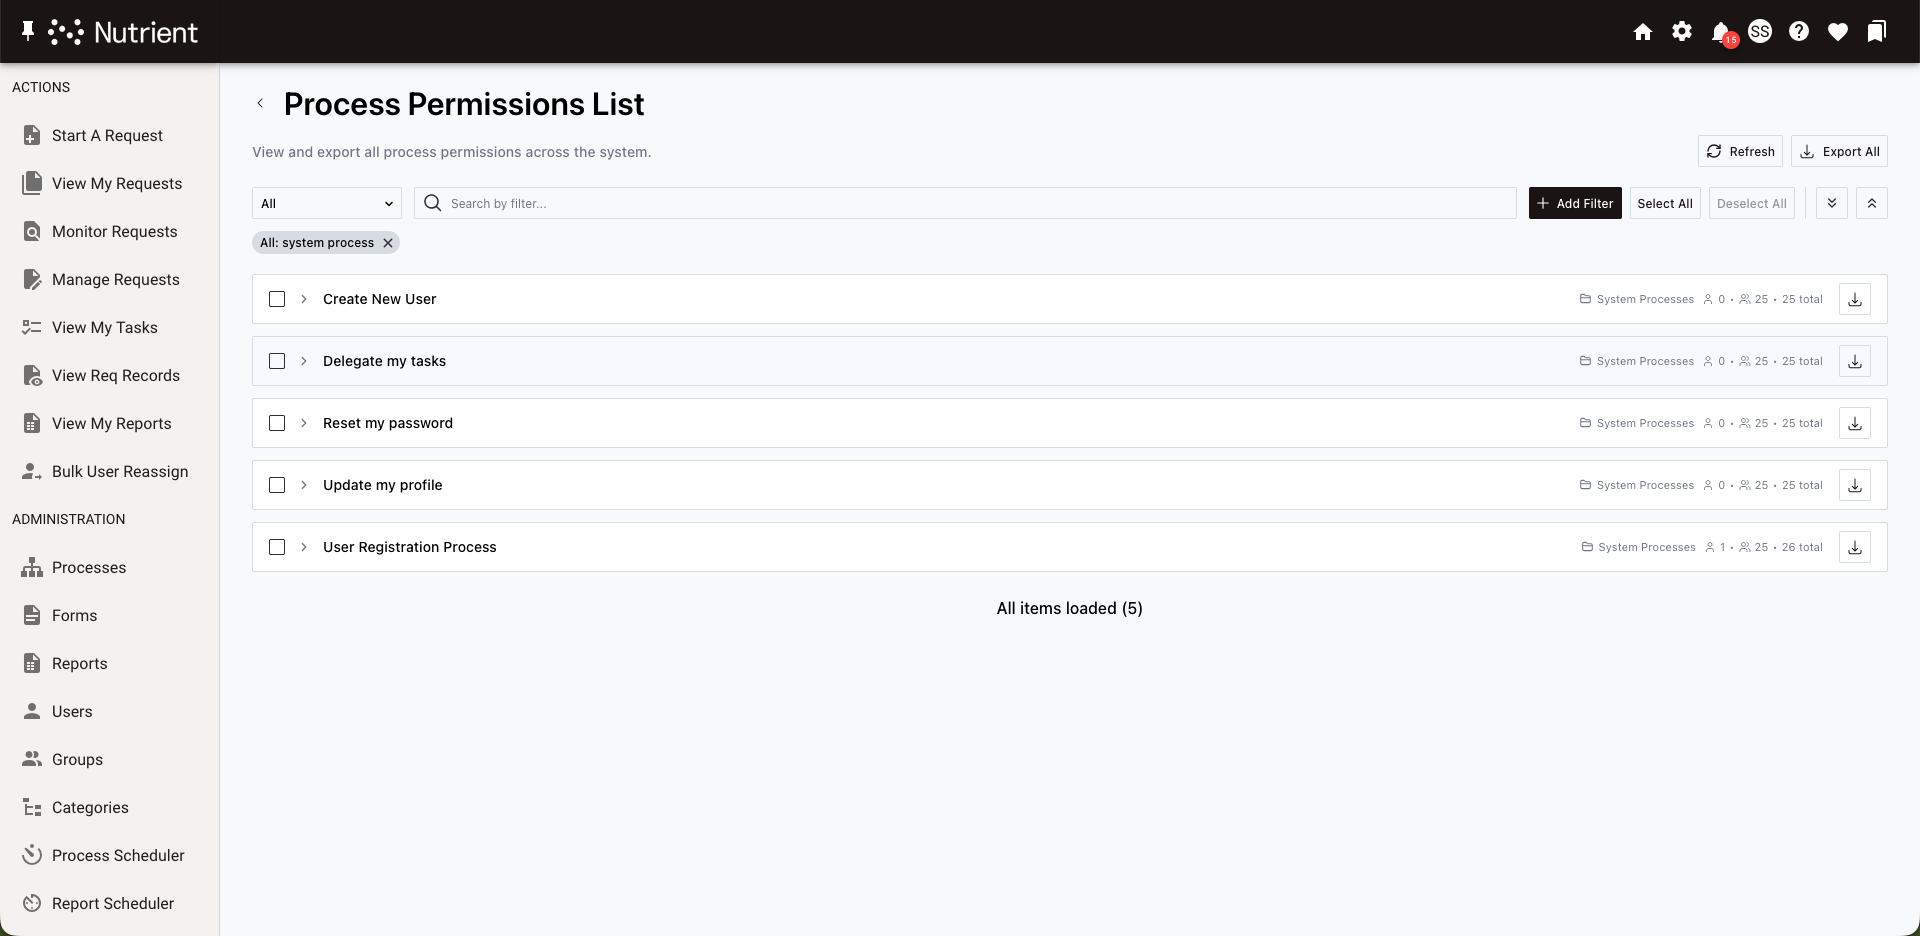
On the page that appears, click Permissions List in the upper-right corner.

The permissions overview opens and shows all processes with their permission details.
To view permissions for other item types (for example, forms, reports, or dashboards), follow the same steps from that item type’s admin page. The report opens for the item type you launch.
Understanding the permissions list
The permissions list groups items by name. Each row shows the item name and the number of users and groups with access.
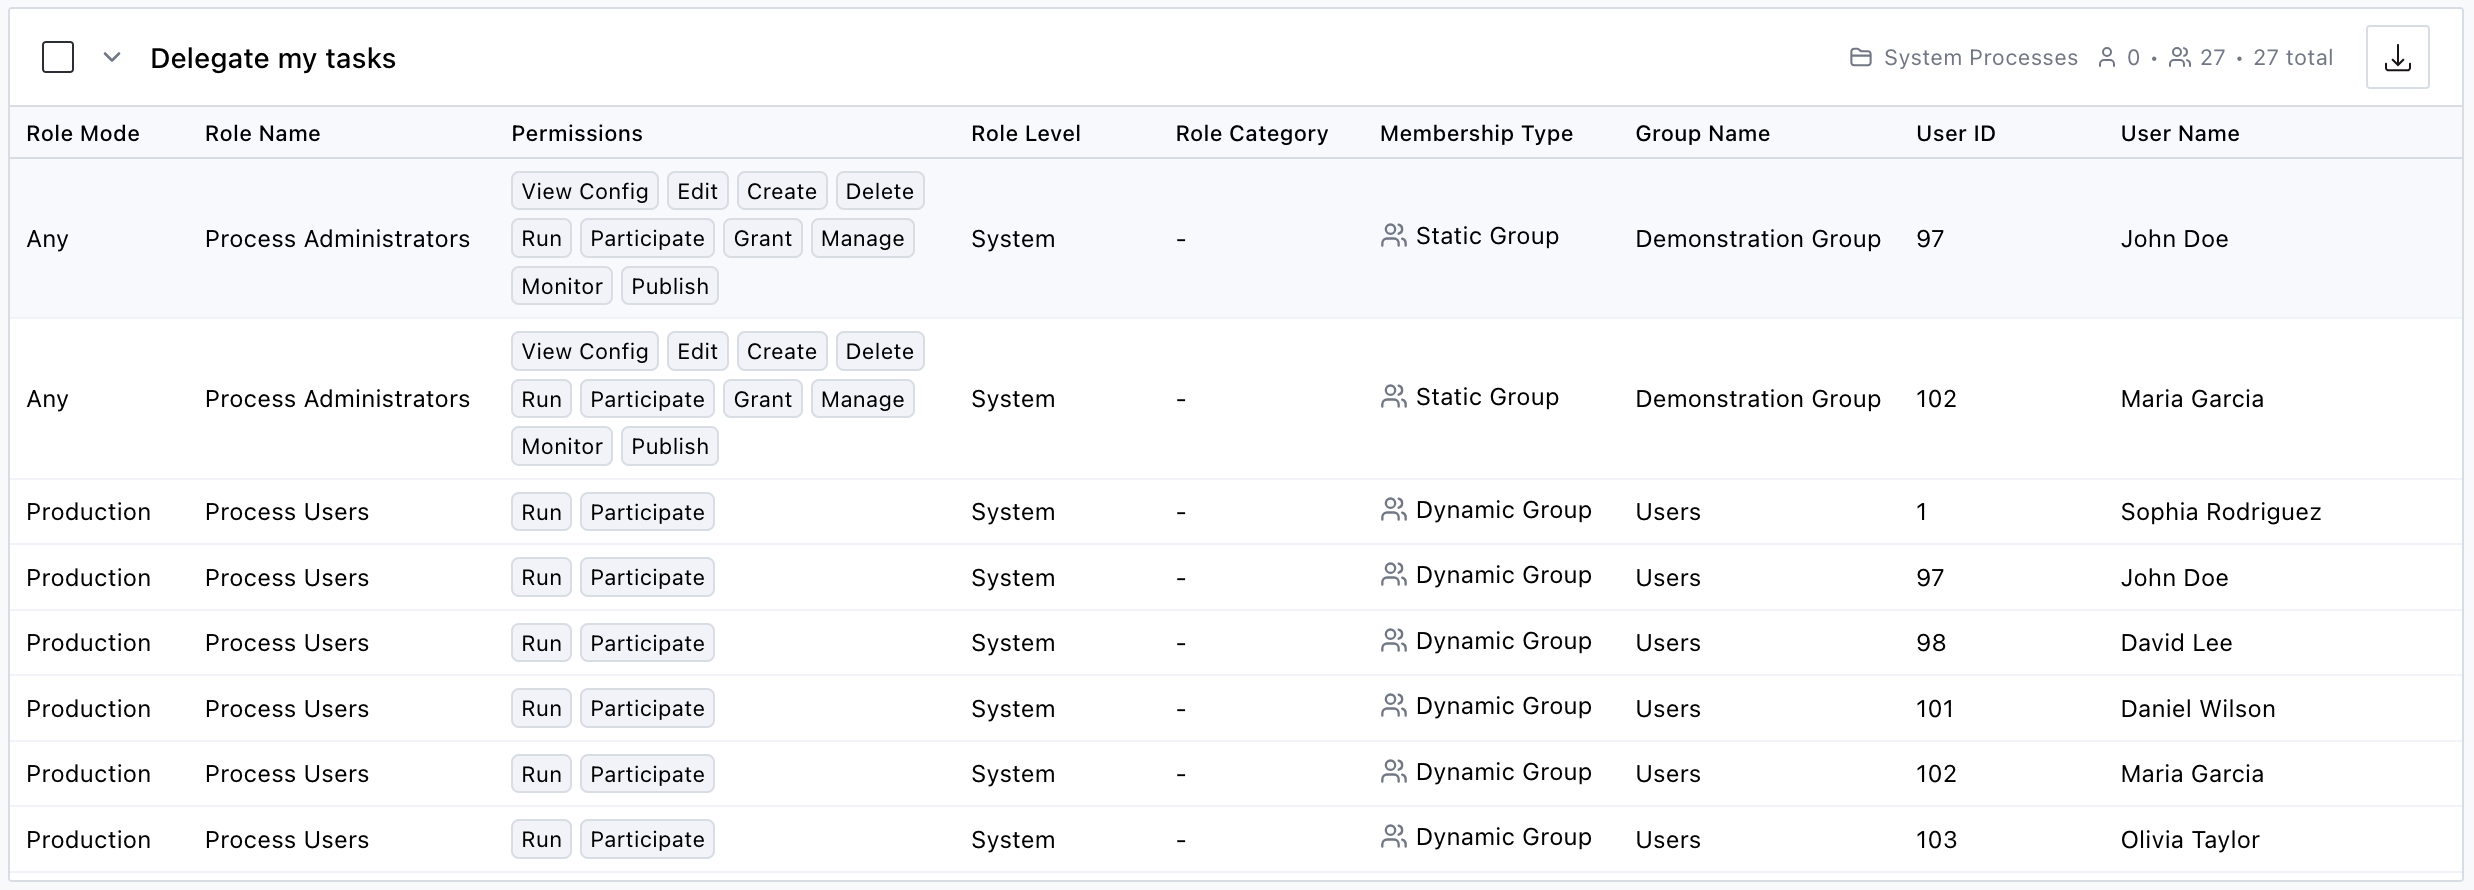
Click a row to expand it. Each permission entry includes these fields:
| Field | Description |
|---|---|
| Role Mode | For processes, this is the publish status the role applies to (Production, Testing, Development, Inactive, or Any). For non-process items, this field is hidden. |
| Role Name | The role that grants the permission |
| Permissions | The granted permission types (for example, View Config, Edit, Run) |
| Role Level | The scope where the role is defined: System, Category, or a specific object type (for example, Process or Form) |
| Role Category | The role’s category path |
| Membership Type | How the user gets access: User (direct), Static Group, or Dynamic Group |
| Group Name | The group through which the user is a member of the role (blank for direct role membership) |
| User ID | The user’s numeric identifier. Use it to distinguish users who share the same name. |
| User Name | The user’s name for this permission |
For a complete list of permission types and definitions, refer to the managing roles and permissions guide.
Filter permissions
Use filters to narrow the permissions list to specific users, roles, groups, or permission types.

To add a filter:
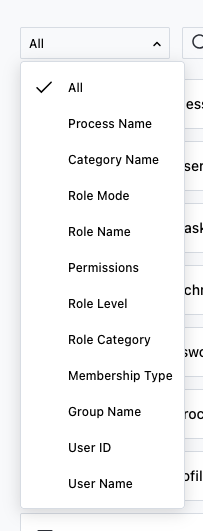
- Select a filter field from the dropdown on the left side of the action bar (for example, Permissions, User Name, or Membership Type). Select All to search across all fields.
- Enter a search term in the search field.
- Click Add Filter.
The filter appears as a pill below the action bar. You can add multiple filters to combine criteria. All filters apply at the same time (AND logic).
To remove a filter, click the Close X icon on the filter pill.
The system saves filters automatically and restores them when you return. Each item type keeps its own filter set, so when you switch between process and form permissions, each view keeps its filters.
Select and expand items
This section explains how each item type displays permissions and how to expand, collapse, and select items.
System-scoped vs. object-scoped item types
Item types with only system-level permissions (Category, Contact, Business Hours, Holiday, Database Connection, Email Monitor, and AI Connection) show a flat permissions table without accordion grouping.
Item types with per-object permissions (Process, Report, Form, Dashboard, and Group) show expandable accordion rows, with one row per object.
Expand and collapse items
For object-scoped item types:
- Click an item row to expand or collapse permission details.
- Click Expand All to expand every item in the current view.
- Click Collapse All to collapse all expanded items.
Select items
- Click the checkbox on an item row to select it for bulk actions (for example, Export).
- Click Select All to select every item in the filtered view.
- Click Deselect All to clear the selection.
Export permissions to CSV
Export permissions data to CSV for offline analysis, compliance reporting, or record keeping.
You can choose from three export options:
- Export All — Exports every item in the current view. It respects active filters, so it exports only matching results. You’ll find this button in the header.
- Export Selected — Exports only the items you selected with checkboxes. This button appears in the header after you select at least one item.
- Export single item — Click the download icon on any item row to export only that item’s permissions.
The CSV includes the same fields as the permissions list, with one difference: Instead of one Permissions column, it includes one column per permission type:
- View Config
- Edit
- Create
- Delete
- Run
- Participate
- Grant
- Manage
- Monitor
- Publish
- Reassign
If an export exceeds 100,000 rows, the system shows a confirmation dialog before download starts. Large exports take more time to process.
Refresh permissions data
After you modify roles, group memberships, or permission assignments, refresh the report to view the latest data.
Click Refresh in the header. This action clears the permissions report cache and the dynamic group membership cache. The next load recalculates all data.
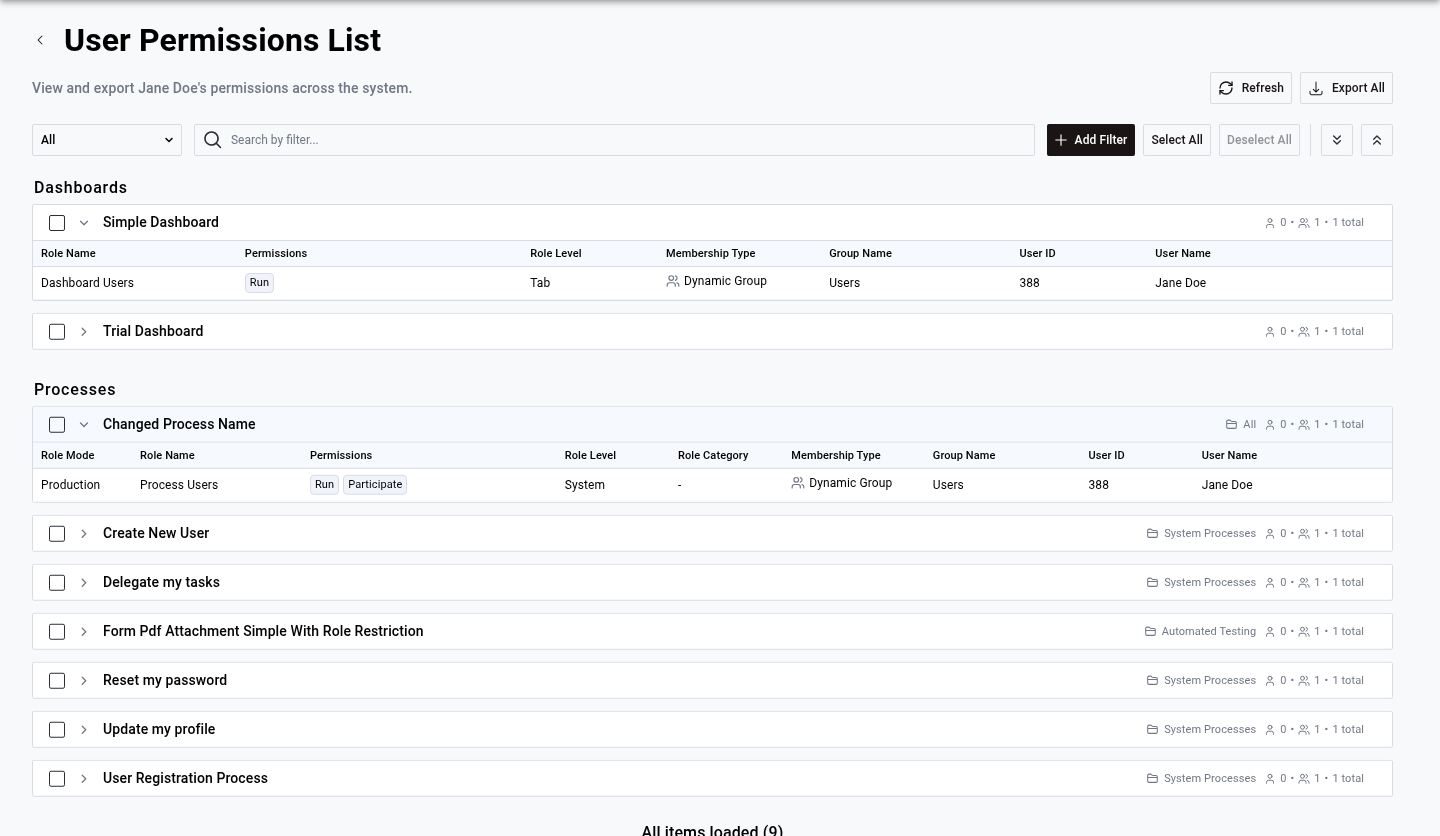
View all permissions for a user or group
You can also view all permissions for one user or one group in a single view instead of browsing by item type.
From the users list
Click Administration > Users.
Click the View Permissions (Key icon) in the actions column for the user you want to inspect.

The User Permissions List opens and shows every permission the user holds across item types, grouped by type.
From the groups list
Click Administration > Groups.
Click the View Permissions (Key icon) in the actions column for the group you want to inspect.

The Group Permissions List opens and shows all permissions assigned to that group across item types.
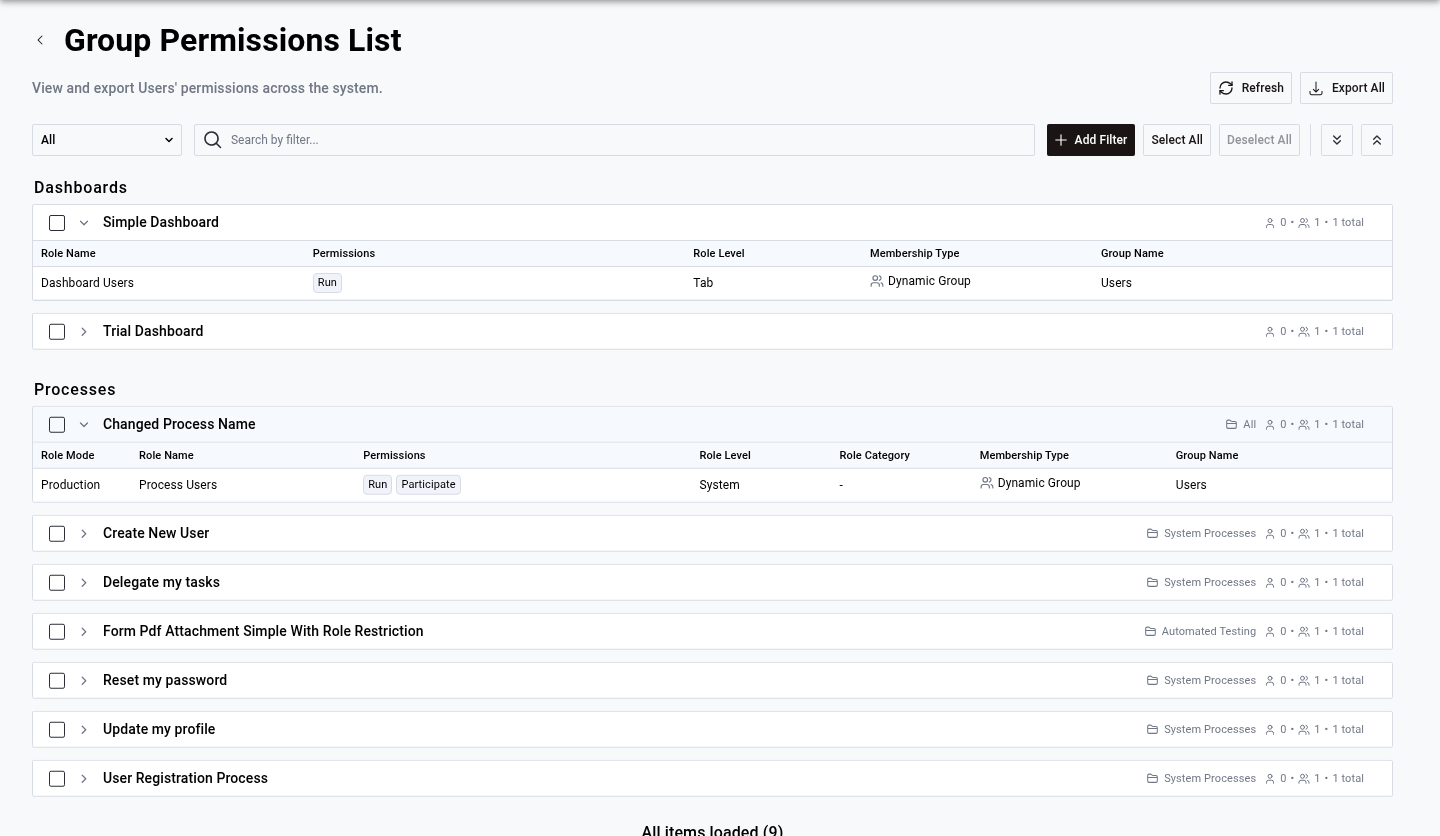
How the entity permissions view is organized
The view groups permissions by item type. For example,
- AI Connections
- Business Hours
- Contacts
- Dashboards
- Forms
- Processes
Each type section shows one of these layouts:
- System-scoped types (such as AI Connections, Contacts, and Business Hours) show a flat permissions table because these types only have system-level permissions.
- Object-scoped types (such as Processes, Forms, and Dashboards) show expandable accordion rows, one row per object, with the item name, category, and permission counts. Click a row to expand details.
Filter and export from the entity view
The entity permissions view includes the same filtering and exporting features as the main permissions overview. Use the Object Type filter to show only one type section.
Inactive users show an empty permissions list with a message that says “Inactive users do not have any permissions.”
Next steps
- To create roles and assign permissions, refer to the managing roles and permissions guide.
- For process-level role assignments, refer to the setting roles and permissions guide.