Create and register tables
Create a new table from scratch or register an existing table from an external database connection.
Both options require system administrator privileges and an available database connection such as SQL Server or Oracle. Some deployments don’t support system database registration. If the system database doesn’t appear in the database connection list, contact Nutrient Support(opens in a new tab).
Creating a new table
Use this option when you need a new table that doesn’t already exist in a database. The platform creates the table in the database and registers it in one step.
Navigate to Settings > Data Tables and open the Data Tables page.
Click Create New Table to open the three-step wizard. Complete the following steps in the wizard:
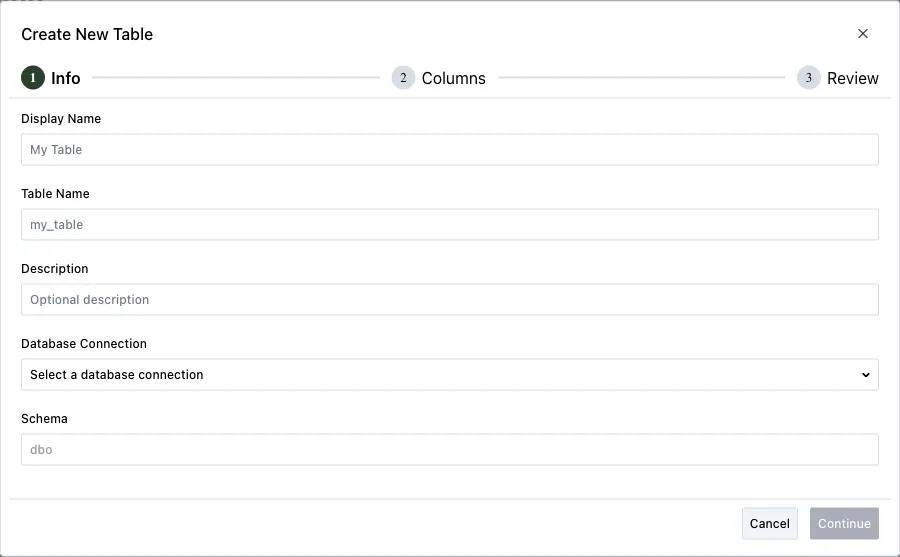
Info
- Enter a display name. This name appears in the table list.
- Enter a table name. Use only letters, numbers, and underscores. The name must start with a letter or underscore.
- Optionally enter a description.
- Select a database connection. The system database option appears only if your deployment includes system database access.
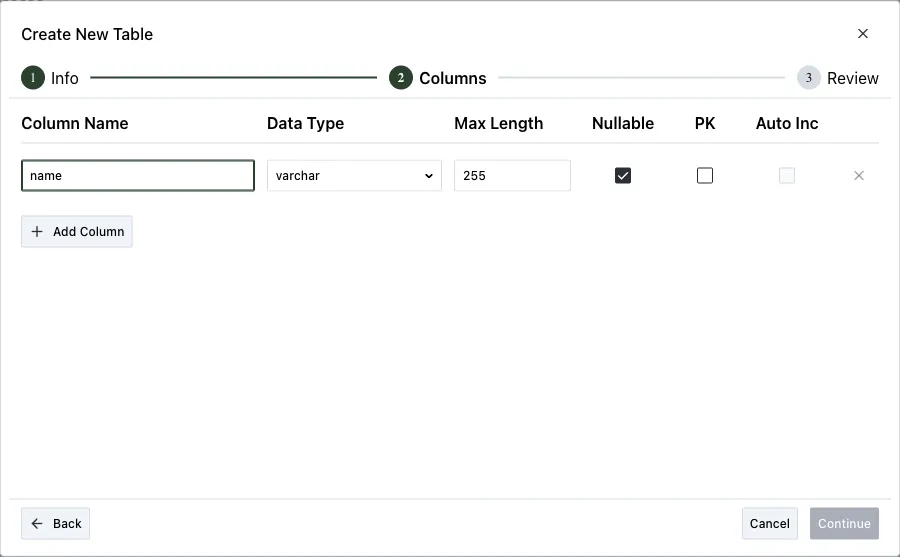
Columns
- Add one or more columns. For each column, specify:
- Column name — Letters, numbers, underscores, and spaces are allowed.
- Data type — Choose from:
varchar,nvarchar,int,bigint,decimal,numeric,bit,datetime,date,text,ntext,float,real,uniqueidentifier,money. - Max length — Only applies to
varcharandnvarchartypes. - Nullable — Whether the column accepts empty values.
- Primary key — Exactly one column must be designated as the primary key.
- Auto increment — Available only for integer primary key columns.
- Column names must be unique within the table. The wizard highlights duplicates and prevents you from continuing until you resolve them.
- Add one or more columns. For each column, specify:
Review
- Review the table name, schema, display name, description, and column definitions.
- Click Create Table to create the physical table and register it.
The platform creates the table in the selected database and grants you full admin access to it.
Registering an existing table
Use this option when a table already exists in an external database and you want to manage its data from the Workflow UI.
Navigate to Settings > Data Tables and open the Data Tables page.
Click Connect Table. The three-step Register Table wizard opens.
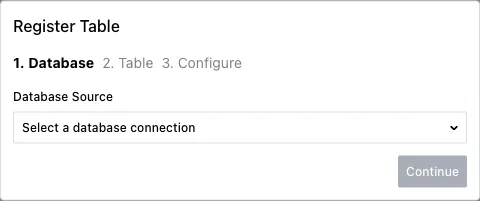
Select database source:
- Select a database connection.
Select table:
- Choose a table from the list. Tables appear with their database schema prefix.
- The platform lists the tables available through the selected database connection.
Configure:
- Enter a Display Name (prefilled with the table name).
- Optionally enter a Description.
- Primary Key Column — The platform detects this from the source table and shows it as read-only. You can’t register tables that don’t have a detectable primary key through this wizard.
Click Register to complete the registration.
Editing a table registration
To update the display name, description, or primary key column of a registered table:
- On the Data Tables page, click the Edit icon next to the table.
- Update the fields as needed.
- Click Save.
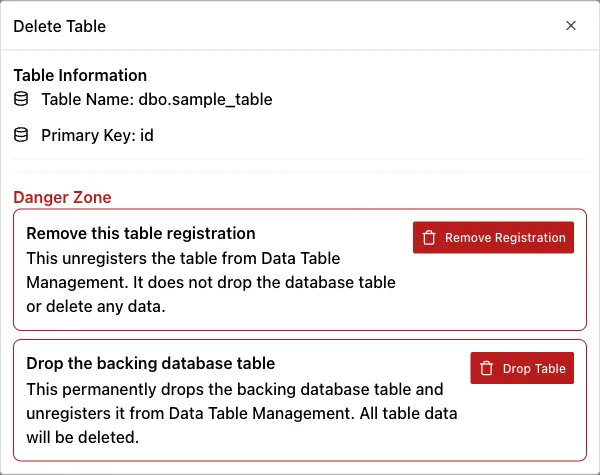
Deleting a table registration
Deleting a registration removes the table from the Data Tables page. It doesn’t drop the underlying database table or delete data.
- On the Data Tables page, select one or more tables using the checkboxes.
- Click Delete.
- Confirm the deletion in the dialog that appears.
You can’t undo a table registration deletion through the UI. If you need the table again, register it again.
If your deployment has a table registration limit, the Data Tables page shows a message when you reach that limit. The Create New Table and Connect Table buttons are then disabled. Remove an existing registration to free a slot.