Manage table data
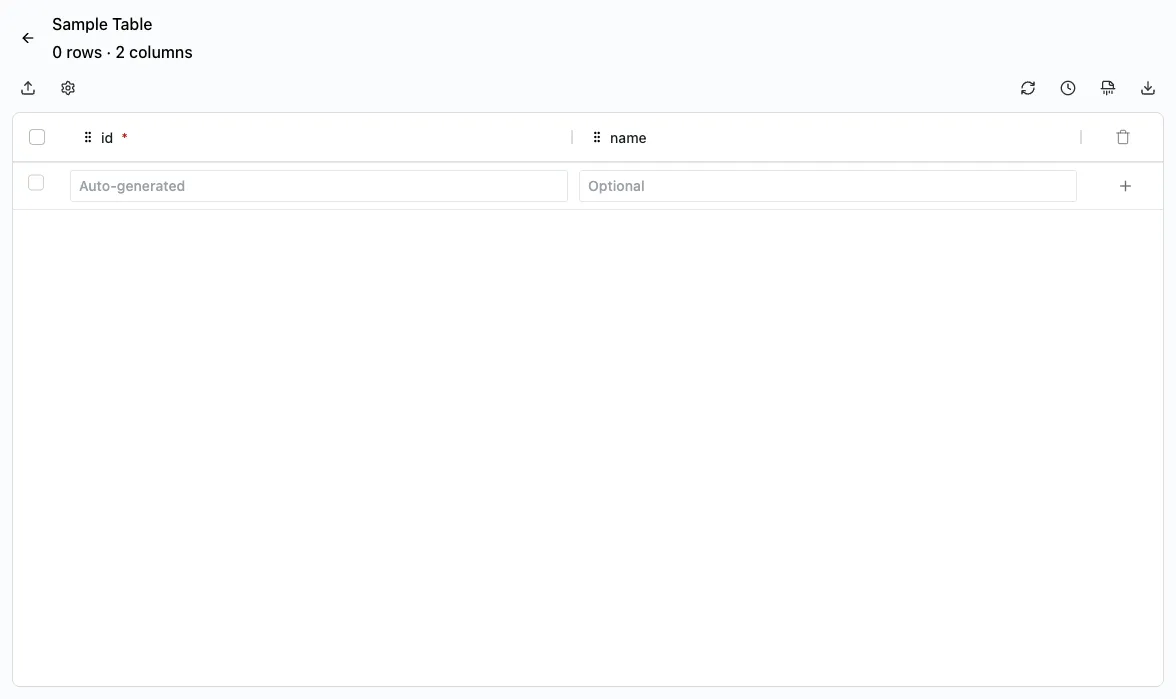
After you create or register a table, manage its data from the table details page. This page shows the table rows in a data grid that supports sorting, inline editing, and CSV import and export.
To open the table details page, navigate to Settings > Data Tables and click the Browse icon next to a table.
Adding a row
Add rows inline from the + icon pinned at the lower-right corner of the data grid.
- On the table details page, click the + icon pinned at the lower-right corner of the grid to add a new row. Cells show Required or Optional placeholders based on whether the column is nullable.
- Click a cell and enter a value. The grid uses input controls based on the column data type:
- Text columns — text input
- Number columns — number input
- Boolean columns — checkbox
- Date columns — date picker
- Large text columns — popup text editor
- Once all required fields are filled, click the + icon again to insert the row.

Auto-increment primary key columns are read-only when adding a row. For UUID primary key columns, leave the field blank. The platform generates a value automatically.
Editing a row
- On the table details page, click any cell in the row you want to update. The cell becomes editable inline.
- Enter the new value and press Tab, or click outside the cell to save. Each cell change is saved automatically.
The primary key column is read-only and can’t be edited inline. Each cell change is recorded in the changelog.
Deleting a row
- On the table details page, click the Delete icon on the row you want to remove.
- Confirm the deletion in the dialog that appears.
Row deletions can’t be undone. The deleted data is recorded in the changelog for audit purposes, but it can’t be restored from within the application.
Importing data from CSV
Use CSV import to add multiple rows at once.
On the table details page, click Import in the upper-left corner.
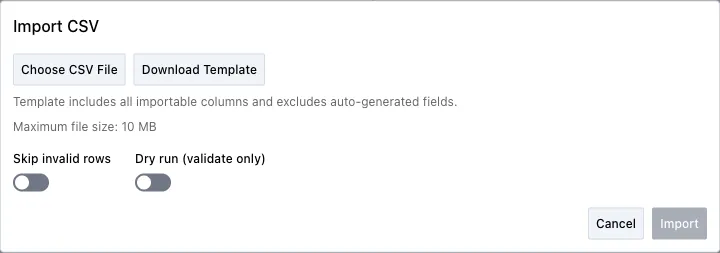
Select a CSV file or drag and drop it into the upload area. The file size limit is 10 MB.
Review the preview, which shows the detected headers and the first 10 rows.
Configure import options:
- Skip invalid rows — If enabled, rows that fail validation are skipped and the rest are imported. If disabled, the entire import fails on the first error.
- Dry run (validate only) — Runs validation without writing rows. Use this option to catch column name mismatches before you import data.
- Download Template — Generates a CSV with all importable columns prefilled, excluding auto-increment columns.
Click Import.
The results summary shows the number of rows inserted and any errors encountered.
For UUID primary key columns, leave the field blank. The platform generates a value automatically.
Exporting data to CSV
- On the table details page, click Export in the toolbar.
- The CSV file downloads immediately with all rows from the table.
Dates are exported in ISO 8601 format, so reimporting the file doesn’t require manual date formatting.
Sorting rows
- Click a column header to sort rows by that column. Click again to reverse the sort order.
Form builder integration
Data tables can serve as data sources for form dropdown questions. When you register a table, it becomes available in the form builder as a choices source. You don’t need additional configuration beyond registering the table and ensuring the right permissions are in place. For details on building forms that use table data, refer to the forms admin guide.